


While Blender may be famous as a 3D modelling software, it also has grease pencil: A versatile and powerful tools for creating entirely 2D scenes within Blender or even to add 2D elements to a 3D scene. Naturally drawn strokes and shapes can help you achieve a more unique look in your artwork and can be used for anything from adding line art to a mesh to adding textured strokes. Most of this can be done by using brushes within a grease pencil object.
To use grease pencil brushes in Blender, insert a new grease pencil object by pressing Shift+A > Grease Pencil > Blank. Switch to draw mode by selecting it in the editor type in the top-left corner of the viewport.
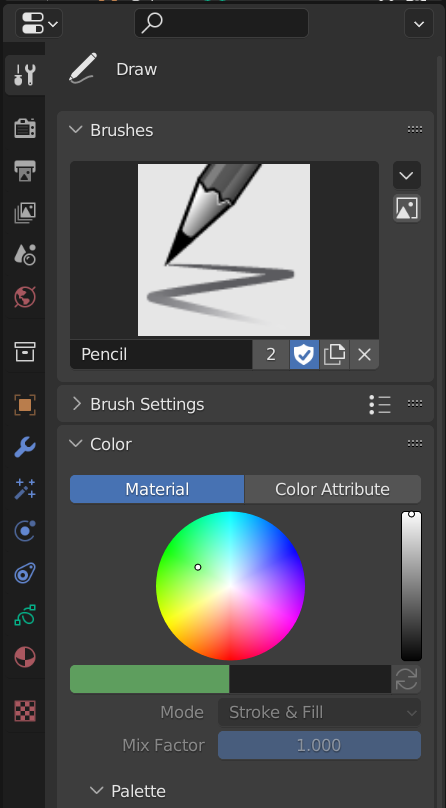
The brush properties are found in the tool settings tab (denoted by a screwdriver and wrench icon) in the properties editor. Here you can change brush radius, strength, color, and hardness.
Let's now dive in deeper and take a look at common brush settings, grease pencil materials, and textured brushes.
Related content: How do grease pencil layers work in Blender
To find the bush settings while using grease pencil, select the grease pencil object in the 3D viewport or in the Outliner, and make sure you are in Draw Mode by selecting it from the interaction mode dropdown in the top-left corner of the 3D viewport.
With the draw tool selected from the toolbar, the brush settings can be found in the tool properties section (denoted by a screwdriver + wrench icon) in the properties panel.
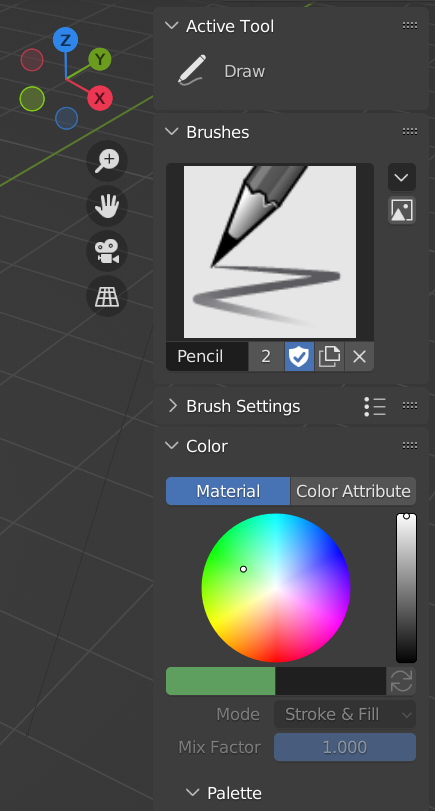
These same settings can also be found in the tool settings tab in the N-Panel:
The brush settings for the eraser as well as the fill and tint tools can be found in the same section if the respective tool is selected in the toolbar. If the toolbar is not visible on the left side of your 3D viewport, press T to toggle it.
Within the brush settings, there are numerous customisation options to enhance the look of your strokes. The most important sections here are the brush type, the brush settings, and the color.
Blender comes with a set of default brush types. To select one of these, click on the large pencil image to see a list of the options. Simply select one of the eight preset options and it will enable it.

This is already a sufficient variety of brushes for most general drawing in grease pencil. However, even more brush presets are available for download online, made by members of the Blender community. After exporting them into Blender, those will also show in this same menu. You can use the search bar the bottom of this popup to quickly find the exact brush you need.
You can change the current properties of any of Blender's preset options, or you can create a duplicate of one of these sets by clicking on the duplicate icon and renaming the brush to anything you like.
By the way, if you like reading as a way for learning about Blender, you might enjoy our E-Book.
Related content: Artisticrender E-book

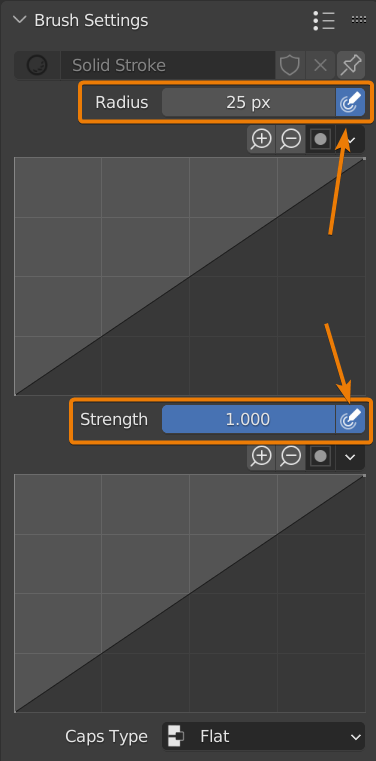
In case you would like to customise your own brush within Blender, head to the "Brush Settings" section in the same tool settings panel. Here, you can easily change the radius and strength of the brush stroke.
These settings are also shown as sliders at the top of the 3D viewport (when in Draw Mode).
Another important setting is the caps type, which can be set to either rounded or flat. This simple feature lets you decide whether the ends of the stroke are smooth or more blocky and cut off.
If you are using a pen tablet as an input device to draw, it might be desirable to enable pen pressure for the radius. To do so, select the small pen icon to the right of the radius input.
Enabling this means that the radius of the pen will change dynamically as you increase or decrease the pen pressure while drawing. The same applies for the strength of the brush.
As a mouse can't generally have different clicking pressures, this feature doesn't really do anything unless you use a pen input device.
However, a convenient way to "fake" pen pressure while using a mouse, or even just enhance the effect if you are using a pen, is to change the Angle and Factor values under the advanced settings.
The first of these settings is for adjusting the angle at which the brush has maximal thickness. This means that if, for example, you set the angle to 90 degrees, the brush stroke will be thickest when vertical and get thinner as the angle becomes near-horizontal. To select how thin it gets at the thinnest point, you can adjust the factor setting.
To give the stroke a softer and more blurred look, you can adjust the hardness setting
When working with thin and quick strokes, enabling the smooth option under post-processing lets Blender smooth the grease pencil object after the stroke has been placed. You can adjust the level of smoothness, as well as the number of times smoothing is applied (iterations). If the scene is complex, it may be a good idea to increase the simplify value for Blender to adaptively reduce the number of vertices.
For more interesting and unique effects on brush stokes, Blender has a wide variety of randomisation options to set how much you would like to change the radius, strength, and jitter of the brush within each stroke you draw.
It is also possible to randomise the UV, which is especially useful when working with texture brushes where you would like each iteration of the texture to have a randomized rotation to make it seem seamless and non-repeating.
To quickly change the color of the strokes, make sure to select "Color Attribute" under the color settings in order to use the RGB color selector. When quickly switching between different colors, it can be handy to select a color from the palette. Blender comes with a default palette, but it is also possible to add and remove colors (using the + and - symbols under the palette settings) or even create a new one entirely.
For more complex texturing of the strokes, you can work with grease pencil materials by changing the color to "Material" in the brush settings. To give a stroke a particular material, simply select the material in this tab before you start drawing.
To then adjust the of the grease pencil brush, go to the Material Properties tab (shown by a red sphere, second from the bottom) in the properties editor. By default, Blender has 4 material options already created. These can be added, deleted, duplicated, or renamed similar to regular Blender material settings for all other objects.
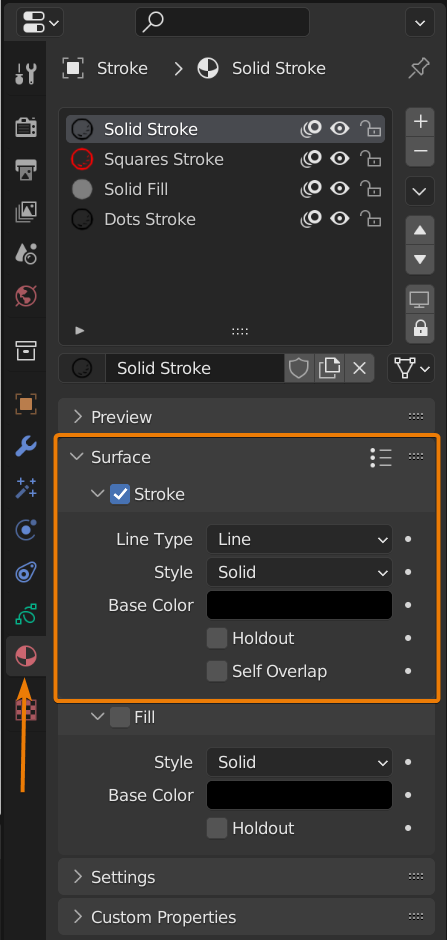
For a regular brush to make strokes with, enable "Stroke" under the surface settings. Here you can change the type of stroke (lined, dotted, squared) as well as the base color.
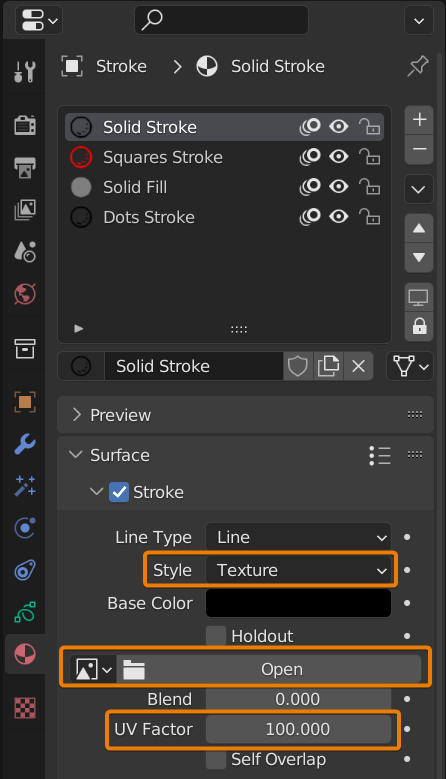
It is also possible to uses brushes with custom textures within grease pencil. To do so, change the "Style" setting of the brush stroke within the material settings by clicking on the Solid dropdown and switching to Texture.
Switching to a textured brush style shows a section to open a new image texture. After opening any image from your local files, the stroke of the brush will be textured as the image instead of a single color. Do note that the color of your brush stroke will now be whatever color the texture image is.
To increase the size of the texture on the brush strokes, increase the UV factor of the image.
For the best results, ensure the texture image has a transparent background and is in a PNG file format.
We've gone over many basic features and settings to effectively use grease pencil brushes within Blender. Whether you use Blender's preset brushes, assets found online, or create your own solid or textured brushes, the customisation options allow you to make endlessly unique brushes for just about any art style.
Thanks for reading!
