


Sometimes when we're modeling in Blender we may want to create a much more complex scene or object such as a castle. Modeling every individual element is very time consuming for such a large an intricate object.
With kit bashing we can cut a lot of the modeling out and get straight to designing the scene or object we'd like to create.
In this guide we'll be going over how to use RenderCrate's Castle Kit to create a castle with kit bashing. We'll also be adding it to Blenders Asset Browser so we can quickly drag and drop parts into our scene.
We'll be creating our castle using a technique called kit bashing. Kit bashing is the process of taking a set of assets and mixing or bashing them together to create our scene.
In this guide we'll be using RenderCrate's Castle Kit to create our castle. You can find it here.
External Content: Medieval Castle Kit
This is the workflow we will use.
The first step is to import the assets as well as configuring the materials. We will also need to adjust the clipping distance to reflect the scale of our assets.

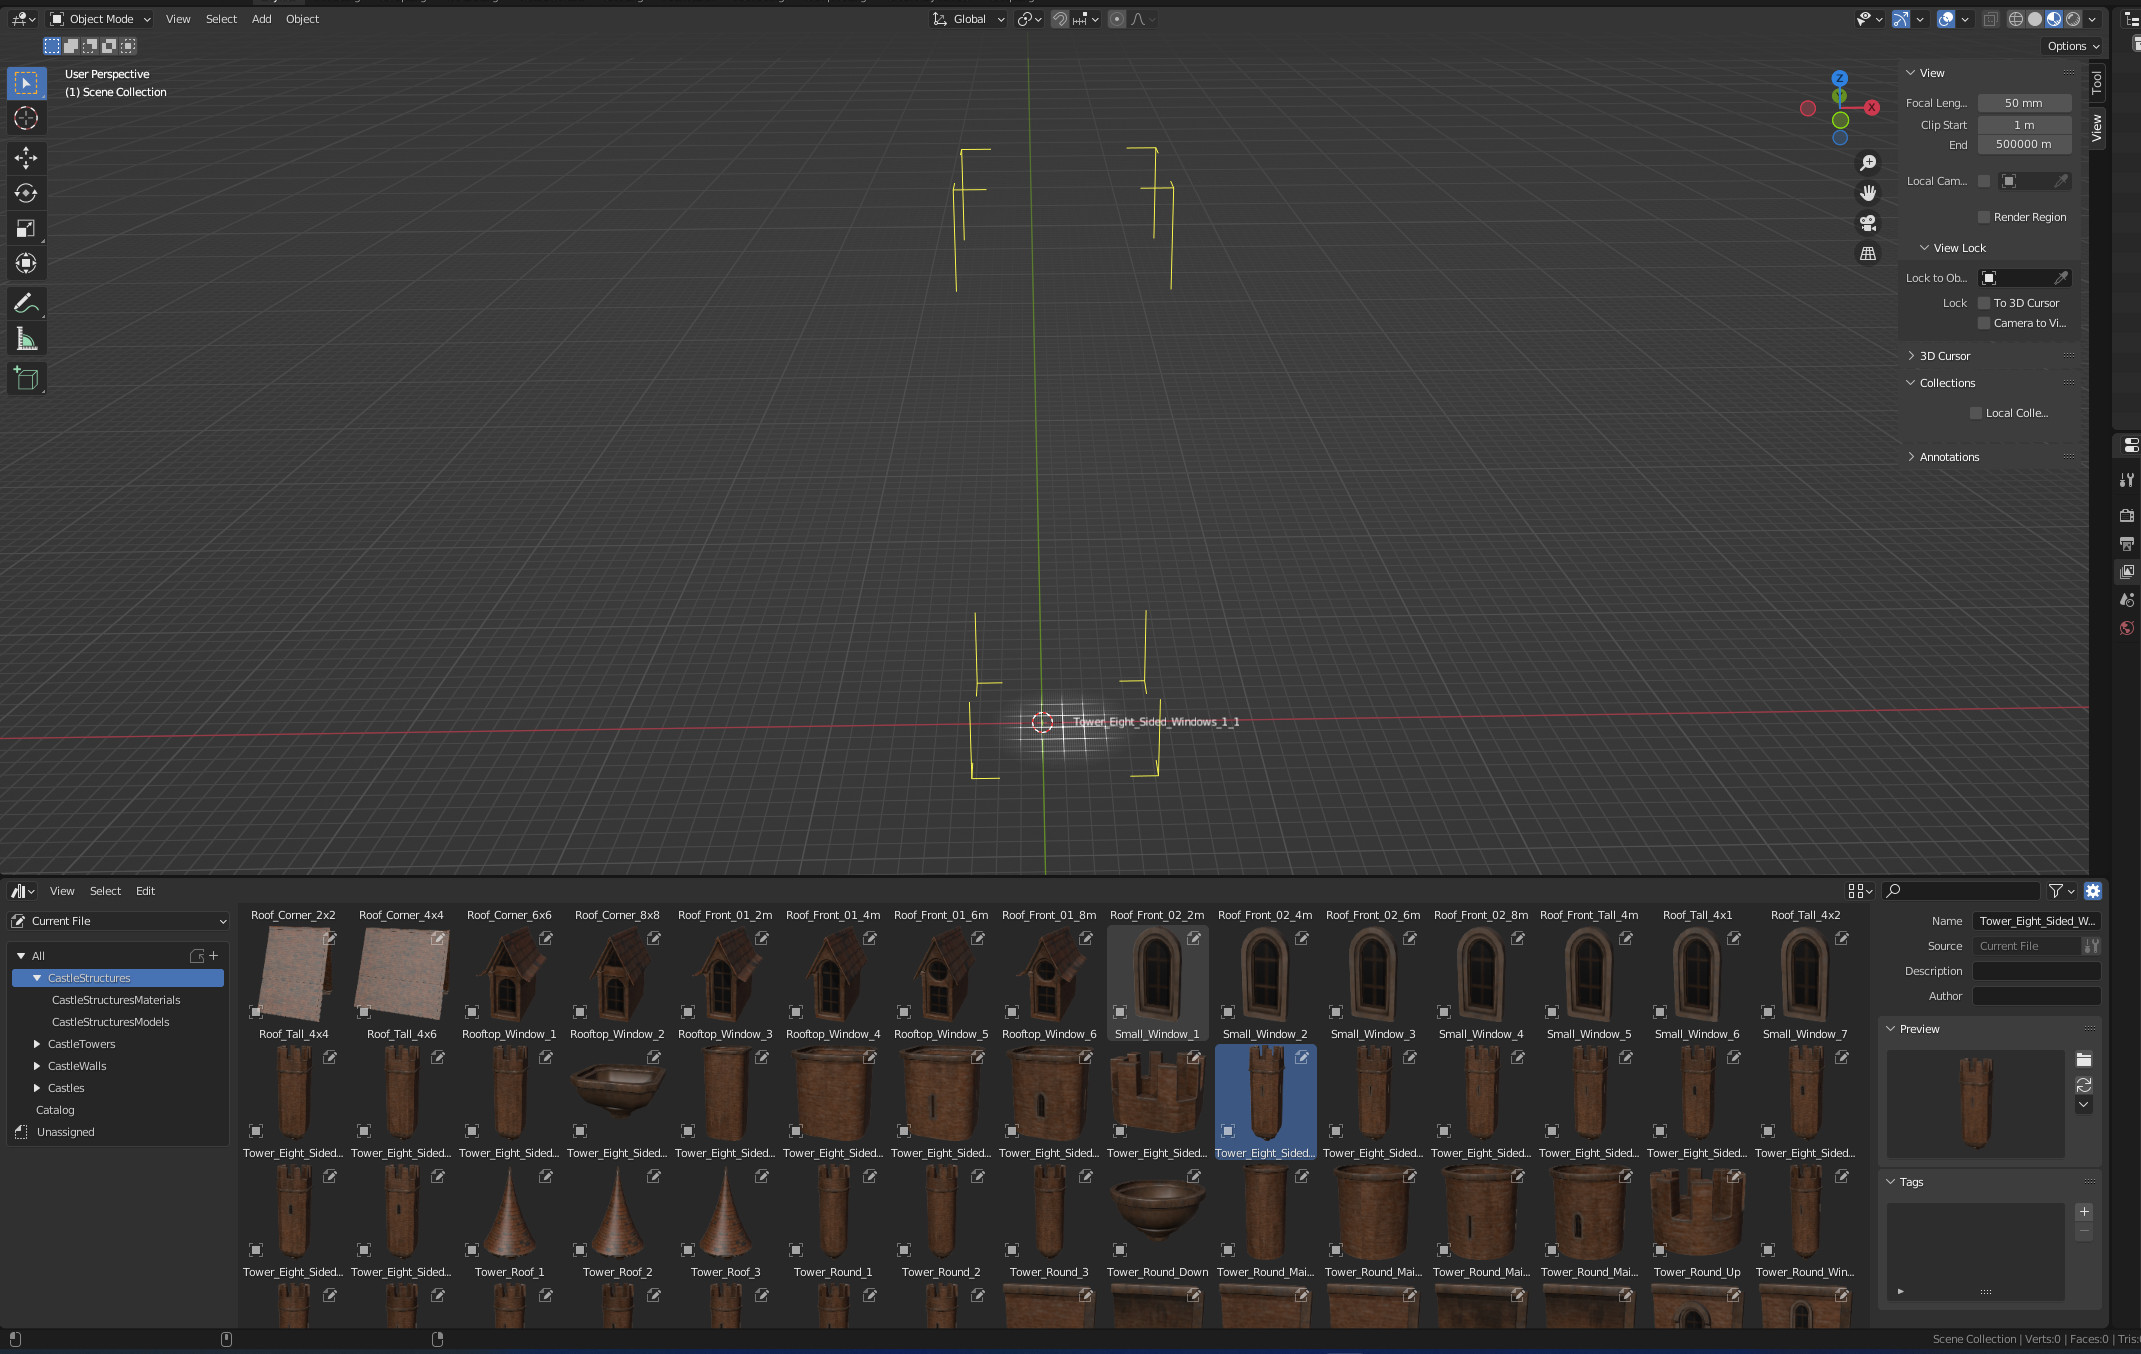
Next we add all of the objects to the Asset browser to make it easier to access them. With the kit added to the asset browser we can drag and drop pieces into the scene to quickly build up a scene. We also add each material variation so we can drag and drop them onto the assets in our scene.
Finally we start building out our scene using the kit. We can quickly build it up since we already have the assets and they're easy to access.
With our scene designed we configure the scene for rendering by adding in a sky for lighting and any extra lights we want to add. We also add a camera and configure our render settings so that we can get our final results.
We focus on the kit bashing of the castle itself in this article. On top of this we can add any surrounding scenery, sky or environment. I will leave that up to you.
To get access to the castle asset pack we will need to visit rendercrate and setup an account. With our account set up we can go ahead and download the castle kit.
External Content: Medieval Castle Kit
The resolution you should choose will depend on your needs, if the camera is going to be close to the castle you will want to choose a higher resolution, and lower if you're going to view the castle from far away.
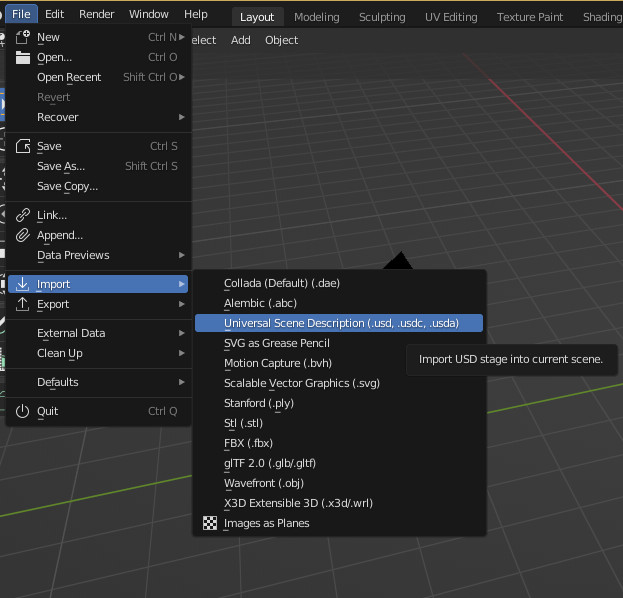
The Castle Kit comes with both FBX and USD format so we will need to import the files into Blender.
In Blender navigate to File > Import > USD and select one of the Asset Groups and import using the default settings. We can also use the FBX format but the USD format provides more information when we import.
We can follow this importing process for each asset group as well as laying out the assets to make them easier to view.
Depending on our settings in Blender we may notice that the view is cutting off the assets. Since we're dealing with castle sized assets they are fairly large so we will need to adjust Blender's clipping distance to reflect this.
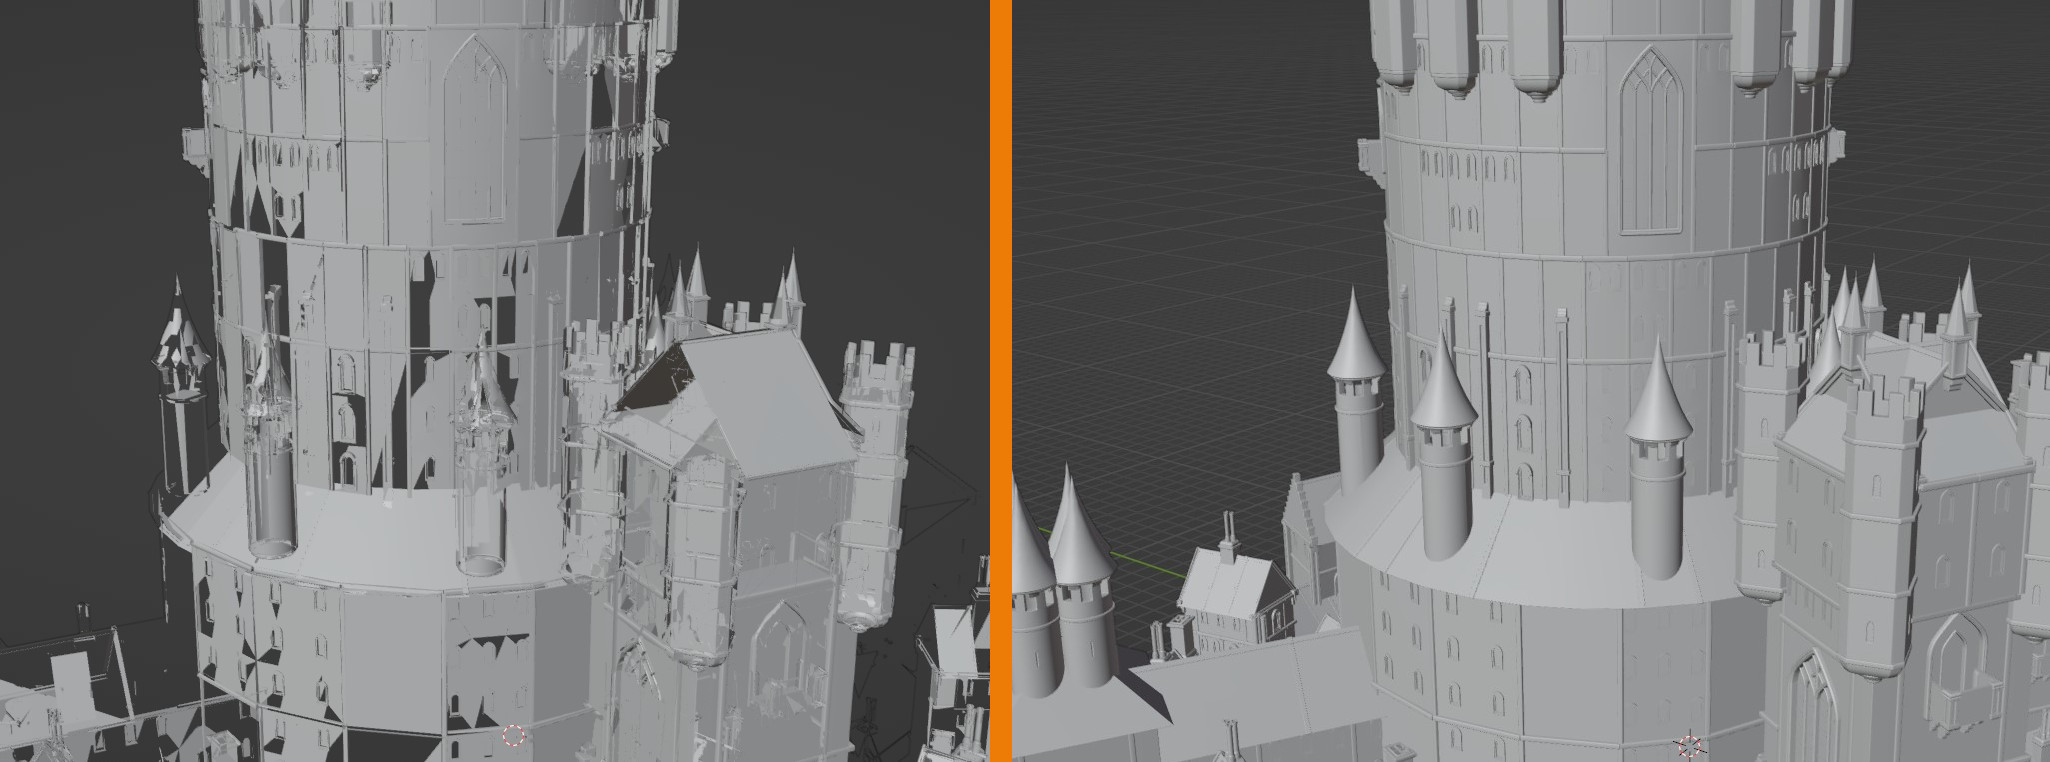
Open the sidebar by tapping N then go to view and set the Clip Start to 1 and Clip End to 50000 this will basically increase the view distance in Blender. For more information about clipping distance refer to the Blender manual.
External Content: Blender Manual - View Clip
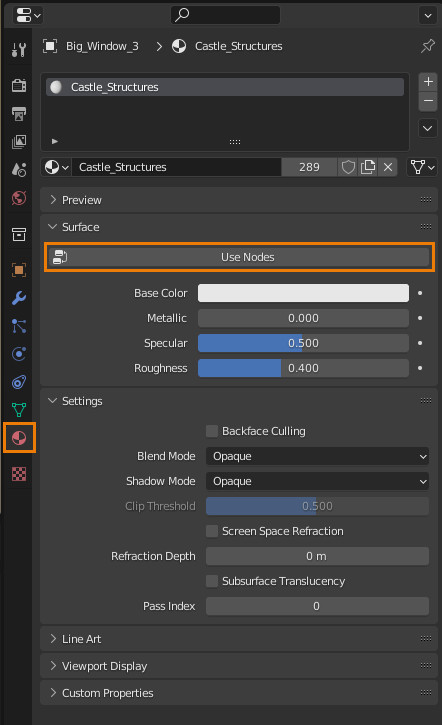
The first thing we'll want to do to setup the materials is to make sure nodes are enabled on our material first so that we can import the PBR textures into Blender.
Next we can navigate over to the Shading Workspace and start importing one of the material variants.
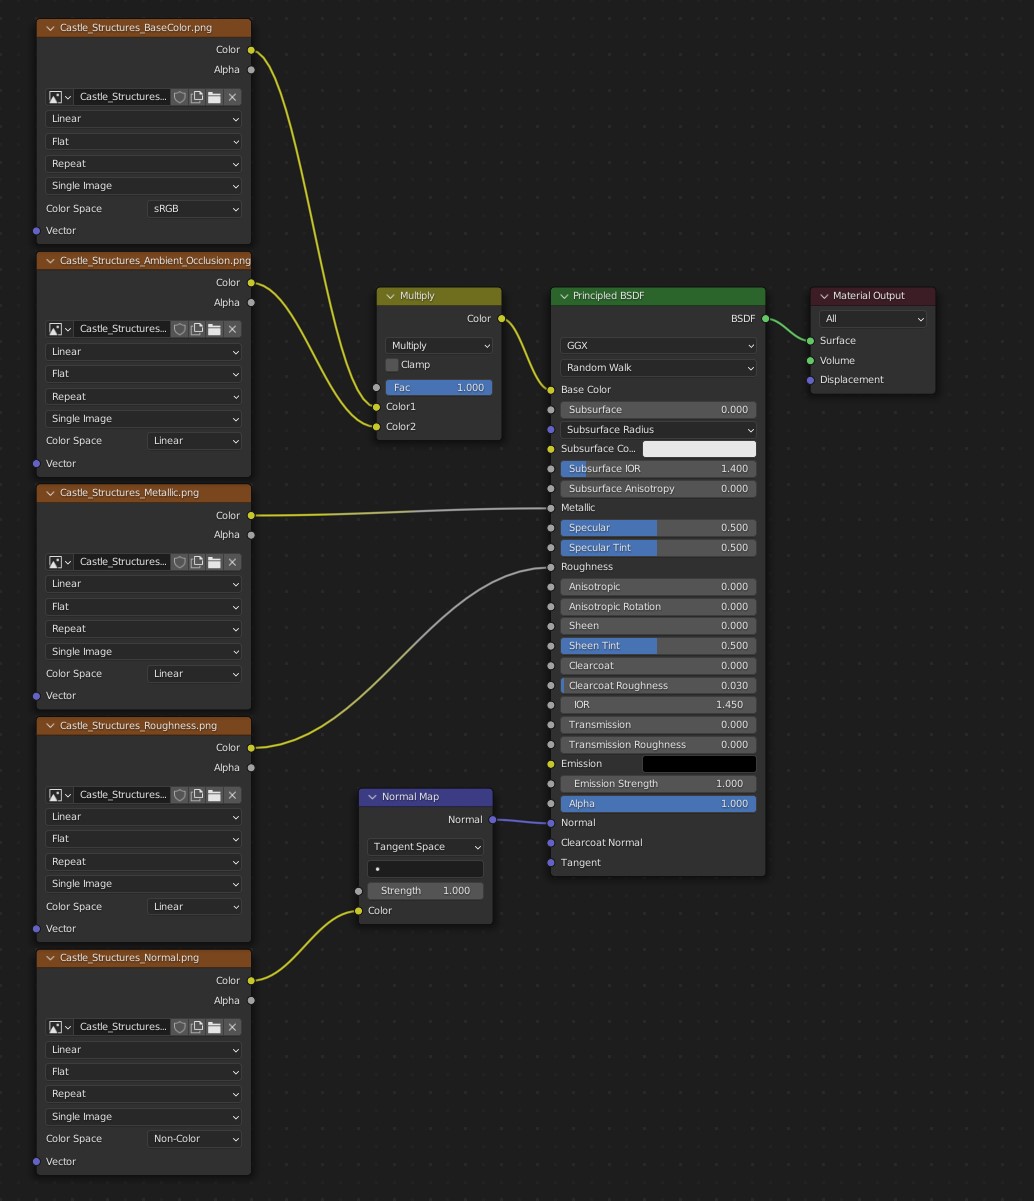
To import images into our material in Blender press Shift + A or select Add and search for the Image Texture node. Go ahead and add these pbr textures for that material variant:
Related content: The complete beginners guide to Blender nodes, Eevee, Cycles and PBR
The process for setting up the shader is fairly straight forward, connect the roughness and metallic maps directly to their inputs on the principled BSDF. For the base color and ambient occlusion we will need to add a mix node and set it to multiply.
Connect the base color to the first input then connect the ambient occlusion to the second input and set the factor to 1.
For the normal map we'll need to add a normal map node. Connect the normal texture to the normal map color then connect the normal output to the principled BSDF Normal. For the normal texture set the color space to Non-Color.
Finally for the roughness, metallic and ambient occlusion textures set the color space to linear.
If you're looking for a more in depth guide on how to setup a PBR material check out the PBR material guide.
Related Content: What is PBR and how do we use it in Blender?
Before we start adding the castle pack to the Asset Browser we will first need access the asset browser.
To access the asset browser we first will go to the workspace we want the asset browser to be visible in, such as the Layout workspace. Then drag out a new window. We can then set the editor type in our new window to the asset browser.
Related Content: how to use the asset browser in blender

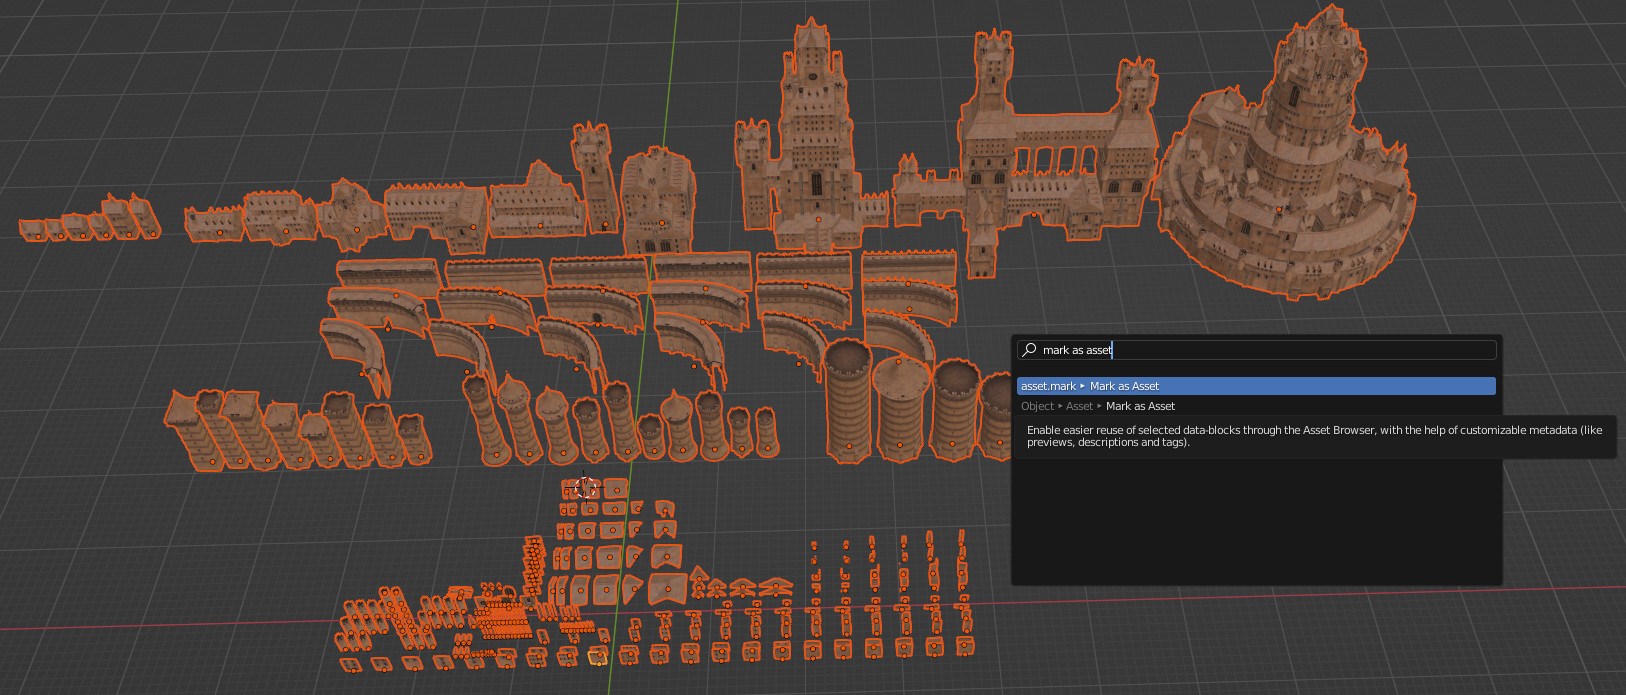
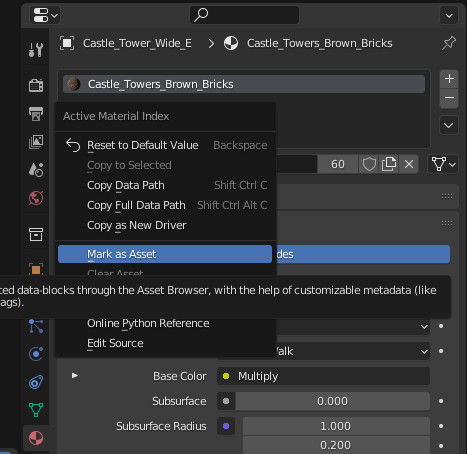
Now we can select all of our assets by tapping A or by going to Select > All. With all of our assets selected we can go to the operation search by tapping F3 and searching for mark as asset.
We can also add the material variations to the asset browser by going to any object that has the material variations on it.
To add a material variation to the asset browser select the object that has the material variation you want. go to the material properties tab and right click on the material then select mark as asset.
Currently Blender has some issues creating previews for large scale objects. We can either render custom thumbnails for each model or we scale down the large objects to something around the size of the smaller Castle parts.
We can then add the assets like before and now they should have their previews. Now we can scale our objects back to the original scale and the model should update while keeping the working preview. In the future this will likely be fixed but as of now its a quick way of solving the issue.
For a more in-depth guide on the asset browser check out the linked article.
To use the asset browser version of the assets we can simply drag and drop them from the browser into the scene, if we also have material variations added to the browser we can drag those onto each object to quickly change the material variation they use.
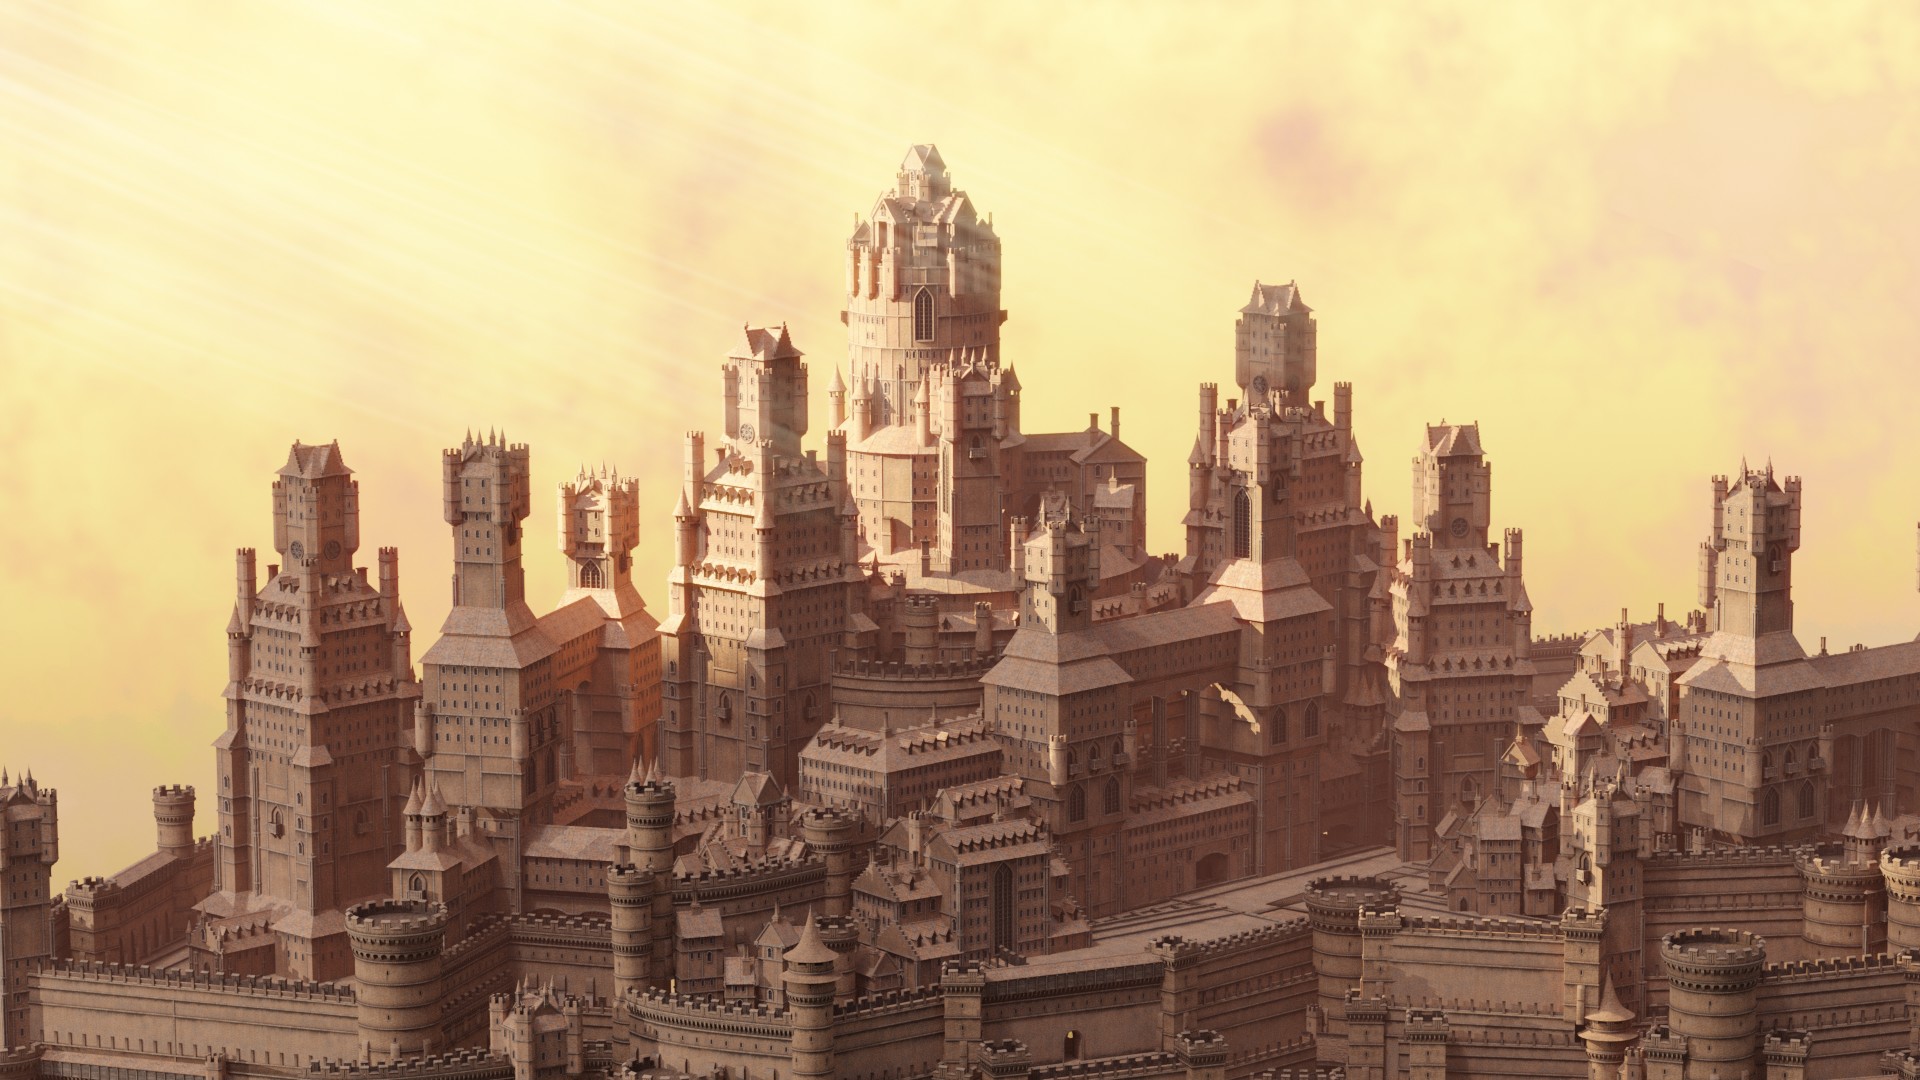
We don't have to be exact about how we assemble these assets. We can mix and match pieces and clip things together to create the shapes and looks we want. Of course we can still be precise if we choose but assets can have a wide range of uses that aren't so obvious.
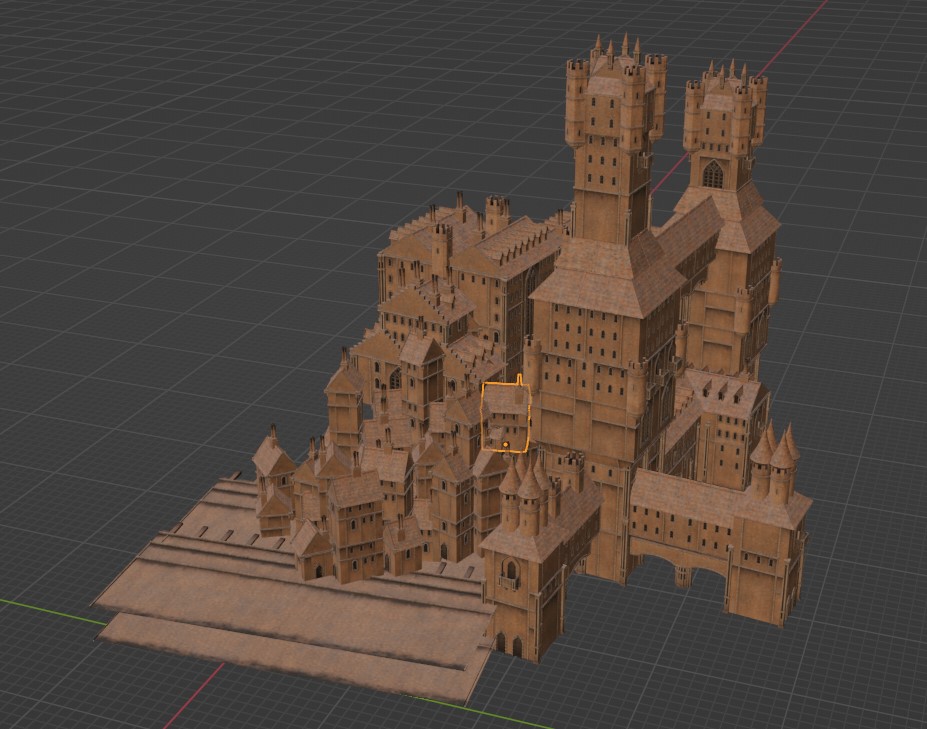
In this part of the sample scene I used the walls as a ground and stacked a bunch of the smaller houses onto each other to give the illusion of a very cluttered and dense living area.
We can build up completely unique scenes by mixing and matching assets until we're a happy with the the results.

Lighting the scene is a pretty simple process with blender whether we're using Eevee or cycles. To start navigate to the Shading Workspace and change the shader data type to World.
Add a sky texture node and for cycles set the sky model to Nishita and connect the texture color to the Background Color. I recommend lowering the strength of the background a bit as the texture can be quite bright.
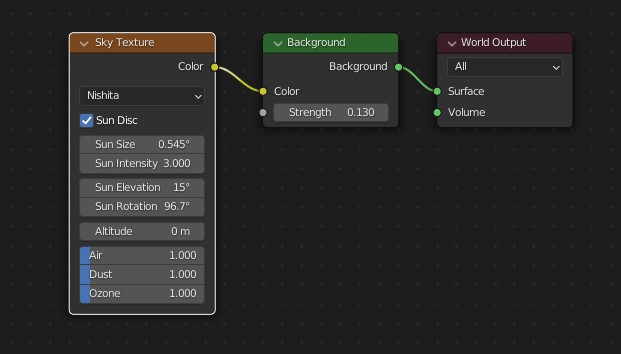
Feel free to adjust the sky texture until you're happy with the results. To quickly preview the changes either go the rendered viewport or enable Scene World in the Material Preview Shading options.
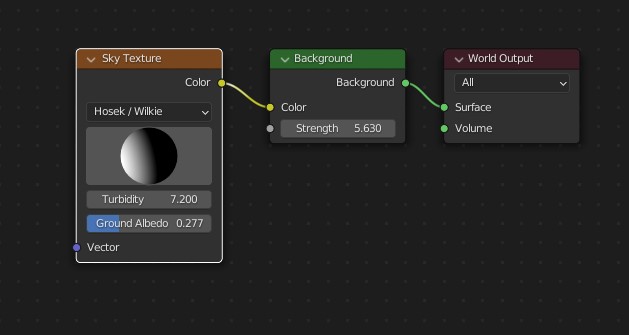
When rendering with Eevee we cannot use the Nishita model so instead we can use the Hosek / Wilkie Model. For this model I recommend turning up the background strength as the texture tends to be a bit dark. We can click and drag on the sphere preview to change the direction of the sun.
For this example I've went ahead and added a simple plane under the castle just for visualization purposes. We could of course replace this with an environment or even build out a more expansive castle using more of the castle pieces to fill in more area.

To render our scene we'll want to setup a camera and adjust our render settings. The settings we use will depend mainly on how much time we want to spend on rendering vs the quality we want.

Eevee renders are going to be less resource intensive and quicker to render at the cost of accuracy. Cycles will give us the best results and requires less adjustment since we're not trying to recreate the look of Cycles.
Related content: Blender: A Cycles render settings guide
The main settings to focus on in Cycles are the sample counts. We can use Noise threshold to render until our image has reached a certain noise threshold. The sample counts allow us to manually define the sample limit.
Finally Denoise can give us a less noisy render but many introduce its own artifacts.

For the example we've gone ahead and used Cycles since it gives the best results but if you decide to use Eevee the scene should still render out properly. I recommend enabling Ambient Occlusion and Bloom as well.
Related content: A guide to Blender Eevee render settings
In the final render I've composited some noise over the background to create a kind of cloud effect and added some streaks to the foreground to emulate god rays as well as adding a slight amount of bloom.
Kit Bashing is a fun and easy way to build scenes. Using Premade kits such as the castle kit can save us a lot of time and give us easy access to high quality assets that go together well. The castle kit gives us a wide variety of assets to combine to create whatever we imagine.
Thanks for your time.
