


Whether we're creating a fisheye lens for artistic purposes, or we're making a 360 image we'll need a fisheye lens to achieve it. So how do we create a fisheye lens in Blender?
There are two ways we can create a fisheye lens in Blender. Either through the camera settings by changing the camera type to panoramic or by using the lends distortion node in the compositor. In Cycles, both methods are supported while Eevee does not have support for panoramic camera.
Next, we'll go over more details about setting up our camera as well as the multiple panorama types and how to achieve lens distortion in the compositor.
Related content: 5 cool camera tricks in Blender
To create a fisheye lens in the Blender camera:
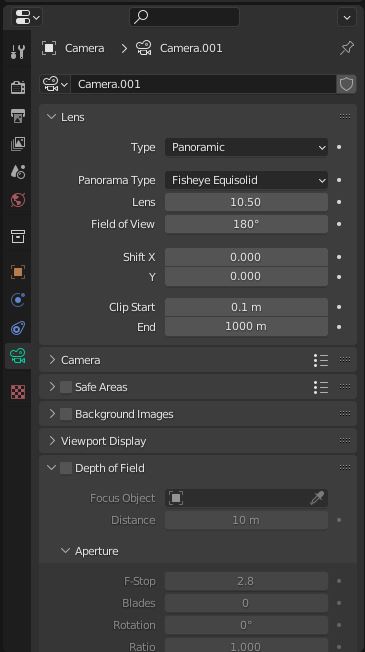
As mentioned in the first step we need to set the render engine to cycles. Eevee lacks full support for panoramas currently which is why we use Cycles. We can set the camera type to panorama in Eevee as well, but we don't have the same options available to us.
The Eevee panorama can still be used for creating a wide field of view image though.
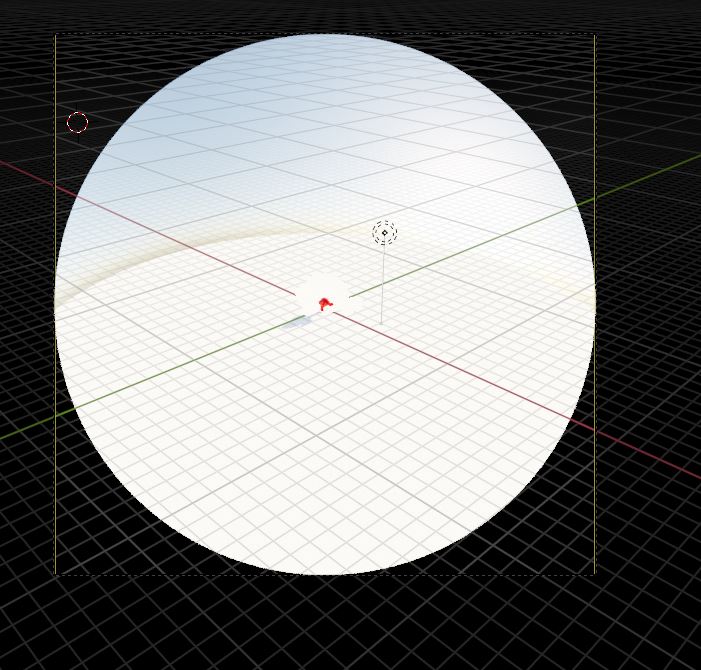
We can also use the Fisheye Equidistant panorama type to automatically fit the image to the bounds of the camera regardless of the field of view. Note that we can keep the fisheye effect square by adjusting the resolution in the view layer properties.
The main purpose of panoramas is to capture an extremely wide field of view. Panoramas tend to have quite a bit of distortion as a result. Depending on the panorama type and how we use it will change how distorted it is.
The equirectangular panorama type is useful for capturing a 360 image with minimal distortion maximum resolution. These 360 images can be used as backgrounds in Blender.

Fisheye equidistant creates a fisheye distorted image that perfectly fits to the resolution of the camera and has a field of view value.

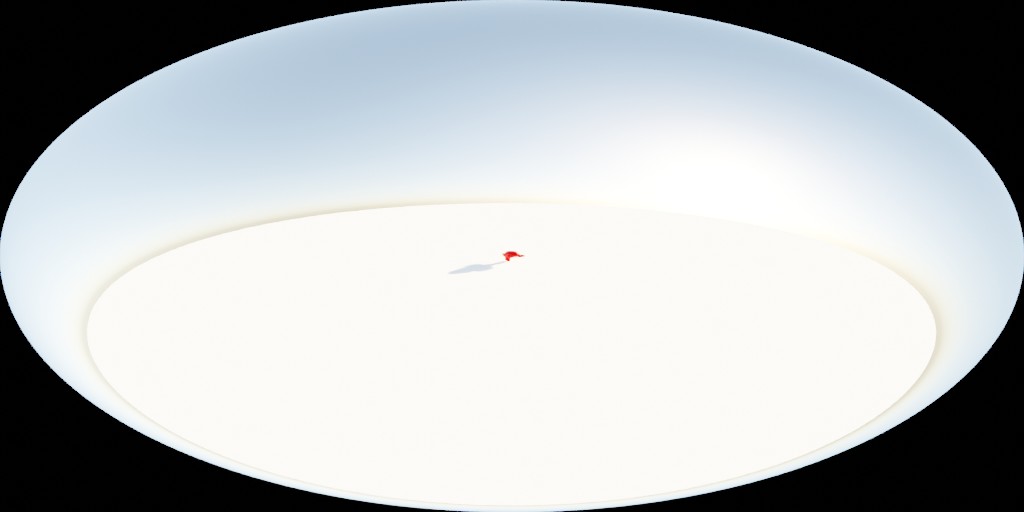
Fisheye equisolid creates a fisheye distorted image that is perfectly spherical. We can use lens value to adjust the scale of the image as well as the field of view value.

Mirror Ball is another method for creating a 360 image similar to equirectangular but this acts like a reflective ball in the scene but the resolution on the edges of the image may be lost and the corners of the image won't be used. It's pretty rare that we would use this instead of equirectangular.
Fisheye lens polynomial can be used to create a fisheye effect that matches a real-world camera. We can also use it to create a heavily distorted image.
For a more technical explanation on the fisheye lens polynomial as well as the other lens types check out the this section of the blender manual:
External Content: Cameras - Blender Manual
To Create a fisheye effect in the compositor:

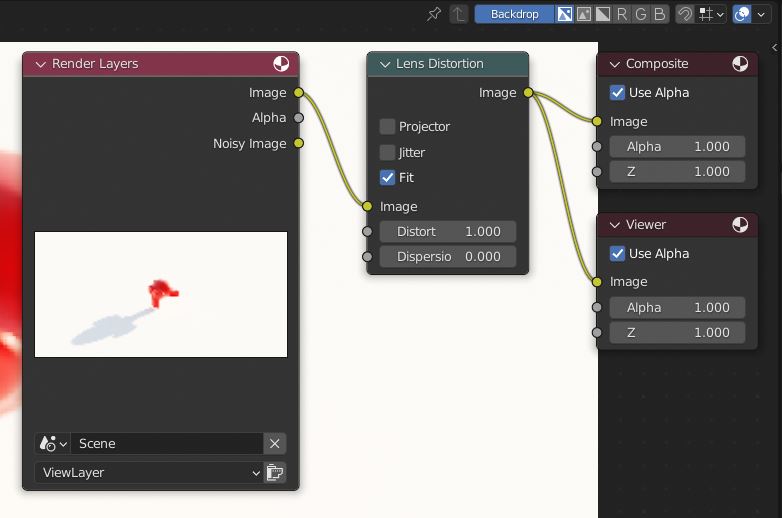
When we're working with the compositor it can be a bit inconvenient to have to change a setting then re render to see its effects. To speed up the process of adjusting our fisheye effect lets setup a viewer node.
Go to add > search > viewer and place it in the graph, now take the lens distortion image out and connect it to the viewer image in so that both the viewer and composite node have the same input. Next on the top right of the composite window enable backdrop.
Now when we render the image the composited image will be visible in the background and any change, we make will show up in the background without having to render the image again. If the image isn't fitting press N to bring up the side panel and under view click on fit.
Sometimes we might want to manually scale and crop the image rather than having the lens distortion node do it. To achieve this effect, go to add > search and search for scale then place it in the graph. Go back to search and search for Crop and place it in the graph.
Disconnect the lens distortion image out and then connect it to the scale image in. Next connect the scale image out to the crop image in. Finally connect the crop image out to the composite image in. Connect the viewer image input as well if we have a viewer node setup.
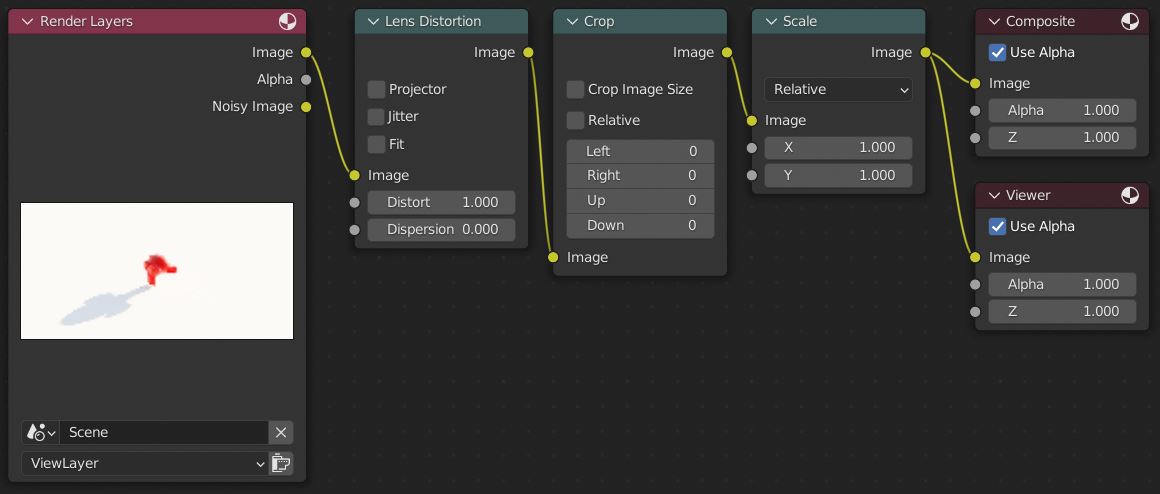
Since the Crop starts off at 0 the image will be completely transparent. We can adjust this to cut out the edges and then use the scale values to scale the cropped image to the boundaries
This setup can be useful for example if we want to distort some footage or video we've already rendered. This is also useful for creating a more adjustable fisheye effect for Eevee renders.
We'll want to make sure our camera doesn't have its mode set to panorama before we use this or otherwise, we'll end up with a heavily distorted image.
Since this effect is being applied to the rendered image and isn't being directly rendered it will not have the same quality that an image rendered with a fisheye camera would.
Blender provides quite a few options for setting up and configuring a fisheye lens. Whether we're just recreating a fisheye look, or we want to create a 360 image we can achieve it with Blender's camera.
We can also use achieve a similar effect with the compositor. This allows us to create it with any render including Eevee renders.
Thank you for your time.
