


Depth of field can be a useful tool for bringing out a focal point. We can also use depth of field to give our renders a sense of scale. So how do we create it in Blender?
There are two ways to create depth of field (DoF) in Blender, either through adding it to the camera object or as a post-processing effetc through the compositor.
In the rest of this article, we'll go into more detail about depth of field. We'll also go into more details about setting it up and how to use it.
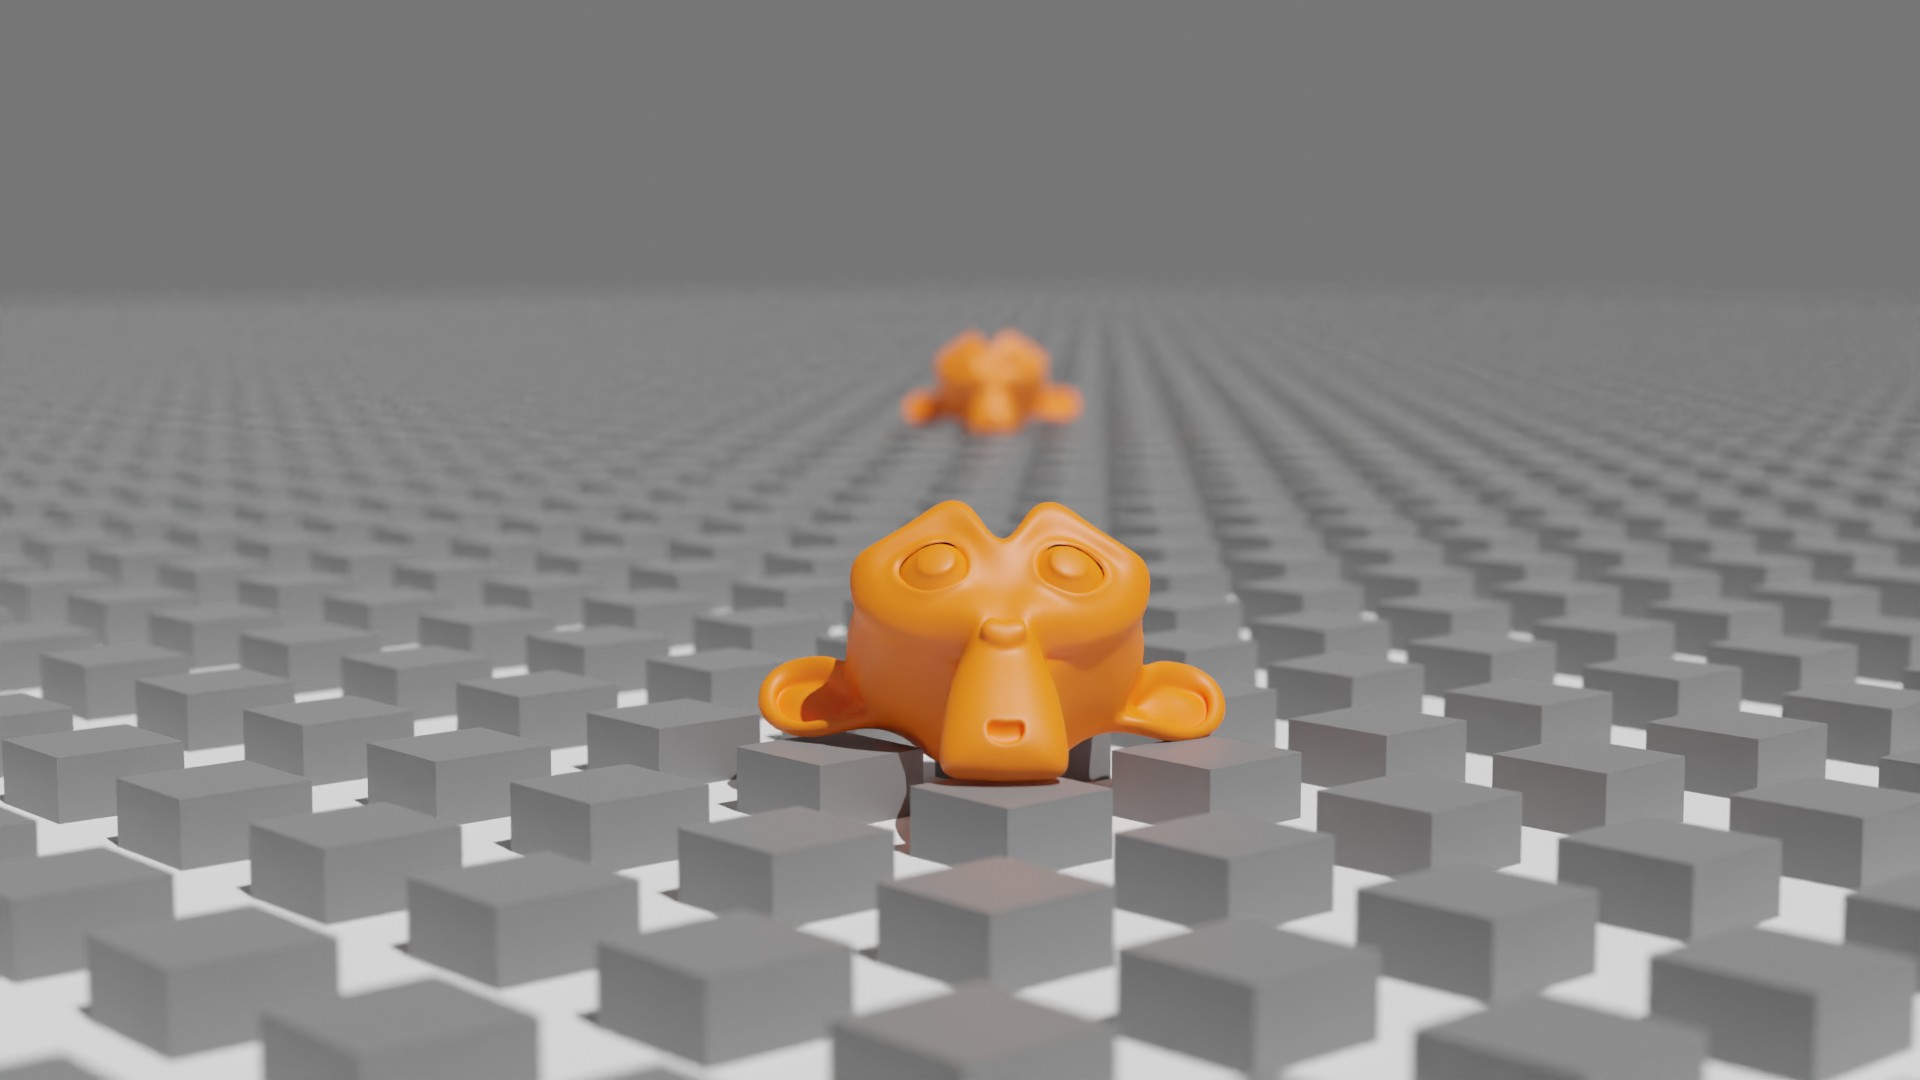
Depth of field is the effect where the camera focuses on an object and all other objects that aren't in focus become blurred.
The basic idea is that certain aspects of the camera such as the aperture and focal length create an imaginary in focus range.
With a short focal length and a low F-Stop that would we close to the camera. If the subject of this image is close to the camera they will be in focus while the background will be blurry.
With a long focal length and a high F-stop the in focus range would be further from the camera. As long as no elements of the images are too close to the camera this will usually result in most of the image being in focus.
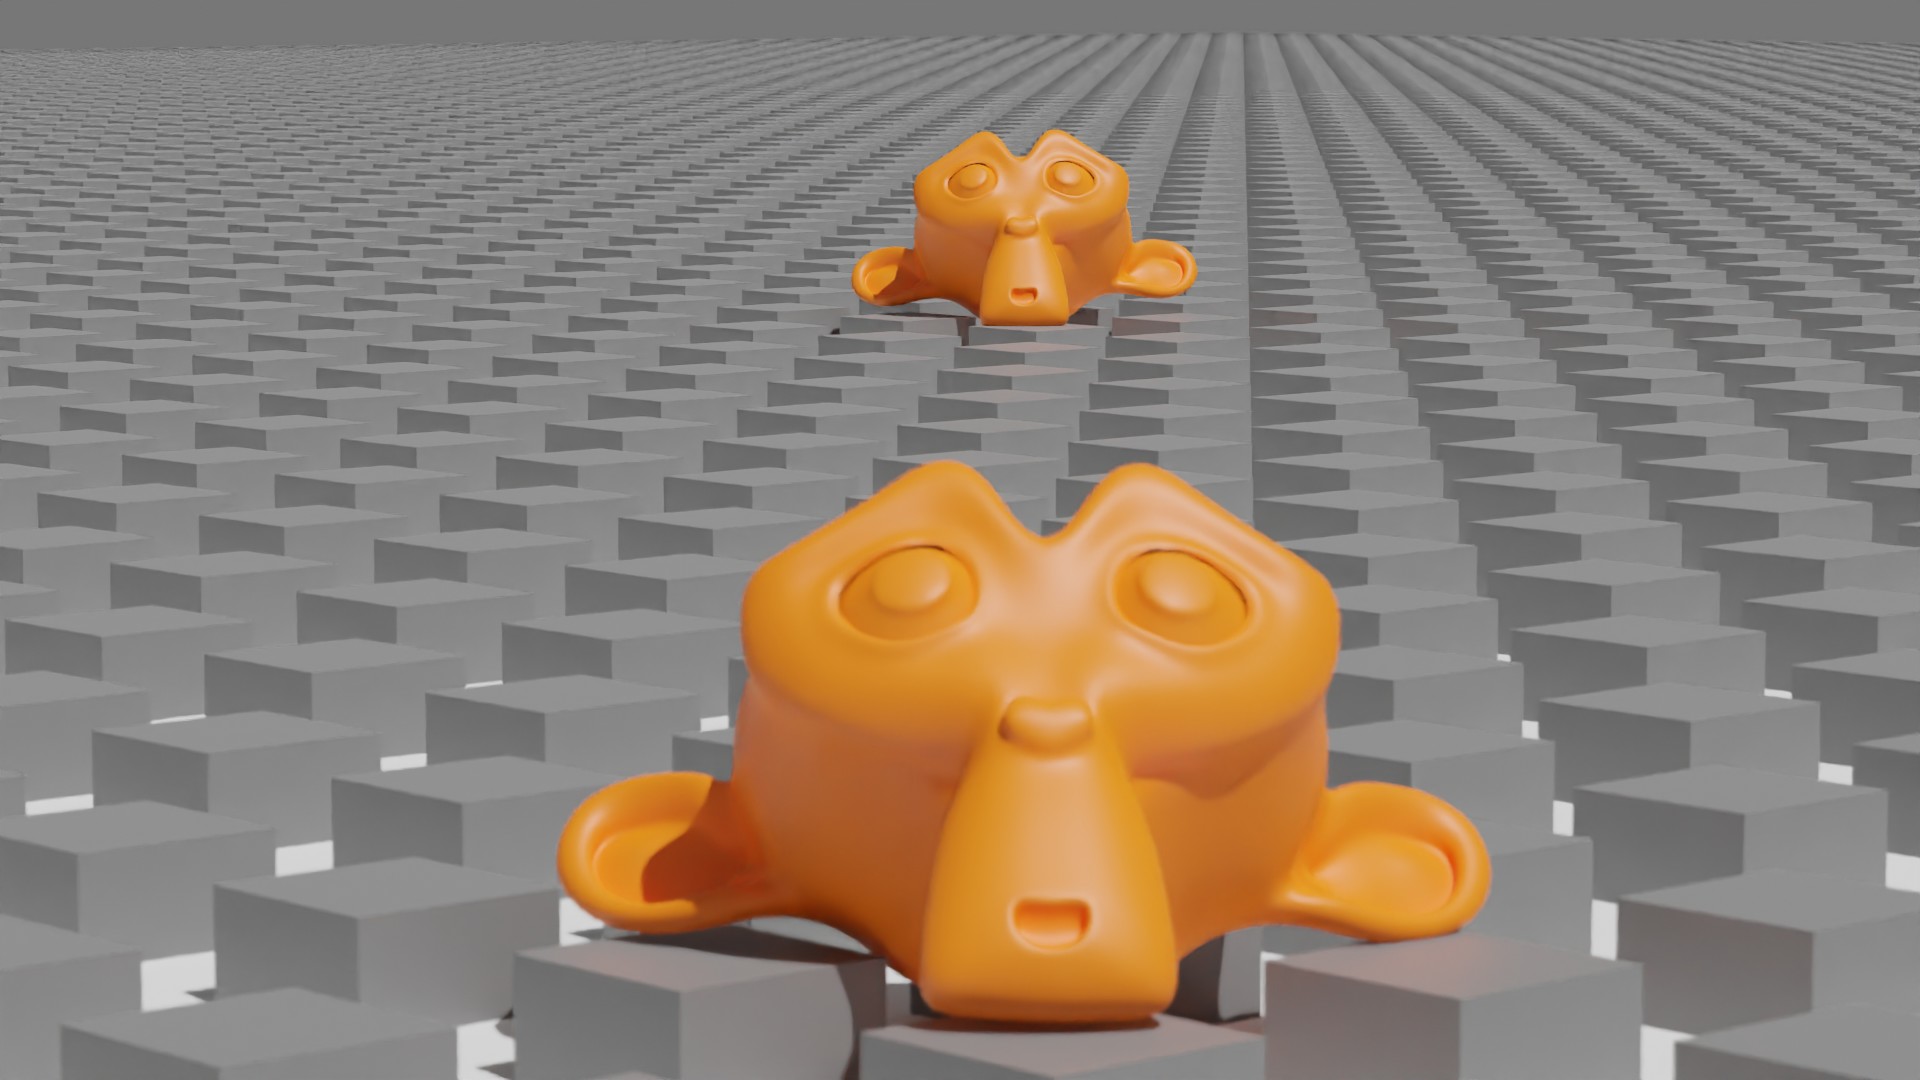
Usually a good depth of field will help guide the viewers eyes towards the focal point. A good depth of field can also help give a render or image a sense of scale.
Having a shallow depth of field can make our render feel small. A deep depth of field can give the opposite effect. Depth of field can also be useful for bringing attention to the subject of our render.
To Create a depth of field effect with a Blender camera:
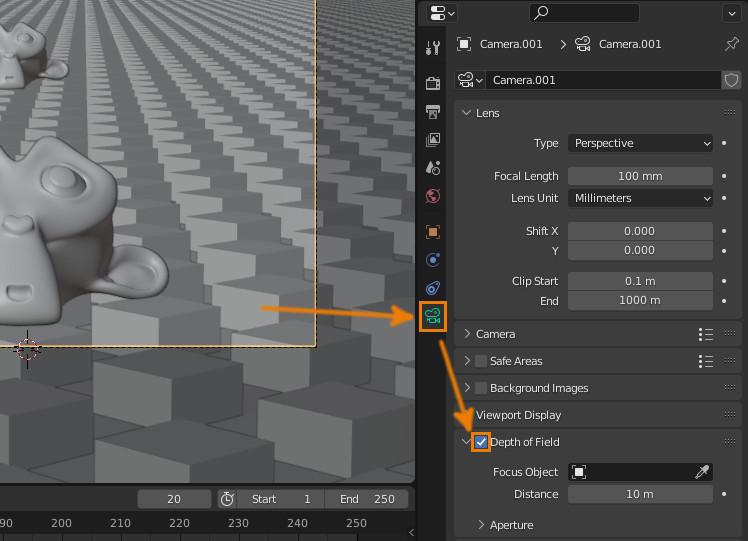
With blender we don't have to really worry as much about how we setup our camera. We can directly set the object we want the camera to be focused on. Unlike a real camera we basically just use the F-stop value to adjust the range from the focal point object or distance that is in focus.
Note that both the Eevee and Cycles rendered previews allow us to preview the Blur. The preview makes it much easier to adjust the look of the depth of field.
We can mainly just focus on focal length and focus distance if we don't have a focus object. For a more in depth explanation of what the aperture settings change check out the Blender manual.
External Content: Camera - Blender Manual
Keep in mind that if we want to use real world settings for our camera we'll also want to make sure that our scene actually matches real world scales. Scenes that are modeled too large or too small will result in a much different depth of field effect.
To Create a depth of field effect in the Blender compositor:
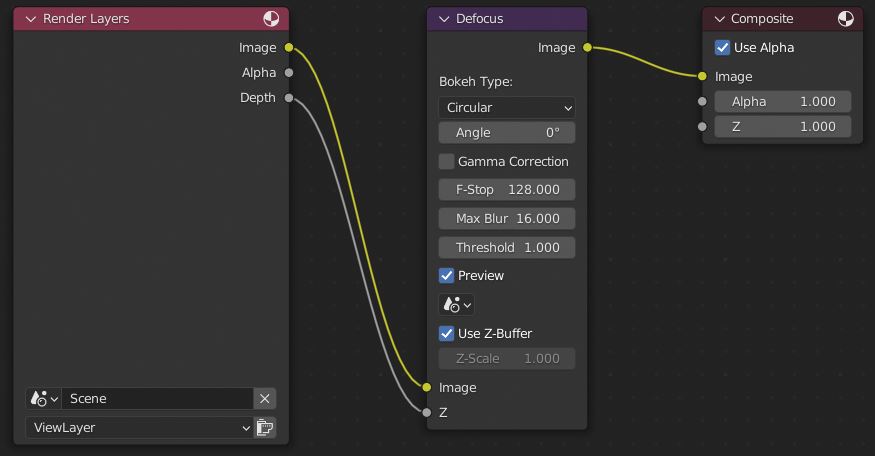
One way we can speed up the process of adjusting the look of our depth of field is to setup a viewer node.
First go to add > search > viewer, place it in the graph by the composite node. Connect the defocus image out to the viewer image in. At the top right of the compositing workspace enable backdrop.
Now when we render the composited image will show up in the background of the compositor. If the image doesn't fit in we can easily fix this by pressing N to bring up the side panel and then in View click fit.

The way the node combines the blurred and in focus areas seems to be similar to just mixing the defocused image with the input image using the depth as a factor.
To make this more adjustable we could just leave our defocus settings as is and disconnect the Z input. Now create a mix node, colorramp, and normalize node. We'll use the normalize node to make sure the depth value isn't too large.
Connect the render layer depth to the normalize value in then connect the value out to the colorramp fac in.
Now Connect the colorramp image out to the mix node Fac. Connect the render layer image out to image 1 of the mix node. Finally Connect the defocus image out to image 2 of the mix node.
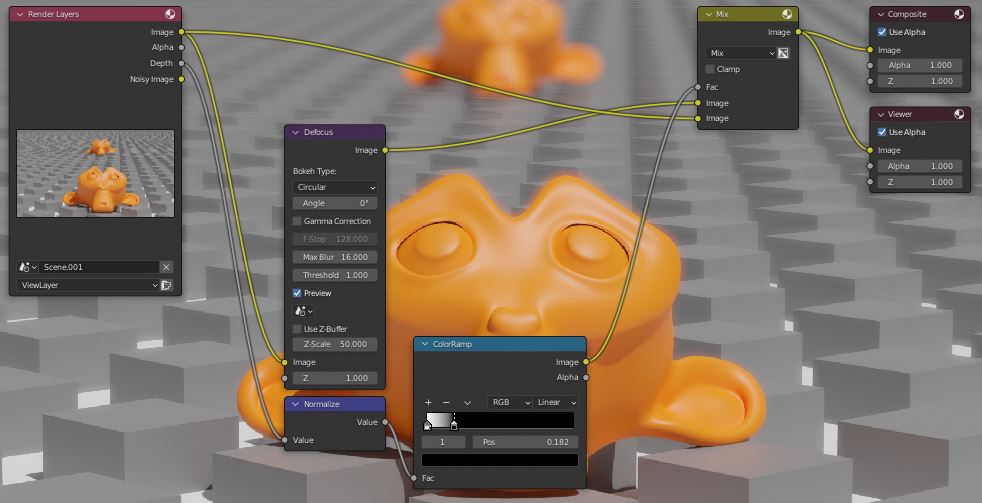
Now we can use the handles of the colorramp to adjust the depth of the defocus by hand. This setup isn't as realistic but is much easier to adjust. We can also add another handle to the colorramp to create a depth of field blur on object that are close to the camera.
Now we have a few ways to add depth of field to our Blender renders. Depending on the scene the camera setup or compositor setup may be easier.
The camera setup can be better when we want a more realistic depth of field effect. It also may make more sense depending on the render to do it with the camera rather than compositing it over afterwards.
The compositing setup can be useful when we don't want the original render to be blurred and would rather composite it in afterwards. It also can allow for quicker adjustment depending on how advanced the compositing setup is.
Thank you for your time.
