


When importing and exporting models in Blender there are many formats to choose from, sometimes the format that you'll need to use is DAE also known as collada. Whether you're looking to import or export, here is how to do it.
To Import a .dae file
To Export a .dae file
In the rest of this article, we will go over what a DAE file is as well as the many options Blender has during importing and exporting.

Collada uses the .dae file extension and is a file format for storing and transferring 3D models between different software.
DAE files can be used to store a wide variety of information, from a single 3D model to a whole scene. The format can be imported and exported from many 3D Modeling Applications and Game Engines. It is a very common file format.
DAE files are XML based using the COLLADA format created in 2004 by the sony computer entertainment khronos group, the COLLADA format is freely available and is licensed under the SCEA shared source license 1.0.
The format is also commonly used by Sketchup when importing and exporting, you can find more information about how to import and export from Blender to Sketchup here:
Related content: How to import and export between Sketchup and Blender
Blender comes with a fairly well featured DAE importer. To start we'll go over how to import files below and then we'll go into more detail about what the available options do.
Next let's go over the options available when importing our DAE files.
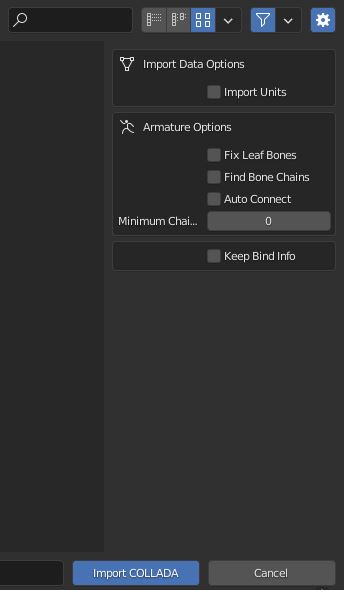
We'll start from the top with Import Units. Depending on which software exported our DAE file it may have a different unit scale than Blender, this option will import the DAE with that Unit scale instead of Blenders, if you're having issues with your objects scale try this option.
Fix Leaf Bones will fix the rotation of leaf bones, to give a quick summary of what a leaf bone is they are usually extra bones added on the end of your armatures so that they import properly into other programs.
Find Bone Chains will connect any bones that would have been connected before they were exported.
Auto Connect will connect bones that have exactly one child bone.
The Keep Bind Info option keeps Bind Poses as custom bone properties, this will keep your bind poses if you plan on exporting your model as a DAE again.
Blender also comes with a well featured DAE exporter, the process for exporting our scene is fairly simple.
To Export a DAE file follow these steps:
While the default settings work in many cases there are some things we may want to change about how it exports, for example we may want to only export one model from your scene instead of the whole scene or apply modifiers when our model is exported.
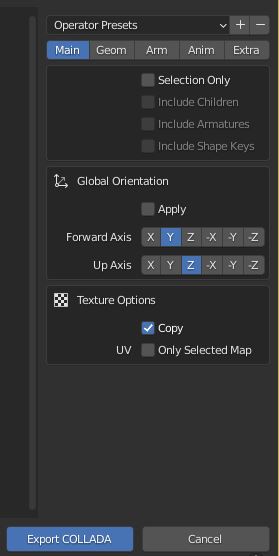
The DAE Exporter comes with 5 sections, each section contains a set of options related to the group. For example the Anim section will contain options relating to how animations are exported.
The first option in the Main Section is Selection Only and must be enabled to access the next 3 options. With Selection Only enabled the exporter will only export the objects selected in the scene.
Related content: Blender shape key basics guide
Applying our Global Orientation this will apply the rotation of the exported objects, this will essentially zero out your rotation without actually changing the way your model is rotated.
Related content: How and why do we apply scale in Blender?
The Axis options will decide how your model is orientated on export, this is used to align models when the program you're exporting to has a different axis orientation then Blender.
For example some programs will interpret Blenders up axis as their forward axis which will cause your model to import on its side. These options allows you to switch that around, if you have issues with model orientation on import make sure to check the up and forwards axis on the program you're importing to.
Triangulate will turn all quads and n-gons into triangles on export.
Depending on what software you're going to import these models into, this is necessary as some 3D software doesn't support quads or n-gons. Though you may want to disable this if you're taking the 3D model to another 3D software and still want to work on it.
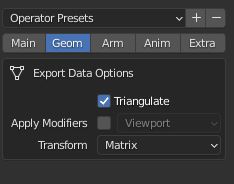
Next, Apply Modifiers will allow you to apply any modifiers on your objects. It also includes an option for which resolution you want these exported at since, for example, subdivision surface modifiers have a viewport and render resolution.
Transform allows us to decide what set of text will represent our objects, position, rotation, and scale.
Matrix will show these values in a single group while decomposed will export these values into separate lists, so one list for position, one list for rotations, and one list for scales. This can be handy if you want to manually change the DAE files afterwards as it makes it easier to read.
Deform bones will export only the bones that our model has weights for, so no IK, Pole targets, or bones used for rig control.
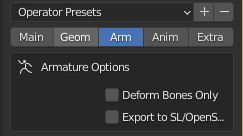
For example, this would be useful if we export the model to a game engine which we either won't need an IK rig in or has a custom solution for IK Rigging.
Export to SL/OpenSim is a compatibility option for SL and Open Sim.
The Anim section of Blender's DAE Exporter is used to specify how animations are exported with DAE.
The first option is whether or not to Include Animations.
Next is Key Type. Sample will sample your animation by taking a screenshot at every frame, or the sample rate, and then interpolate between those samples. Curves will use the models keyframes and curves for the animation.

If you selected curves as your key type will also have the option to keep smooth curves, this will keep curve handles but may not be compatible with some software.
Sampling Rate will decide how many keyframes the exported animation uses, if you set this to two, the animation will be simplified by skipping every other keyframe. This shouldn't affect the speed of the animation, at the cost of accuracy.
Keep Keyframes will sample our exported animations using each keyframe in our animations. This should help with keeping manual changes.
All Keyed Curves will sample our model's animations using curves. These can be found in the graph editor and are used to define how an animation interpolates or blends between keyframes.
This option only supports one handle on curves though, so if you are doing more complex work with the graph editor and see some strange results in your export, you might want to enable Keep Smooth curves as well.
Include all Actions will include all unassigned actions with your export, this option is useful when our models have more than one animation. For example, a character that likely has many different animations.
Transform is how the animations position, rotation, and scale are represented in the DAE file. Matrix will combine all three into one set of values while decomposed will represent each as a different set of values. Similar to what we find in the geom section.
Here, Use Object Instances will allow any instanced objects to be exported as separate objects which will allow them to be included in the export.
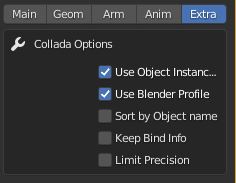
Use Blender Profile will include Blender Specific information about parts of your model such as materials, shaders, bones, this can be handy if you want to later import the DAE back into Blender.
Sort by Object will sort the exported objects by their name, this is helpful if you plan on manually editing or looking through the DAE file later.
Keep Bind Info will store Bind Poses as custom bone data for future exports of the DAE file.
Limit Precision will limit the precision of the exported DAE's data to 6 bits, this will most likely make aspects of your DAE such as positions, rotations, and scales less accurate.
The collada format should work fairly well out of the box but keep in mind that the material exporting abilities are somewhat limited.
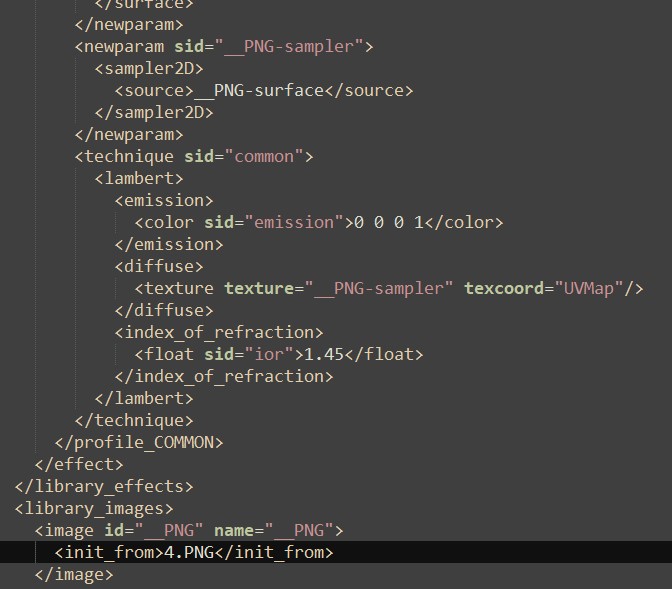
From my experience Blender doesn't always export all linked textures with the DAE file so you may need to manually look for any textures that didn't get included with the export. This is especially evident with PBR materials as usually only the Diffuse texture will be included.
If your DAE file has issues with materials not loading properly you can always open the file with a text editor and see if the material is actually referencing your texture.
Another thing that may be an issue is mesh names, this might apply to exporting models in general but make sure that your objects all have unique names, specifically the mesh data blocks.
If you don't do this and accidentally include multiple models with the same mesh data block names it can cause strange issues in the applications you are importing the DAE files into.
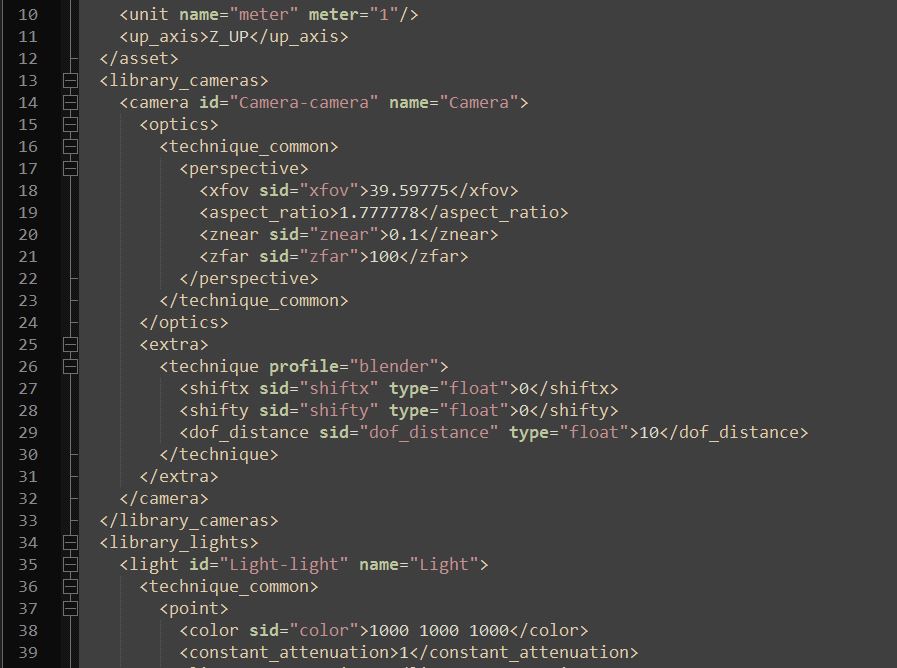
I mentioned in the beginning that DAE files are XML based, this means that we can edit the files in any standard text editor.
Our DAE File can contain a wide variety of information about what we've exported, here is a sample of some of the things a DAE file can contain
As well as that, the files are structured and written in a way that allows us to change certain values fairly easily.
The DAE format is a great tool for 3D artists, while it may be one of the older formats available to us it is compatible with a wide range of tools and programs making it surprisingly useful in a lot of cases. Being in an XML format it is also easier to understand how the file format works.
Thank you for your time.
