


Annotations in Blender is primraily a tool that help you sketch out ideas and draft in Blender. For example, if you want to draw in Blenders various editors to explain something or to quickly write down a few notes.
To use the annotation tool in Blender, press T on your keyboard to toggle the right-side tool panel. Then press the pencil icon representing the annotation tool. Then use your mouse with left click to paint in your current editor.
The annotation tool is not a tool to be used to create finished 2D drawings. For that we have grease pencil or texture painting. But it is a simple and fast tool to be used for quick demonstration or notes for your project.
However the annotation tool can be a bit tricky the first times you use it if you don't know how it works, so let's learn how we can use it effectively.
We can use the annotation tool in multiple editors in Blender, including the 3D viewport, image and UV editor and the various node editors that Blender provides for things such as shader creating, compositing and geometry nodes.
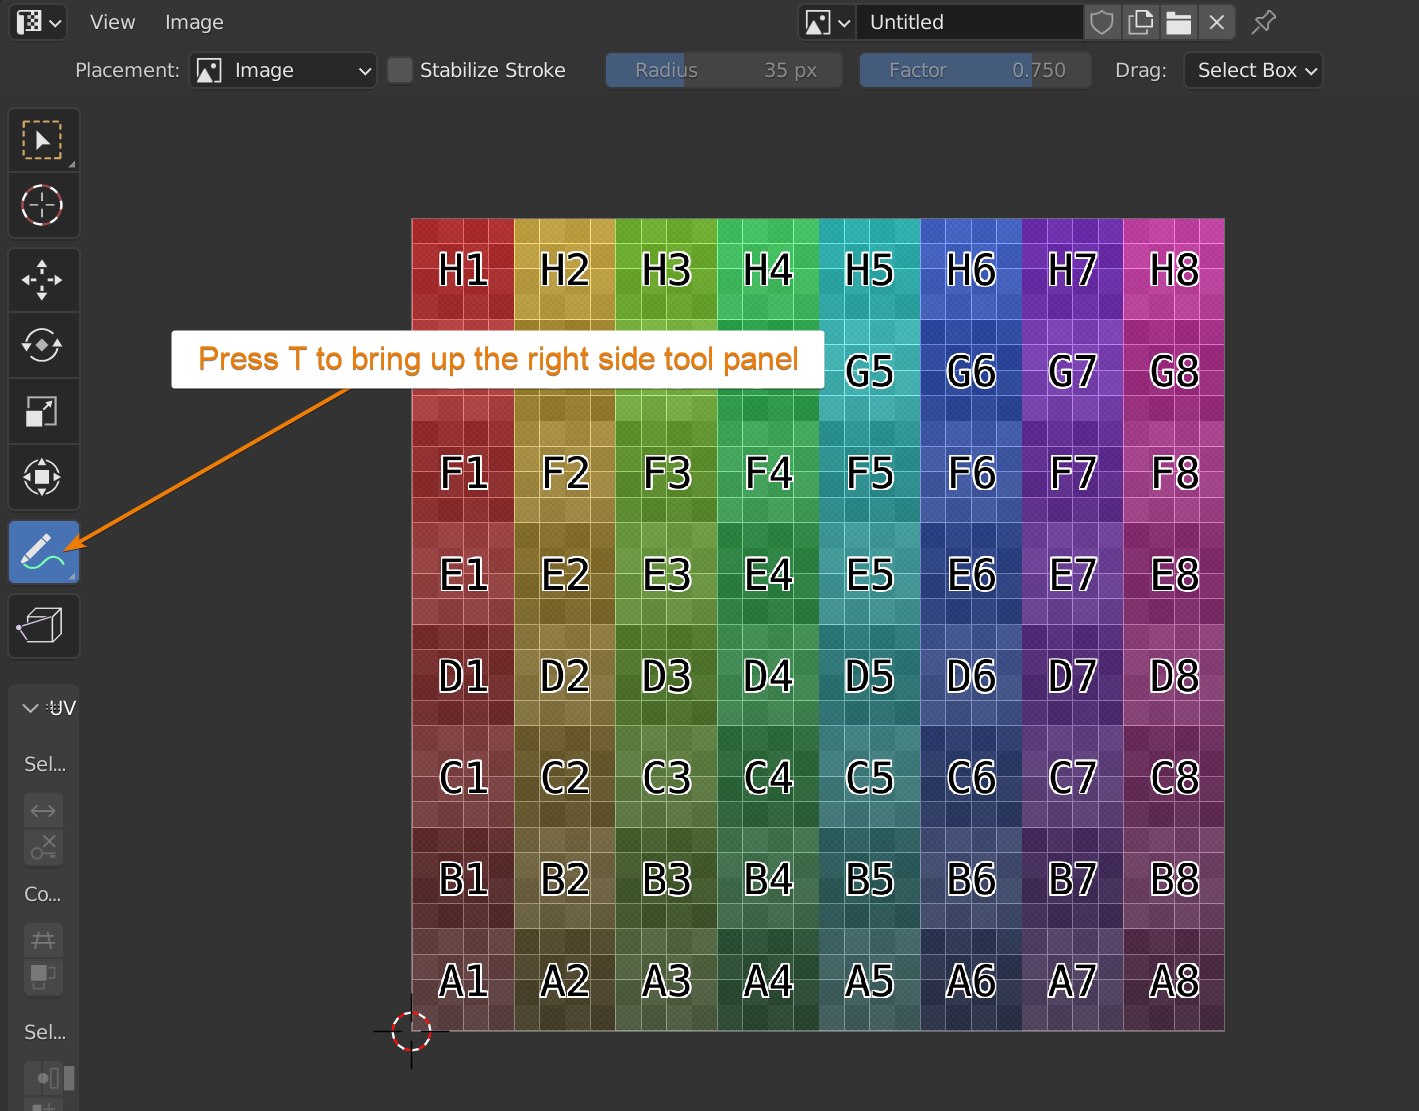
The annotation tool can be accessed by pressing T on your keyboard to bring up the left side tool panel in the editors that support it. Below is an example of where to find it in the UV editor.
Similarily, you can find it in this location in other editors that support it, such as the 3D viewport that tends to be the most common place for it to be used.
If you click and hold the left mouse button on the annotation tool icon, you will get multiple options.
These include:
The default annotation tools simply allow us to draw using the mouse or a pen tablet when it is active.
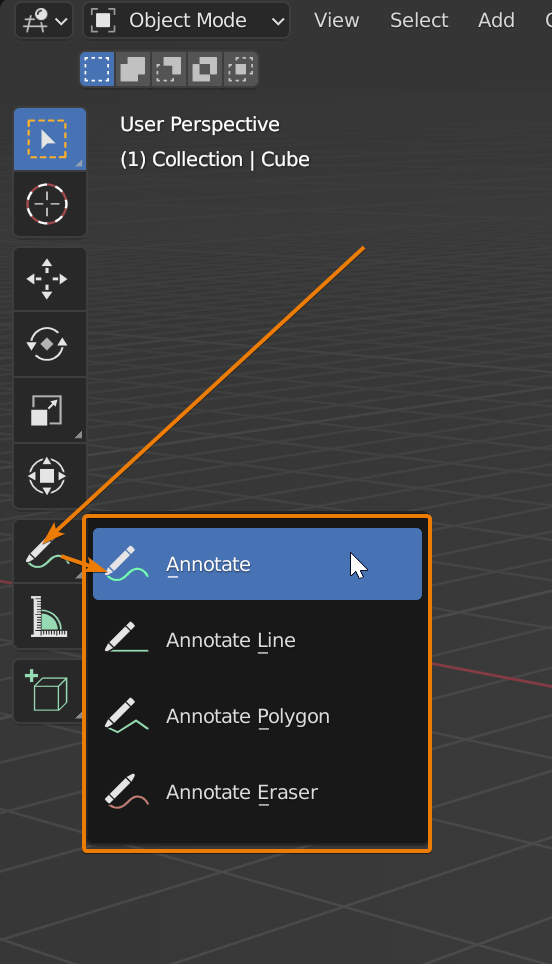
The line tool allows us to draw straight lines by clicking, holding and dragging a line across the screen.
The annotation polygon tool is used by clicking in multiple locations on the drawing surface and the tool will draw a straight line between each clicked point.
At last, we have the eraser tool. This is a circle eraser that will remove any annotation we click and drag across.
For the polygon and line tool, the eraser will erase the entire line when used on these kinds of annotations.
Since deleting annotations in Blender is such a common question, let's answer it before we continue to explain the rest of how the tool works.
There are two ways we can delete annotations in Blender. The first one is by using the eraser tool we just learned about. Follow these steps.
You can change the eraser radius in the header of your current editor.
Annotations are drawn on layers, so the second way and faster way if you want to erase all annotations at once is to remove the annotation layer.
To remove an annotation layer, follow these steps:
Now we will explore the settings of each annotation tool followed by how the annotation layer system works.
We find the settings for our annotation tools in the header of the editor we are currently using the annotation tool in.
In some cases, such as the various shader editors, we don't get the annotation tool in the header. Instead, we press N and go to the tool panel and expand the active tool section to access the annotation settings.
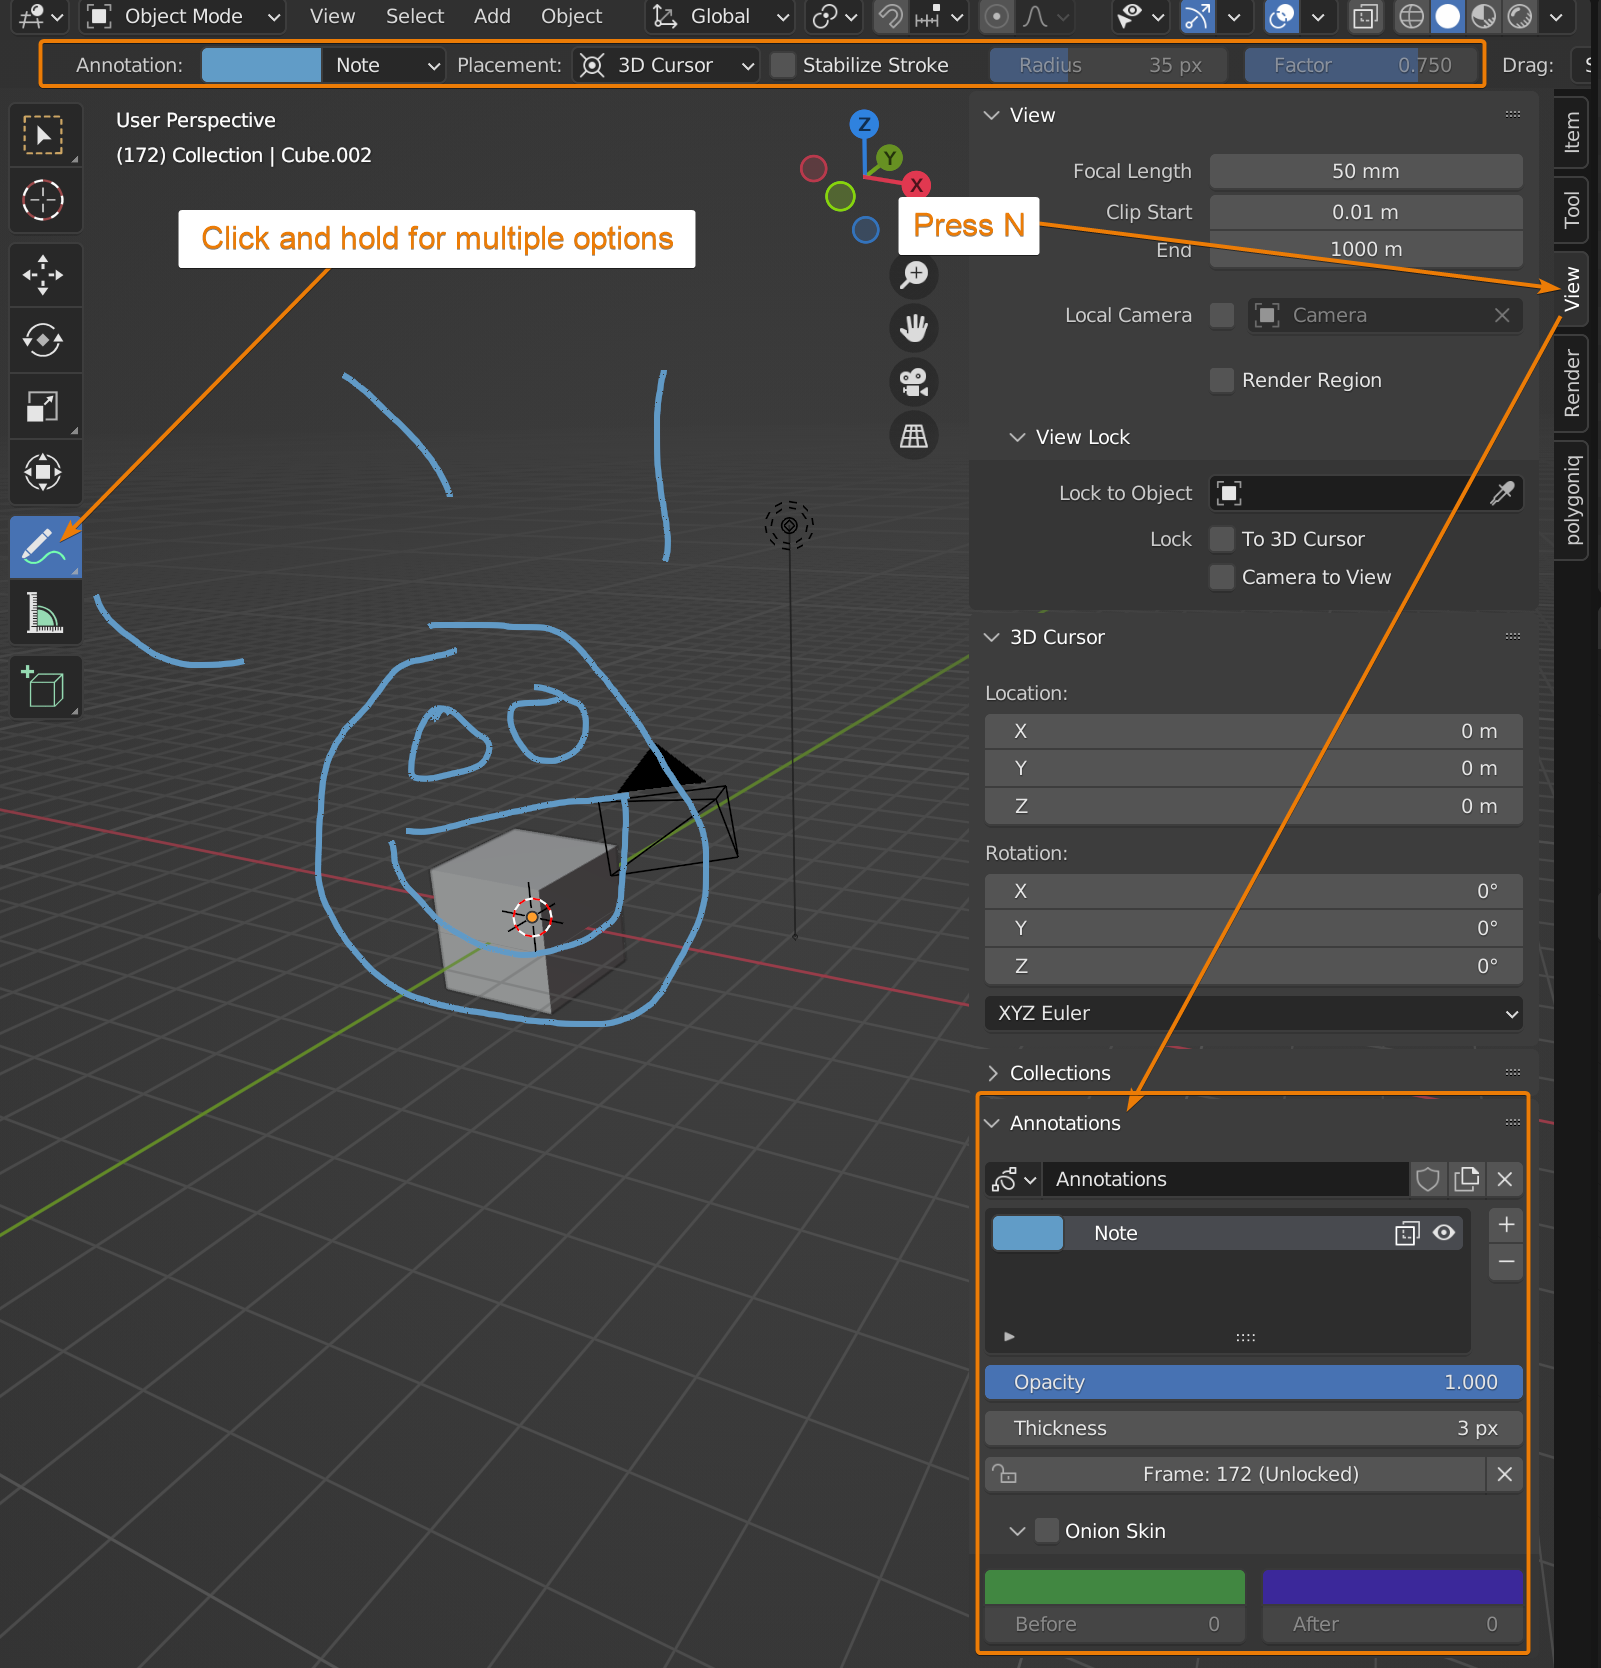
First, let's look at the settings for the regular annotation drawing tool.
Starting from the left, or top depending on if you are viewing the settings in the N pannel or in the header, we have a color widget. By default, this is a teal color. We can change the color here by clicking the color and change it in the color wheel popover. Note that the color is connected to the annotation layer that we will discuss later, so just know that changing the color will change it for all annotations on the same layer.
We also have a button that says "Note" This is the name of the layer and clicking it brings up the rest of the settings for managing layers so we will cover that below.
Next, we have placement. When we draw in 3D space this is important. The options are:
If using the view, the annotation will stay in the same place on the screen no matter how we orient ourselves in 3D space.
With 3D cursor, the annotation will be drawn on the same plane in 3D space that the cursor is sitting on. So, if the 3D cursor is far away in the scene the annotation will be drawn further away. If we are closer to the 3D cursor, the annotation will be drawn closer.
With object, the annotation we draw will stick to the object we draw on top of. This means that we can draw annotations that curve around a surface in our scene.
Next, we have stabilize stroke. This is a toggle that turns on or off the stabilize feature. if we want to draw smooth strokes, this can be useful. It has two accompanying settings.
The radius is the distance from our mouse cursor the stroke will be drawn. This distance helps to draw smoother strokes the longer it is generally, but it is mostly up to personal preference.
The factor is how much the stabilizer should affect the stroke. The closer this value is to one the more stabilization will occur, while at zero, the stabilization is effectively turned off.
For the annotate line tool, we don't have the stabilizer. instead, we have start and end styles. We can have the start and end of a line be one of these figures.
These can of course be useful when we use annotation to explain something, and we need to point at something specific.
For the annotation polygon tool, only placement is available as a setting.
Annotations are drawn in layers. The first annotation layer is created automatically if we start to draw with an annotation tool and by default this layer is called "Note".
We can view the layers and their respective settings by pressing N and go to the view tab. Here we will find the annotation section that we can expand.
If we have not drawn anything yet, no layer has been created and we will only see a "New" button that will create a new annotation layer for us.
Once we have a layer created, we see a list the layers we have. We can create new layers by pressing the plus icon or remove the selected layer by pressing the minus button.
Each layer has a handful of settings. On the row itself for the layer we can change the color all strokes in this layer will have as well as the name of the layer by double clicking the name and changing it.
There is also an eye icon that can hide or show the layer together with an icon that will change annotations in the layer to always be drawn in front of objects or on the depth of the scene where they where drawn.
With the two arrows on the right side of the layer list we can also change the order of the layers.
Below the layer list we find opacity and thickness. All strokes on a layer will have the same opacity and thickness that we can set here.
At last, we have the frame lock button. This needs a bit of explanation. Annotations are drawn on the frame we are currently at in the timeline. With the frame unlocked, we will draw on the current frame.
If we lock the frame here we will draw on the frame we where at when we locked it. So if I lock at frame 12, I will paint at frame 12 even if I change the frame in the timeline.
Last, we can tun on onion skin for annotations. This allows us to view what is drawn on frames before and after the current frame. We can set the number of frames before and after our current frame that we want to see as well as the color of the strokes in those frames.
Once we know how the annotation tool works, we can start to leverage some of the shortcuts available to use it more effectively.
Here are the most useful shortcuts to draw annotations.
When the annotation draw tool is active:
The annotation tool is very useful when you need to create annotations or write some quick notes on screen for yourself or your teammates. It has quite a few features, like a simple layer system, keyframing to different frames and even onion skinning if we are annotating animations.
We can use the shortcut keys available to quickly use the tool and we can erase or delete annotations either by removing the whole layer or by using the erase annotation tool.
Thanks for your time.
