


Baking is a fundamental technique in the world of 3D animation, allowing you to convert dynamic simulations or animations into keyframes. By learning this process, you get the ability to easier transfer animations to other software.
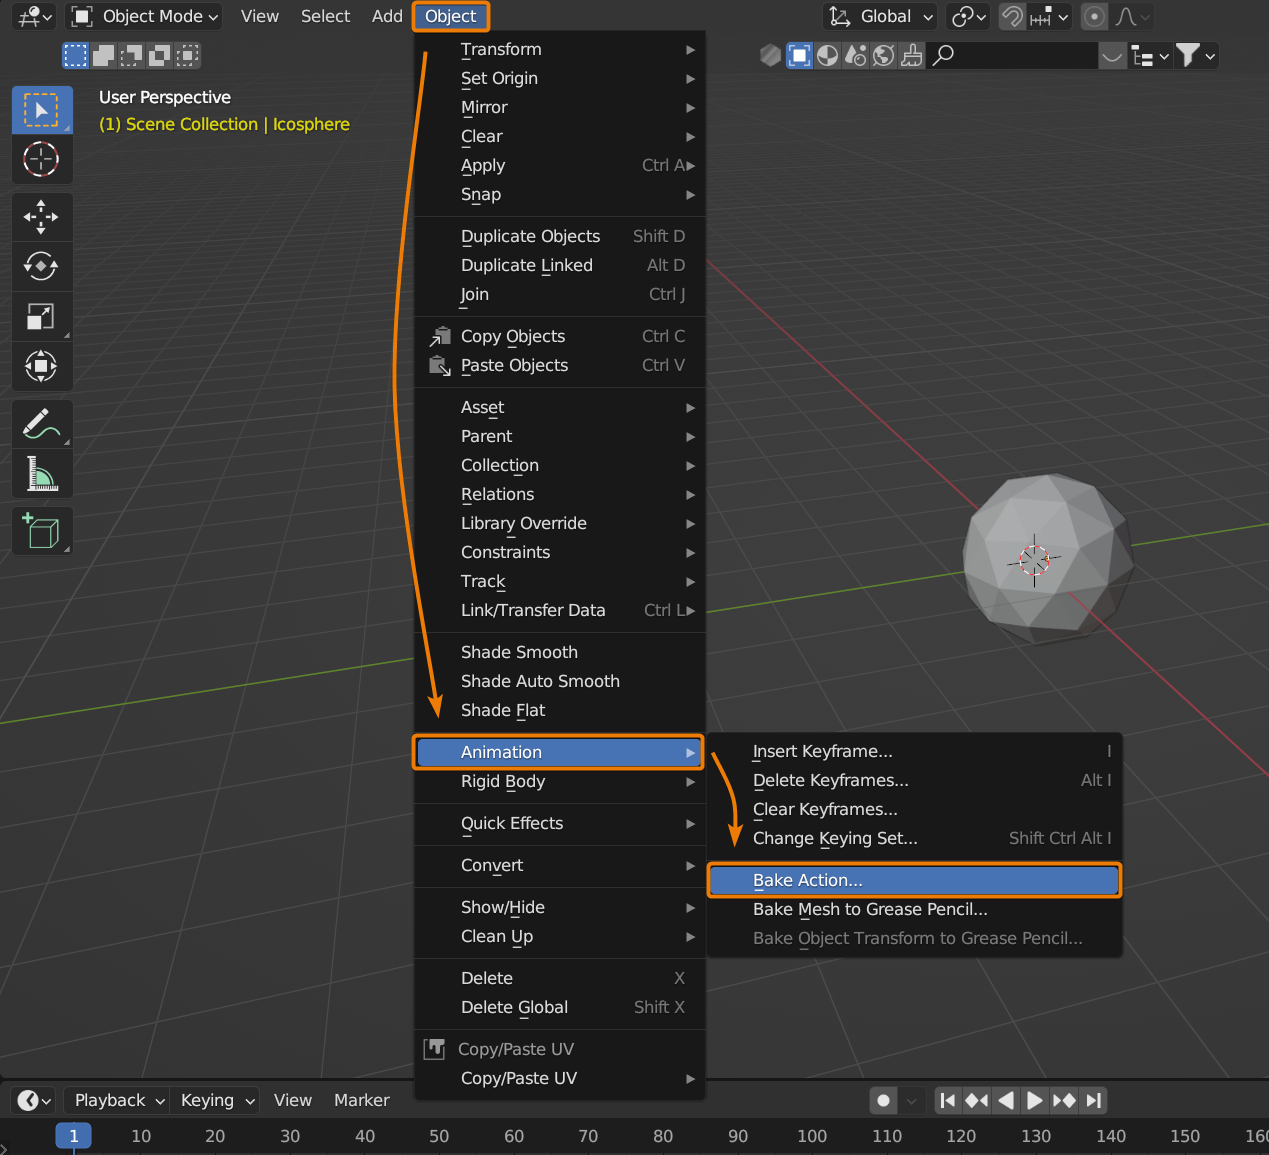
To bake a rigid body animation, select the animated object(s) and go to the Object dropdown at the top left of the 3D viewport. From this dropdown, select Animation > Bake Action. In the available popup, set the starting and ending frames as well as the frame step and any other settings you require. To bake the animation, press OK.
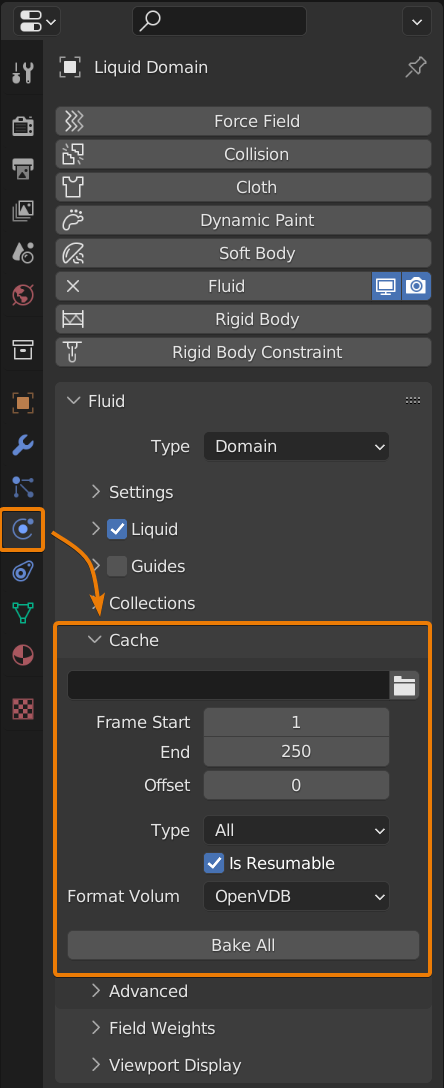
To bake a physics simulation, select the domain of the simulation and go to the Physics tab in the Properties panel. Go to Field > Cache and select an output folder for the simulation to be baked to. Set a starting and ending frame and set the Type to All. Enable the Is Resumable checkbox in case you'd like to pause the bake at any point. Press Bake All to bake the simulation. To delete the bake, press Free All.
Now let's take a deeper dive into why you would want to bake an animation and what type of animations you can use it for.

By converting animations to keyframes, you optimize performance, especially for resource-intensive simulations.
Pre-calculating and storing animation data results in smoother playback and faster rendering, even in complex scenes. Baking simulations to keyframes frees up computational resources and eliminates the need for continuous recalculations.
This means that you can iterate on the animation without waiting for simulations to run each time, saving time and improving efficiency.
If you have an object that is animated using drivers or even rigid body simulations, baking the animation is quite straightforward.
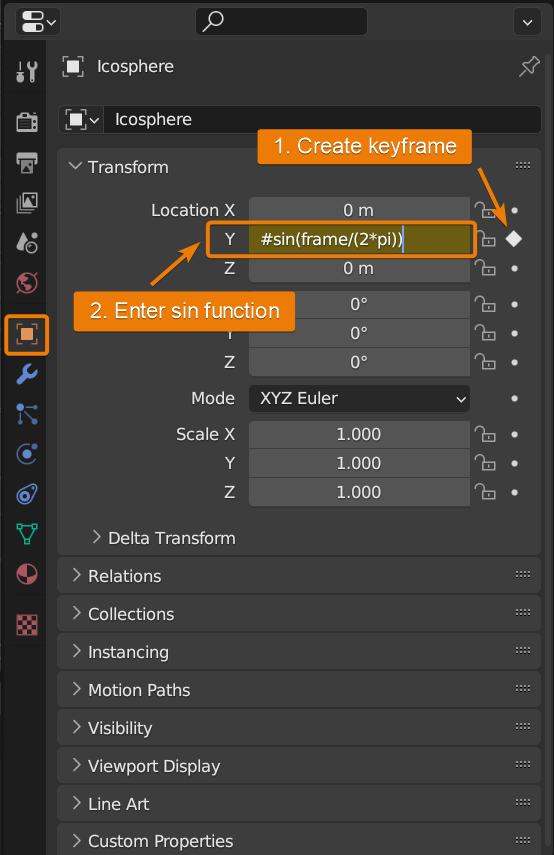
Start by creating or setting up the animation you want to bake. As an example, let's consider a scenario where a sphere is moving along the Y-axis, following a sine wave pattern. To achieve this, select the sphere object and add a keyframe to its Y-location property at frame 1. In the input field for the Y-location, enter the following function: #sin(frame/(2*pi)). Playing the animation now shows the sphere cycling from left to right along the Y-axis.
Alternatively, the following steps outlining how to bake an animation also apply for rigid body simulations as well:
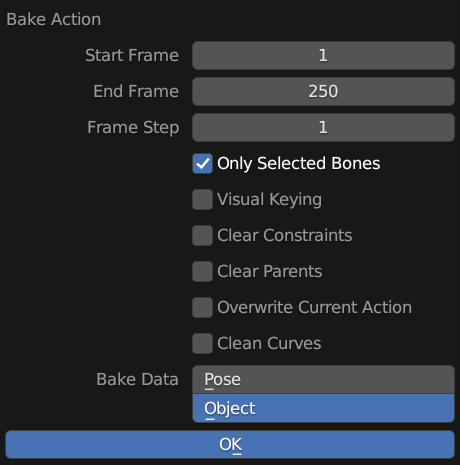

Optionally, you can also adjust the Frame Step property in the bake settings. This setting allows you to control the interval between keyframes when baking an animation for an object. By specifying a frame step value, you can determine how frequently keyframes will be generated during the baking process.
For instance, if you set the frame step to 2, every other frame will be baked as a keyframe, effectively reducing the overall keyframe density.
Baking a fluid, smoke, or fire simulation to keyframes requires a slightly different approach than outlined above. This is because these simulations are more complex than rigid body simulations. For this reason, Blender provides specialized systems to handle these simulations.
Let's first set up an example simulation:
You will notice that, for most devices, this is a rather simple simulation that runs smoothly, and hence you might not consider needing to bake the simulation. Still, it is a good habit to bake the simulation in order to get even faster playback. So let's now bake the simulation:
These same steps can also be applied to any other physics simulation, such as an object with smoke or fire.
We have gone over the simple steps of baking rigid body animations or any other fire, smoke, or liquid simulations in Blender. Even with simpler animations that don't require many resources, it is always a good habit to bake a simulation to keyframes. This especially applies for cases where you might want to manually change how the animation looks for a few specific frames, as this can't be done when using physics or drivers to animate your objects.
Thanks for reading and start animating!
