


Have you ever been modeling something in Blender and wanted to move a face along the direction it's facing? Maybe you wanted to rotate an object relative to its current rotation. We can do that with axis orientations in Blender. So how do we change the axis orientation in Blender?
To change the axis orientation in Blender, go to the center of the header in the 3D viewport and click on the transformation orientation drop-down menu. By default, the menu says "Global" since this is the default axis orientation.
In the rest of this article, we'll go over the difference between global and local axis orientation. We'll also go over the other axis orientations and how they work. Finally, we'll also go over how to use custom axis orientations.

Global orientation is unchanging regardless of how we orient the object we're transforming. Local axis orientation will take into account the rotation and scale of the object. Note that the local axis is not the visible orientation of the object, but the actual transforms applied to the object.
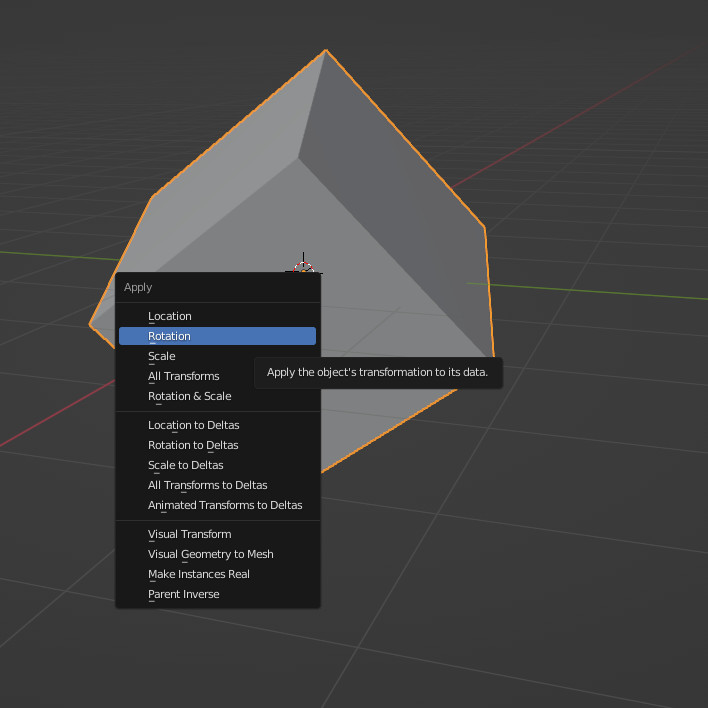
If we rotate our object and then apply the transform this change will apply to the underlying mesh and the rotation will return to zero. Now our local axis is the same as our global axis even though the object appears to be rotated.
When we press N to open the sidebar and go to Item > Transform > Rotation this is the orientation of our local axis. This doesn't tell the whole story though as the local axis also takes into account parenting. Changing the rotation of a parent object will also affect a child object's local axis.
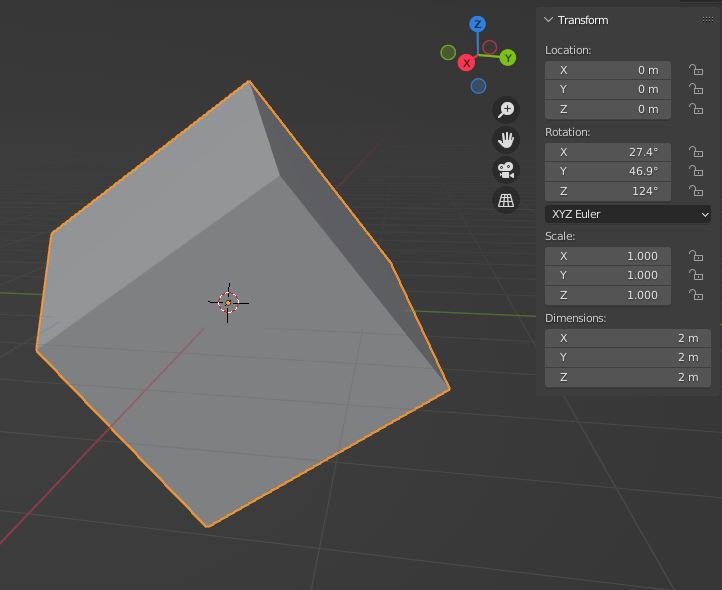
Before we change the local axis orientation let's go over what the local axis orientation is. When we press N to open the sidebar in item > transform under rotation any rotation we have on the object will be the local axis.
If we rotate an object but we apply the rotation, then the local axis will be the same as the global axis. So basically, anytime we rotate an object we change the local axis and any time we apply a rotation we reset it.
Parent objects also affect the local axis of an object. If we offset the child object and rotate the parent object it will change the local axis of the child object.
Now, what do we do if we want to change the local axis without changing the object? Well, we could tab into edit mode and then just re-align the object by selecting everything and then rotating it. A much more simple way of doing this though is just to rotate the object in object mode.
All we have to do now is press Ctrl + A and select rotation. This will align our rotation and the local axis will have changed. We can think of this as a way of un-applying our object's rotation.
If we keep track of the amount that we rotated the object, we can just use the inverse of that to get our object back to its original rotation. Now we've applied the rotation through the rotation transform instead of baking it into the mesh. We'll also have to align the local axis to the object by doing this.
Note that if the object we're trying to change the local axis of is the child of another object the parent object's rotation will affect the child object's local axis without affecting its rotation.
We can always un-parent it by pressing alt + p and selecting clear parent and keep transform then repeat the above process. Once we've finished we can re-parent the child object and we'll have changed the local axis.
With custom axis orientations we can save an orientation and then use it on other objects. We can also use custom axis orientations in edit mode.
To create a custom axis orientation first select the geometry or object you want to create a custom orientation from. Next in the scene view header click on the transform orientation dropdown and click on the create orientation button with a + icon.
Once we've created a custom axis orientation it will be added at the bottom of the transform orientation menu. We can select it by clicking on it and while it's selected we can also change its name. For any unwanted orientations, we can just click on it and select the X on the bottom right.
We can also align the selected object to the current axis by going to object > transform > align to transform orientation. For More explanations on how axis orientations work check out this page on the Blender Manual:
External Content: Blender Manual -Transform Orientations
Now we should have a pretty complete understanding of axis orientations. This is a bit more of a niche topic but these can all come in handy. Now if we run into some case where we need to transform along a specific axis we'll be able to use axis orientations for that.
thank you for your time.
