


No matter what you are making in 3D, environment textures in Blender are incredibly useful to get quick and easy lighting or even background images to make your work more detailed or even more realistic. And the best part? It hardly takes more than a minute to set up!
To change the environment texture in Blender, follow these steps:
Let's now jump into some more detail about how to setup environment textures in the shading editor, how to adjust it by rotating or scaling it, how to set up a solid color environment texture, or even how to use Blender's built-in sky texture.
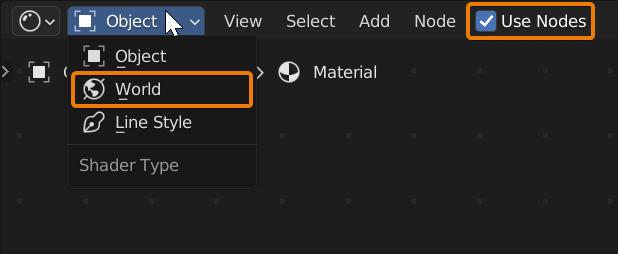
To setup an environment texture in the shader editor, simply head to the "Shader Type" dropdown in the top left corner of the shader editor and select the "World" option. Make sure the "Use Nodes" option is enabled.
The pre set world shader has a "Background" node plugged into the world output. Go to Add > Texture > Environment Texture and plug the colour output of the environment texture into color input for the background. Select the "Open" option on the node and use the Blender file view to locate a saved .hdr or .exr file.
To view the environment texture in material view, make sure to enable "Scene World" under the viewport shading settings.
The resolution of the environment texture file can greatly affect the render times of your scene, especially while using the Cycles render engine.
Most online websites offer different resolutions for downloading (1K, 2K, 4K, 8K, or 16K). Naturally, a higher resolution will lead to longer render times, depending on the specs of the machine it is rendered on.
For this reason, it is important to consider how much of the environment texture is visible in the camera view of the final render. If the background image is blurred, hidden, or only partly visible, consider using a low-resolution environment texture file and save some time!
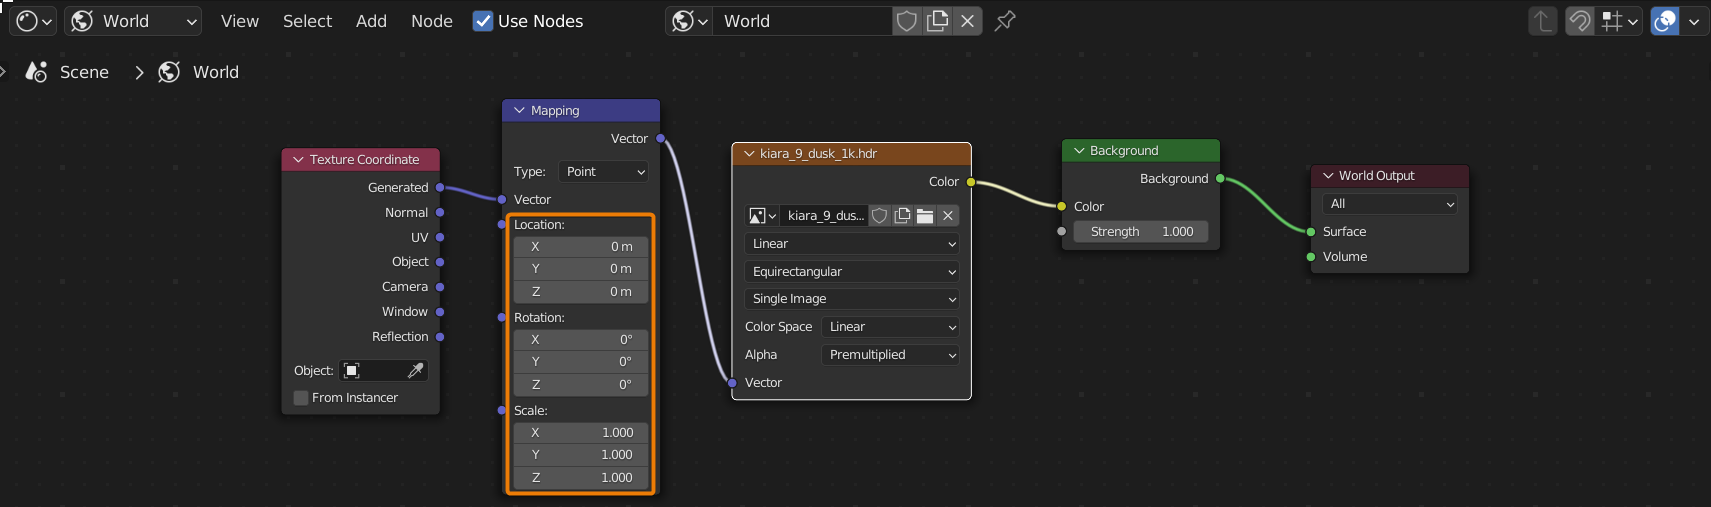
To rotate or scale the environment texture, select Add > Vector > Mapping and link the vector output of this mapping node to the environment texture. Next, select Add > Input > Texture Coordinate and link the generated output to the vector input of the mapping node.
To now rotate the environment texture, adjust the X, Y, and Z values for the rotation in the mapping node. Similarly, to scale the environment texture simply adjust the X, Y, and Z vales for the scale. The location of the environment can be changed in the same way.
To change the strength of the environment texture, adjust the "Strength" parameter on the background node.
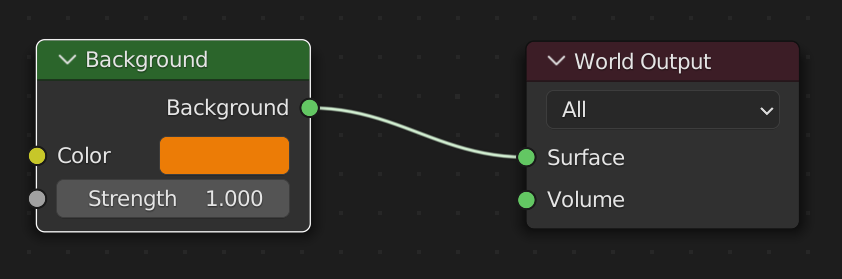
If you require a simple solid color background for the environment, the single "Background" node is sufficient, and the "Color" parameter can be changed to any color of your liking.
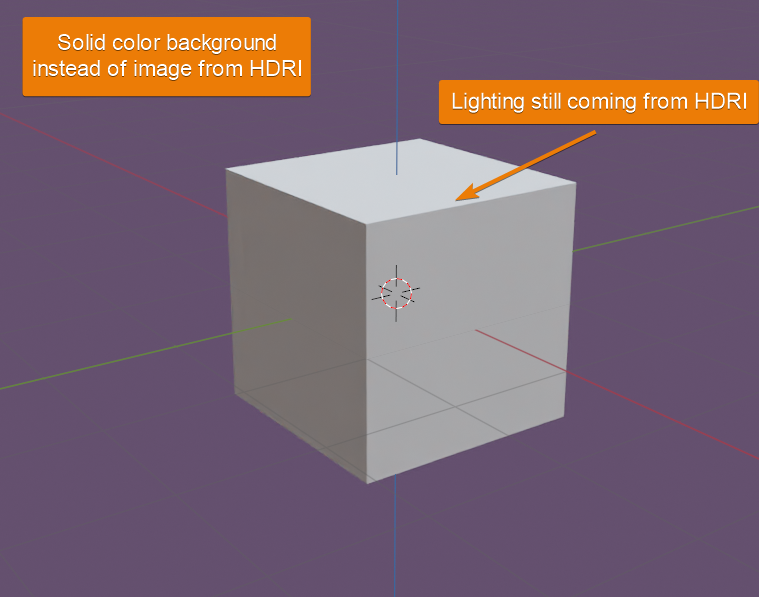
However, the case may arise that you add in an environment texture but choose to have a solid color background. This would allow you to get the desired lighting from the .hdr or .exr file but not show the actual image background. This gives the following effect:
To do so, select Add > Shader > Mix shader and plug the output from the background node into the top shader input. Drop in another background node and insert this into the bottom input of the mix shader node. To control what to mix and which environment to show, go to Add > Input > Light Path and plug the "Is Camera Ray" output into the factor for the mix shader. The resulting node setup looks like this:
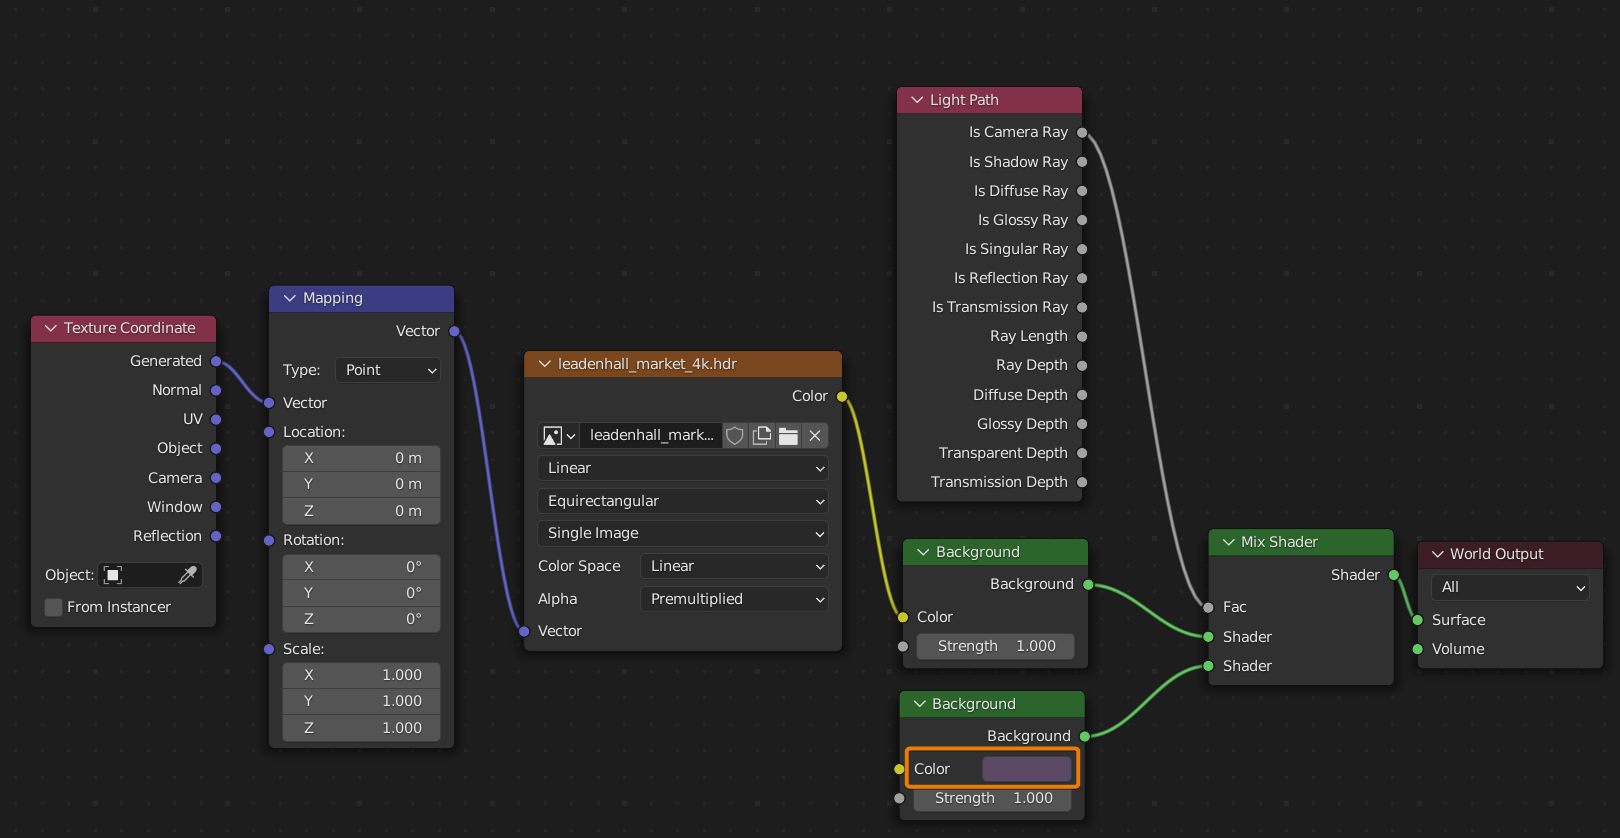
Adjusting the color that is visible in the material and rendered views can be done by changing the color of the second (bottom) background node.
Blender also has a built-in sky texture node for a quick and easy way to add in an environment without the need of an HDRI. Go to Add > Texture > Sky Texture and connect this node to a background node as before.
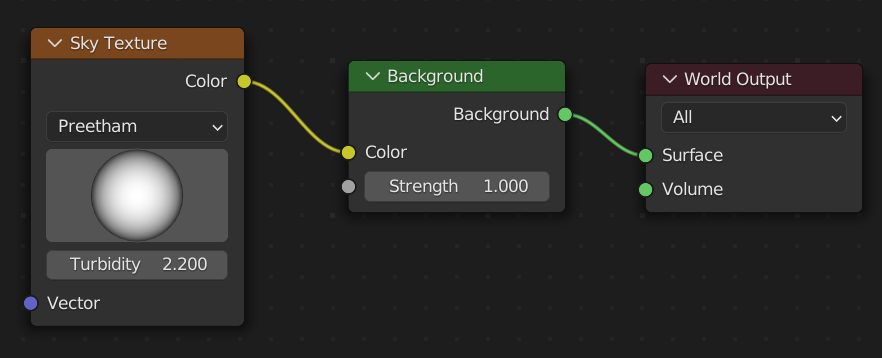
The sky texture node is incredibly versatile as it has three different sky 'types':
Each of the three of these can be useful in different scenes, but Nishita gives the most controls as one can change the size, intensity, rotation, and angle of the sun as well as the altitude and air, dust, and ozone levels to further add to the realism of a scene.
Whether you are making a photorealistic scene, a cartoon series, or anything else at all, you should now be able to use environment textures to set up the quickest and easiest lighting in Blender - the options are endless.
Thank you for your time and go try out some environment textures!
