


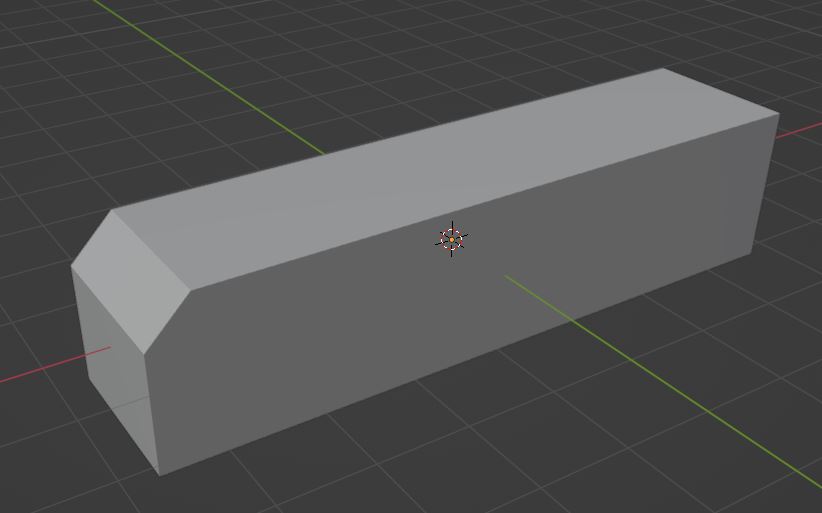
Ctrl + B is a very useful shortcut that we'll often use when modeling in Blender. Sometimes we'll go to bevel an object and it will end up being scaled incorrectly or won't work at all. So, what is the solution to some of these common issues with Ctrl + B?
To resolve most issues with the Bevel tool using the Ctrl+B shortcut:
While these are the most common issues we'll run into when we try to use Ctrl + B to bevel our object there are a few other causes. We'll also go into more detail about these solutions, as well as what causes the issues.
Related content: How to solve bevel problems in Blender

The most common issue we'll run into when beveling a model is that the scale of our model is unapplied. This will cause our bevel to stretch out in weird ways.

To fix this we'll need to first start with our unbeveled model and select it. Make sure the object interaction mode is set to object press CTRL + A and select scale. We can also apply scale by going to object > apply > scale.
Now we can navigate back to edit mode, select whatever we wanted to bevel, and press Ctrl + B to bevel without it being skewed.
Sometimes our models will have edges that look connected but are instead just two edges on top of each other. To fix this set the object interaction mode to edit. Set the select mode to vertices and press A to select all then Press M > By Distance.
We can also merge by distance by selecting everything and then going to mesh > clean up > merge by distance. Now when we bevel the bevel should round the corner of those two edges instead of the edges not changing.
Sometimes we can have a face with inverted normals. This will cause our bevel not to have any depth and just act like a weird loop cut.

The quickest way to solve this is to first select the object we're trying to bevel and set the object interaction mode to edit. Set the select mode to face and press A to select all faces, press Alt + N, and select Recalculate Outside.
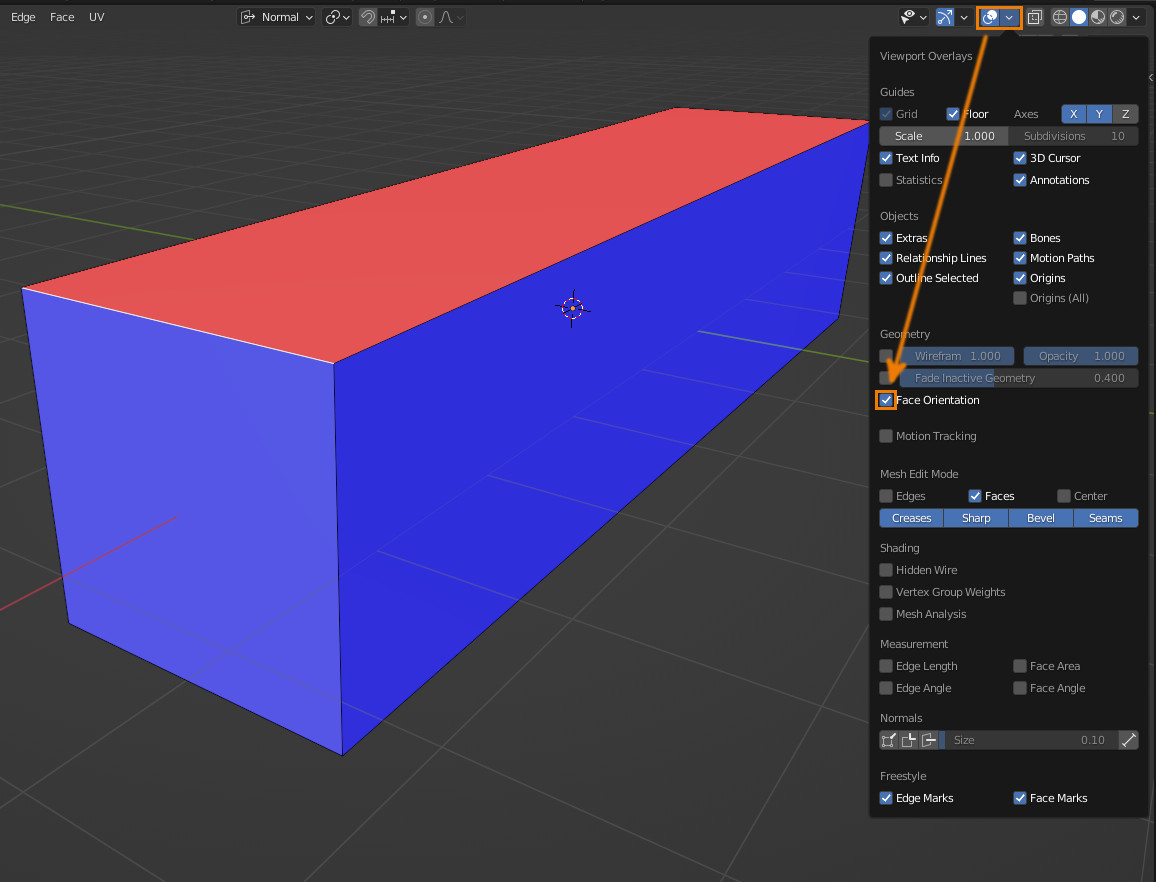
While this should work it is not guaranteed to solve the issue. This is also kind of a shotgun approach to the problem, and we may not want to recalculate the normals of each face on our model. To find and flip the problem faces we'll need to enable face orientation.
In the overlays dropdown enable face orientation. This will show us the direction of our normals. Blue faces are facing outwards and red is interior facing. Usually, we shouldn't see any red faces and these are usually what cause this bevel issue.
Now that we've found the face make sure we're in edit mode with the select mode set to face. Select the red face and press Alt + N and select flip. Now we should be able to press Ctrl + B and bevel without issue.
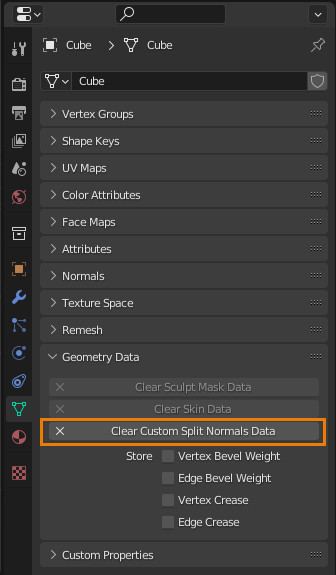
Similar to flipped normals sometimes we'll have models with custom normals that result in Ctrl + B acting weirdly. To remove custom normals first select the object we want to bevel in object mode. In object data properties > geometry data.
When a model has custom normals the custom split normals button will show Clear custom split normals data, click on this button, and now the custom normals will be removed.
Now just to be safe we'll also go ahead and select our object and in edit mode select everything with A and press Alt + N then select recalculate outside. Now we can press Ctrl + B and it should work properly.
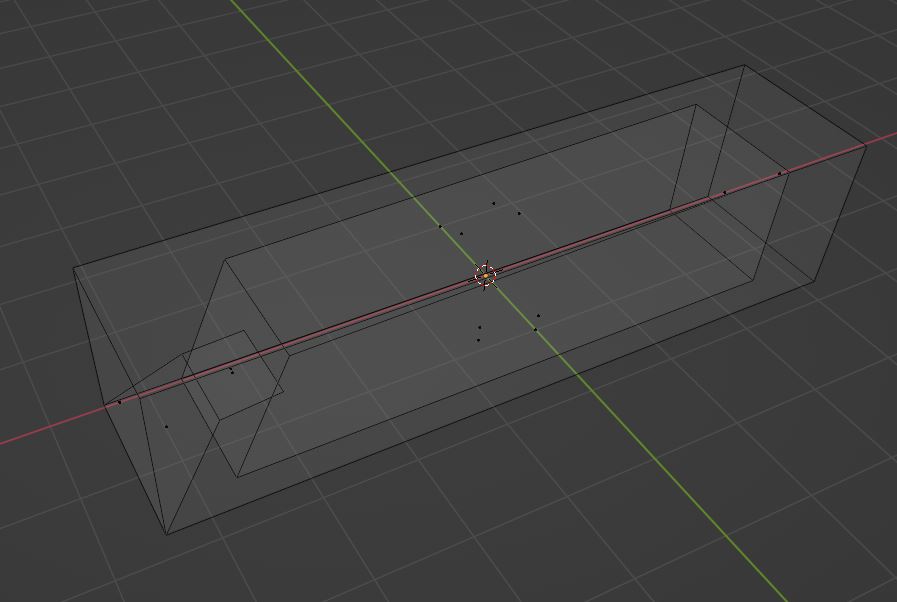
Sometimes we'll end up with some funky geometry in Blender, interior faces can be a result of that and may cause issues with Ctrl + B.
Interior faces are essentially loose geometry that is obscured by the actual surface of our object. The easiest way to tell if we have interior faces on our model is by setting our viewport shading to wireframe.
Since beveling is creating new geometry between faces based on the original angles of the faces on either side of an edge, we will have unwanted bevels created inside our object if we have faces there.
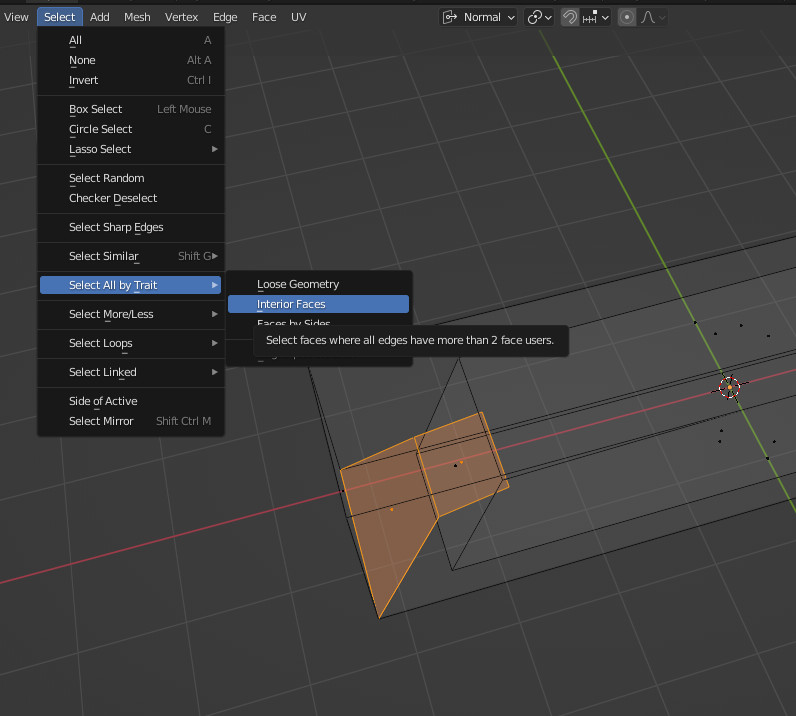
There is a tool in Blender called Select interior faces. This will usually only work if the interior faces are connected to the exterior. To use select interior faces set the object interaction mode to edit and go to select > all by trait > interior faces.
Once we have those selected, we can press X and select faces and then we can use Ctrl + B to bevel. If this does not help though we can instead try selecting the outside surface and deleting whatever isn't connected to it.
First, select 1 exterior face. Hit Ctrl + L to select connected, Hit Ctrl + I to invert the selection, hit X, and choose faces. Now we should be able to bevel without any interior faces poking through or any other issues.
Beveling issues can be quite weird and a bit hard to resolve. With what we've gone over in this article we should be able to solve most of these issues.
We'll most likely be able to solve most of our issues with Ctrl + B by applying the scale, removing doubles, and recalculating normals but we've also gone over a few other causes and solutions just in case these don't work.
thank you for your time.
