


When you are new to a software, things can take a little more time. You know what you want to do, but you just don’t really know where the option for that is. Through time, you find yourself using the same tools and settings repeatedly and having to locate them. To speed up the work, using a shortcut key is the answer!
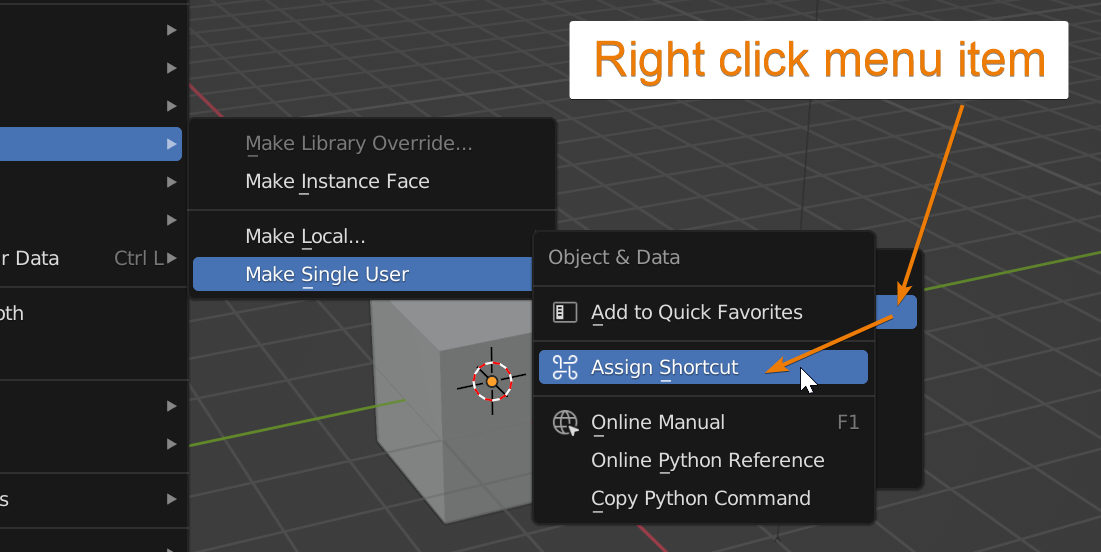
To assign a shortcut in Blender, right click the tool or menu item and click “Assing Shortcut”, press your desired shortcut for the action and it is ready to use.
Let me explain further how we can add shortcuts in multiple ways and in which situations they are useful.
Related content: Blender shortcut keys: How to find, manage, change, and reset

You can use the right-click and assign shortcut in many parts of Blender, for example in the properties panel on checkboxes or dropdown menus.
You can also use it in menus. Just navigate to any menu item, right click it and assign a shortcut that you want for that action.
However, there are some limitations. For example, when setting up a hotkey on a drop-down menu or checkbox in the properties panel or one of the panels that you toggle with the N or T button in most editors, you need to have your mouse cursor positioned in that area or region for the hotkey to work.
It is not enough to have your mouse cursor in the 3D viewport if you have assigned a shortcut to a setting in the right-side N-panel. You need to be hovering that panel, or actually, any panel in the 3D viewport, like the header or the left side toolbar.
You can also assign one hotkey for use in the 3D viewport and the same hotkey for use while hovering your mouse over one of the panels.
Just be aware of the caveats so that when you have trouble getting a shortcut key to work, you know that you might need to move your mouse into the correct region for it to work. Not just the right editor.
The quick favorites menu is accessed with the Q shortcut key. By default, this is an empty menu that we can add tools and options to for quick access.
For it to be useful you first need to add the tools and options that you most frequently use. Let’s look at how we can do that now.
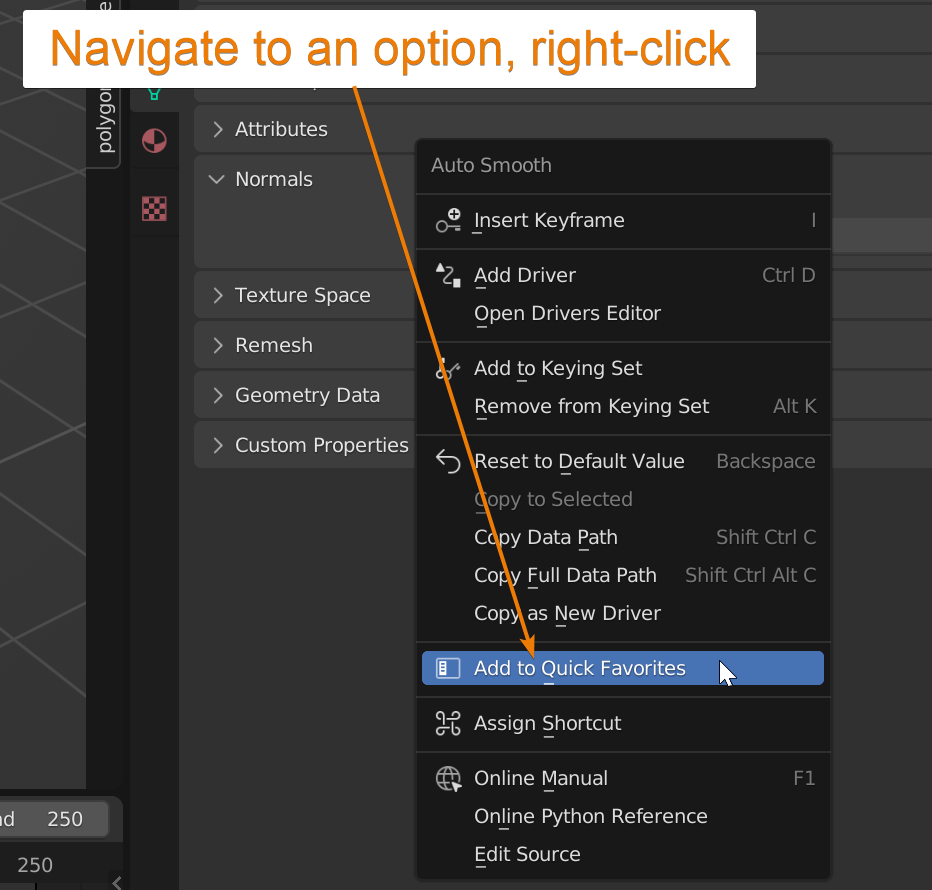
To add a shortcut to the quick favoriters menu, right-click one of the options in the toolbar, header, or one of the drop-down options in the header menus. Click “Add to Quick Favorites”.
Press Q to access your newly added option.
I think that the quick favorites menu is particularly useful when you are modelling. Many artists find themselves trying to locate the option of a certain object that we want to add into the scene or figuring out which icon in the toolbar is the one that lets you insert a loop cut, etc. That is mainly when the shortcut to the quick favorites menu is of great help.
So, if you see yourself frequently adding Monkey heads to your scene, just add them to the Quick Favorites menu!
In this example you just need to go to “Add”, right click on “Monkey”, select “Add to Quick Favorites”, and it’s ready to use when you press the “Q” key anywhere in the viewport.
Most often, it is far easier to change an existing shortcut key than to add a new one. So let's cover that first.
Step one is to find the shortcut key we want to change. We do that easiest by search.
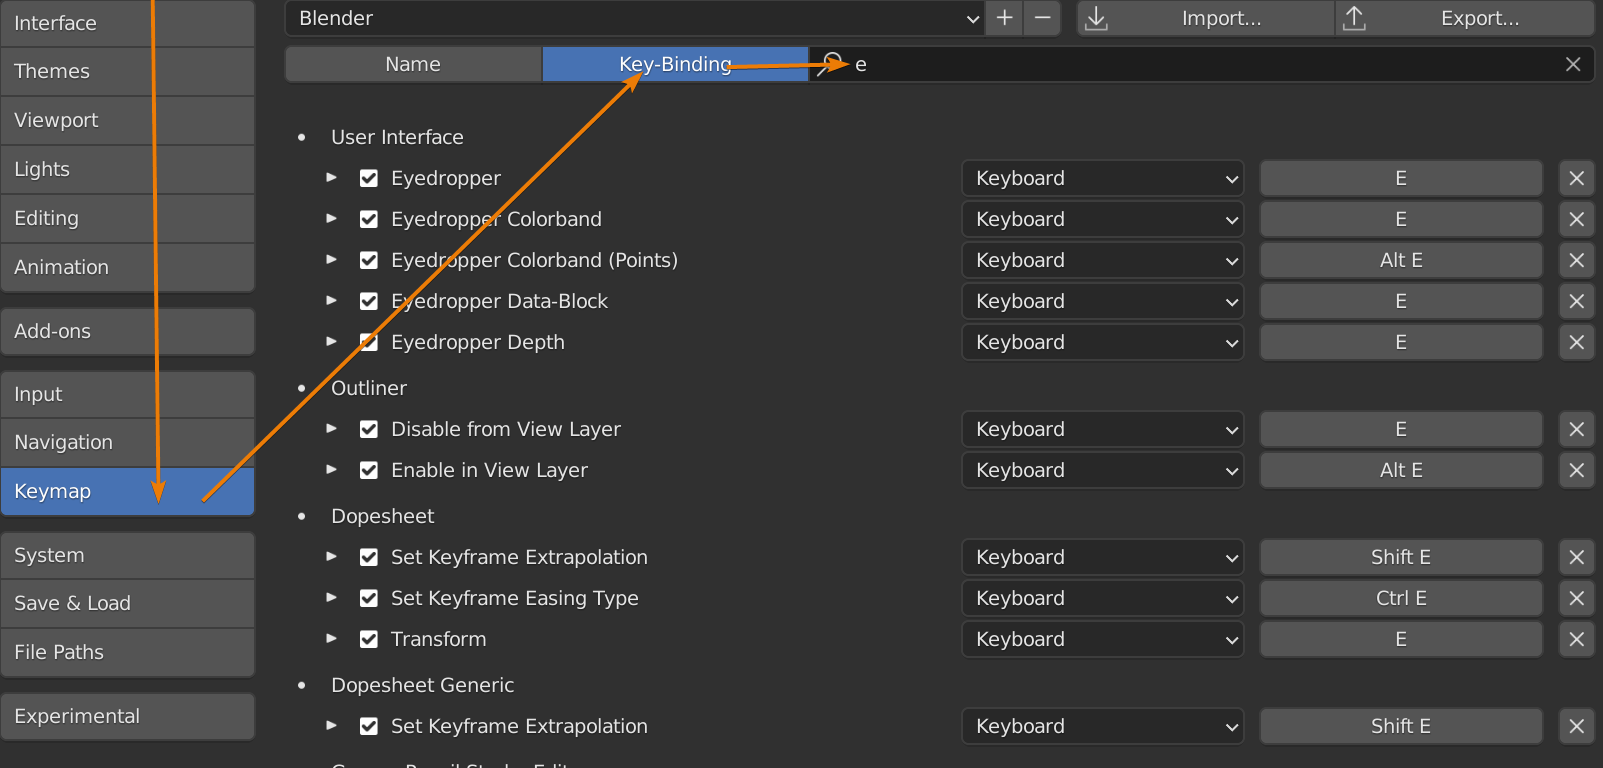
Go to edit->Preferences and navigate to the keymap section. Here you will see two buttons named "Name" and "Key-Bindings" as well as a search box.
Choose Name to search by operator name or Key-Binding to search the current shortcut key then simply type in the search box to filter the list.
For example, if you choose "Key-binding" and search for E, you will find all contexts where E is used as a shortcut. If we wanted to change the shortcut for Extrude for example, we could scroll through the list until we find the "mesh" context and there we will find "Extrude and Move on normals" this is the extrude tool that we access with E in edit mode.
We can then expand the settings for this shortcut by pressing the small white down arrow and change it how we like.

Next, I think that the most complex way of adding a shortcut but the one that applies to all the possible tools and options that you can shortcut in Blender, is adding a new shortcut key through the “Preferences” menu.
For this we need two pieces of information that might now be so easy to find.
The context and the name of the operator. Knowing what context to add a shortcut key depends on the shortcut key you want to add. But for the most part, we will need to reference the python API documentation to know this.
Related content: Blender Python API
Once we have figured out the context, we can add a new shortcut in the right section.
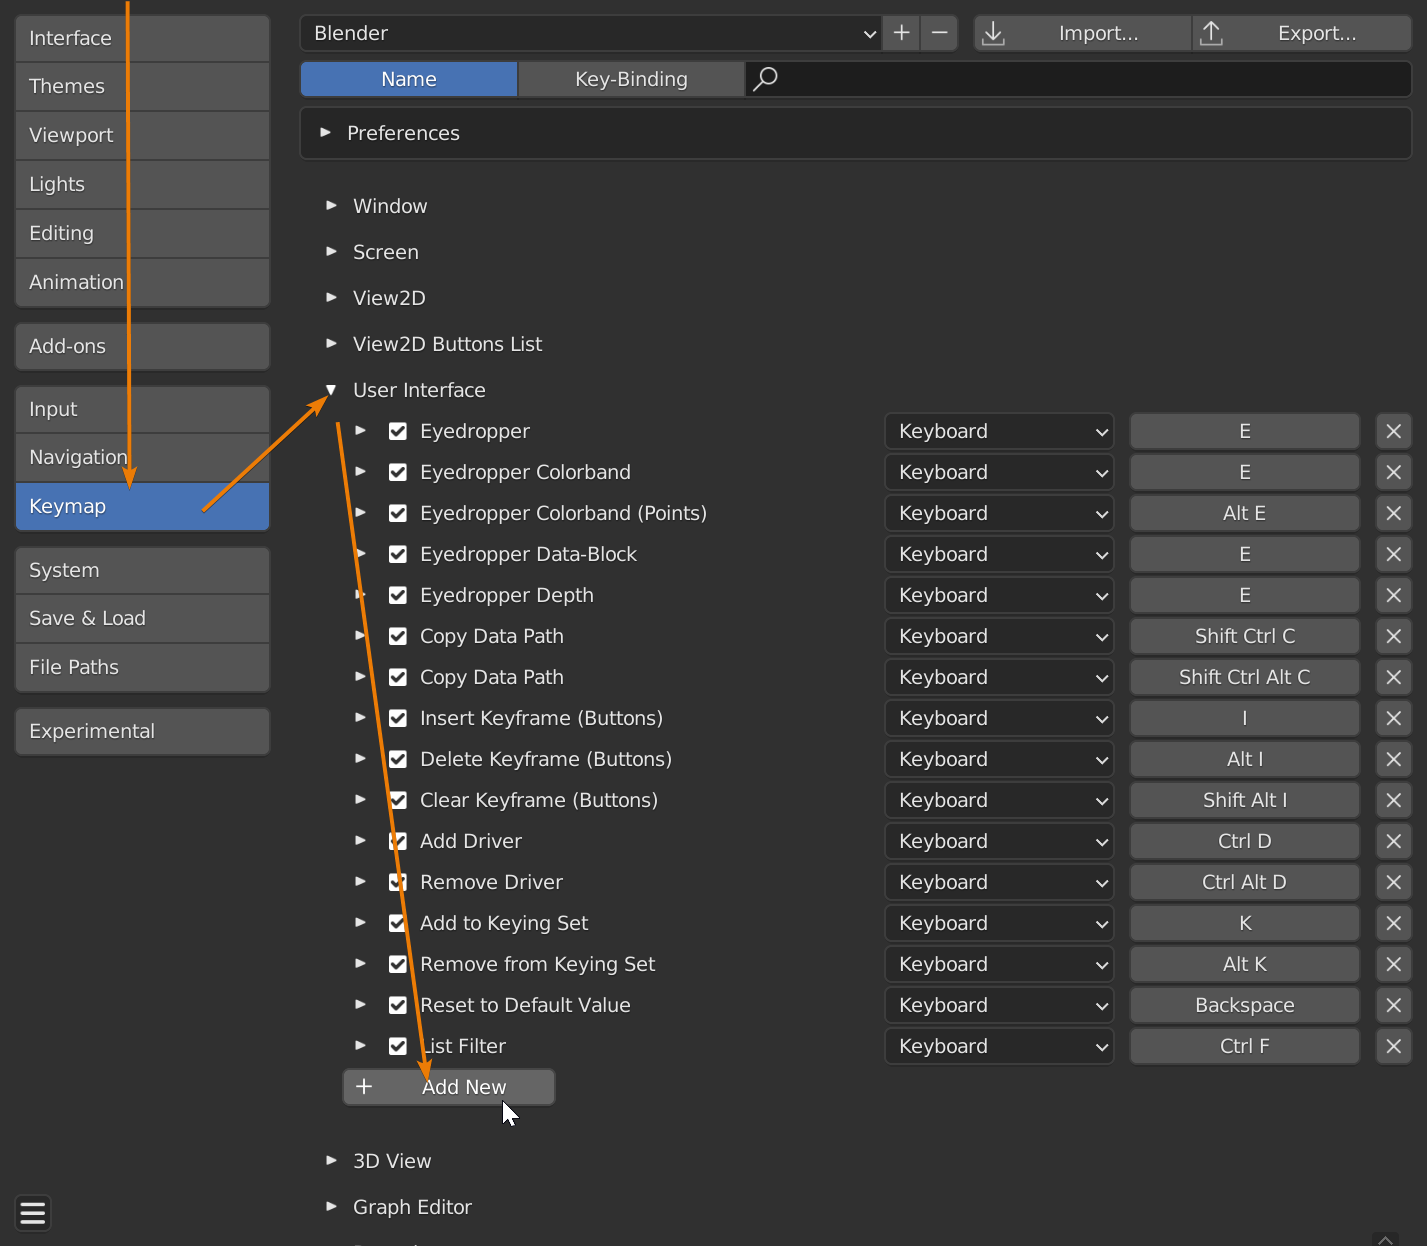
Go to “Edit”, then select “Preferences” and finally select “Keymap”. In “Keymap” you will be able to see different groups of drop-down menus. At the bottom of the drop-down list, you will find the option “Add new”.
It is here that it is important to find the right context. The groups refer to the different areas of Blender, but it can be hard to know if a shortcut should go in the Window, screen or 2D view category for example.
However, for adding a shortcut key in this way you need to know the operator of the tool or setting that you want to shortcut.
To know that first use the tool, then go to the top menu bar and select the scripting workspace. In the bottom left info editor, you will see the last used action. The name is the phrase after “bpy.ops” and before the open parenthesis in the last action.
Once you have that name you can go back to “Keymap” inside “Preferences” and finish setting up your new shortcut key.
To delete the custom shortcut key just click on the arrow pointing to the left and it immediately will change back to the cross. In that way you have restored the shortcut key to its default key combination.
To sum everything up, shortcut keys allow you to use tools or choose settings in the fastest way possible by pressing a key or a combination of keys. They can be especially useful if you have set them up correctly and you remember the keys selected.
In this article we reviewed three different ways of adding shortcut keys:
No matter the method you use and the tool that you want to shortcut, shortcut keys are a great asset to speed up your workflow when using Blender.
Thanks for reading!
