


One of the features that make Blender a more versatile software than other 3D software in the market, is the Video Sequencer Editor (VSE). Like many video editors, one of the features that the Blender VSE offers is the possibility of adding text to your video.
For adding text to a video, when you are in the VSE window click on "Add" in the menu bar, then click on "Text".
When performing the previous step, you will see that the text is added into the Sequencer and also as an overlay on top of your video. Although this seems a very simple and straightforward process there is more to talk about this feature, I will cover this topic in more detail in the lines below.
At this point, we have already added our text as explained above and now we want to transform it by increasing its size, rotating it and moving it to a different location.
The first thing that you need to do is check that the "Sidebar" is enabled, otherwise, you will not be able to see the transform options. In order to enable your "Sidebar", when you are already in the VSE window, go to "View" and tick "Sidebar".

Now that your "Sidebar" is enabled click on the text added to the sequencer and you will see on the sidebar a panel in which you can modify the text properties. In that sidebar, click on the "Transform" drop-down menu.
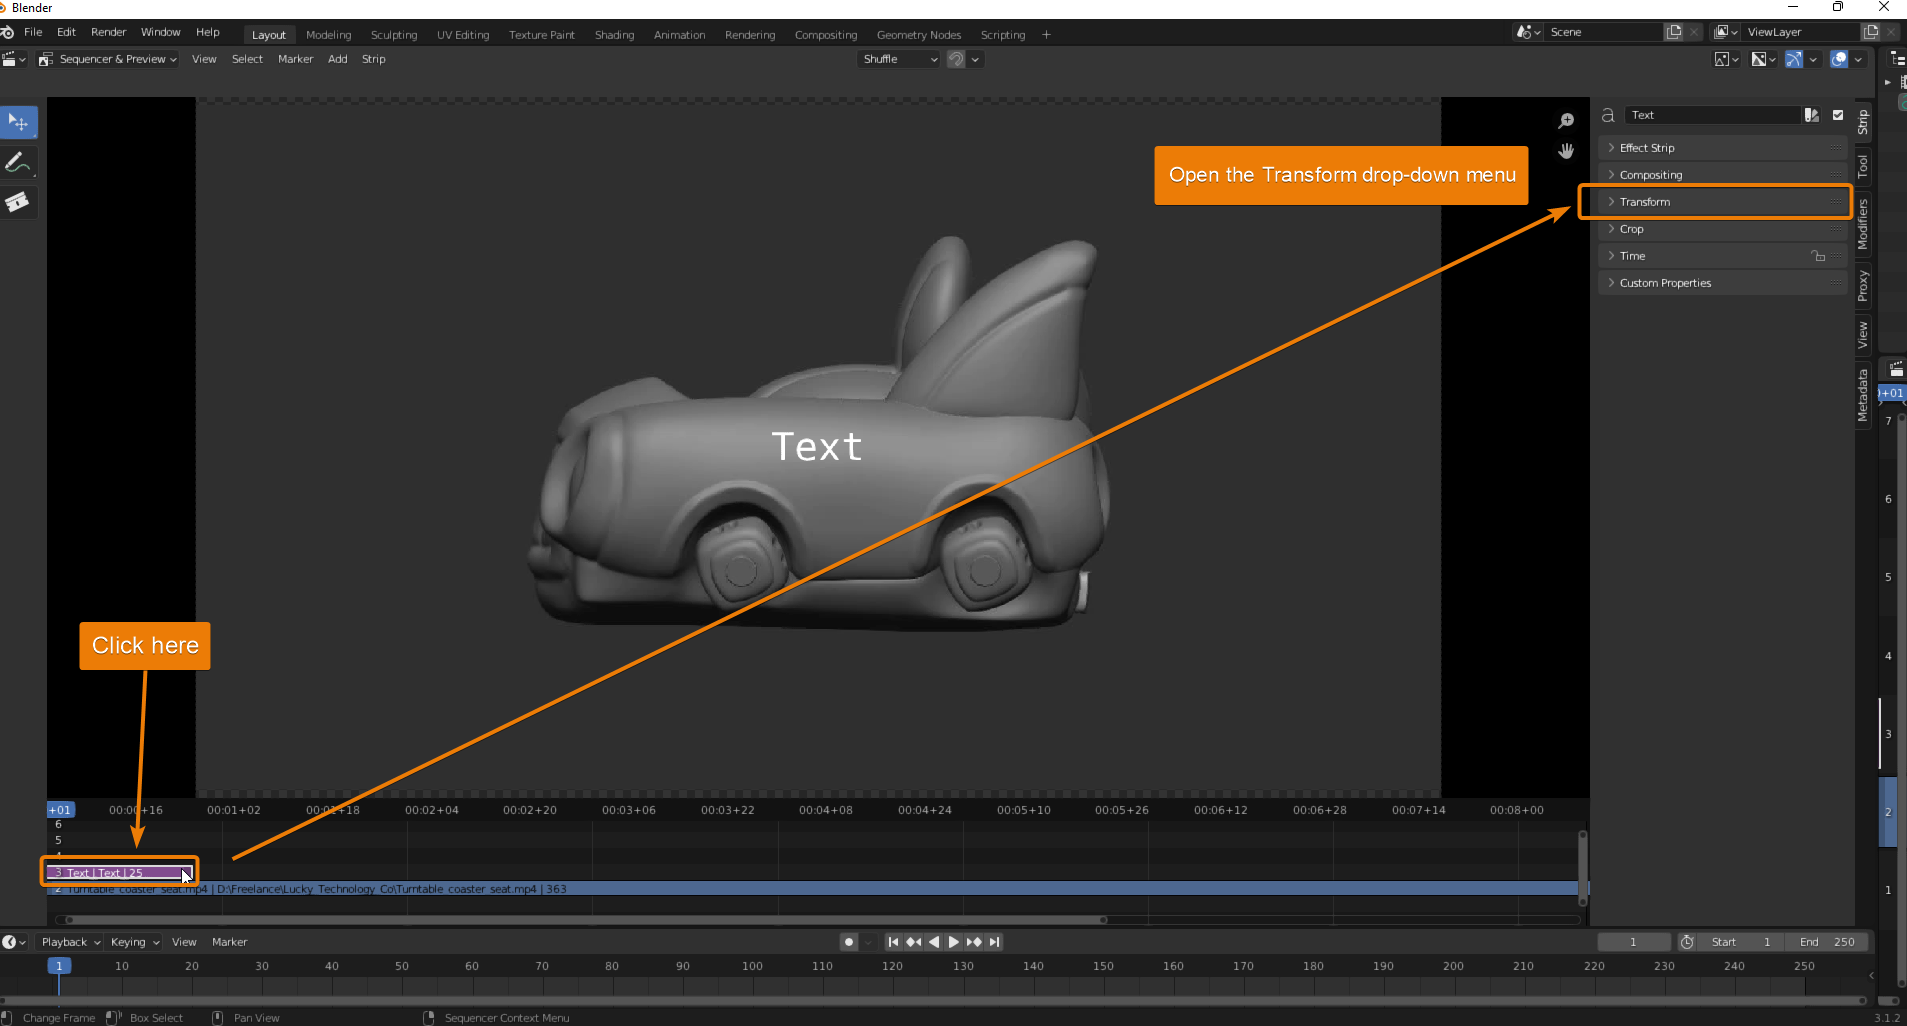
We can see in the "Transform" drop-down menu that there are different options to modify where your text is positioned, its orientation, its size and the direction in which your text is read (mirror). Let's say that we want to make the text bigger, putting it in the lower part of the video, rotating it 90 degrees and reverse the orientation of the text.
All of that is possible if we just adjust the values of each of those aspects. For putting the text in the lower part of the video I will modify only the value in the "Y" textbox of the "Position" option. However, please note that you could also modify it if you want to display it on the left or right side of the screen, in that case, you will also have to adjust the values of the "X" textbox.
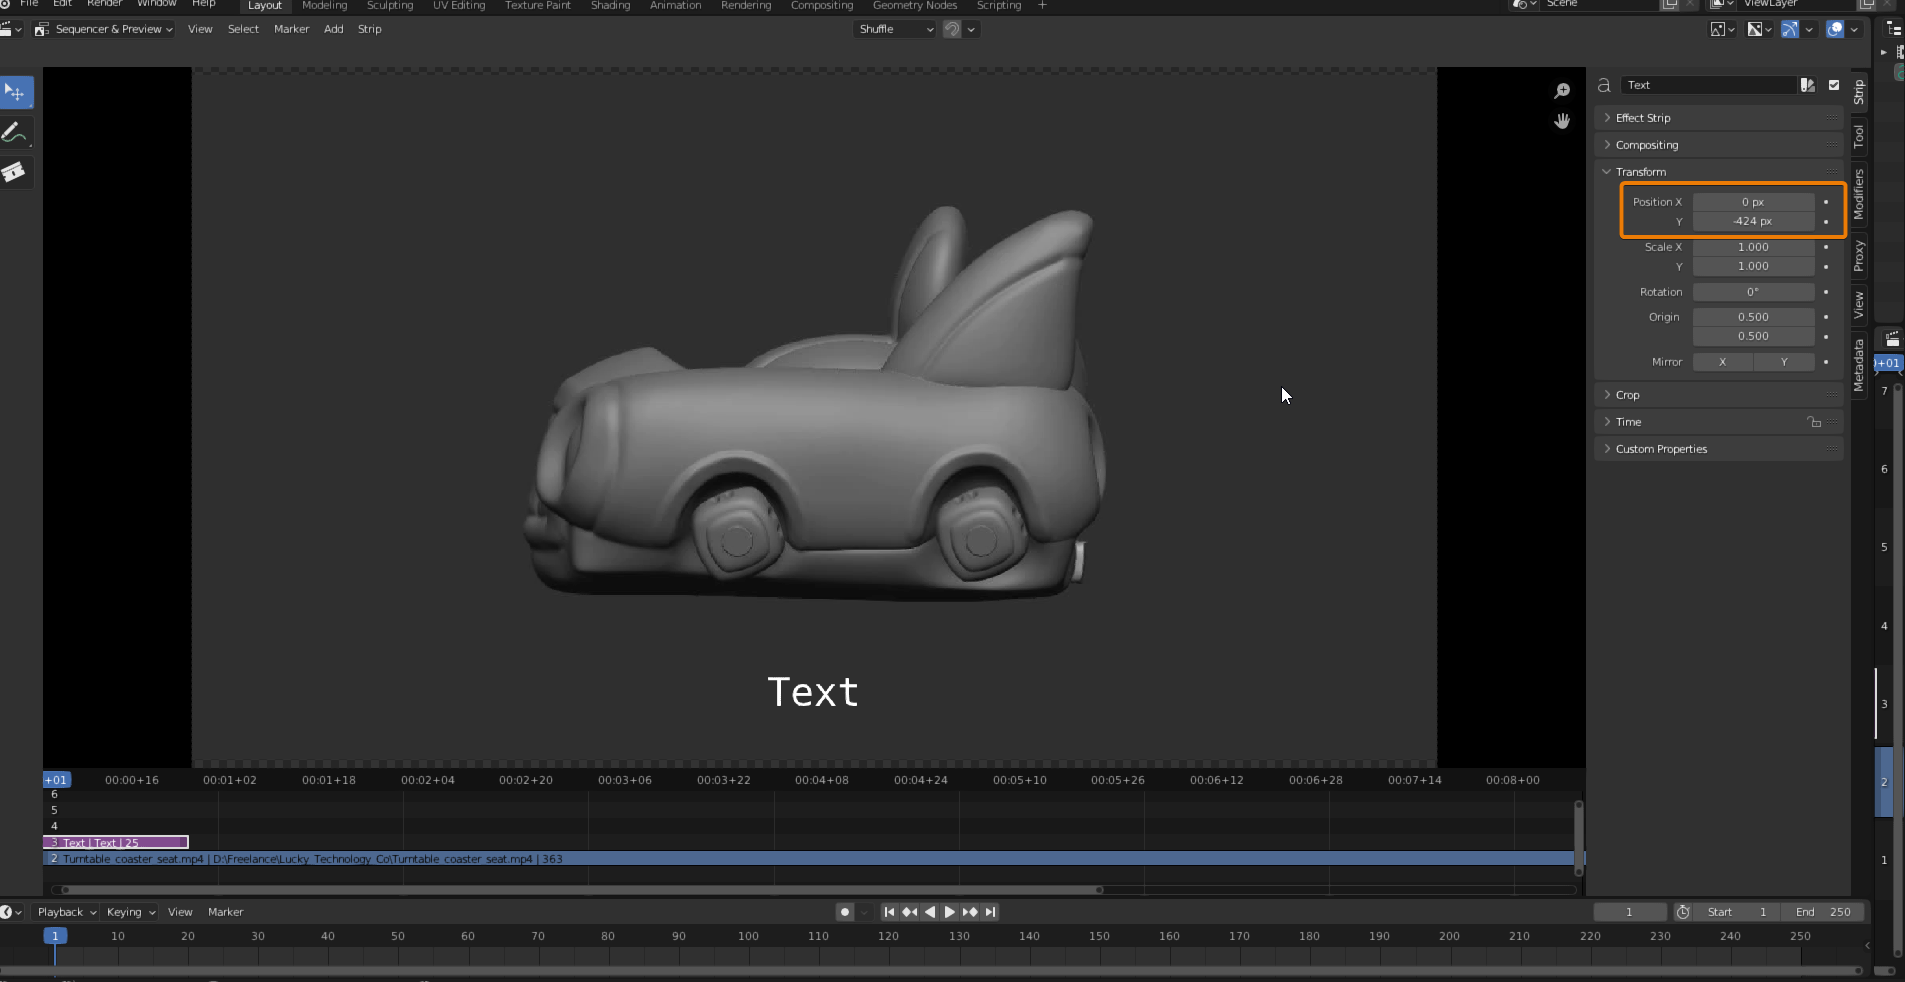
Now that I have lowered my text, I also said that I wanted to make it bigger. For that, I will need to modify the values of "X" and "Y" in the "Scale" option.

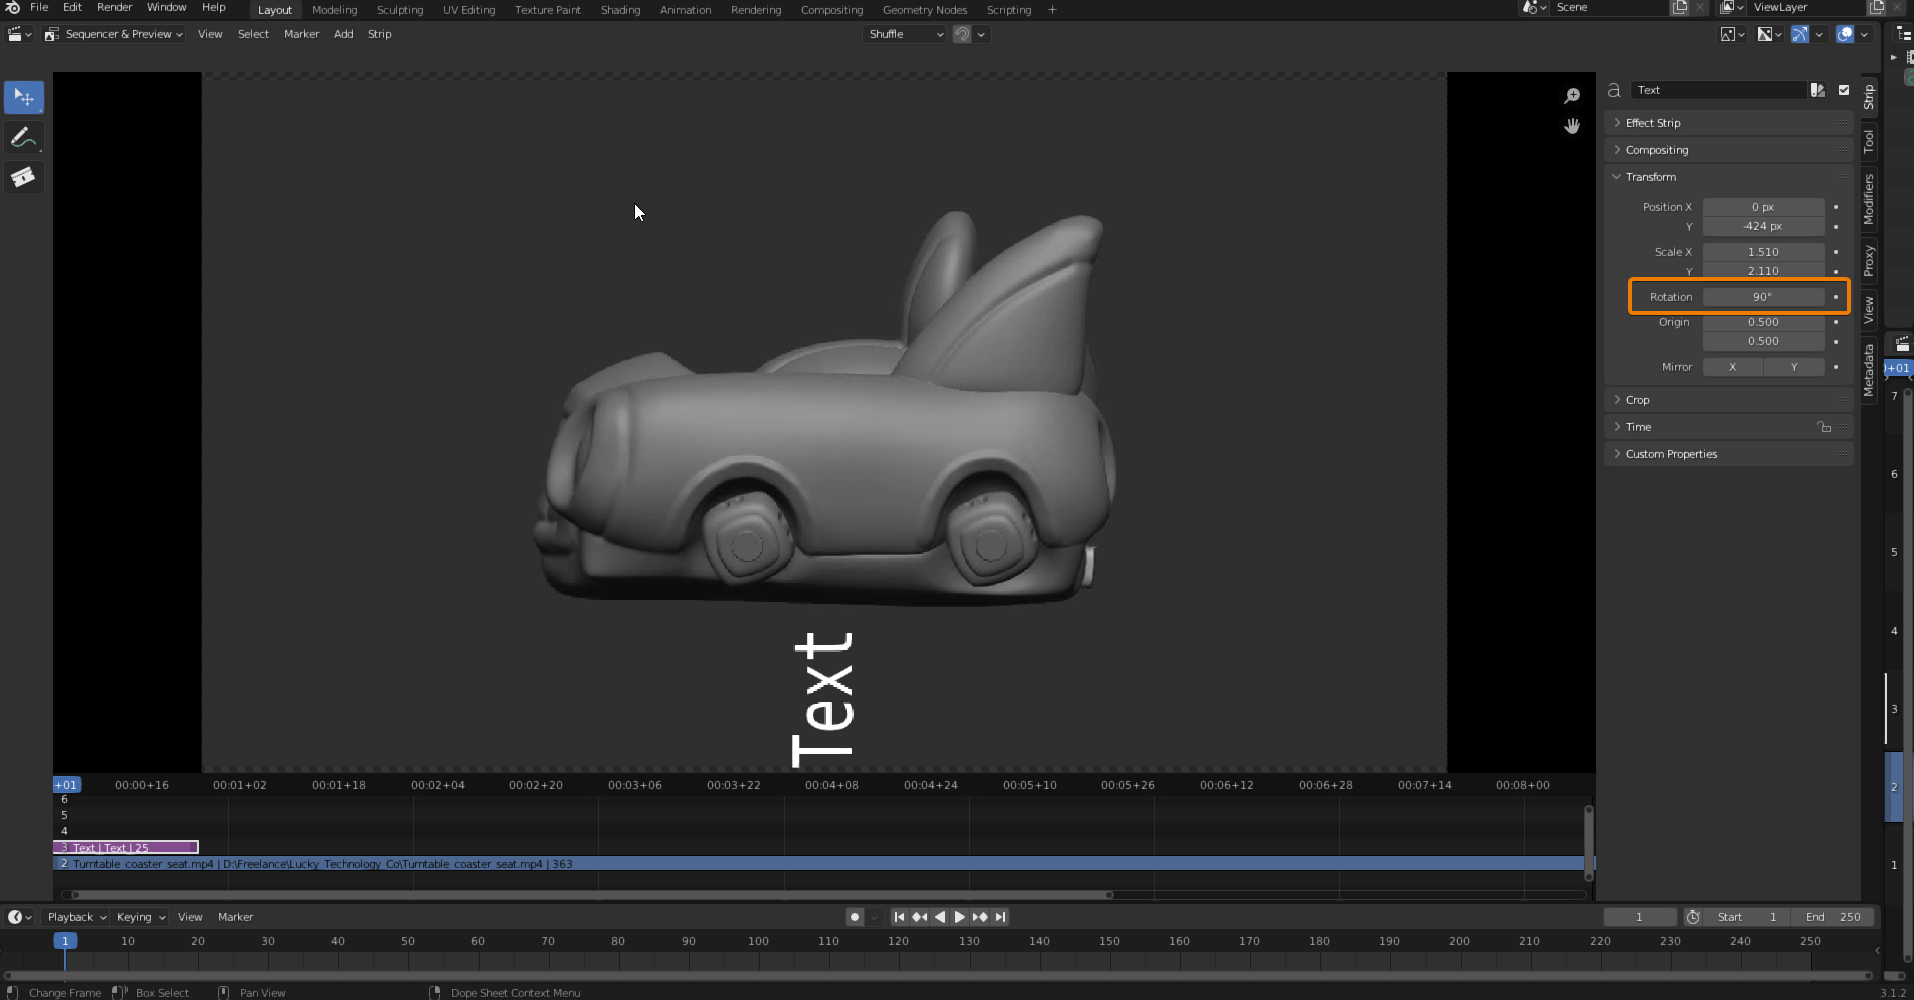
I have scaled my text, and now I will try to rotate it. In order to do that I will modify the value in the "Rotation" textbox.
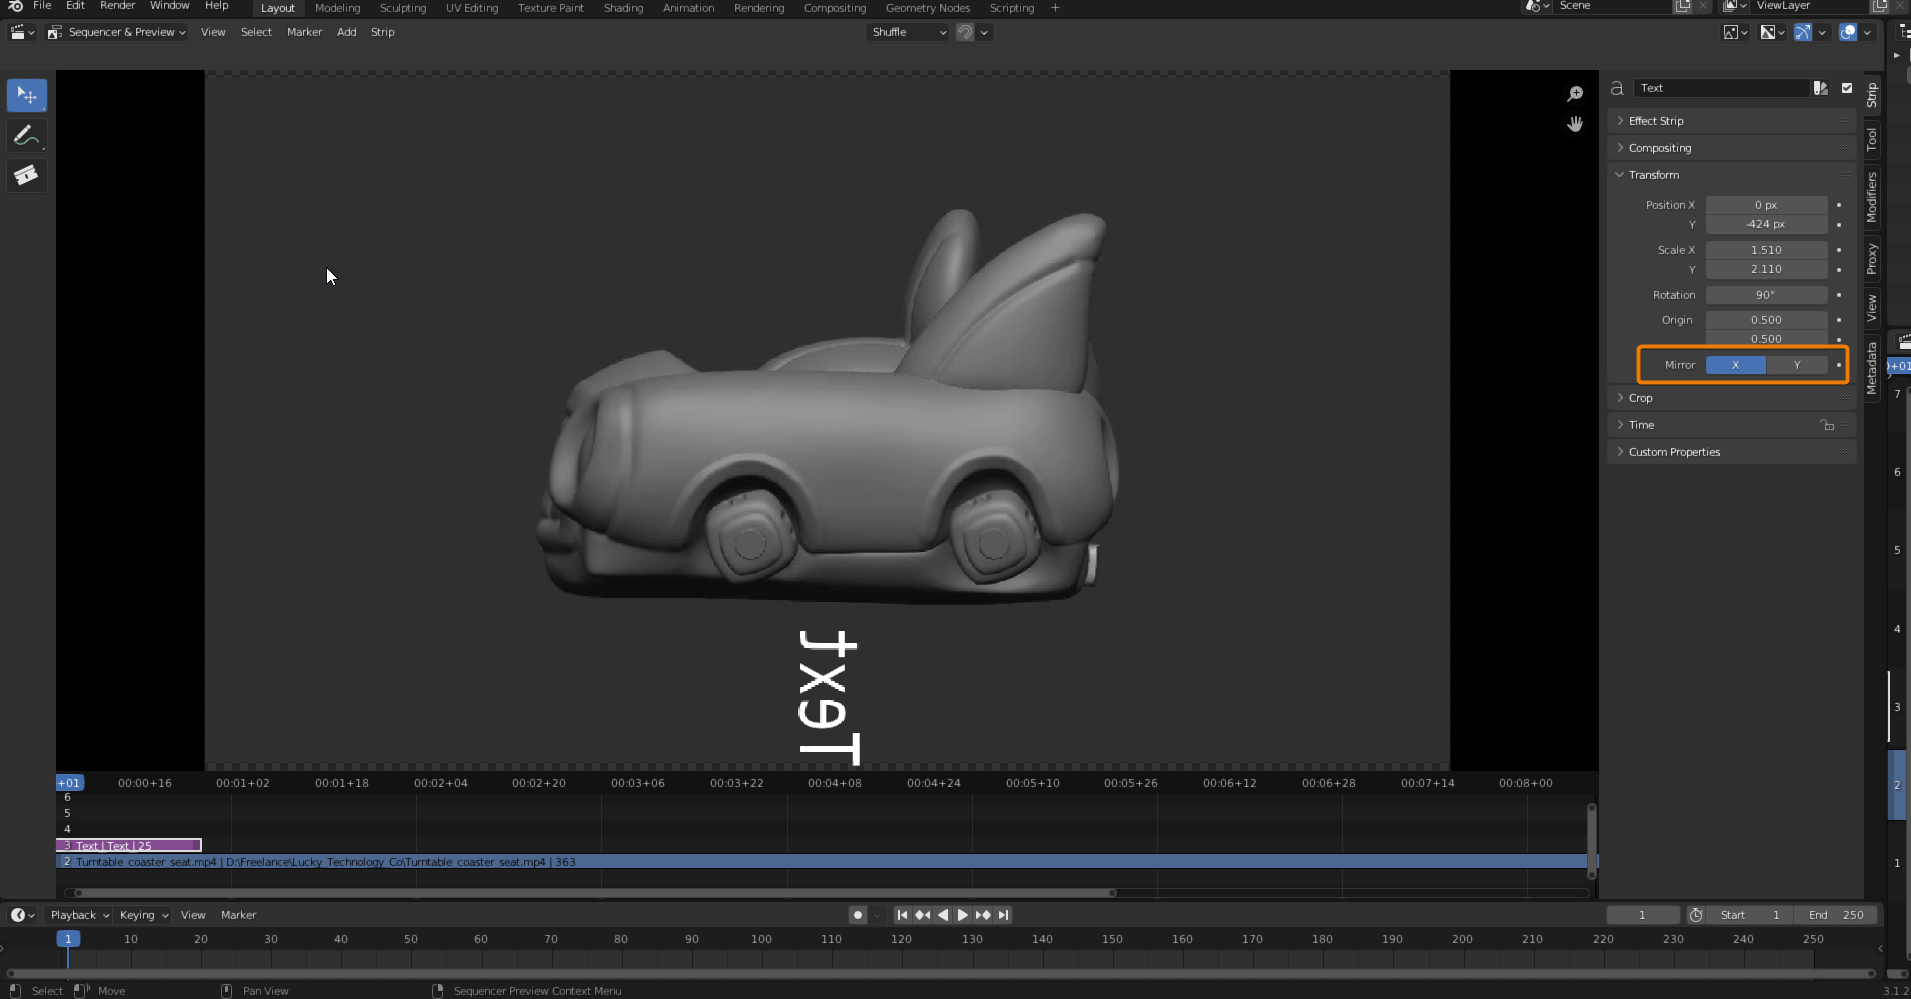
Finally, if I want that the direction of my text is reversed then what I can do is mirror it. In this case, I want it to be mirrored on the X axis but you can also decide to mirror it on Y or both axis. In order to do that I only have to select the option of the axis I want it to mirror.
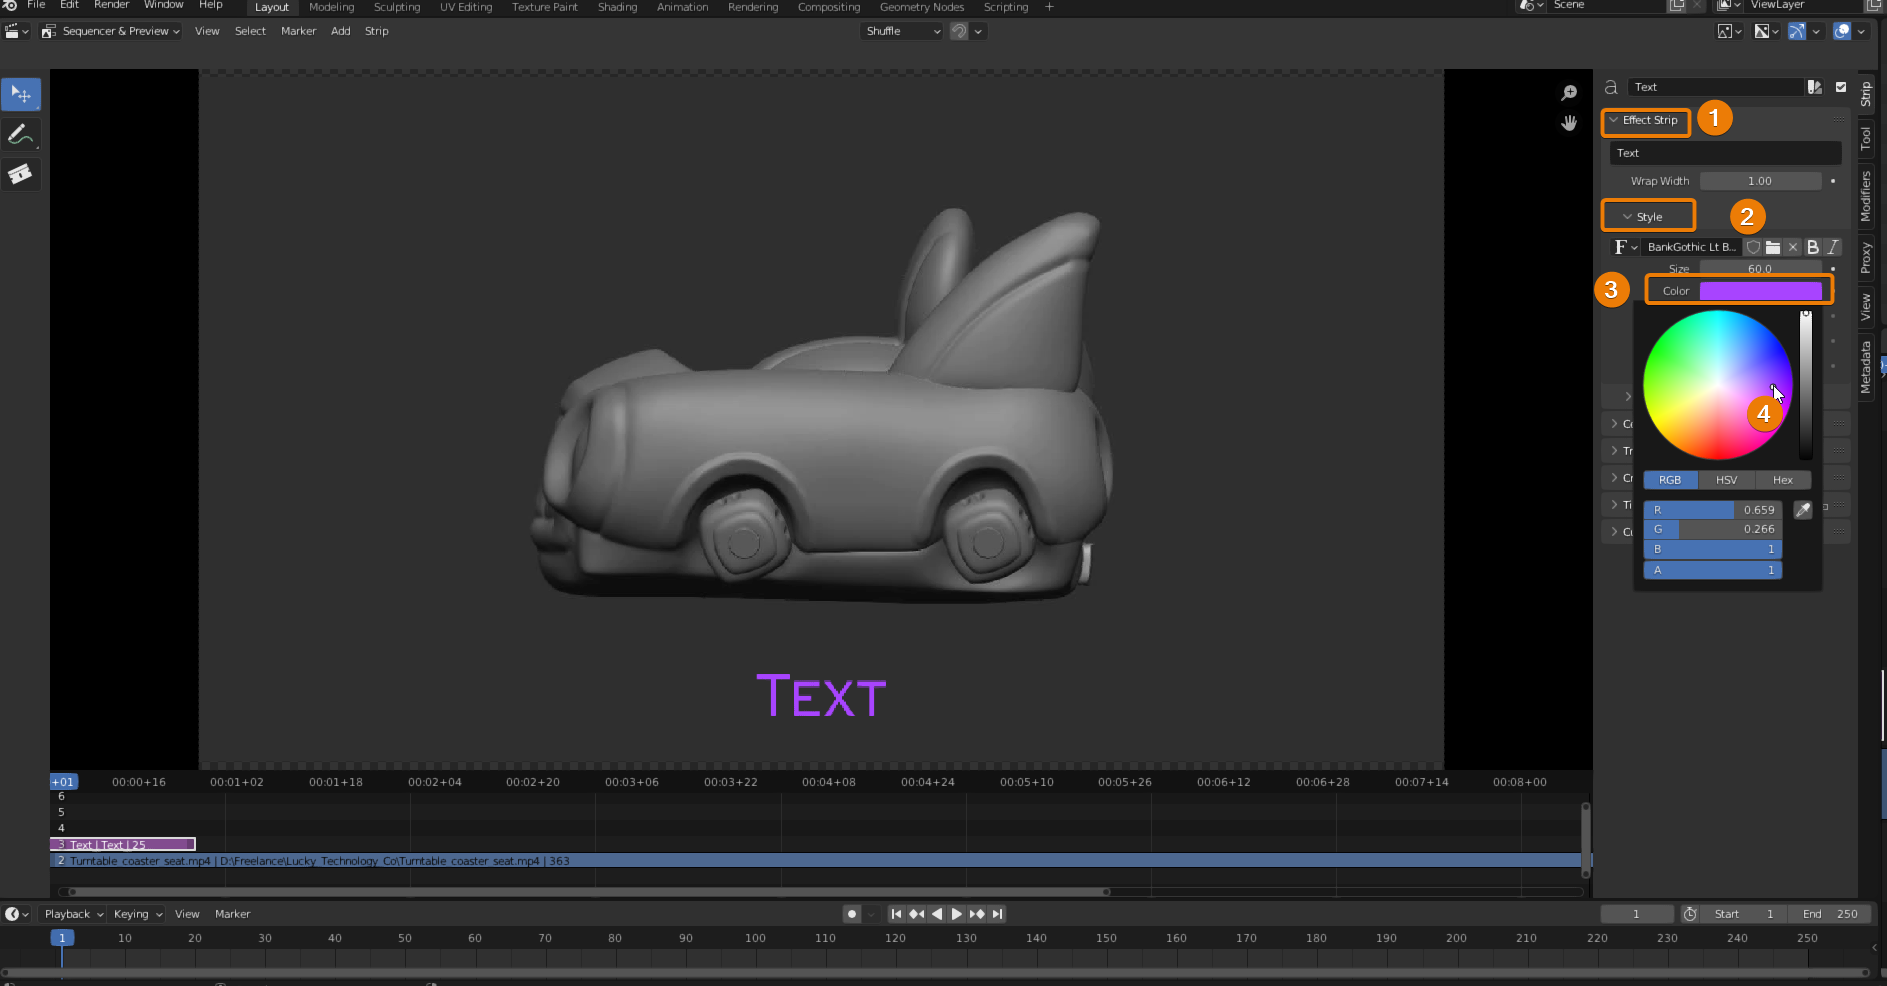
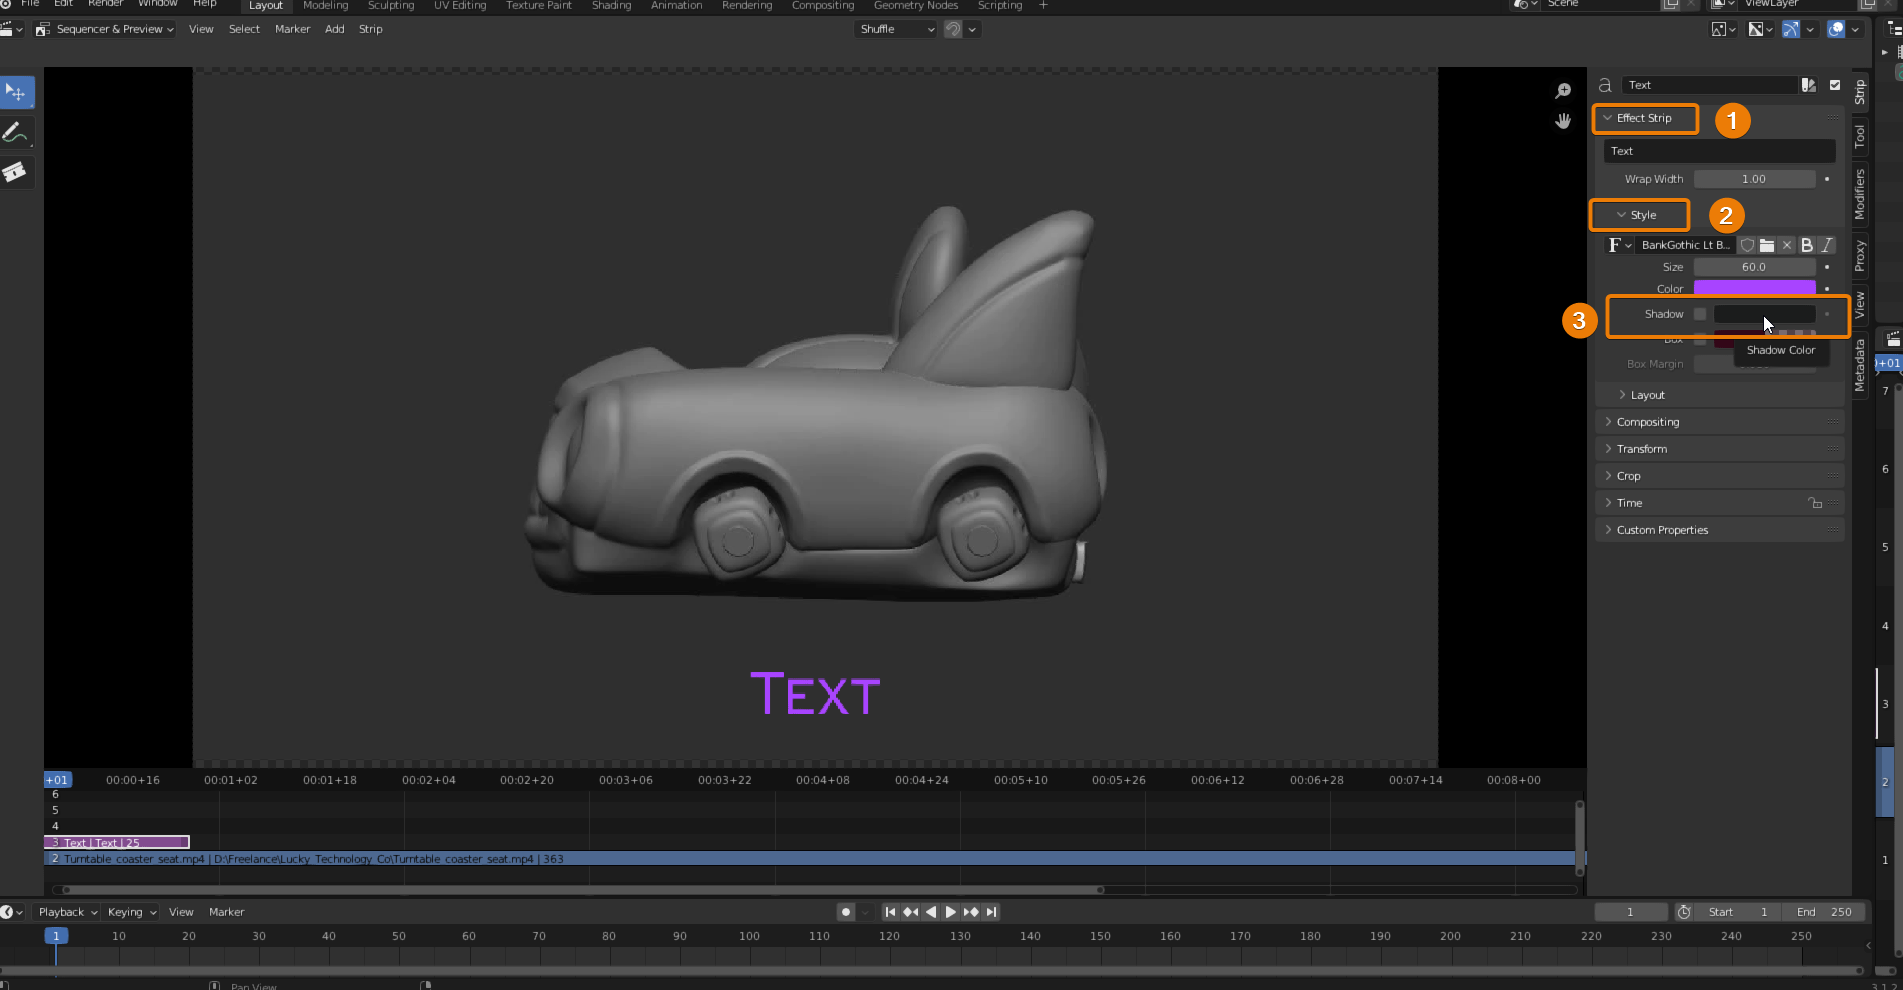
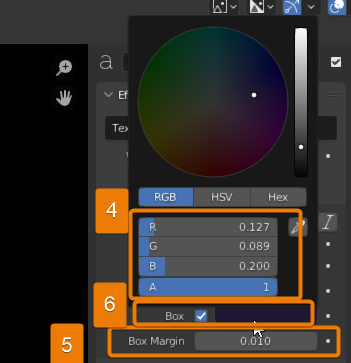
Other very common modifications that you might want to do to your text are changing the font, and colour, adding a shadow as well as using the text in bold or italic. This is something very simple and I will guide you through it.

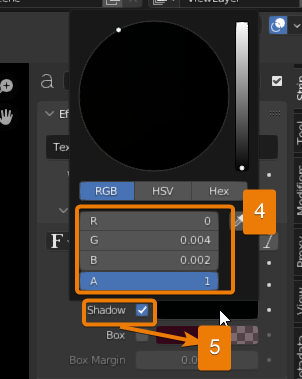
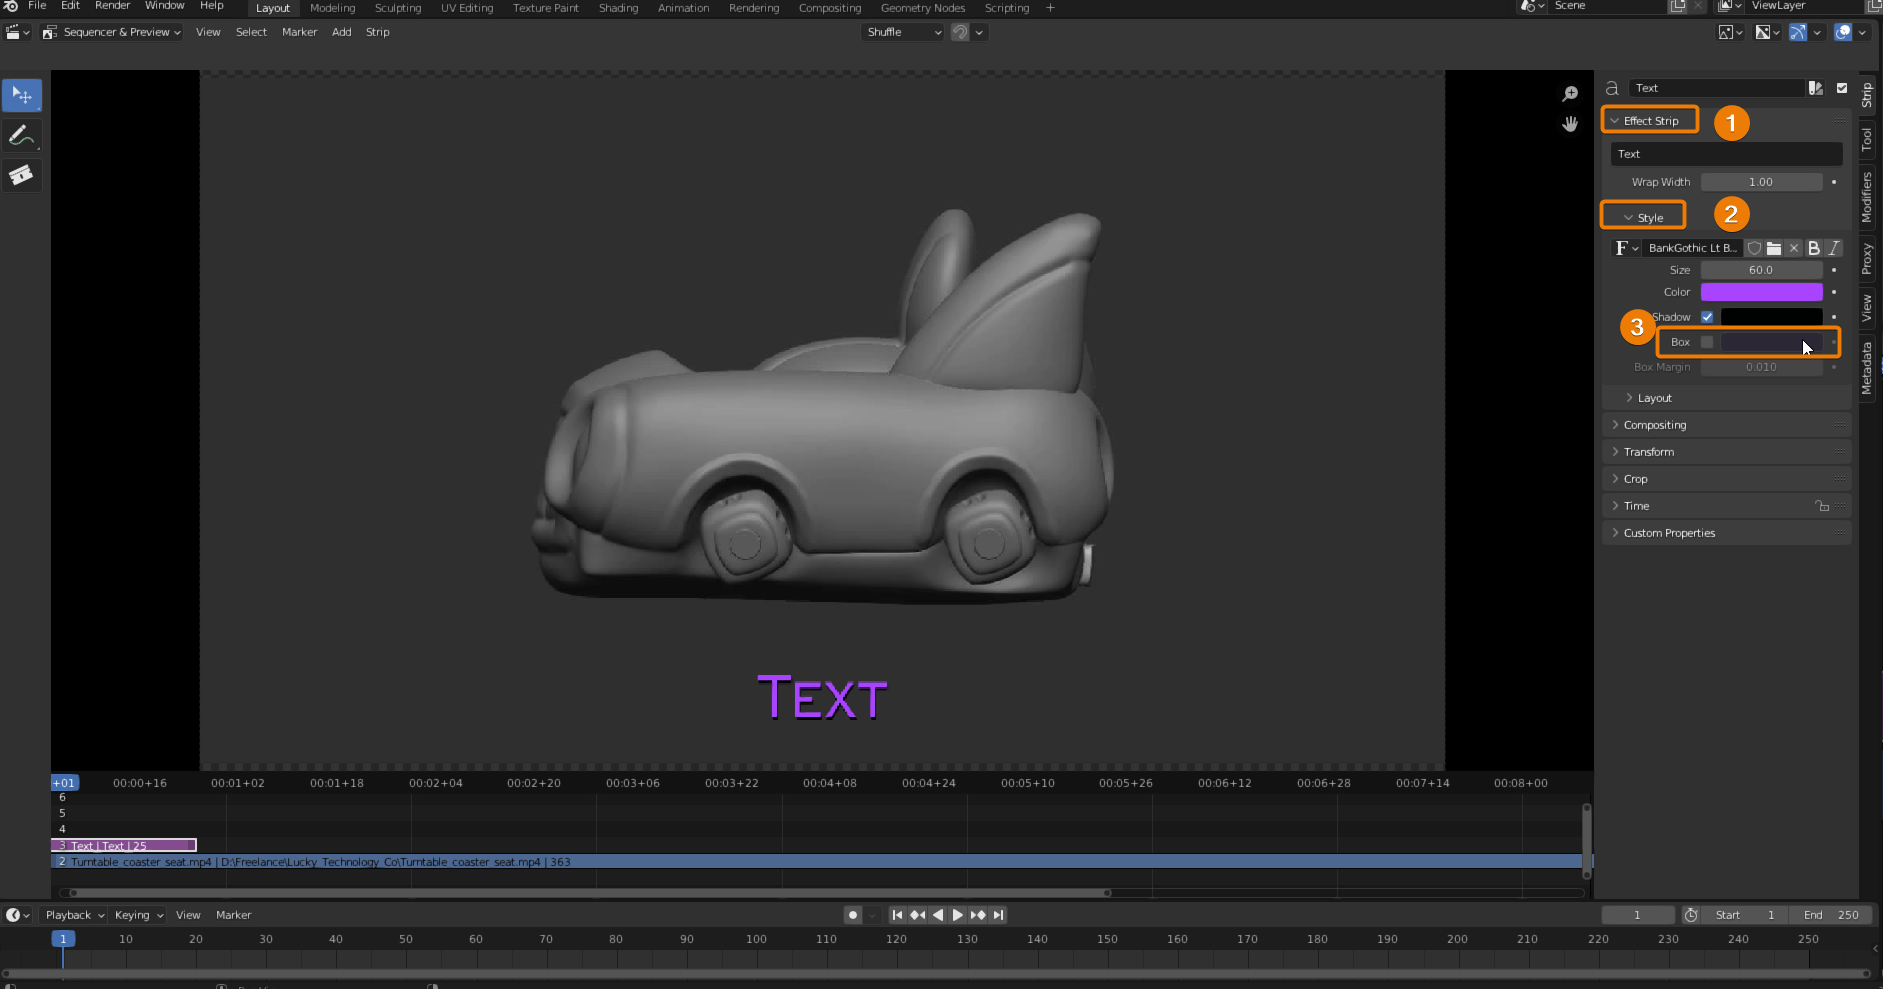
When you think that your text needs a background, then adding this is very easy to do.
In a previous section, I was telling you how to modify the position of your text by using the Transform options. In the VSE "Sidebar" you will also find an alternative way to do it which might be more convenient as this section is focused only on the layout of the text.
The menu for modifying the layout of the text can be found in "Effect Strip". This menu includes two options which are the location and anchor.
In the location section, you can adjust the position of your text. While in the anchor section, you will adjust the alignment.
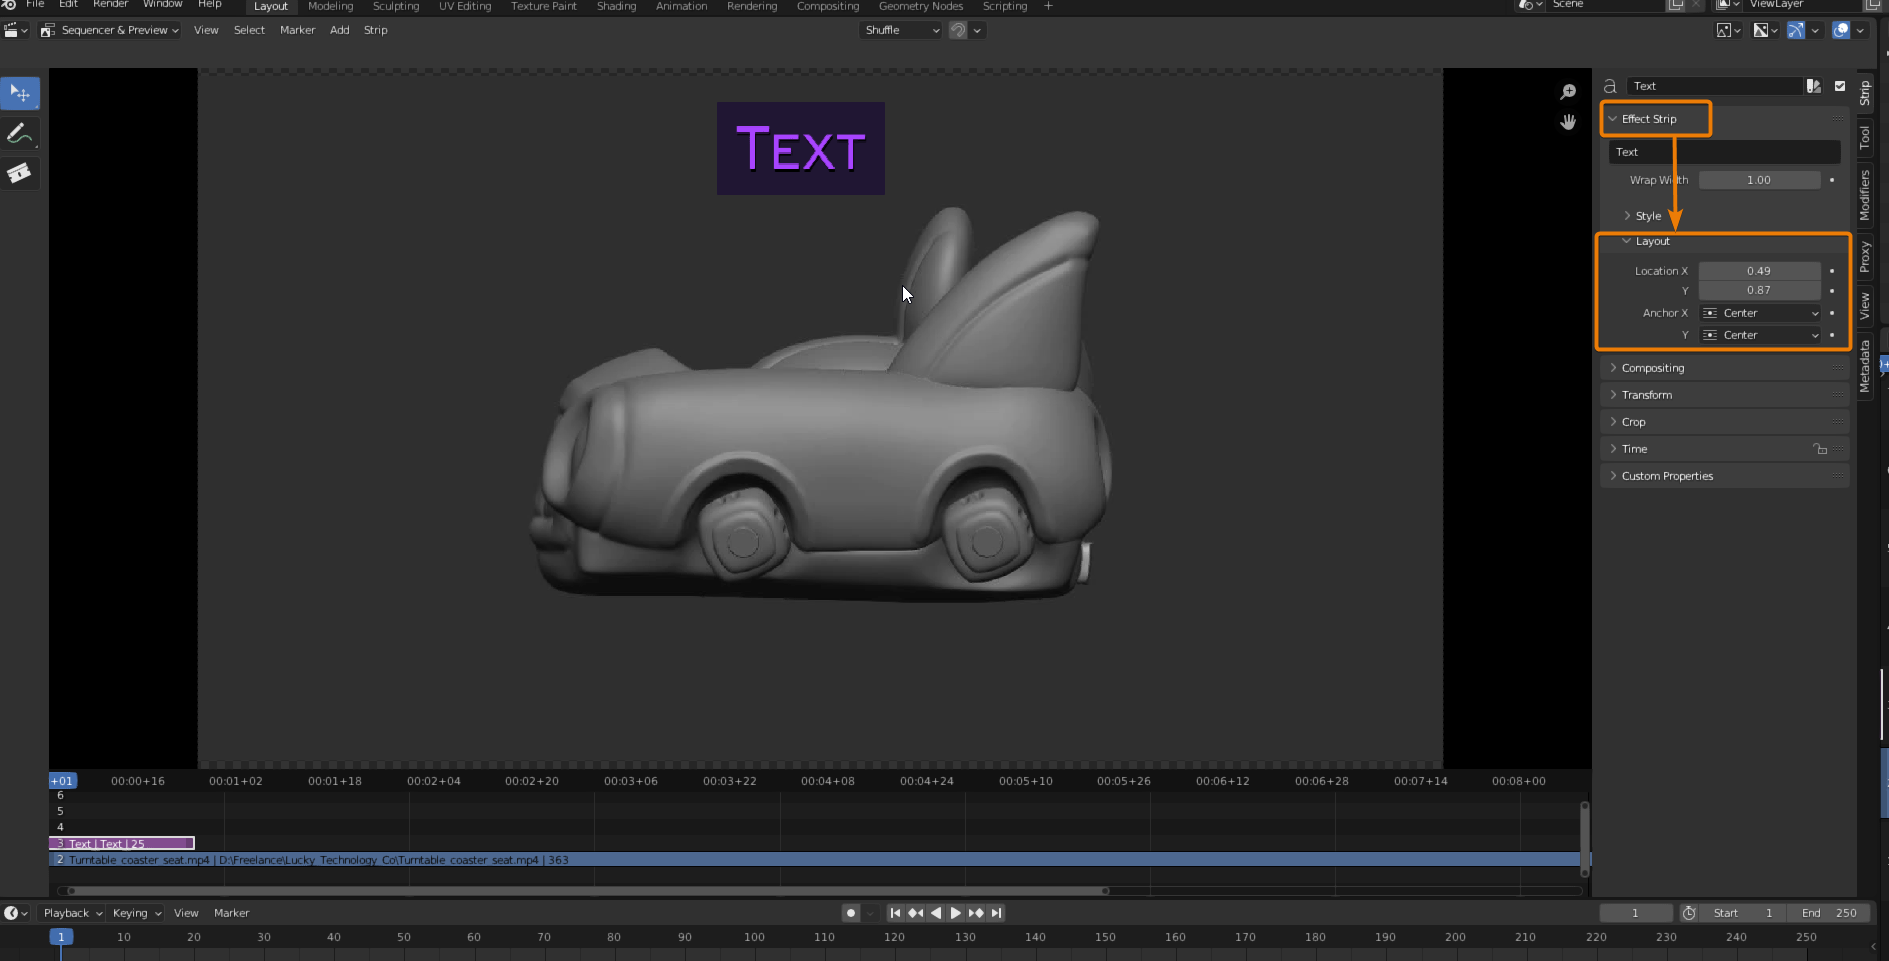
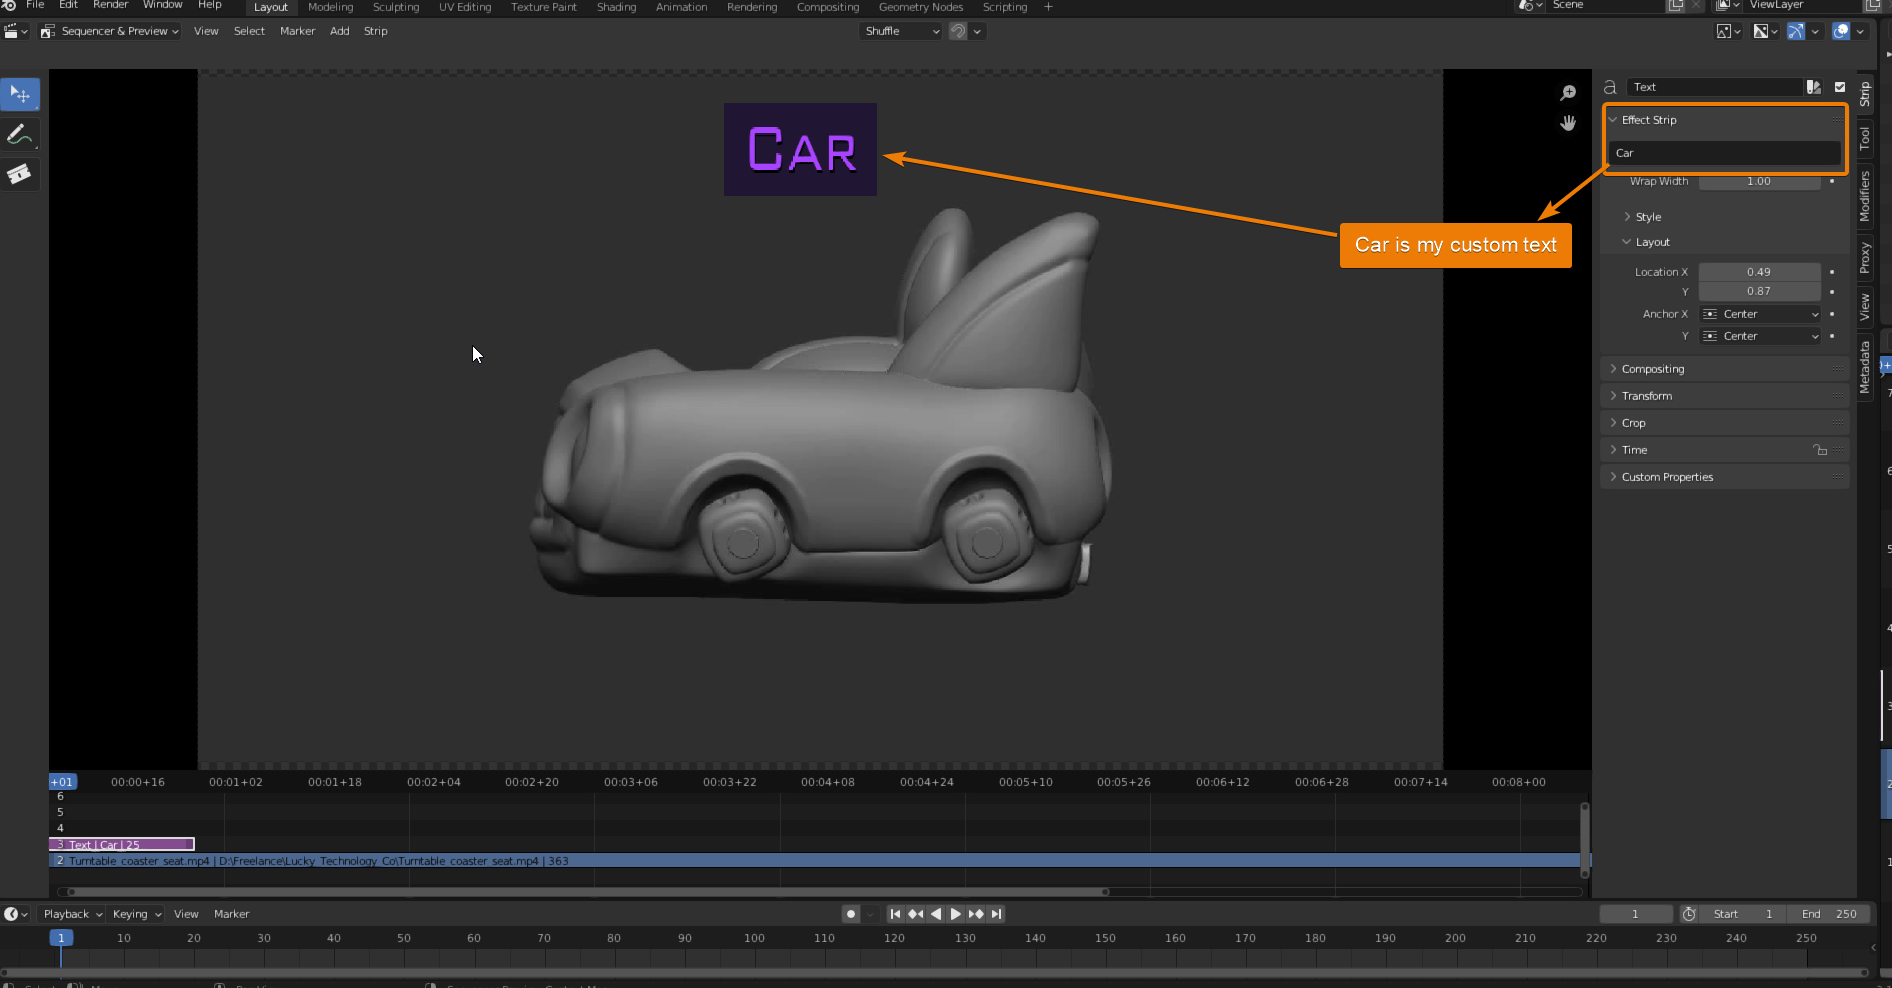
Once you have decided on the design and layout of your text, it is time to add your custom text. This is done in a very simple step, below "Effect Strip" in the "Sidebar" there is a textbox, replace the word "Text" with your custom text.
You have now your custom text and selected the design in which your text will appear, and you think it's time to animate the text. Animating the text in the VSE takes several steps but it becomes a very simple thing once you have learnt the process.
The first thing you need to do is go to "Add" and select "Effect strip". In the "Effect strip" select "Transform". You will see that another box (Transform strip) is added in the sequencer on top of where your text is.
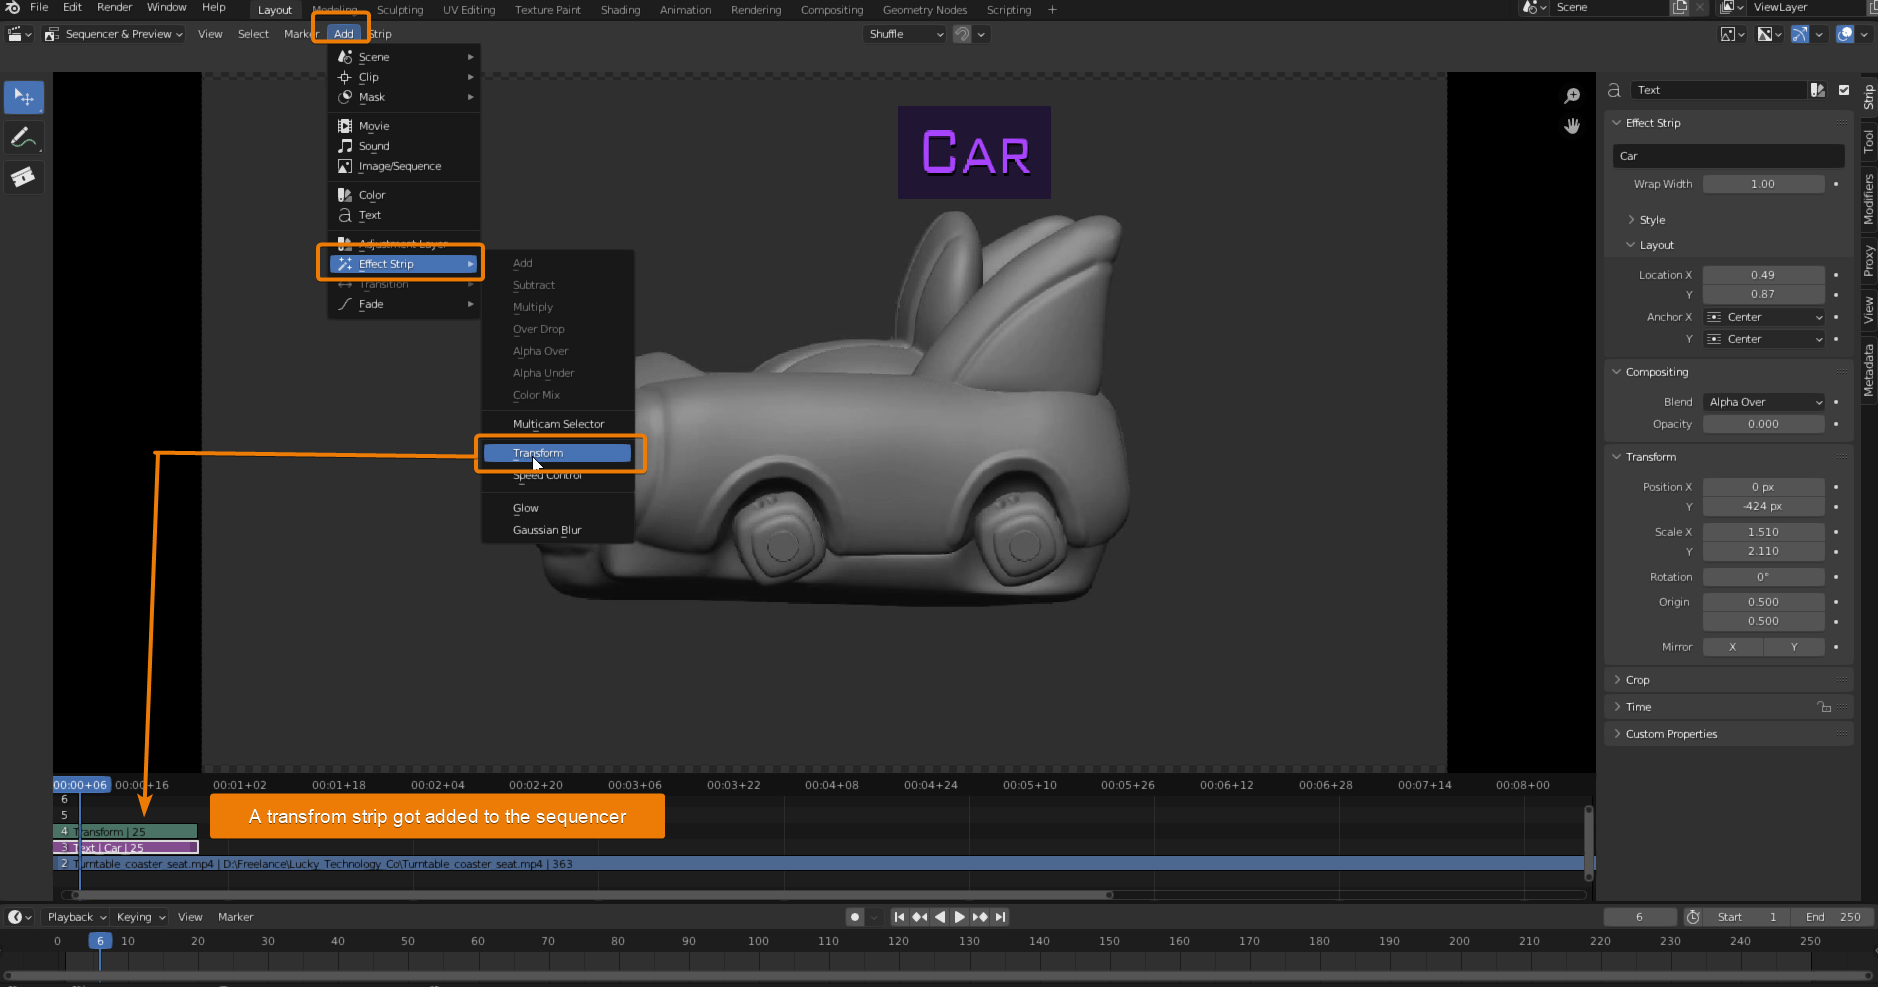
When you click on the new "Transform" strip in the sequencer, you will now be able to adjust its properties in the "Sidebar". In this case what we want is to animate our text, maybe by moving the position of the text from left to right.
In order to animate the text as we have mentioned before, select the transform strip in the sequencer and go to "Transform" in the "Sidebar". As I want to move my text from left to right, I will change the value of X in the option "Position". You will see a copy of your text moving to the left.

However duplicating our text is not what we want. In order to fix this, we have to click on our text in the sequencer and in "Compositing" on the "Sidebar" just turn down the "Opacity" all the way to zero.

Now I will go back to my transform strip, and I will move the time slider to the desired time in which I want the transform strip to be on the left side of my screen. Then I will click on the transform strip and on the "Sidebar" I will go to "Transform" and when hovering the mouse over the "Position" textbox in X where I modified the value, I will press the key "I". This will create a keyframe in that exact timeframe of my video.
I will do the same for a second position in which I want my text to be, so I will go to the sequencer again and move the timeline. Then, I will go to "Transform" on the "Sidebar" move the X value in "Position", hover the mouse over and press the key "I". Now I have a second keyframe and when I play the video I will see my text moving from left to right during the time interval set.
You will know that a keyframe has correctly been set as the X value in the "Position" option in the "Transform" menu will be highlighted. Also, at the bottom of your screen where you will see the animation timeline, there will be a dot indicating where the keyframe is set.

I think that the VSE in Blender offers great features that waive the fact of using an aside video editor when editing a video rendered from an animation, for example. In the case of the "text" feature in the VSE, I think it is quite convenient because you got multiple options to insert, edit and animate a text in your video without too much hassle.
I hope that you have found this useful.
Thanks for reading!
