


Adjusting the exposure in Blender can greatly enhance the overall look and feel of your renders. By correctly setting the exposure, you can achieve a more realistic and compelling image.
Whether you want to create a moody, low-light scene or a bright and sunny one, learning how to adjust the exposure will give you more control over the final outcome. It can also help to balance out the overall brightness of a scene, making it more visually pleasing to the eye.
This article will guide you through the steps of how to change the exposure in Blender, giving you the tools to take your renders to the next level.
There are two places we can adjust exposure in Blender. Both are located in the render settings found in the properties panel by clicking the white camera icon, second from the top. We find the first exposure setting in the film section and the second one in the color management section.

But which of the two should you use, and when? Let's get into that now.
The term exposure refers to the amount of light that reaches a camera's sensor. In photography, adjusting the exposure allows a photographer to control the brightness of the final image.
In general, a proper exposure will result in a well-lit image that accurately represents the scene as the human eye would perceive it. A render that is underexposed will be too dark, while an overexposed render will be too bright.
An example of overexposure in our day-to-day lives can be felt when you photograph the sky. The camera is typically pointed towards a bright, expansive area that can be difficult to properly expose. The sky is often much brighter than the foreground, and as a result, the camera may struggle to balance the exposure between the two.
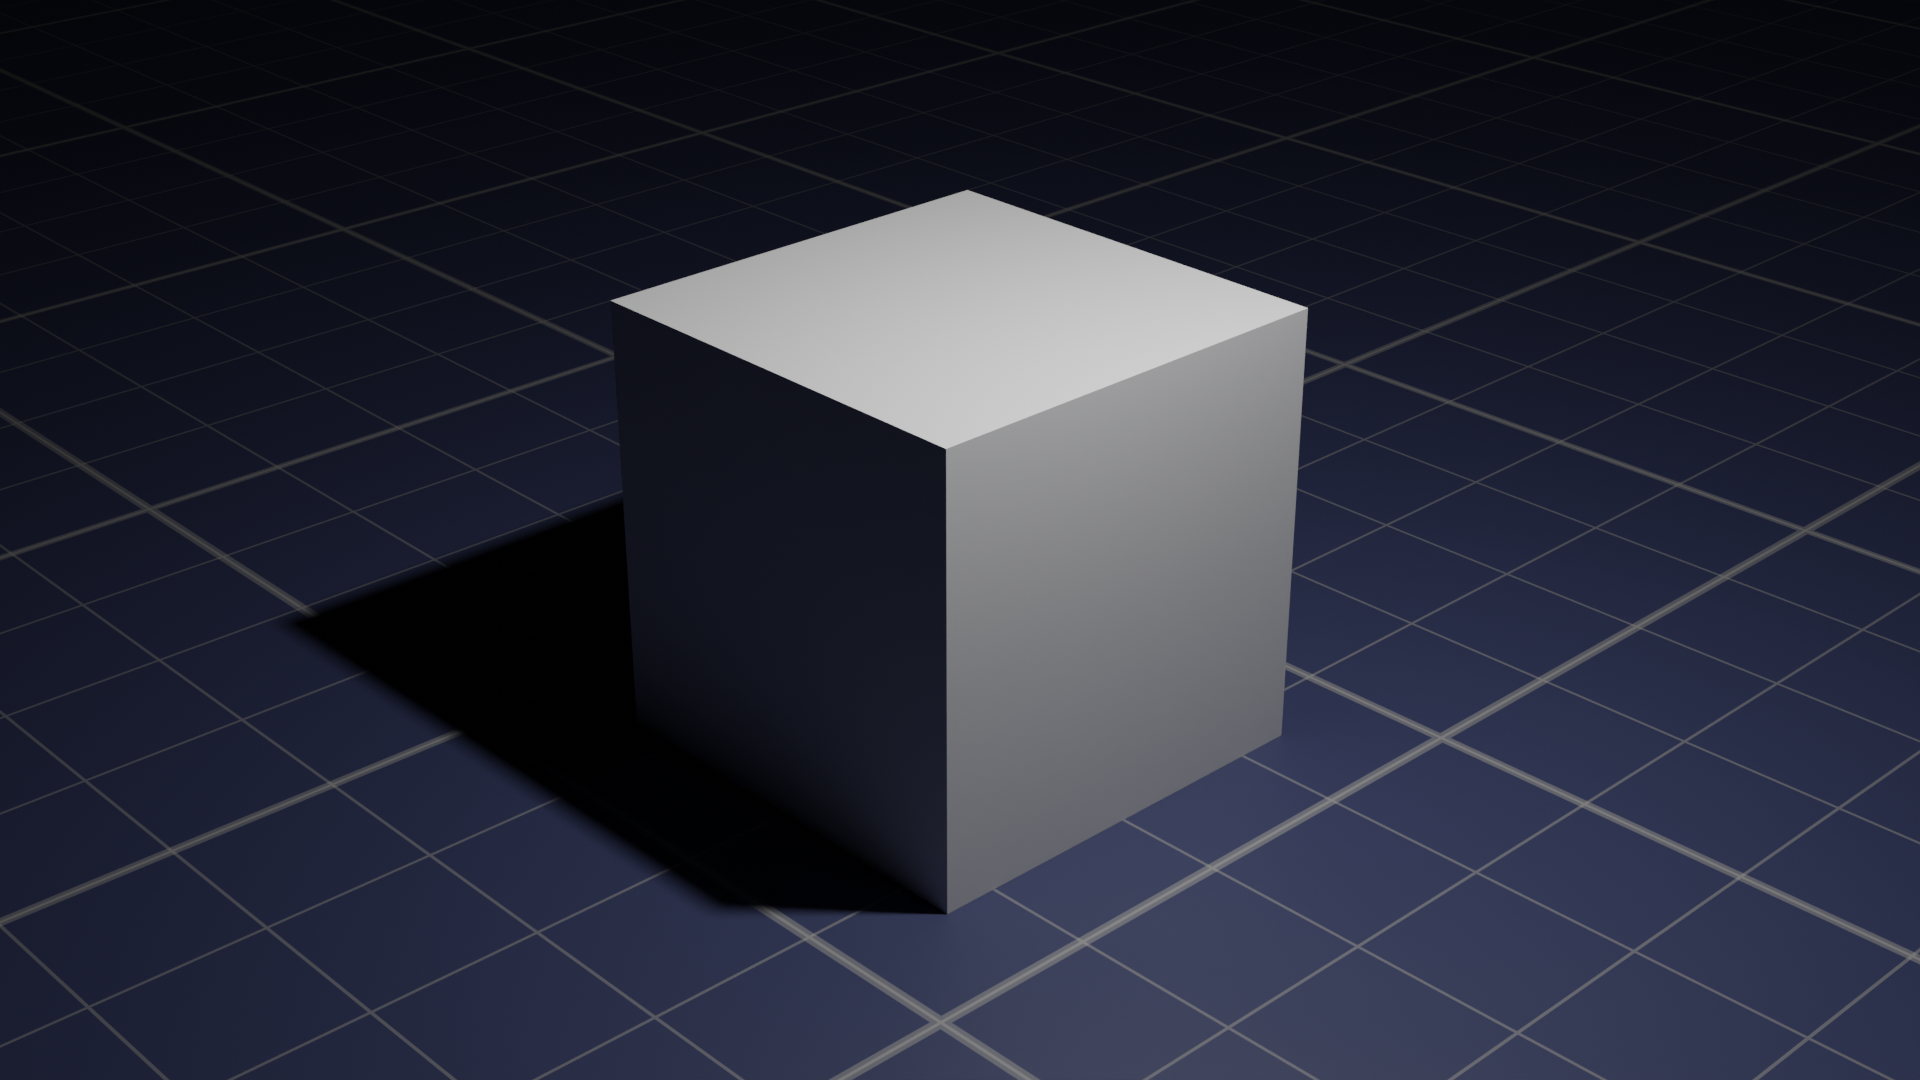
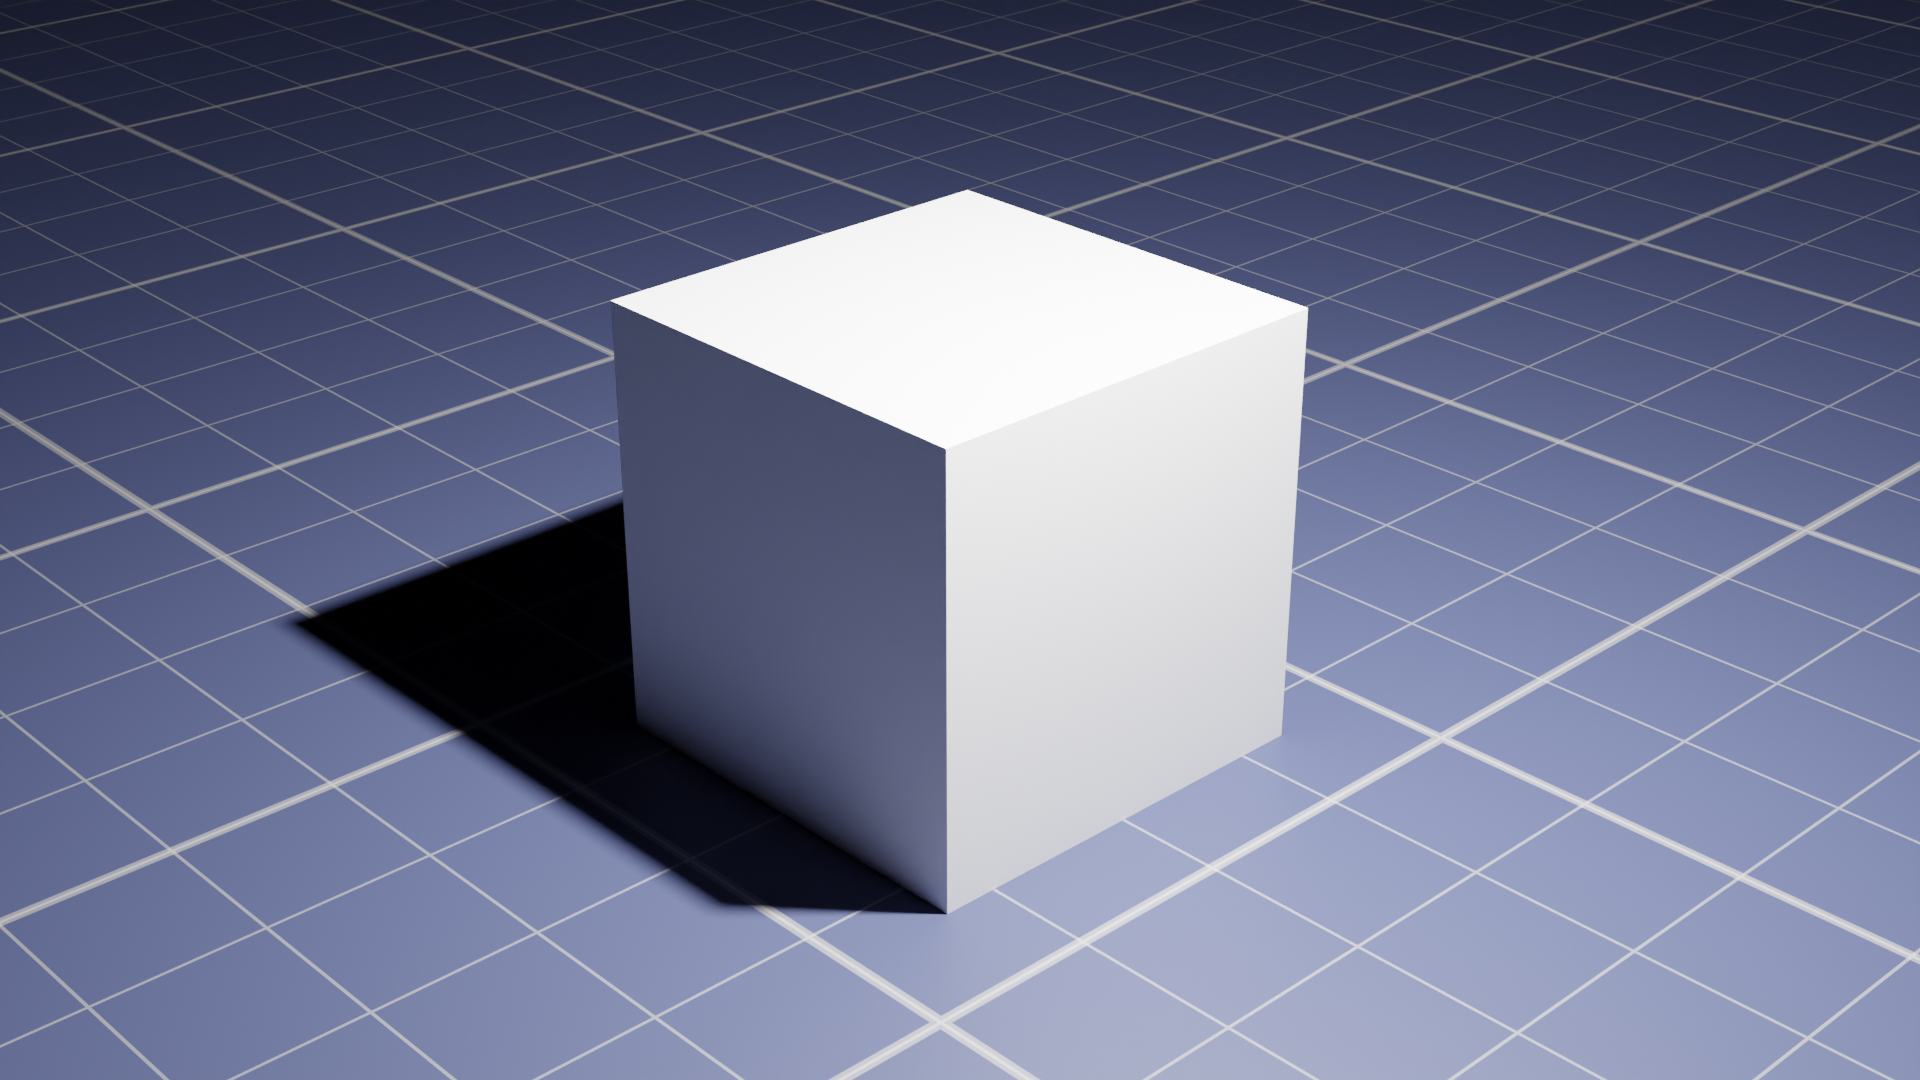
Simple examples of under and over exposed images can be seen below, where the given exposure value was set under the film properties.

Upon first glance, overexposure may be considered an undesirable feature. However, slightly over- or under-exposing a render of a scene might just be that one extra step that lets you achieve photorealism.
As mentioned above, there are two different ways to change the exposure of your render, but these do not both work in the same way.
The exposure setting in the film section is, simply put, adjusted before the rendering process. This means that the data values of what you are seeing are adjusted.
The color management section in Blender controls the color balance and contrast of the final render.
This type of exposure allows the user to fine-tune the final image's colors and contrast. The exposure setting adjusts the overall brightness, similar to the film section.
However, the color management section's exposure setting works differently than the film section's exposure setting.
Instead of simulating a camera's physical properties, the color management section's exposure setting adjusts the final image's brightness, meaning it adjusts the colors after the render has completed, and hence only adjusts the "view" of the render, not the data of the scene itself.
When working in Blender, the Film section's exposure settings should be used when trying to mimic the physical properties of a camera and achieve a specific overall brightness in the final render.
For example, if you want to recreate the look of a photograph taken with a specific camera and film, you will use the film section's exposure settings to match the aperture, shutter speed and ISO of that camera.
On the other hand, the color management section's exposure setting should be used when fine-tuning the final image's colors and contrast.
For example, when trying to create a specific look or feel for the render. Additionally, the color management section's exposure setting can be used to adjust the overall brightness of the final image after it has been rendered, which can be useful for making final adjustments to the image.
For a general and more casual workflow, the final product after making all adjustments to the render will look practically identical whether you are using the color management section or the film setting. A notable difference between the two results can be seen while using file formats such as EXR, for example.
In summary, changing the exposure of your render can significantly improve the photorealism of your scene, especially when you are trying to replicate a photograph taken by a camera with very specific or unique settings to get a certain desired effect.
Whether you do this with the film or the color management setting in Blender depends mostly on your workflow, as in most general cases the result of using either stays the same.
Thank you for your time!
