


After performing a render, you might want to edit it by cropping or resizing the image using the compositor that Blender provides. This is possible using the "crop node" in the compositor window.
In the compositor in Blender, press use nodes and add a crop node from the add menu and drop it between the render layer node and the composite output node. Next, adjust the left, right, up and down values to crop in the image.
Let's walk through it step by step.
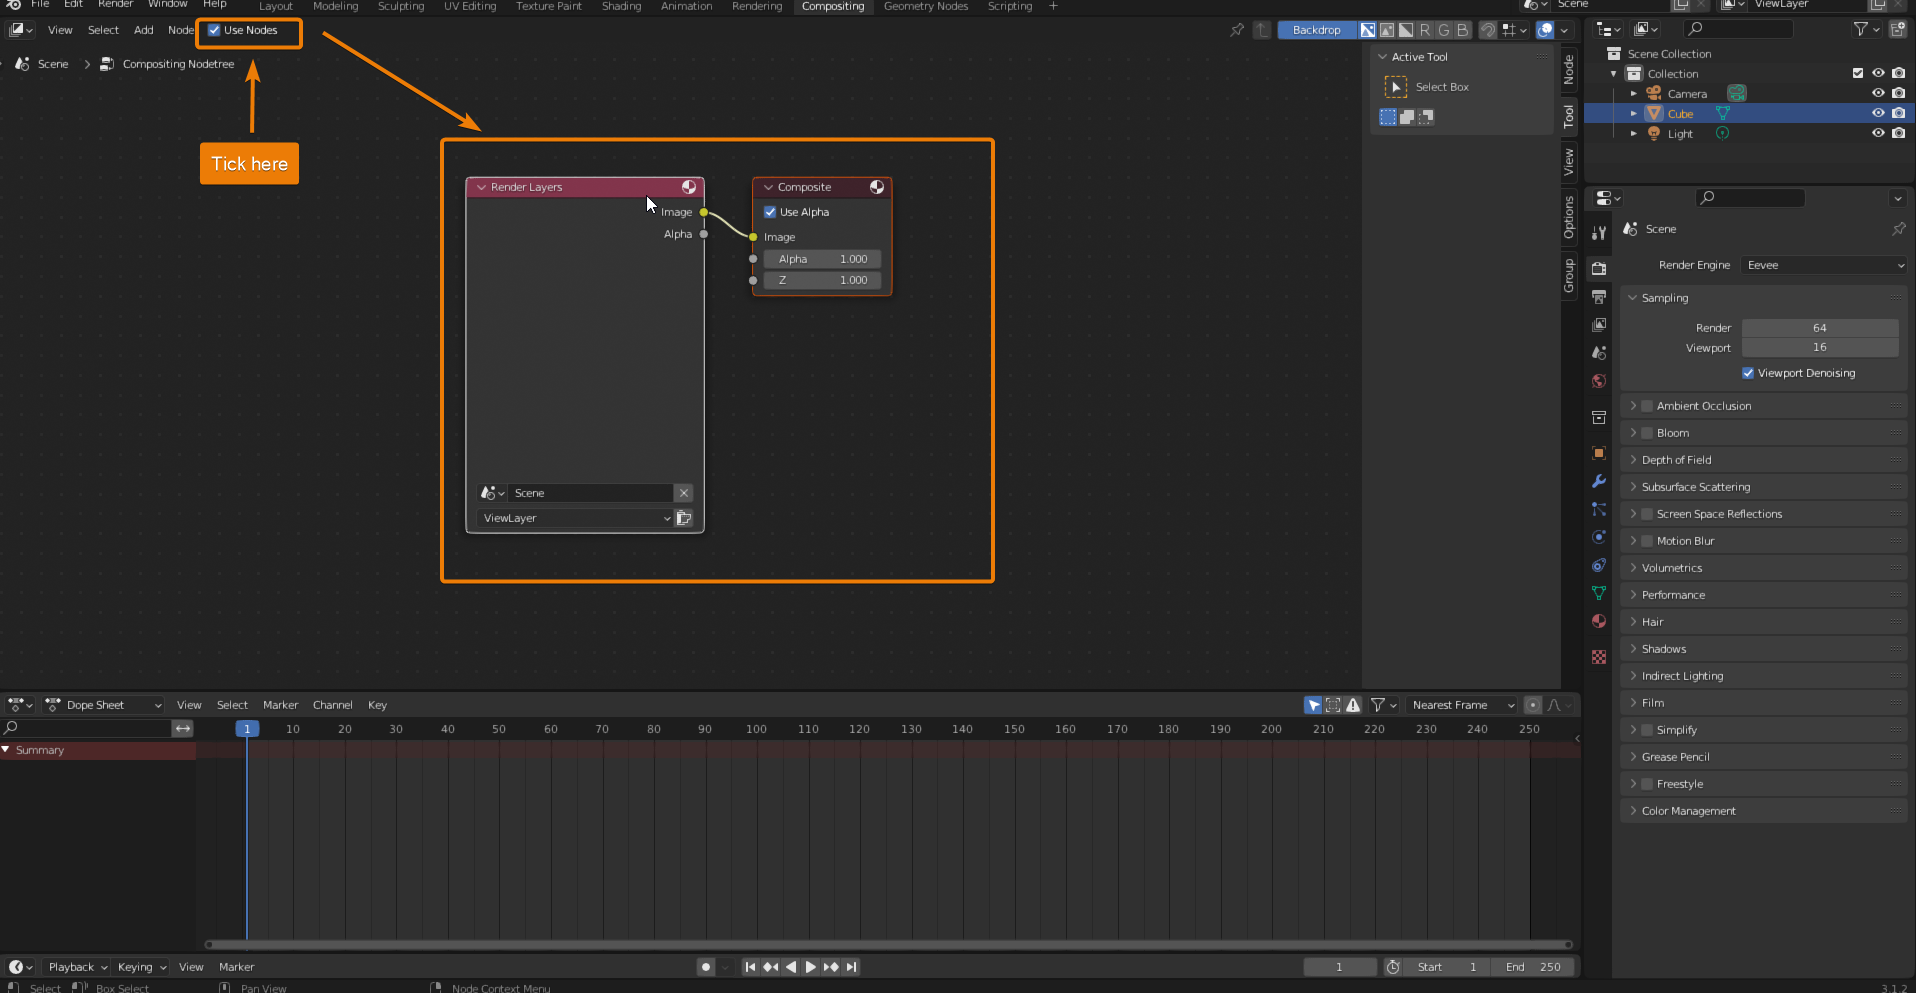
I will go a bit deeper with this option and show you how it works. The first step is going to the compositing tab located in the menu bar.

Once you are in the compositing window, you need to tick the box "Use Nodes" and you will immediately see the "Render Layers" and the "Composite" node.
Aside from the "Render Layers" and "Composite" nodes, you will also need a "Viewer" node which will allow you to immediately see what your crop image is looking like inside that same compositing window. For adding that node, just go to "Add", click on "Output" and then on "Viewer".

Once you have your "Viewer" node you will then have to connect it between the "Render Layers" and the "Composite" node. You can do that by going to "Add", selecting "Layout" and then "Reroute"
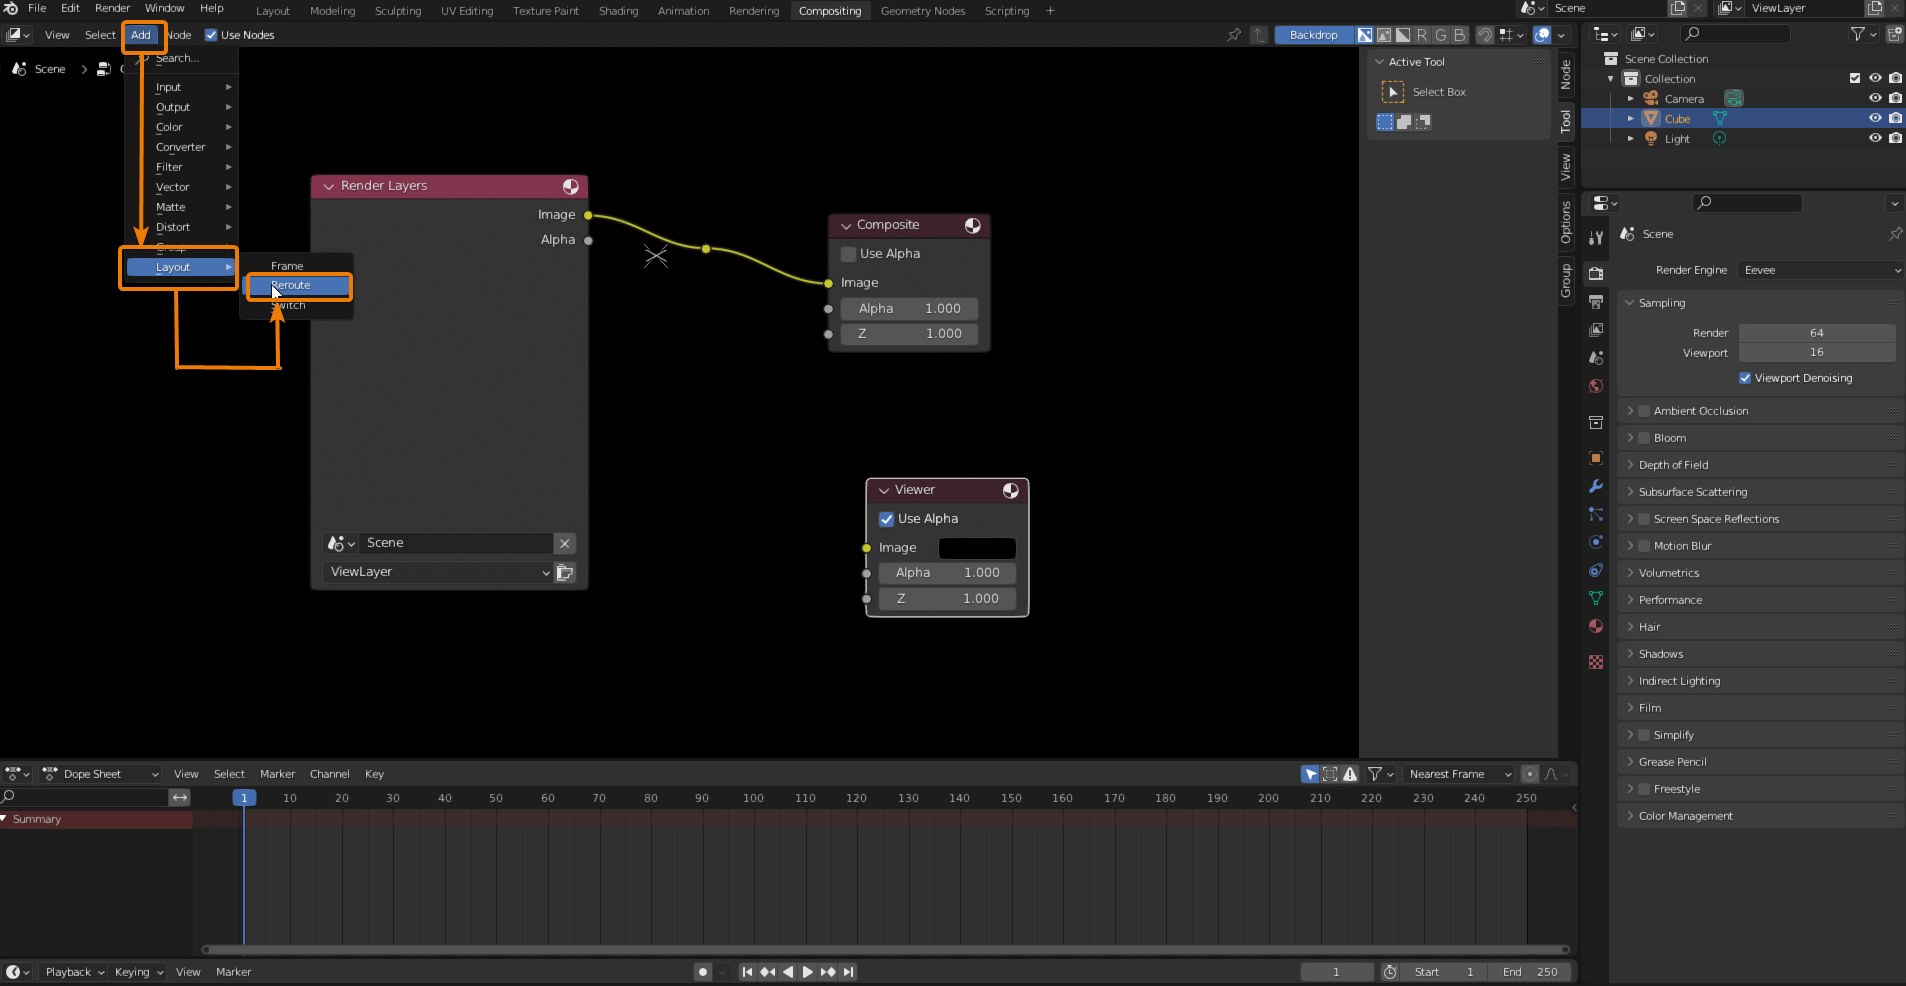
Then you will just have to link the connection between "Render Layers" and "Composite" to the "Viewer" node. Make sure that when you link it you are linking it to the "Image" section of the "Viewer" node.

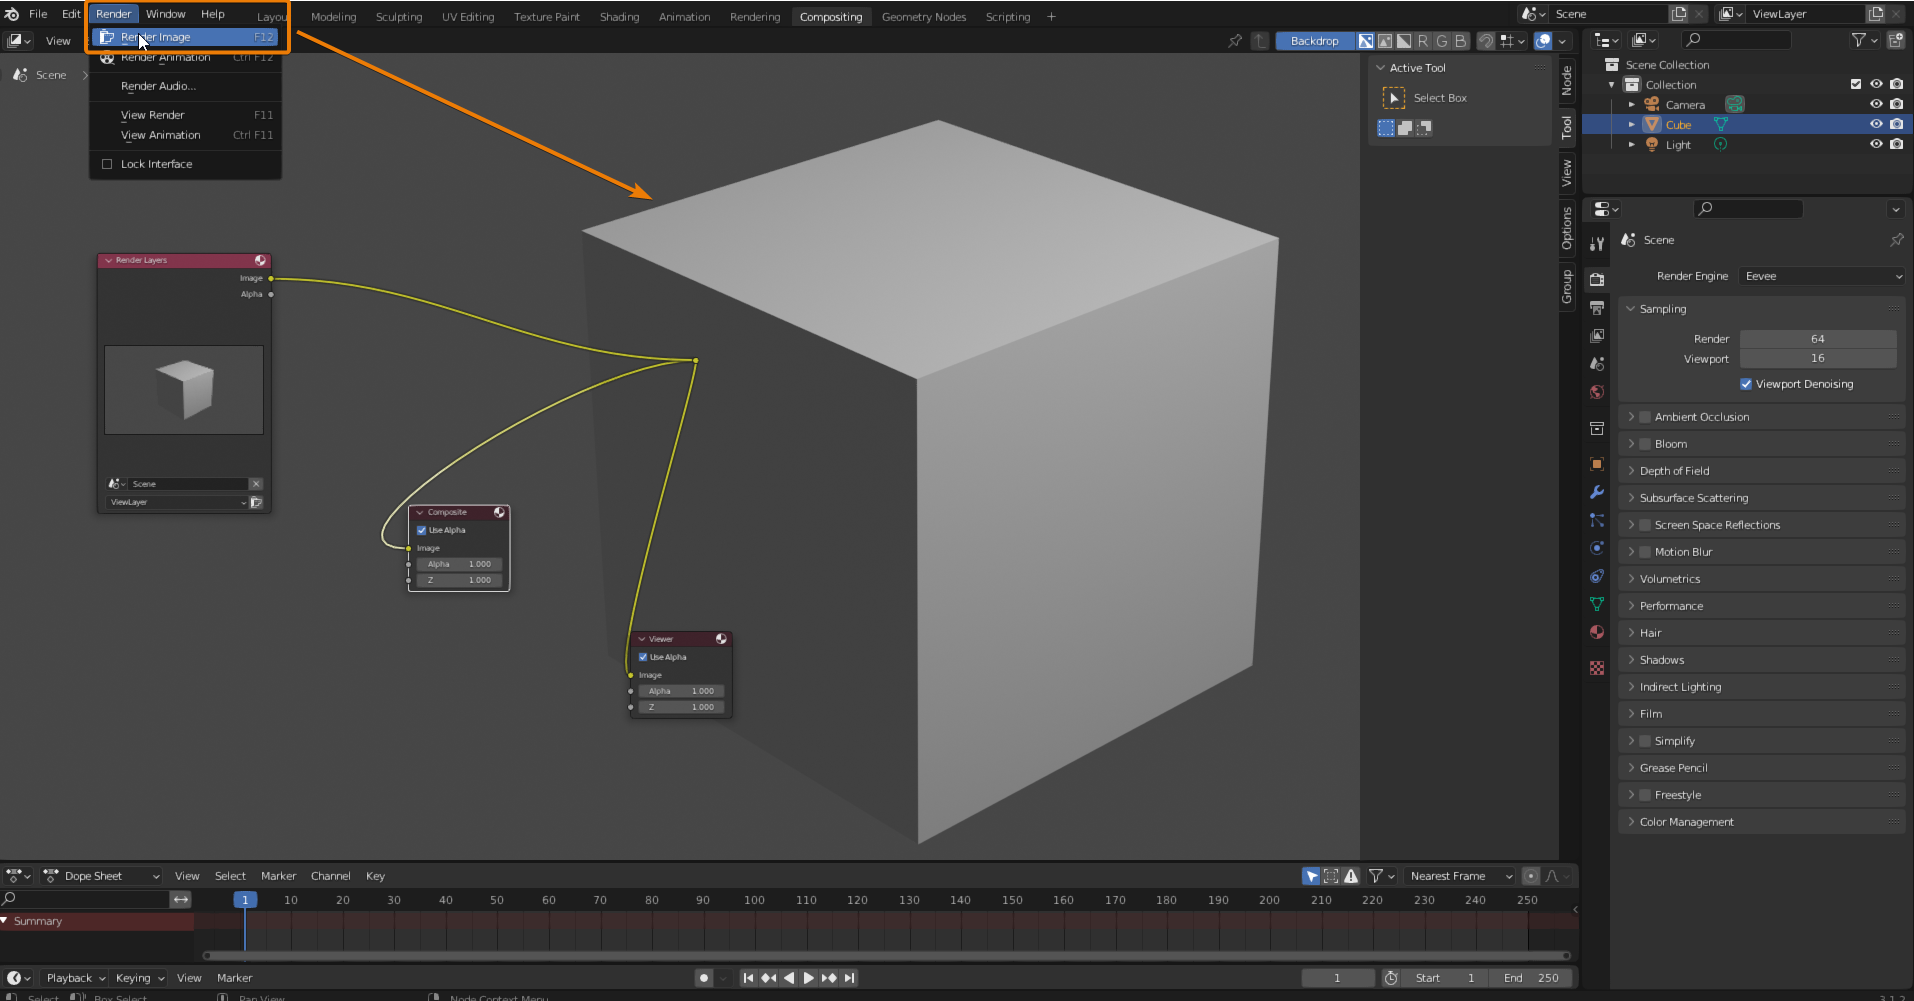
Now is the time to render your image so you can go ahead cropping it. Assuming that all your lights and render settings are already in place, just go ahead rendering your active scene by pressing "Render" and then "Render Image", alternatively you can press "F12". And you will see the render output image in the same Window.
The image is a bit enlarged just now and you might struggle to see the whole of it which will be important to decide the side you want to crop. In order to make it a more manageable size just press the "V" on your keyboard until you get the desired size so you can start cropping it out.
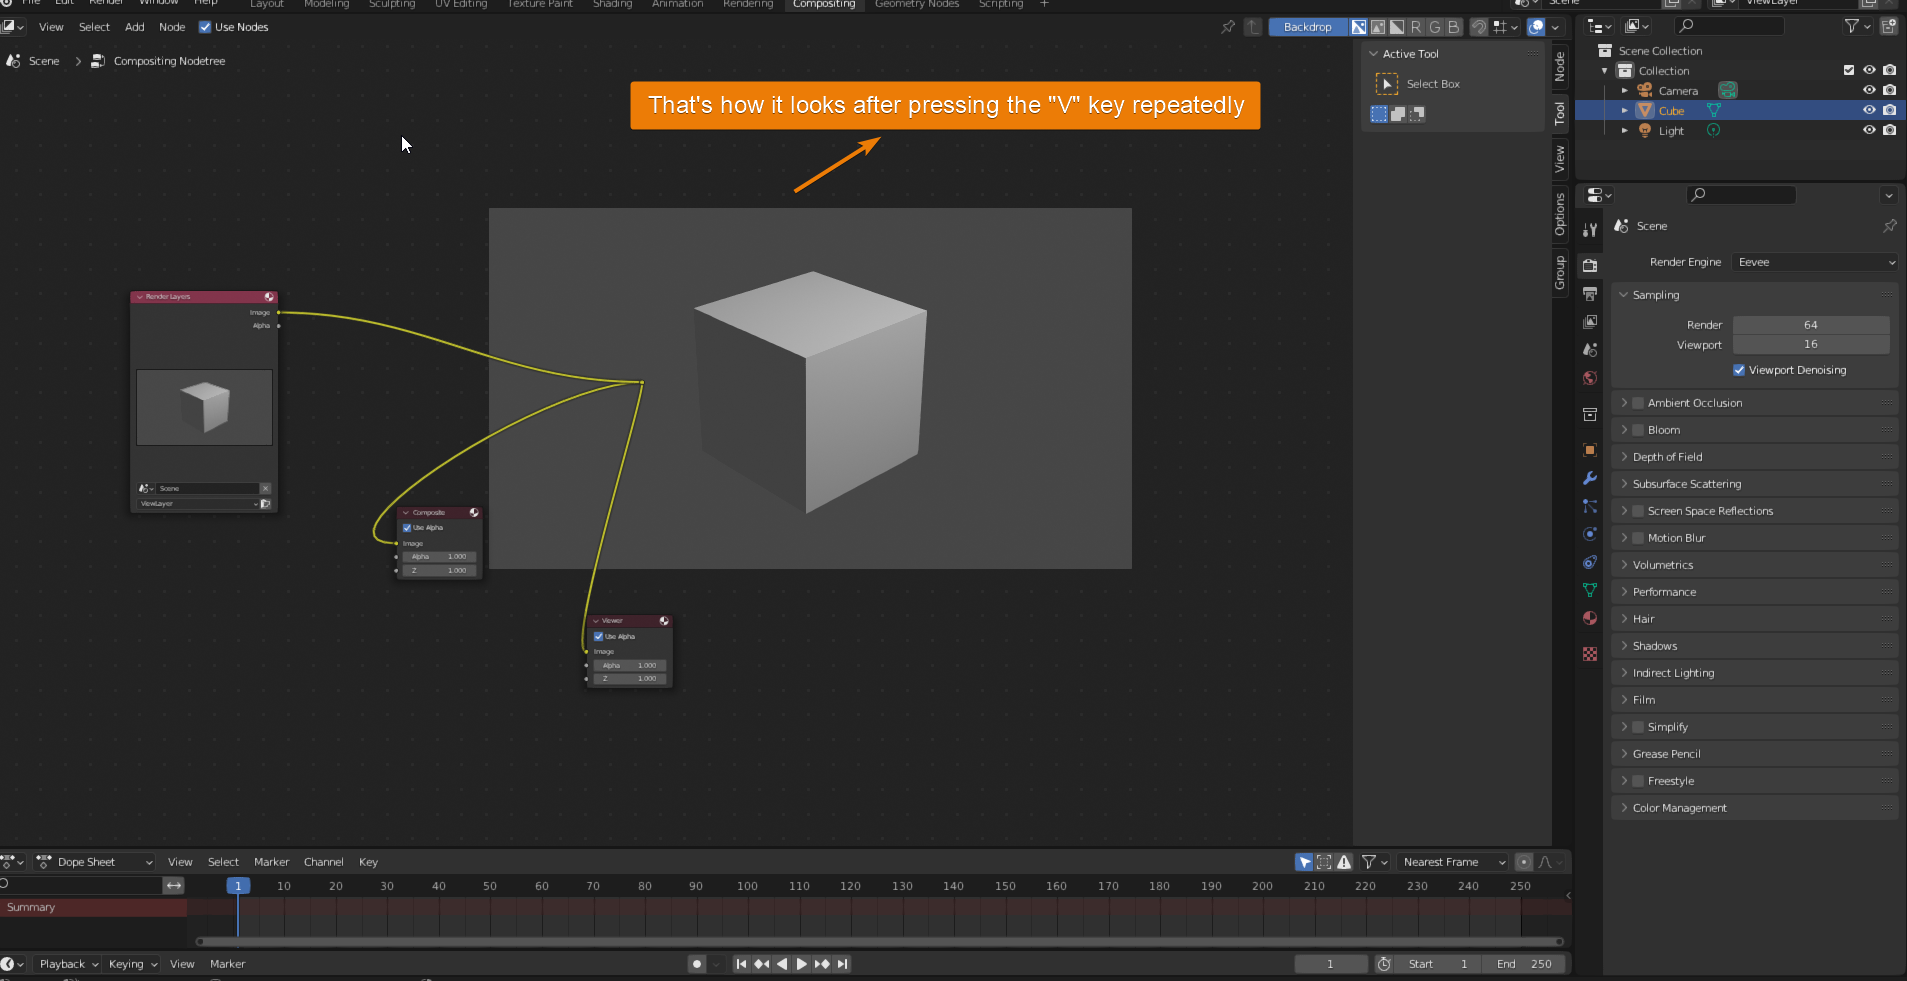
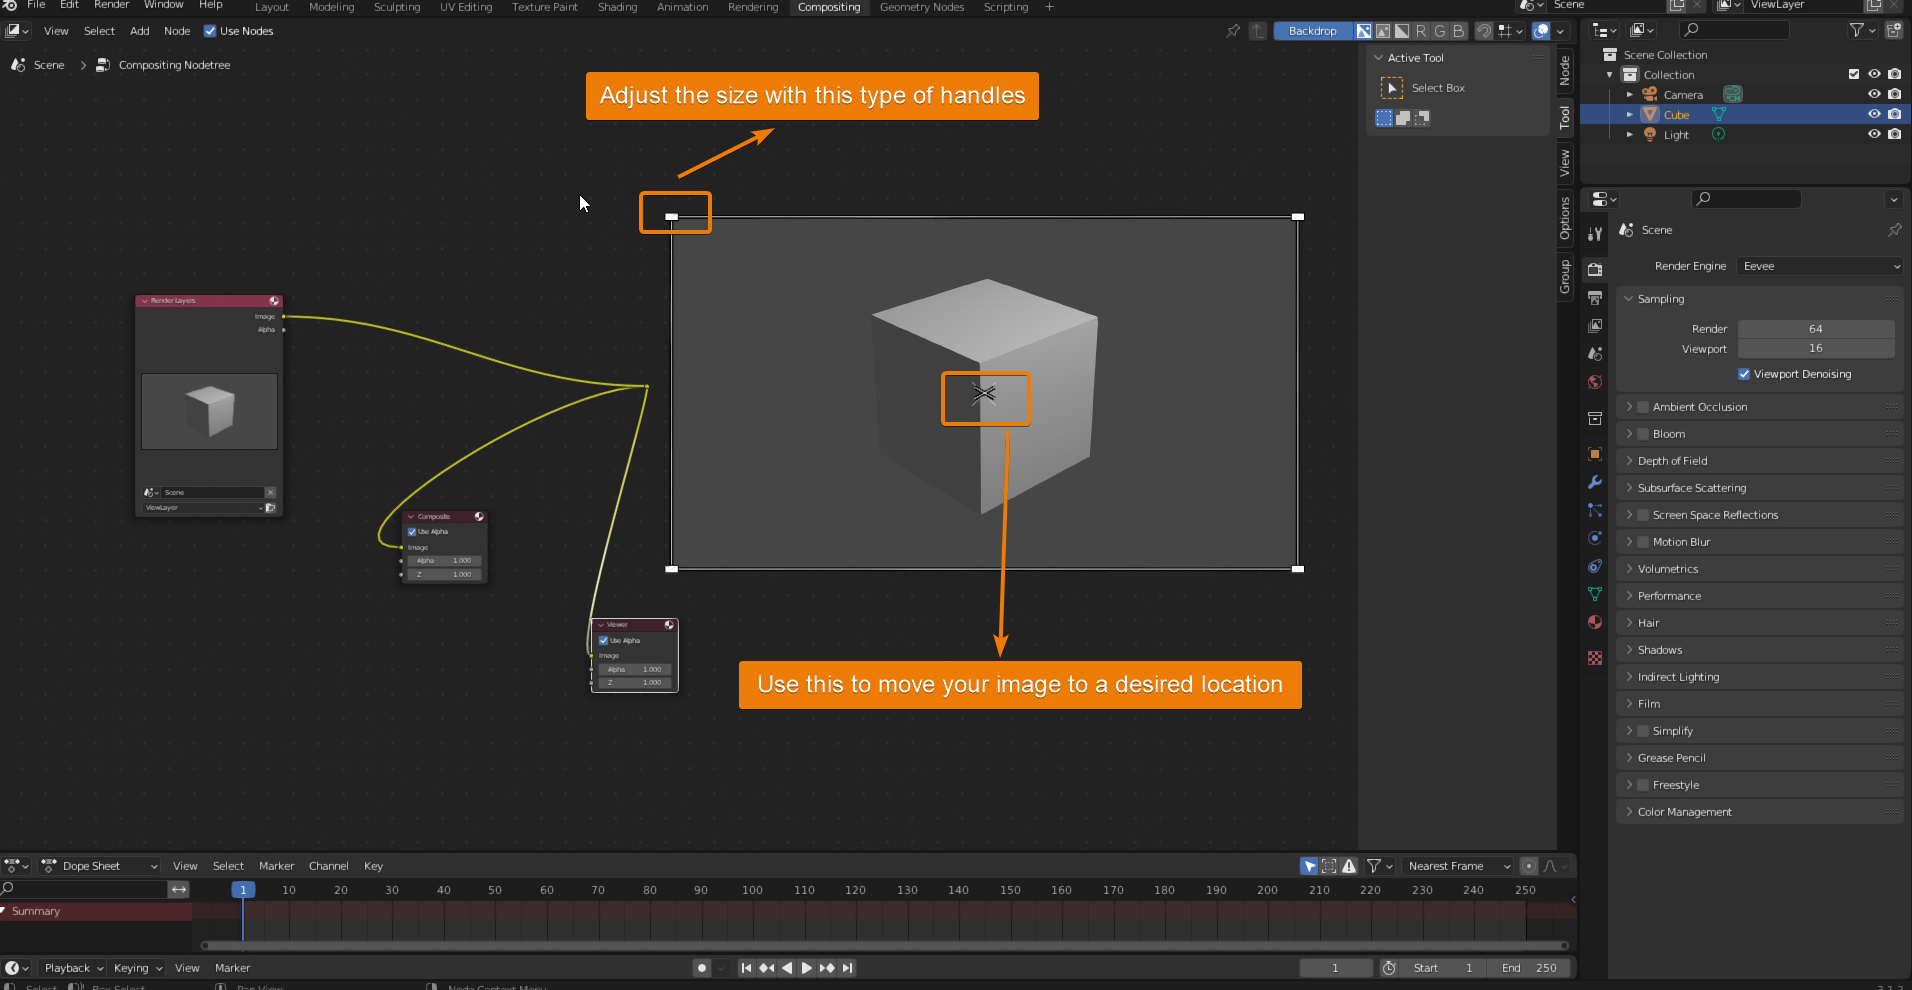
if you still need to adjust its size or location after pressing the "V" key, just click on the "Viewer" node and you will get some handles to adjust its size and location.
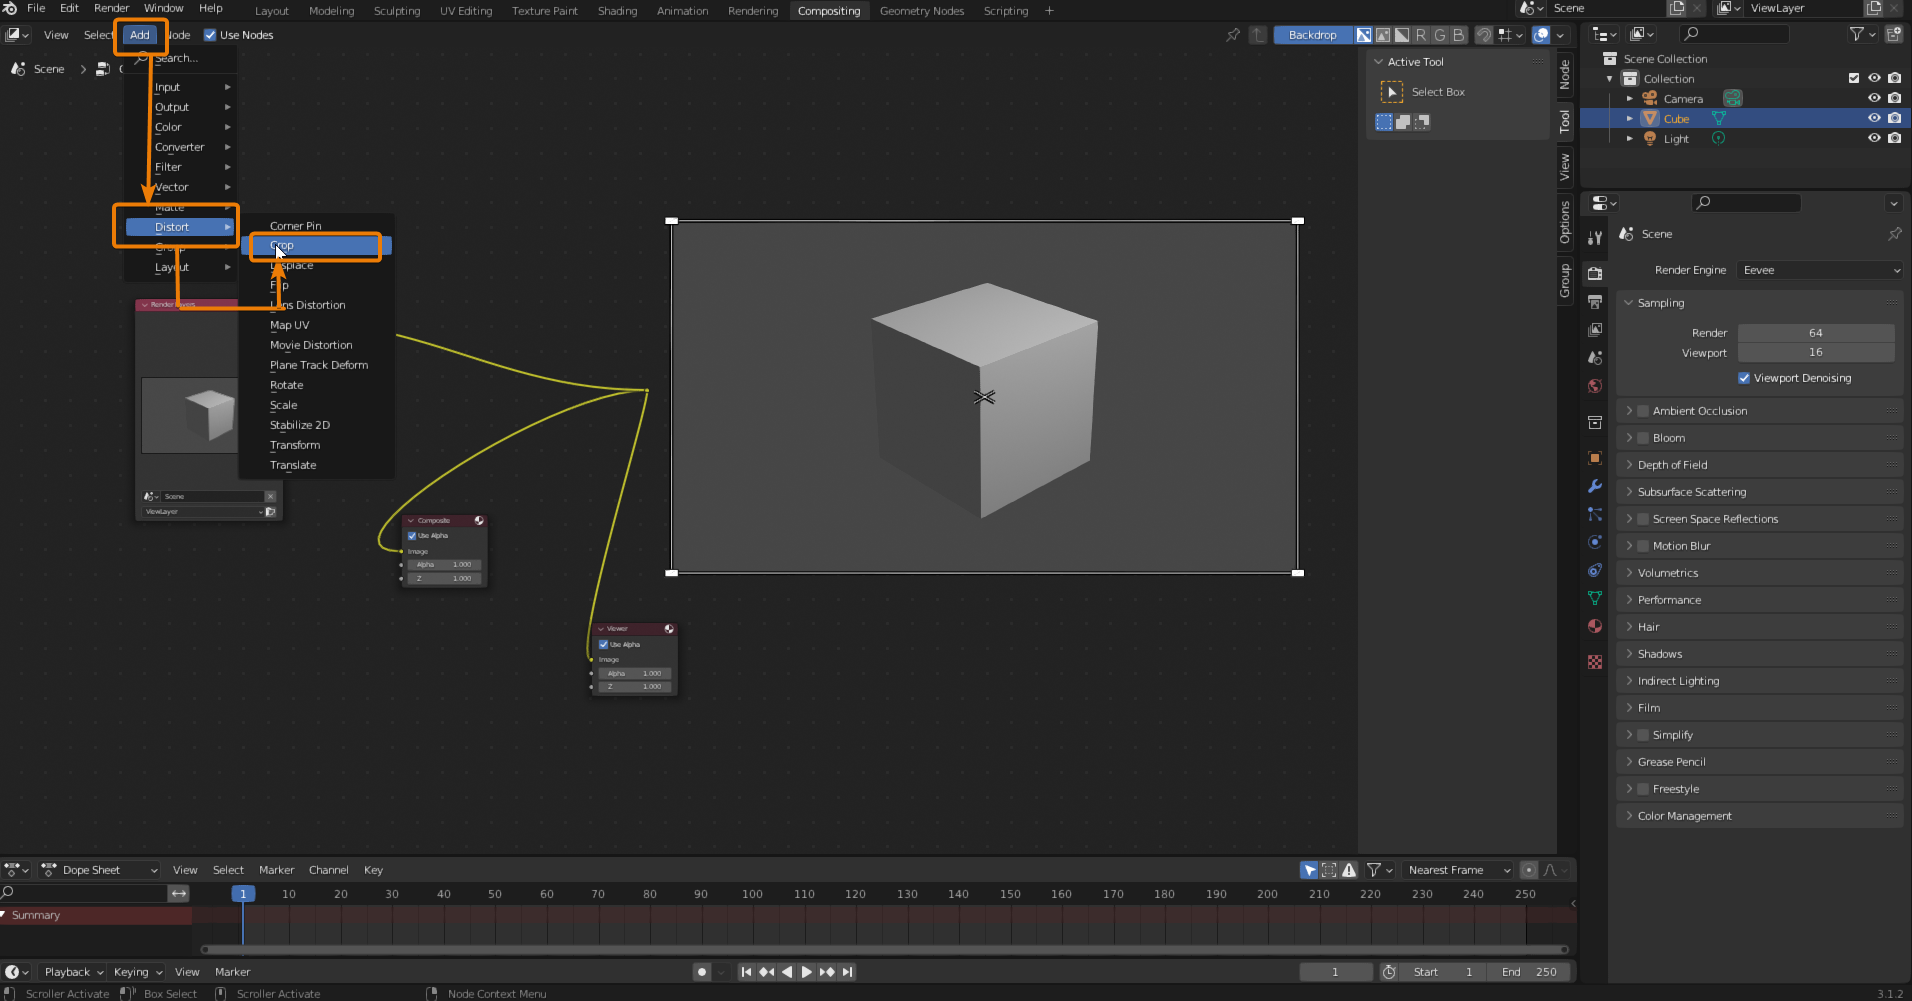
Finally, we got to the moment where we add our crop node. Go to the "Add" menu, click on "Distort" and then click on "Crop"
Once having the "Crop" node you can release it in between the "Render Layers" and "Composite" nodes. And you will immediately see that your render image has disappeared.
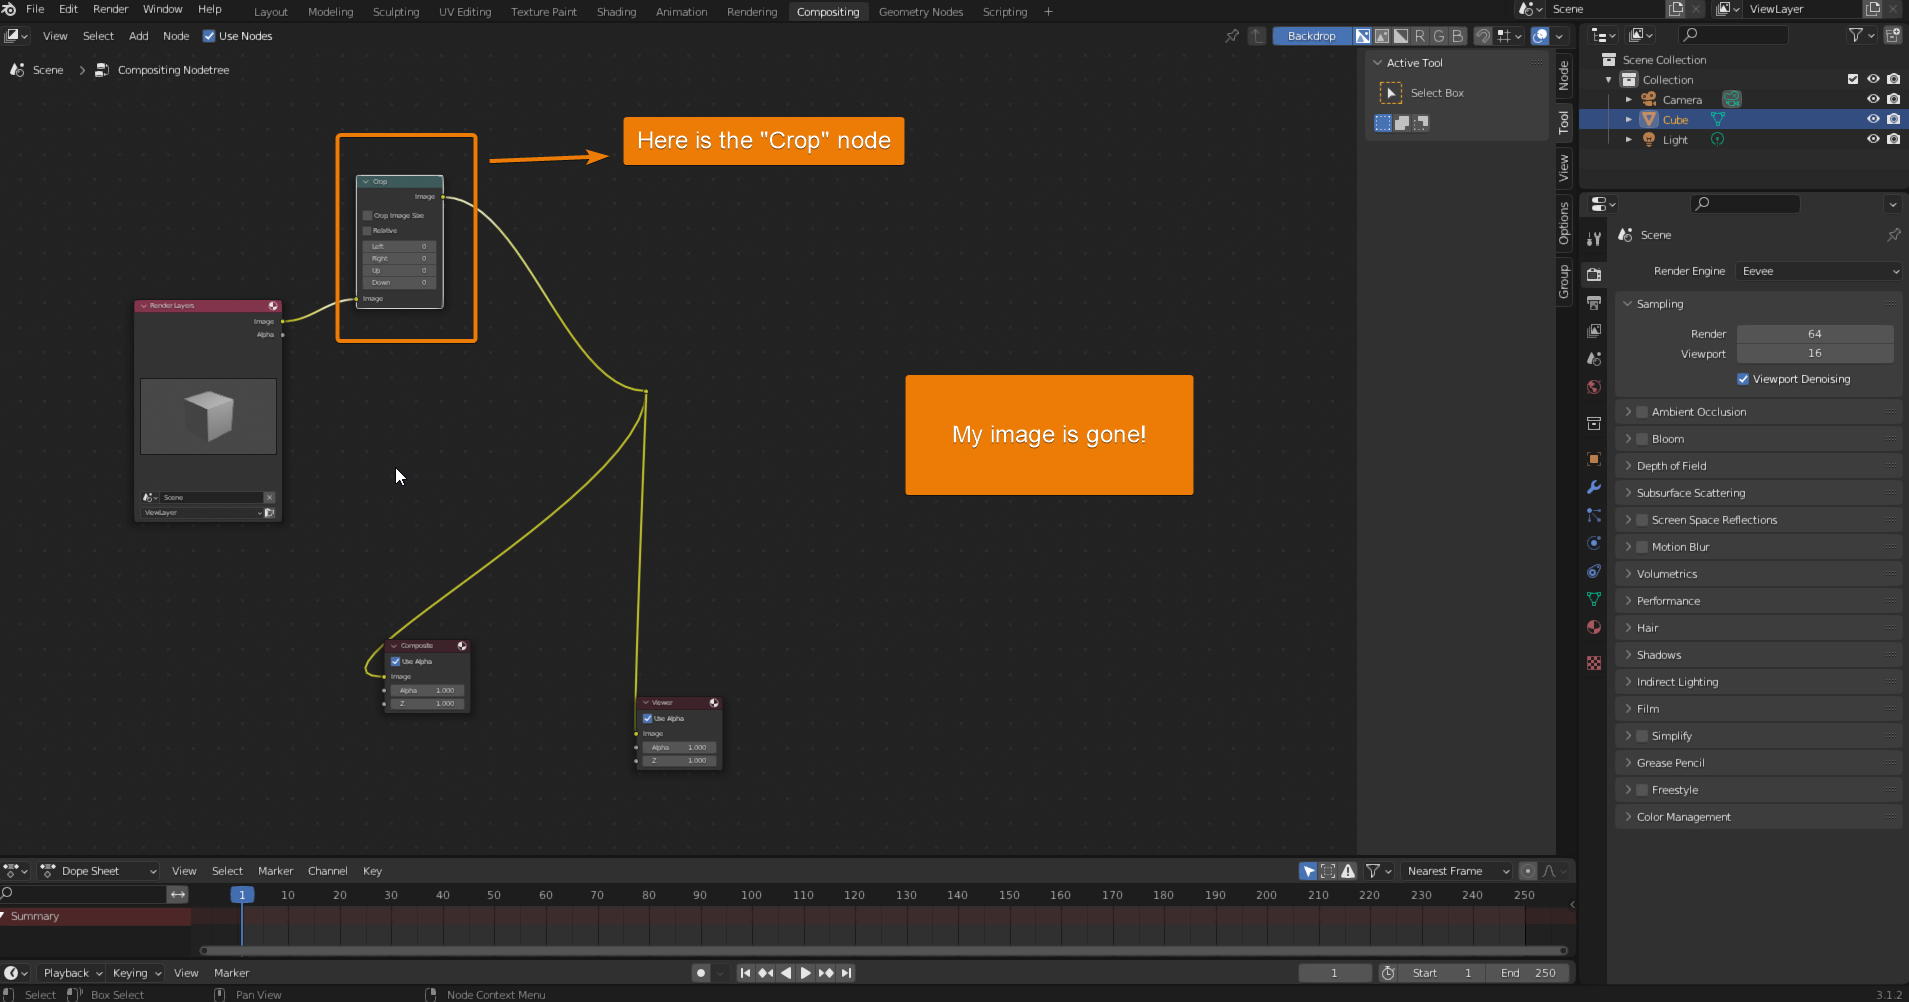
Move the values of the left, right, up and down options inside the "Crop" node until you see your render image again.

Now that you have your full rendered image on the screen again, you can decide the best way how to crop it. For cropping the image you just need to modify the values of the crop node again until you get the desired result and tick "Crop Image Size".

I think that the crop image node is of great help for cropping out your rendered image without having to affect your scene. This means that you do not need to modify the position of your cameras, the position of your object or the render size in order to get a nicely cropped image after you have performed a render. Moreover, the process is really simple and will not take you more than a couple of minutes once you have learnt the steps.
I hope this was helpful to you.
Thanks for your time!
