


So you’ve just started learning Blender, you’ve got your good old friend the default cube just sitting there as you begin to model it into something show-stopping. You’ve textured it through the use of materials, but what if you change your mind? What do you do with all these extra, outdated materials now?
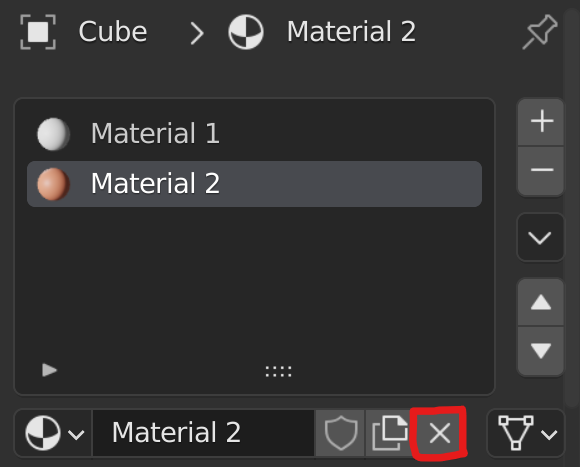
To delete a material, select the object and go to the ‘Material Properties’ tab in the properties panel. Select the material to be deleted and click on the ‘x’ sign underneath to ‘Unlink data-block’ and remove the material from the object.
One of the most important steps in maintaining a user-friendly, efficient workflow while working in Blender is to stay organized, and it’s far too easy to get lost in mountains of unused materials with random duplicates cluttering your workspace. Hence, it remains crucial to quickly discard any outdated materials on-the-go, so let’s explore how to delete materials from specific faces, objects, or even from the entire blend file.
Removing a material from an object can be done by following a few simple steps:
In this image you can see how pressing the X on the material leaves the material slot to be filled with an actual material.

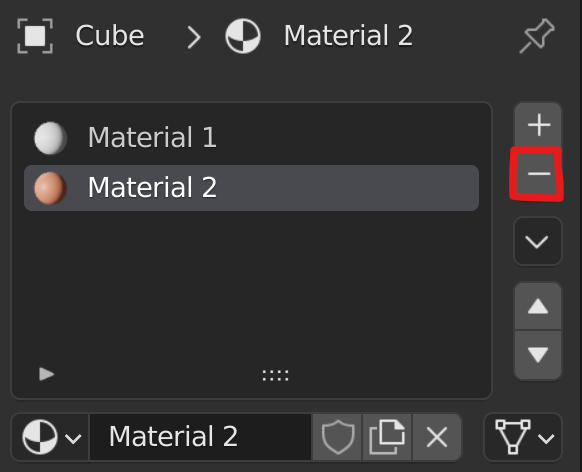
In this case, we press the minus sign and delete the selected slot together with any material that might be present in it.

If none of the objects in a scene require a material, it can be completely deleted from the blend file altogether in two different ways:
Method 1: Purge Orphan Data
Any unused materials (i.e. materials that are not assigned to any object) are automatically deleted from the blend file when the blind file is reloaded. Hence, the second method includes simply re-opening the file.
Method 2: Reloading File
How To Unassign a Material from a Face
If you assign multiple materials to an object, only the first added material is shown on every face of the mesh. But what if you’d like a different material for different faces on a mesh? This is once more an easy task which can be accomplished in a few steps.

In order to unassign the second material from the face, reselect the face and repeat the process, assigning the original material to it instead.
As mentioned above, any unused materials are automatically deleted once the file is refreshed or reopened. However, it is possible to save a material (despite it not being in use whatsoever) for any future use or reference.
To do so, simply select the required material in a slot and select the Fake User icon shown next to the name of the material (displayed as a small shield symbol) before removing it. This saves the material and prevents it from getting deleted upon refreshing or restarting the file at any later time.

Ever since the release of Blender’s newest 3.0 version, the asset browser has been one of the most efficient ways of storing and duplicating assets for a much faster workflow. So, what is it?
The asset browser allows grouping and storing of different objects and materials (both of which come under the term ‘Assets’) so that they can be used in a drag-and-drop manner to be placed in a scene.
For example, a material stored in the asset browser can simply be dragged above an object and mesh, and it will be automatically added on in the Material Properties tab for use.
To mark a material as an asset, simply right-click on it and select Mark as Asset in the list menu.
To view all the materials marked as assets, follow these steps:
With the incredibly intuitive user interface of the new asset browser, it becomes notably easy to delete assets as well.
Simply right click on an available material in the browser and select Clear Asset. Once more, the option for Fake User can also be selected to clear the material but still keep it for future use.
Materials in Blender are a crucial part of creating anything from truly mesmerizing artworks to photorealistic product design or even colorful game artworks, and this further emphasizes the importance of keeping your materials organized and easy to use and reuse over and over again.
Developing a proper workflow when working with hundreds of different materials is certainly the key to your success.
Thanks for taking your time to go through this article, and remember: keep those materials organized!
