


Duplicating objects is generally a common step in artists' workflows, but the linked duplicate feature in Blender is often overlooked. It can be handy to learn how both of these actions work, and what both of them really do.
To duplicate an object in Blender, select it and press Shift+D or right-click and select "Duplicate Object". Move your cursor and left-click to confirm its new location. To create a linked duplicate press Alt+D or right-click and select "Duplicate Link" from the menu.
Let's now go into some more detail about the differences between a full duplicate using shift+D compared to a linked duplicate using Alt+D and when to use either one.
The duplicate feature creates a copy of the mesh which shares some, but not all, data-blocks with the original mesh. For example, materials, textures, and F-curves are shared between the original and the duplicate, but the rest of the data is a hard-copy. If you change either mesh within edit mode, remove any data blocks such as materials and textures, or add any modifiers, etc. the other mesh will not be affected: It is its own object.
On the other hand, a linked duplicate creates an instance of your object. This means that, for example, removing and applying new materials (not just changing the shaders) on either of the two will also affect the other object. Most importantly, changing the mesh in edit mode also affects all linked instances.
To make it a bit easier to understand, here's a short list of what linked duplicates share.
Linked properties:
Copied but not linked properties:
To create a full duplicate, select the original mesh, right-click and select "Duplicate" from the dropdown, or simply press Shift+D. The object is naturally in move mode, so move your cursor and left-click to confirm the new position, or immediately right-click to cancel the action and keep the duplicate in the same location as the original.
Creating a full duplicate is needed when you plan on changing the mesh of the new object without affecting the first one. Similarly, it should be used when wanting to change materials, textures, etc.
Creating a linked duplicate has similar steps, simply right click with the original object selected and choose "Duplicate Linked", or press Alt+D. Once again, you can either move the linked duplicate or right-click to keep it in it's original location.
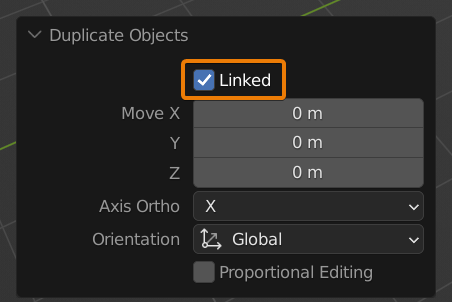
Another way is to duplicate your object as usual by pressing Shift+D, and then checking the "Linked" option in the duplicate object "Adjust last operation" panel that pops up in the bottom right of your screen right after the action.
Linked duplicates are naturally handy if you want to be able to change multiple objects at once in future with just a single action, rather than changing data properties for all the objects separately or even having to delete the duplicates and recreate them after making changes to the original object.
Moreover, as linked duplicates are merely instances of one single original mesh, they are much more efficient to render than full duplicates, which is quite useful when working with a large amount of objects. While the reduction in render times may not be noticeable with simple meshes, it can make an enormous difference with more complicated objects.
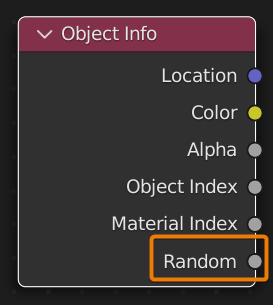
If you want some random customisation with linked duplicates, you can always drive the "Random" output on the "Object Info" node of the material shader to properties such as base color, roughness, bump scale, etc. to add some randomisation.
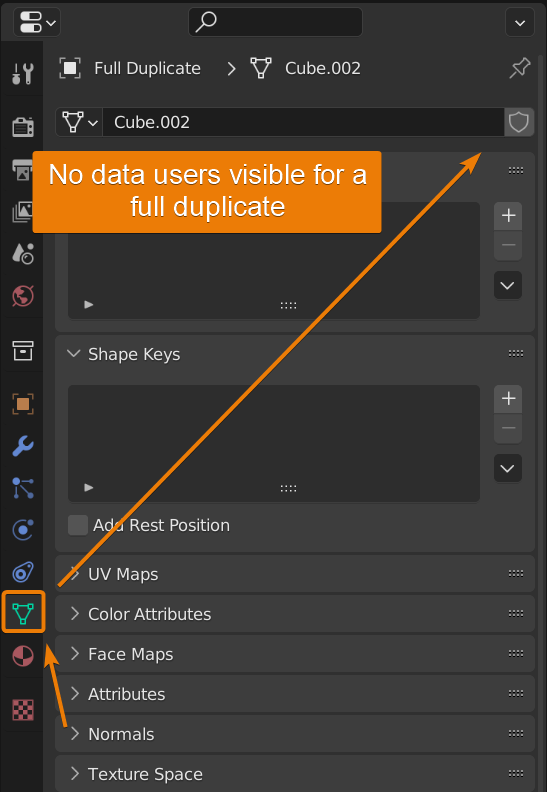
You can check whether an object is a linked or a full duplicate, select it and head to the Object Data Properties (marked by the green triangle icon, third from the bottom) in the properties editor.
At the top of this section you can see the name of the original object. Next to it you can see a number denoting the number of users of the mesh data: this is the number of instances of the object (including the original). This number won't be showing if the object is a full duplicate.
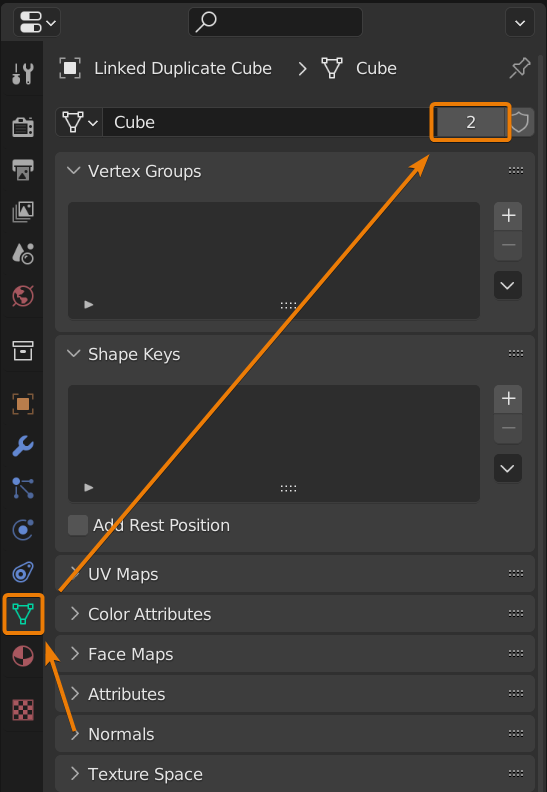
To make a linked duplicate into its own full duplicate, or to make it its own "single user", simply press on the number showing the number of data users for the mesh in the Object Data Properties in the Properties editor.
Now the duplicate is no longer an instance, but its own object. Changing the original will no longer affect the properties of this duplicated object in any way.
We've gone over the differences between full and linked duplicates, and when you might want to use either feature. Whether you're trying to cut down on render times or aiming to speed up your workflow, these tips are always handy to keep in mind.
Thanks for reading!
