


It is important that our objects get the right shading depending on the kind of surface and our artistic goals with the piece. By default, all mesh objects in Blender have flat shading. However, when we deal with round or organic shapes, we want the surface to be smooth, so that we don't get a visible sharp edge between each face.
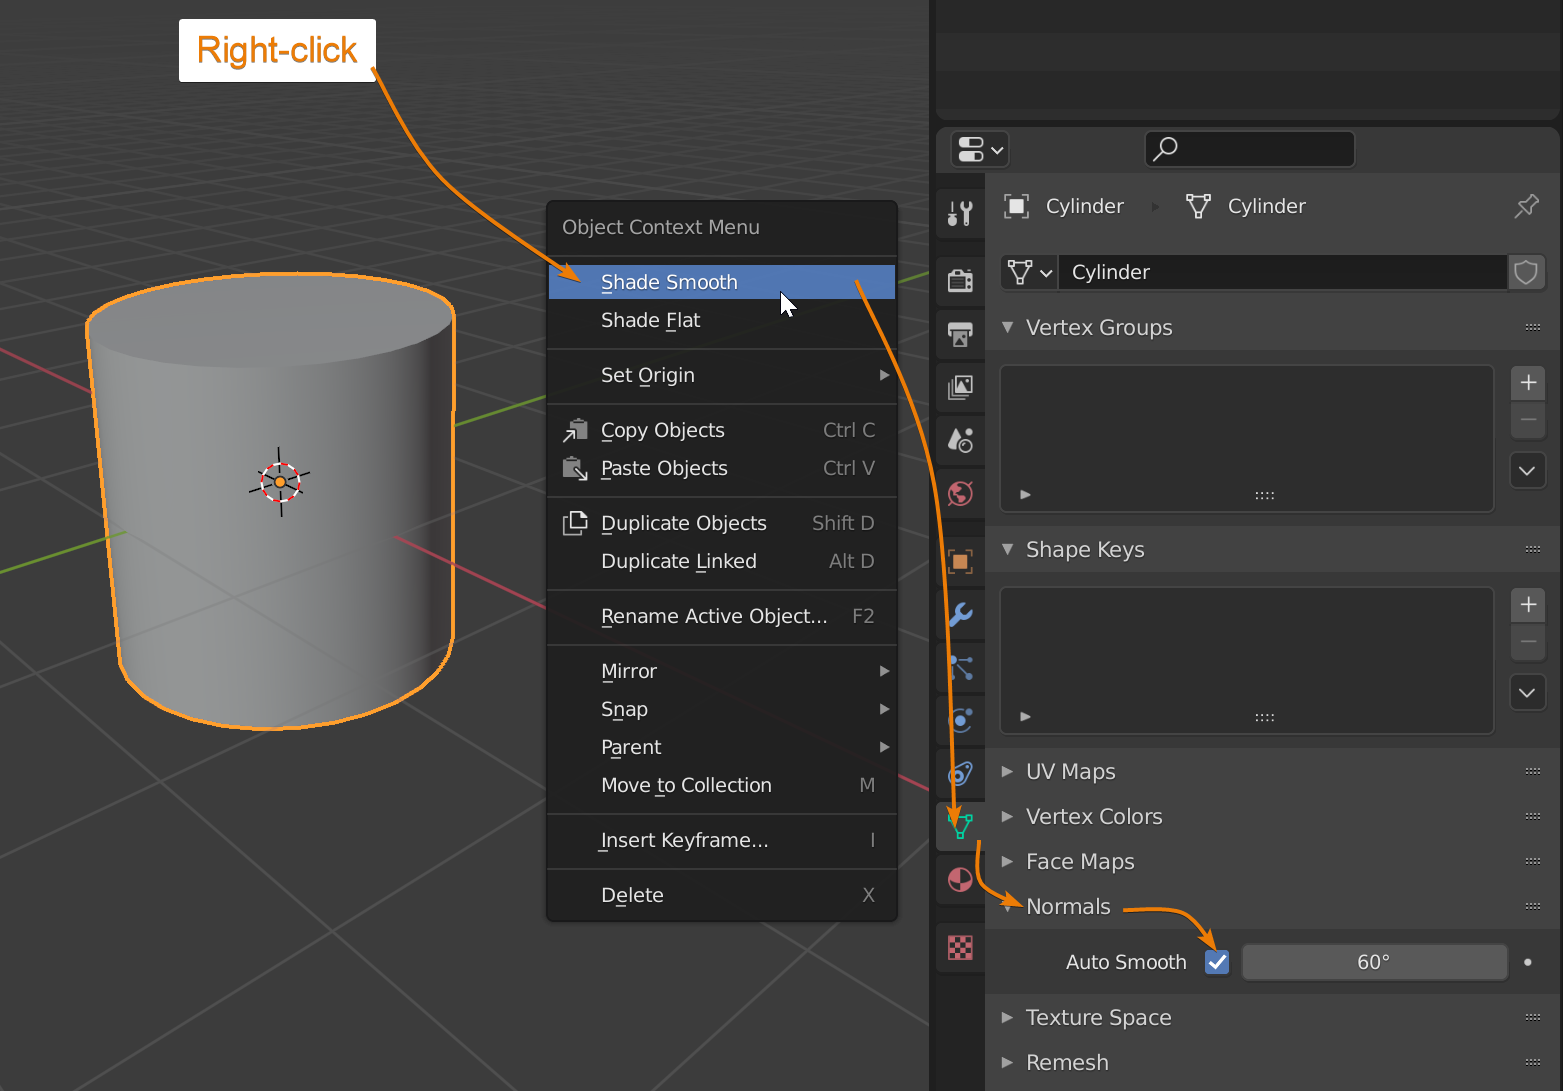
To smooth the shading of your object, select it, right click, and choose shade smooth. To switch back to flat shading, click shade flat instead.
Thats, great and all, but what does this all mean? And what if we have a slightly more complex scenario, like a Cylinder that needs both flat and smooth shading? Let's find out.

There are two kinds of shading we encounter when working with 3D art. The shading that determines if we have smooth or sharp transitions between our faces, and the shading we do in the shader editor when developing materials for our objects.
So how do we know when we are talking about what kind of shading?
Whenever you hear shade flat, shade smooth or object shading, we are talking about the kind of shading that determines smooth or sharp edges on the geometry.
When dealing with material shading, we often also hear acronyms like PBR (Physically based rendering), Shaders (as a thing rather than as a state), materials, and nodes.
In this article we are concerned with the first kind. For shading materials, this article will help you get started:
Related content: The complete beginners guide to Blender nodes, Eevee, Cycles and PBR
You can think of the shading of an object as the base coat when painting. Without the correct shading on the object, the material may not look as intended. For instance, we may see hard lines that shine through the material or different luminance on different faces.
To understand shading we need to have a basic understanding of normals, the driving factor of our shading.
A normal is the direction something is pointing. Vertices faces, and edges all have normals. A normals direction is a vector.
We can preview normals. In edit mode, go to the overlay menu in the top right corner of the 3D viewport. Find the Normals section close to the bottom of the drop-down menu and enable the normals for vertices, edges or faces, then adjust the size so that you see the lines drawn from each geometry element.
So, what does normals have to do with shading? The normals are the driving force behind the shading.
When we have flat shading, the normals are all pointing in the direction of the individual faces. This leaves no normals pointing in directions between faces, leaving a sharp edge between them.
When we switch to smooth shading, we average the normals between the faces so that we get a smooth transition.
By controlling the normals, we control the shading of our objects.
We have primarily three tools to control the shading when we need to combine both flat and smooth shading.
If we want only flat shading, we use smooth flat from the right-click context menu. But if we want smooth shading or combine the shading, we need to start with smooth shading, so start by choosing to shade smooth from the right-click context menu for any of these methods.
The first option, called auto smooth can be found in the object data properties. That is the green triangle icon in the properties panel. Here, find the normals section and check auto smooth.
Auto smooth will smooth any edge that is smaller than the given angle. So, for instance, if we set 90-degree, any angle between two faces that is lower than this will be shaded smooth. A value that works for most scenarios is 60-degrees.
This is how a cylinder looks with smooth shading and auto smooth enabled and set to 60-degrees.
Instead of letting Blender set sharp and smooth edges based on a fixed value, we can mark edges as sharp to have full control over what edges are sharp and not. Just note that this requires an edge split modifier. This modifier actually split the geometry making separate pieces. This is generally regarded as an outdated method of managing shading.
To mark an edge, follow these steps.

A blue outline will show what edges are marked as sharp. Now add the edge split modifier following these steps:
To clear a sharp marked edge, follow the steps above, but instead of choosing to mark sharp from the edge menu, choose clear sharp.
The weigthed normal modifier takes the size of faces into account to determine more dynamically what kind of shading a face should have instead of just averaging the normals.
Related content: How modifiers work in Blender, an overview
It is useful primarily when we have beveled edges in our geometry. The bevels are made up of much smaller faces along the perimeter of larger faces.
Related content: How to solve bevel problems in Blender
With smooth shading, Blender give them the same importance, but the weighted normals modifier can look at the size of faces and give them importance accordingly.
This creates a weighted transition between faces that favor larger faces, maintaining their flat shading while still shading beveled edges smooth.
Follow these steps to add the weighted normals modifier to your object.
There are a handful of settings in this modifier that we may need to configure depending on our scenario.
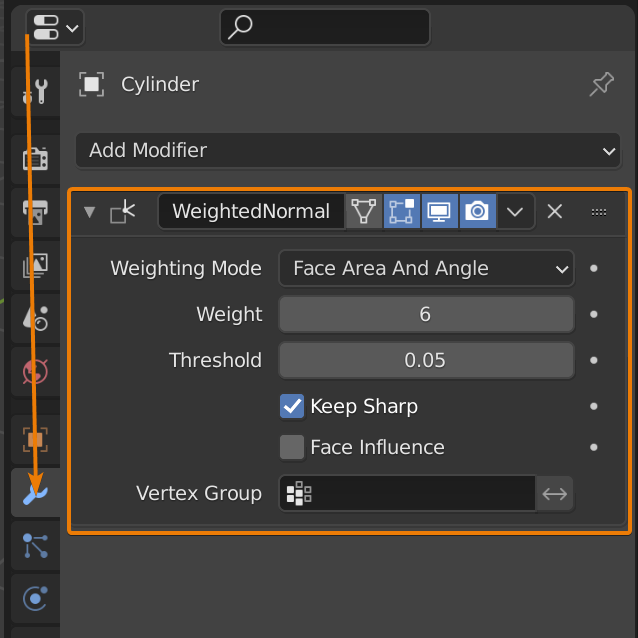
First, we have several weight modes. Here we decide how the modifier calculates the new normals, we can use either the face area, corner angles or both.
You can think of the weight parameter as weighting between faces that has weaker and stronger influence on the shading.
The threshold decides the lower end at which all faces are considered equal.
Keep sharp allow us to maintain sharp edges decided by auto smooth. This is useful when we have low poly objects without bevels.
We also have the option to set a face strength manually as well, we can do this by pressing Alt+N to bring up the normals menu. At the bottom you will find set face strength. If face influence is checked, we can use this as a manual way of assigning strength to different faces.
External content: Blender manual weighted normals modifier
We learned that normals is what controls how the shading of our objects looks and at the highest level we have flat and smooth shading.
Often, we have an object that needs a combination between smooth and flat shading or a weighted shading to look optimal. We looked at several tools that can help us achieve this at various levels and scenarios and different amount of control.
Thanks for your time
