


Noticeable only by the tiny magnet icon in the top of your viewport, the snapping tool is a commonly overlooked tool in Blender that could easily be saving you lots of time. The most versatile of these is the vertex snapping option, which allows you to snap any vertex, edge, face, or object in general to a singular target vertex belonging to the same or even a different mesh.
To snap to vertices in Blender, go to the snap menu in the header in the 3D viewport. Select vertex. Next, turn on snapping by pressing the magnet icon next to the menu. Now select the object or geometry you want to snap, press G hover your cursor over the target vertex you want to snap it to. Left click to confirm.
Let's explore the various ways we can snap to a vertex in Blender and some examples where it might be useful.

When in the 3D viewport, the snapping options can be find in the centre of the header, at the very top of the screen. The snapping settings are denoted by a small magnet icon with a ruler-like symbol next to it:


The magnet icon can be pressed to actually toggle the snapping - if it's grey it means snapping is off, whereas if it's blue it means that snapping is enabled.
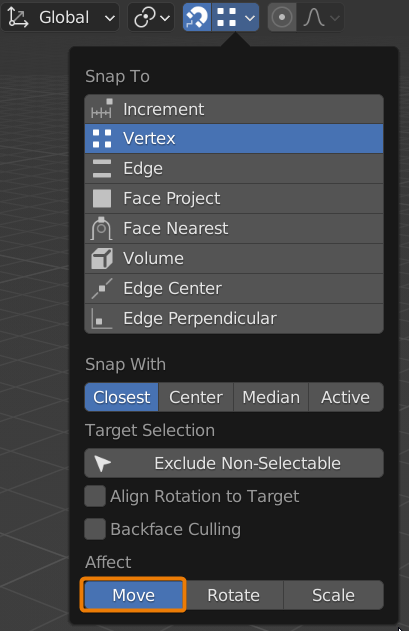
The dropdown to the right allows you to access the snapping options, and this is where you can select vertex snapping as well as customize it's effect:

In the same dropdown, you can find numerous settings to customize the effect of the snapping tool.
The most used of these settings is the "Snap With" option, which is especially helpful when snapping something in object mode, or alternatively snapping a selection of multiple vertices in edit mode.
Here, you can choose one of four options: closest, center, median, active. This essentially controls which vertices in your selection are snapped to your target vertex. If you have a single vertex selected (in edit mode) to move, then naturally only that one vertex will snap to the target vertex. However, if you have an entire object or multiple vertices selected, the 'closest' setting means that whichever of the numerous vertices is closer to the target object is the one that will get snapped, while the other selected items will simply follow.
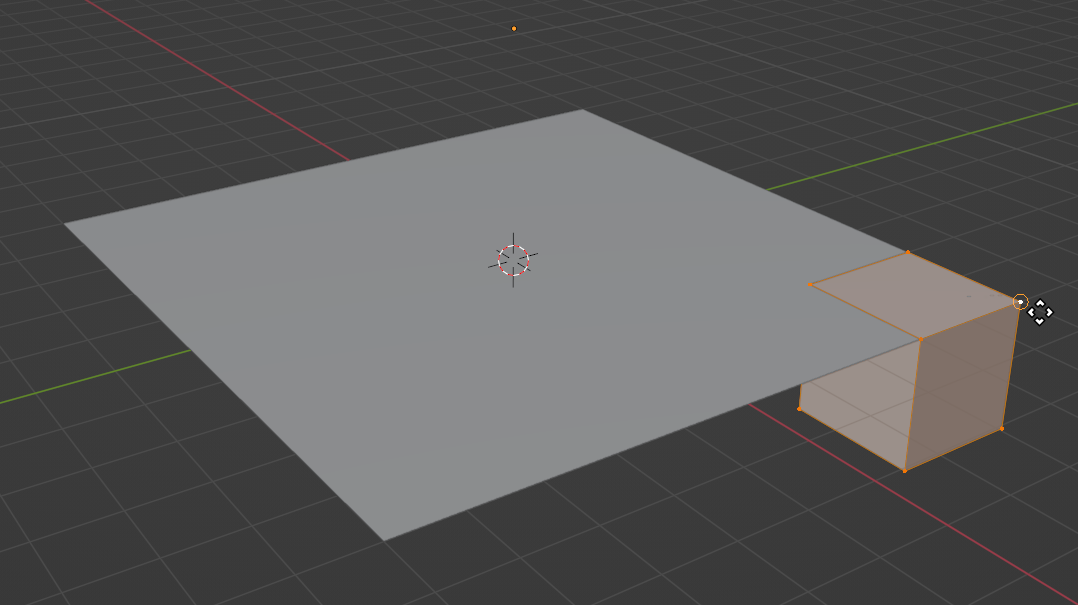
An example of this can be seen below, in edit mode for easy visibility of the vertices.
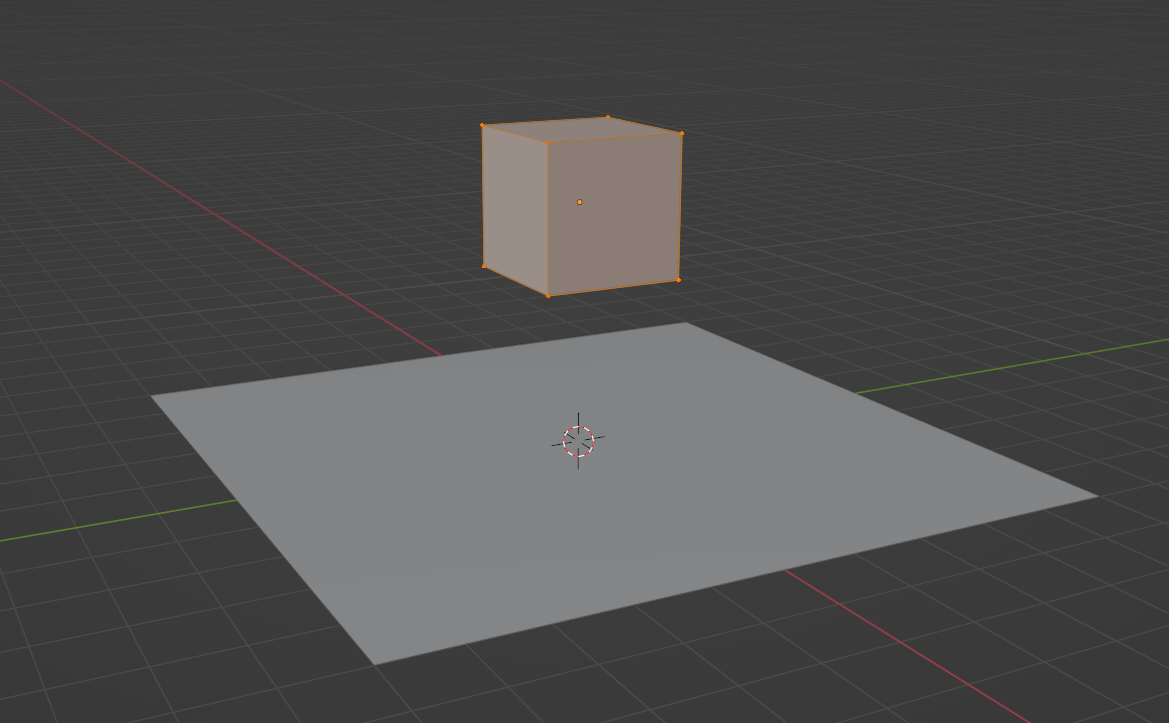
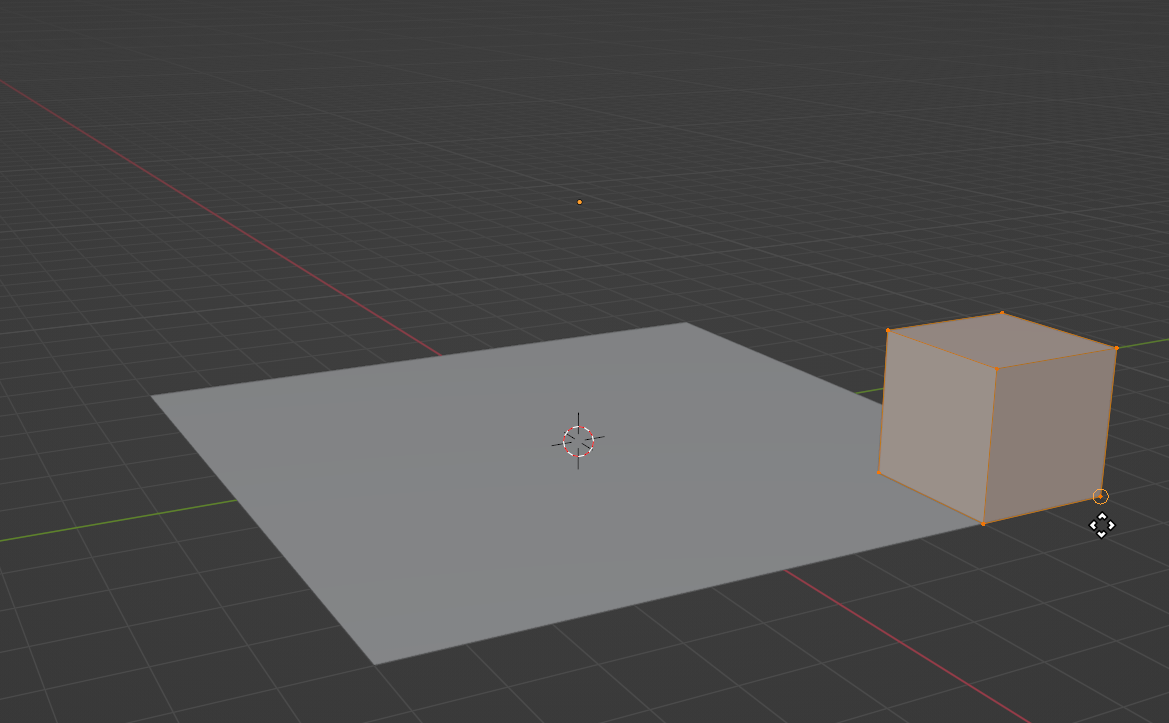
In the above example, it can be seen that when the 'closest' option is selected to snap with, the bottom right vertex of the cube is snapped to the target vertex, as it is closest. This effect is the same in object mode, although it may be trickier to see which vertex is getting snapped in this mode, especially for more complex meshes.
The 'center' snap with setting snaps the center of the selection to the target vertex, even if there is no vertex at the center itself. Whether you have one or more edges selected or one or more faces, the center location of the entire selection is chosen to move to the exact location of the target option. The 'median' option works in the same way.
The 'active' option might seem to work differently between edit and object mode, but in general the concept is the same. In object mode, having 'active' selected means that the origin of the selected mesh will be snapped to the location of the target object.
In edit mode, choosing 'active' means that whatever vertex or edge or face was selected last will be snapped to the target object. Of course, if you last selected an edge or a face, then the center of that last selection will be snapped. If you don't have any last or active selection, then once again the center of the entire mesh (not the origin) will be snapped.
This setting, which can be enabled using the checkbox in the snapping settings dropdown, simply rotates the selection such as to align its z-axis with the normal of the target vertex after it's been snapped.
A helpful option to enable when using this setting is the visibility of the normal direction of the vertices for the target mesh. To make these visible, select the target object and hit Tab to go into edit mode. Open the overlays settings dropdown in the top right of the 3D viewport:
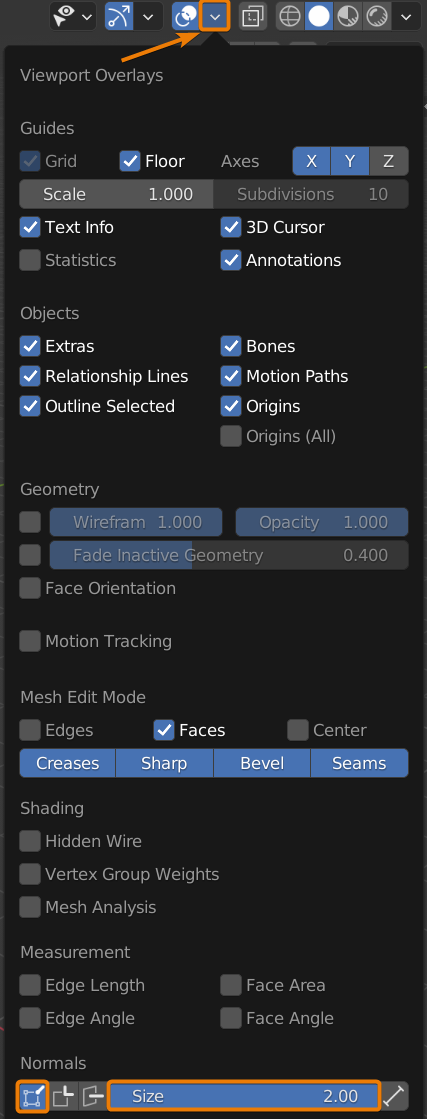
Enable normal visibility for vertices by selecting the left-most option at the bottom of the dropdown, and increase the size to a large value to make it more visible. The normal directions of vertices can now be seen when in edit mode.
Enabling this setting allows you to only snap to target object that are selectable - this way you can speed up your workflow by making certain objects un-selectable so that you don't accidentally snap to them if not needed.
Sometimes you may want to use vertex snapping for a single movement, rather than multiple times in a row. In this case, it may get tedious to enable snapping for use and then disable it afterwards.
Hence, a quick shortcut to use vertex snapping when it is disabled is to press Ctrl while moving your object or selection. Then you can continue to hover over the target object as usual to snap to it. All this does is temporarily enable snapping just for as long as you're holding down Ctrl, but not at any other time.
Do make sure that you first enable the vertex option in the snapping dropdown as well as any other desirable settings before you use the shortcut.
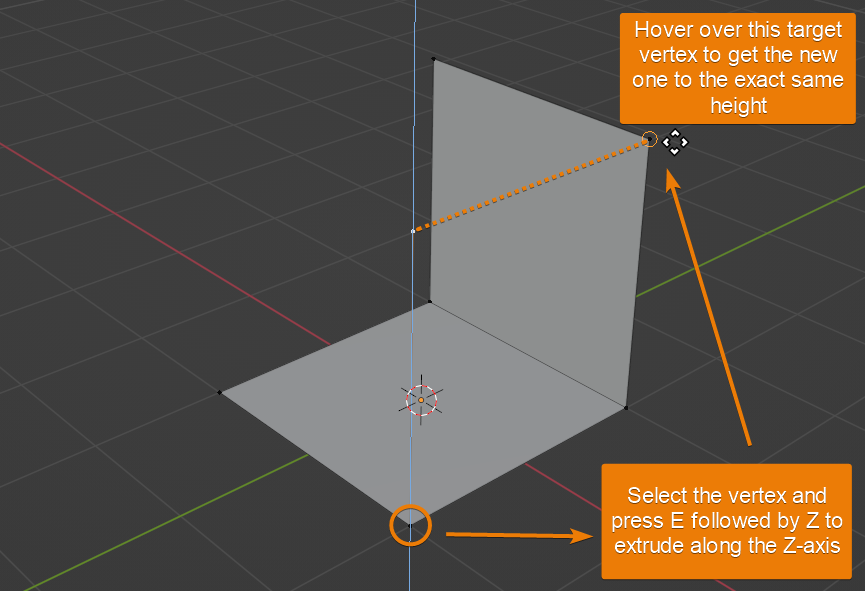
Building up a mesh manually can be made much easier by setting up a quick workflow to extrude and snap vertices quickly. To do this, make sure you have vertex snap enabled by clicking on the small magnet icon in the top center of your 3D viewport.
Let's use an example of building up a cube from the following 2 faces:

Let's start by selecting one of the 2 free vertices on the horizontal face. Press E to extrude, and immediately press Z to limit the movement of the extruded vertex only to the Z-axis.
With vertex snapping enabled, if you now hover over one of the top vertices on the vertical face, the new vertex will automatically snap to the correct height.
Now you can simply select the new vertex as well as the 3 other vertices on the same side, and press F to create a new face:
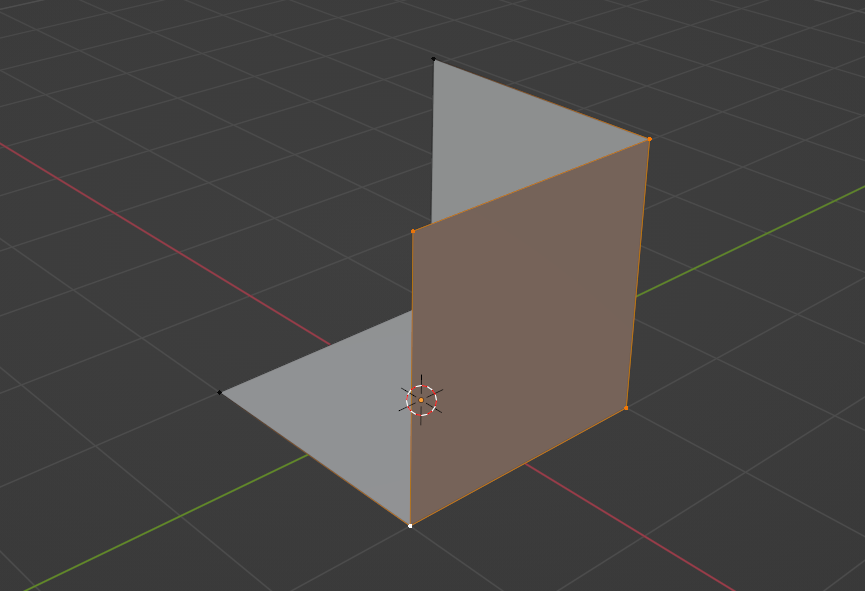
Next, repeat the same steps for the other available vertex on the horizontal face to get the following
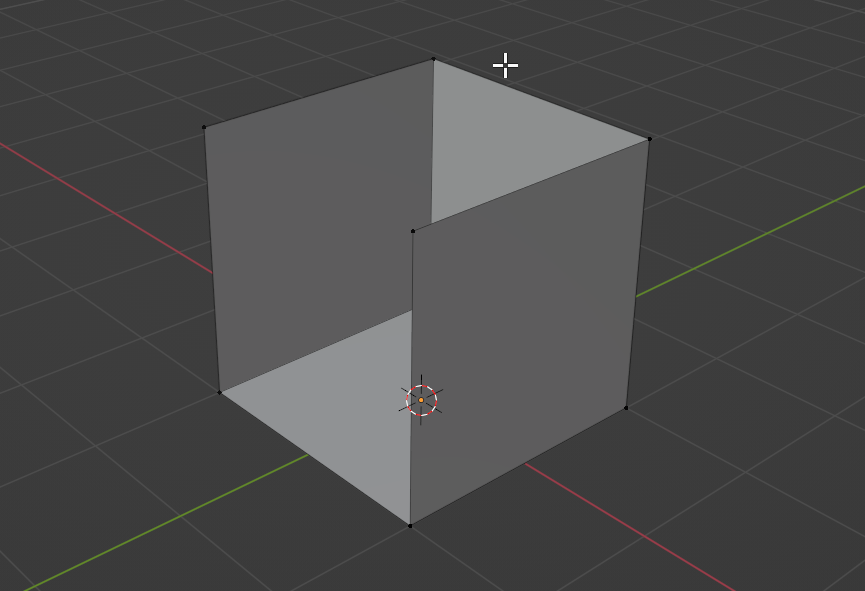
The final step is simple, select all the top vertices and hit F to create a new top face, and do the same for the last side to get your full cube back!
This example was quite redundant, but displays how handy it can be to use vertex snapping to speed up your workflow while creating meshes manually, especially for hard-surface modelling.
Vertex snapping is a reliable tool to use to quickly relocate selections, and will almost always work with great ease. In case issues do arise, as in the snapping doesn't work, the underlying cause is usually simple.
In case snapping isn't working, make sure it is enabled in the top of your 3D viewport. Next, open the dropdown for snapping settings and make sure vertex snapping is selected.
If the issue is still there, double check whether you are in the correct mode (edit/object mode) for your neneds.
Another reason may be if you have selected "Exclude non-selectable" in the snapping settings. If your target object is non-selectable and this setting is enabled, you won't be able to snap to it.
Lastly, you could've switched the "Affect" setting in the snapping dropdown. The most common affect setting is for "Move", so make sure it is enabled so you can snap to target vertices while moving.
We've gone over numerous settings for using the vertex snapping tool in Blender, as well as some helpful shortcuts to speed up your workflow. Whether you are trying to manually build up meshes or you're trying to move different meshes to align perfectly, vertex snapping is an incredibly handy tool to have under your belt.
Thanks for taking the time to read!
