


Blender's subdivide tool and subdivision surface modifier are both very helpful for creating intricate, smooth, and aesthetically pleasing models while keeping a simple and clean mesh. However, you might at certain points want to undo such subdivisions to simplify your mesh for rendering or exporting. Luckily, this is just as simple and can be done with just a couple clicks.
To un-subdivide your geometry, select the relevant faces in edit mode and press Ctrl+E to bring up the edge actions, followed by U to select un-subdivide from the list. Adjust the number of iterations in the last action panel that shows up in the bottom left of the viewport.
Now let's go into some more detail about how to adapt a non-destructive workflow while using subdivisions, and how to use modifiers to achieve interesting effects with your geometry, as well as troubleshooting some common issues that may arise while using un-subdivide.
In short, a subdivision surface modifier gives meshes a more smooth appearance by splitting or 'subdividing' all faces.
When using this modifier, you might've noticed that it does not allow you to change the new subdivided faces in edit mode unless you've applied the modifier. This is because the modifier is a 'non-destructive' tool.
Not being able to edit the new geometry means that you can undo the subdivision surface whenever you'd like. To do so, you can choose to reduce, remove, or temporarily disable the modifier.
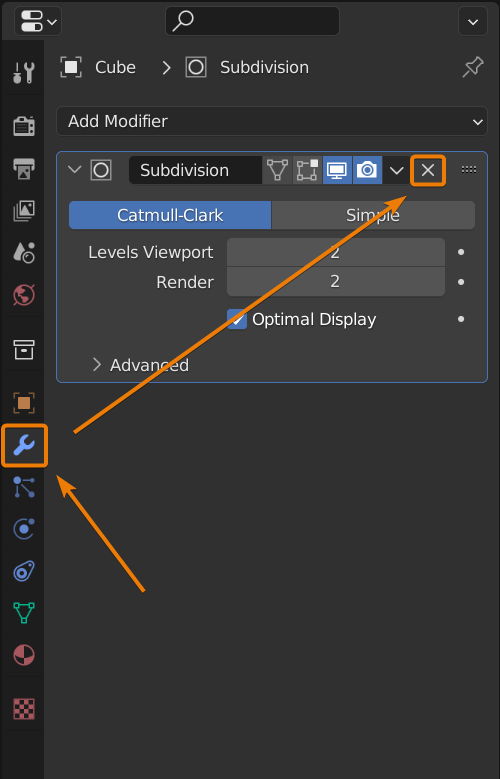
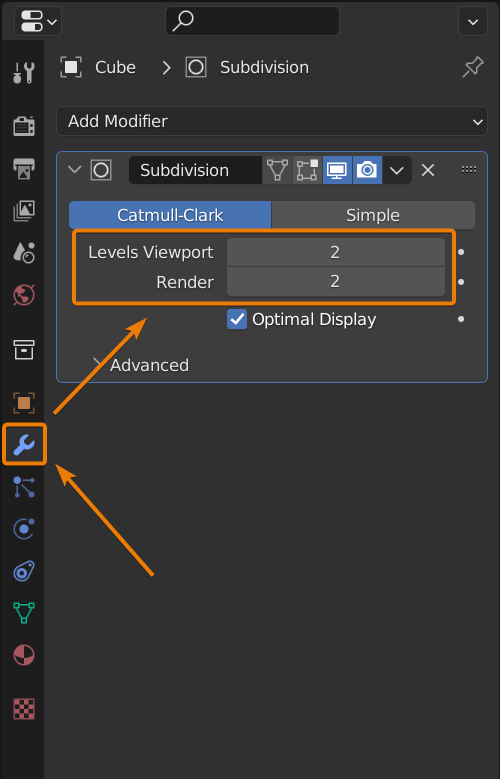
To remove the subdivision modifier, select the object and head to the Modifier Properties section (donated by a blue wrench icon) in the Properties editor. Locate the subdivision modifier and press the X symbol in the top right corner to delete it.
Alternatively, you might want to temporarily disable the modifier, so that you can undo the subdivision but get it back at a later point in time. Once more, this is entirely possible thanks to Blender's non-destructive approach to modifiers.
In the same modifier settings, you can disable the modifier in the viewport by pressing the monitor icon at the top of the panel. If the icon is blue, it means that the modifier is enabled, and if it's grey it means it's disabled.
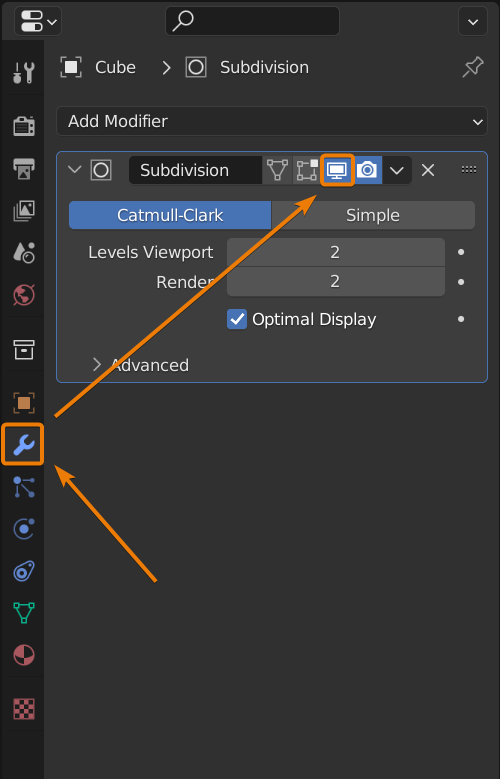
If you only disable it the modifier in the viewport view, it will still show up in the render. You might want to do this if you do want the subdivision modifier, but want to temporarily turn it off while you're working with a complex scene to reduce lag.
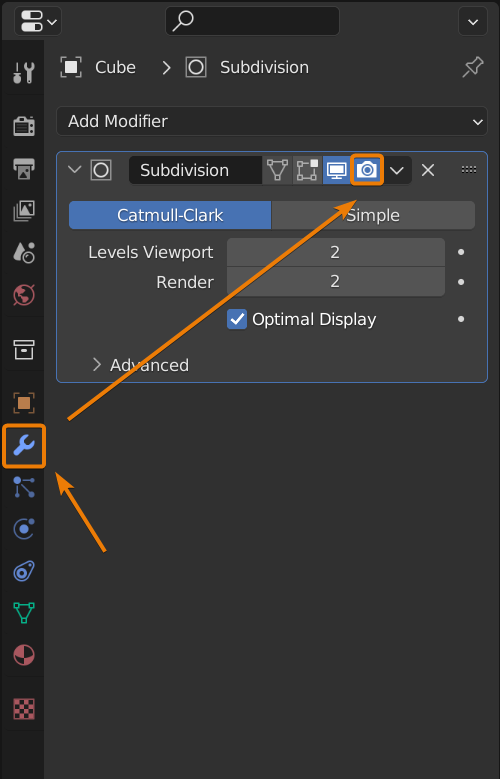
In case you do want to disable it in the final render as well, click the small camera icon near the top of the settings.
Lastly, you might have multiple levels or iterations of the subdivision modifier, and you might want to reduce these. This setting can also be found under the modifier, where you can reduce the subdivision levels in the viewport and the final render:
In case you've already applied the subdivision surface modifier, you can still undo the subdivision by using the decimate modifier.
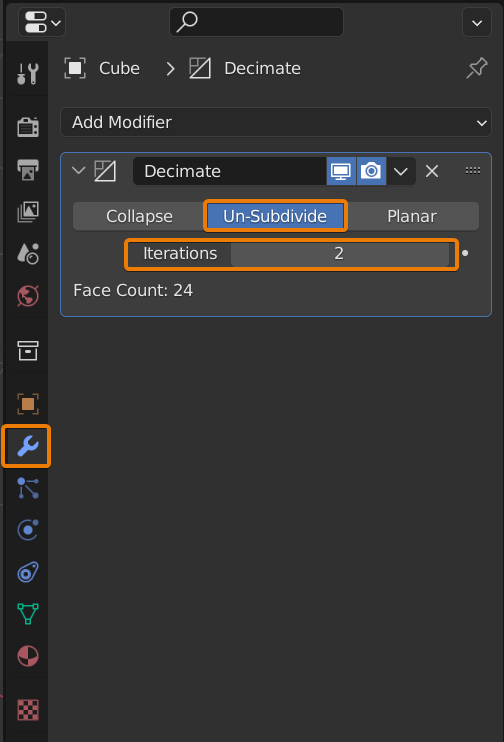
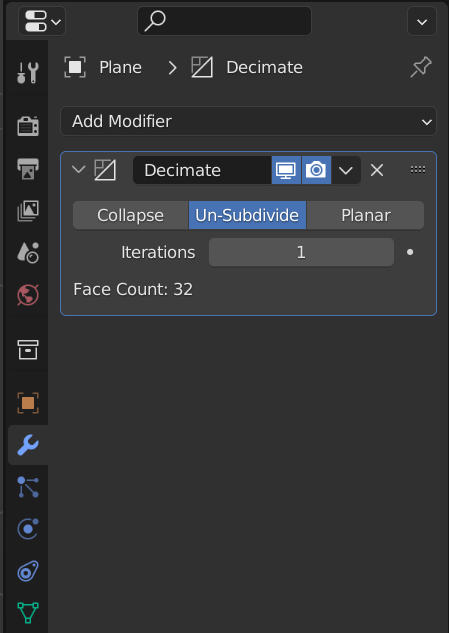
To use it, head to the Modifier Properties tab (donated by a blue wrench icon) in the Properties editor. Locate 'Decimate' in the Add Modifier drop down and select it. Change the mode to "Un-Subdivide", and increase the number of iterations as per your liking.
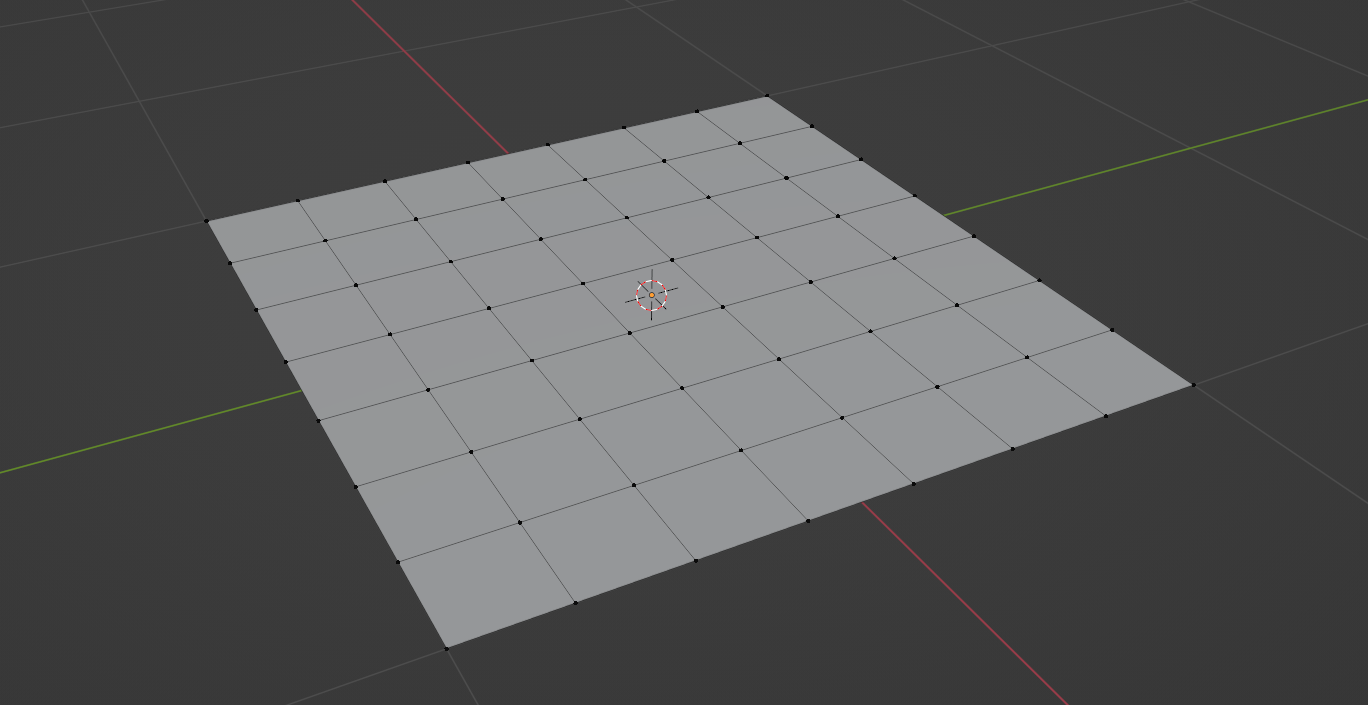
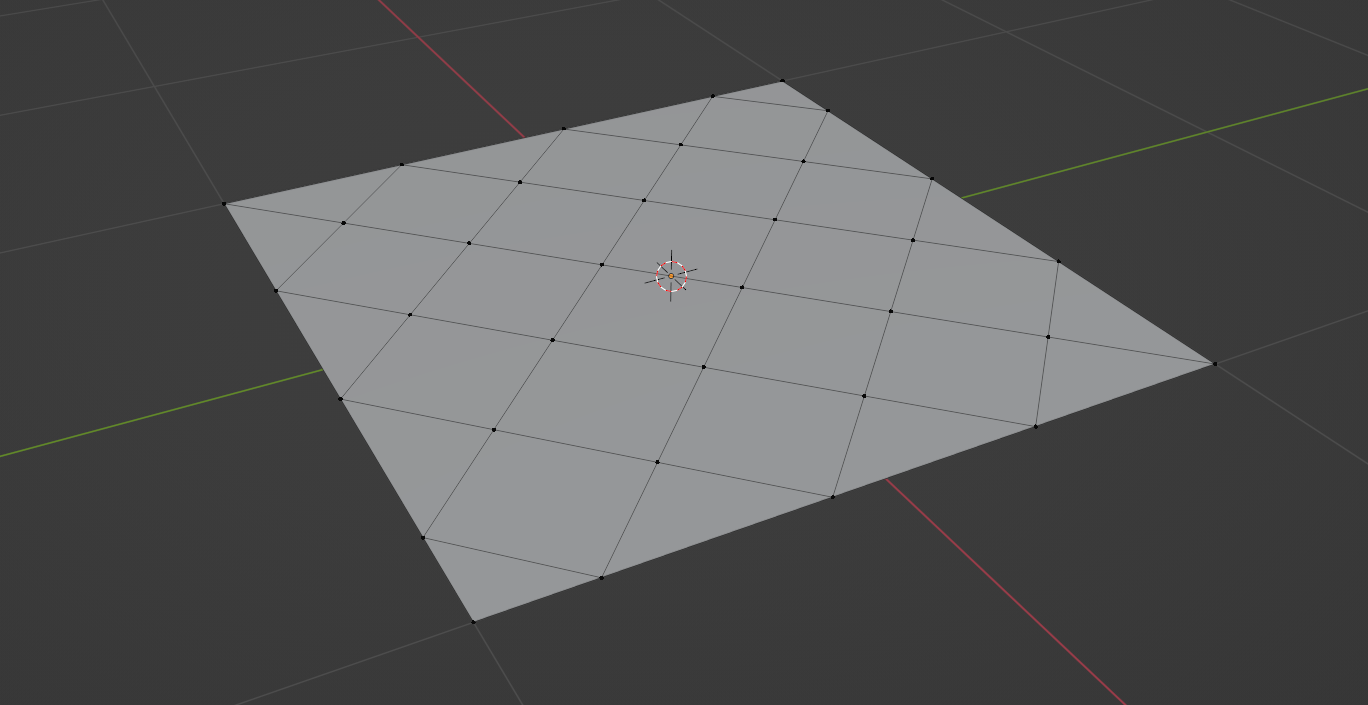
The way that this decimate modifier works depends a lot on the number of iterations you choose to set. Choosing an odd number of iterations makes the un-subdivided faces diagonal, whereas an even number keeps them in the right orientation. This is visible in the example below:
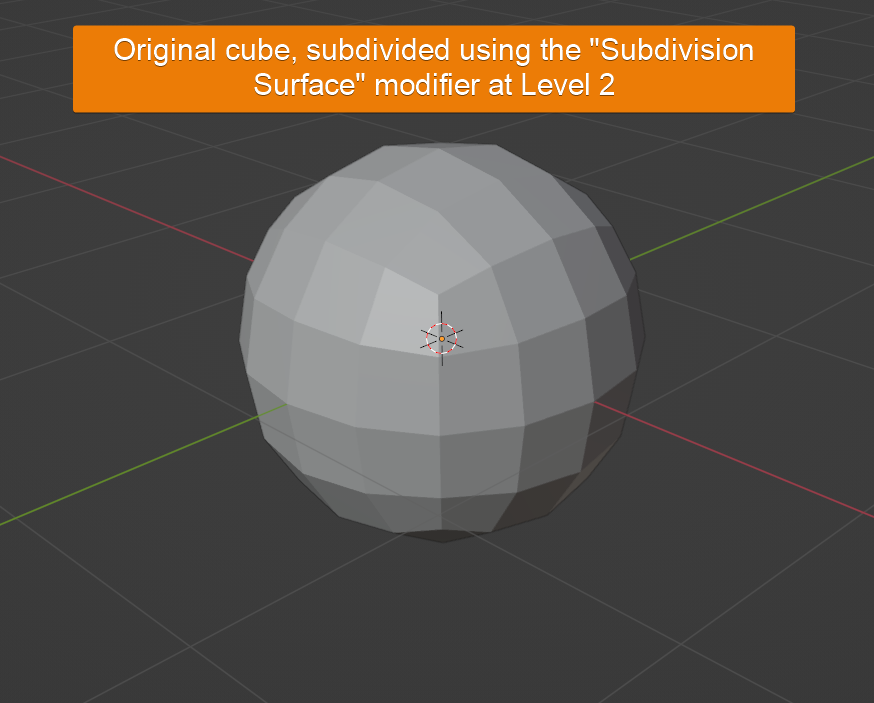
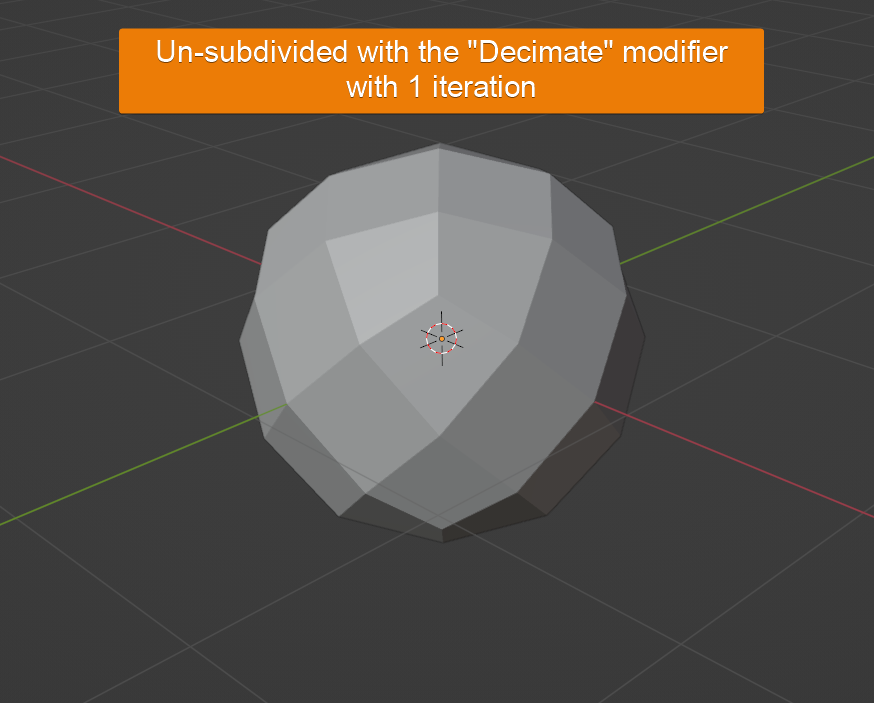

As can be seen in the series of images above, un-subdividing with 1 iteration (or any odd number) results in diagonally oriented faces, whereas 2 (or any even number) iterations returns to correctly rotated faces. This means that to remove a certain number of subdivision surface levels, you need twice as many un-subdivide iterations.
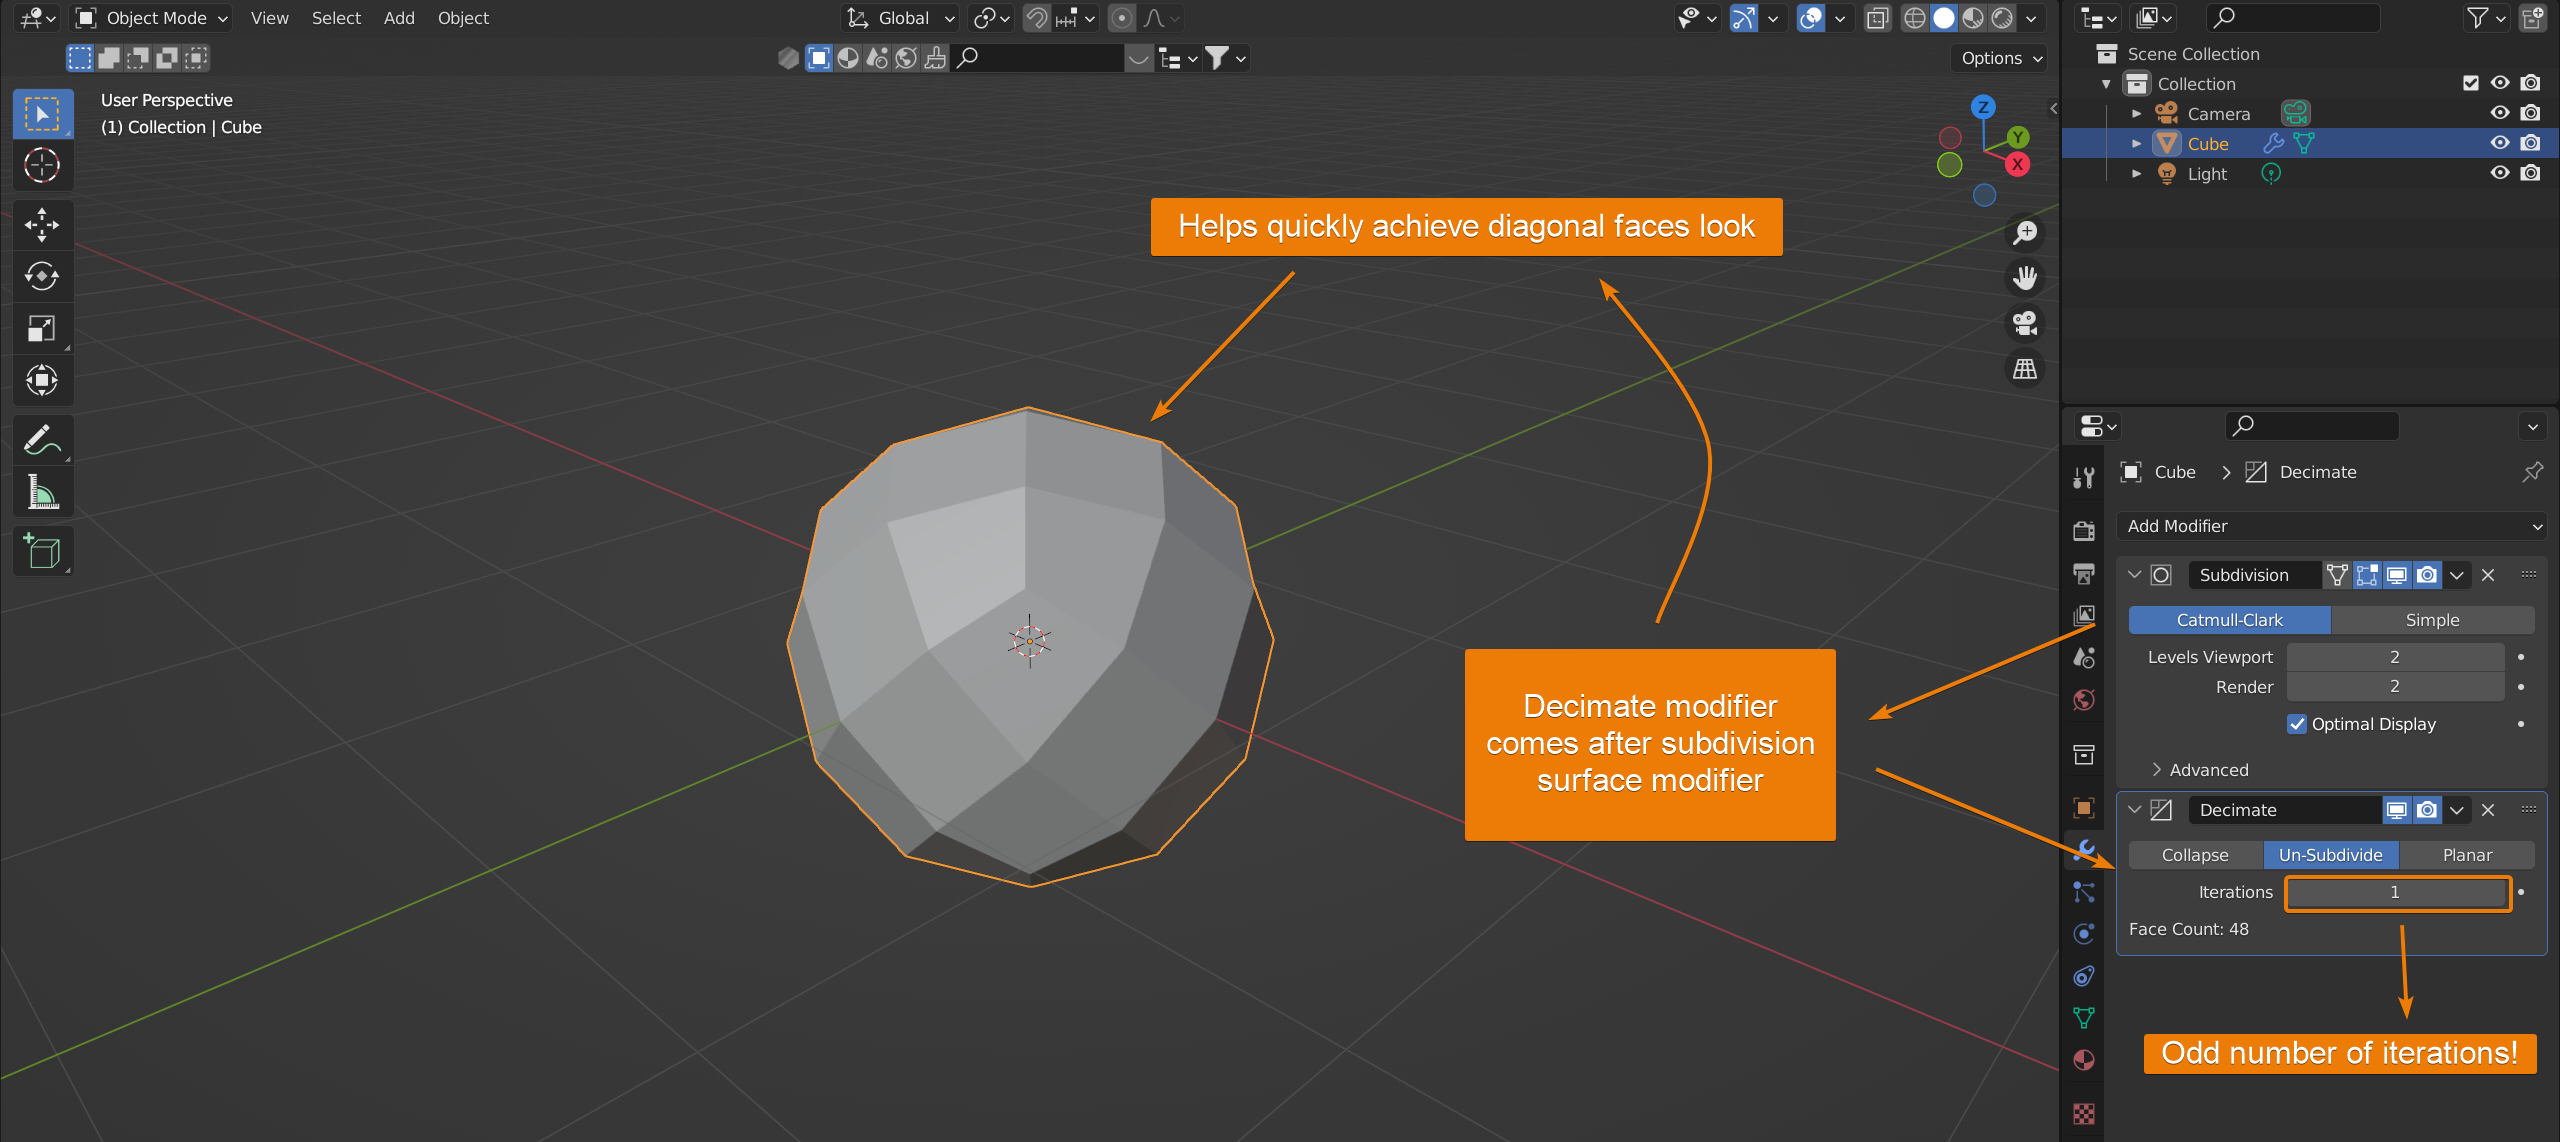
On the other hand, you might actually desire the diagonal grid of faces depending on what you are modelling. In that case, you can also create a stack of modifiers to keep going with a non-destructive workflow: stacking a decimate after a subdivision surface modifier helps you achieve this look in your geometry, without having to apply either modifier.
An example of when you might want this would be when modelling something similar to a wire fence. Let's quickly go through a typical workflow:
1. Add a plane and subdivide a few times by pressing Ctrl+E > Subdivide
2. Add a decimate modifier set to Un-Subdivide with 1 iteration
3. Apply the modifier (make sure to be in object mode) to get the following diagonal effect:
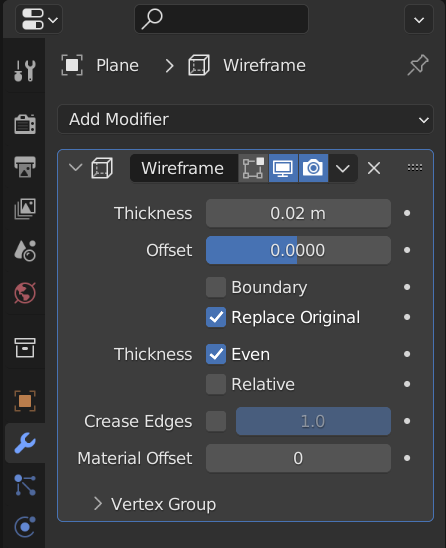
4. Add a wireframe modifier and adjust the settings to your liking:
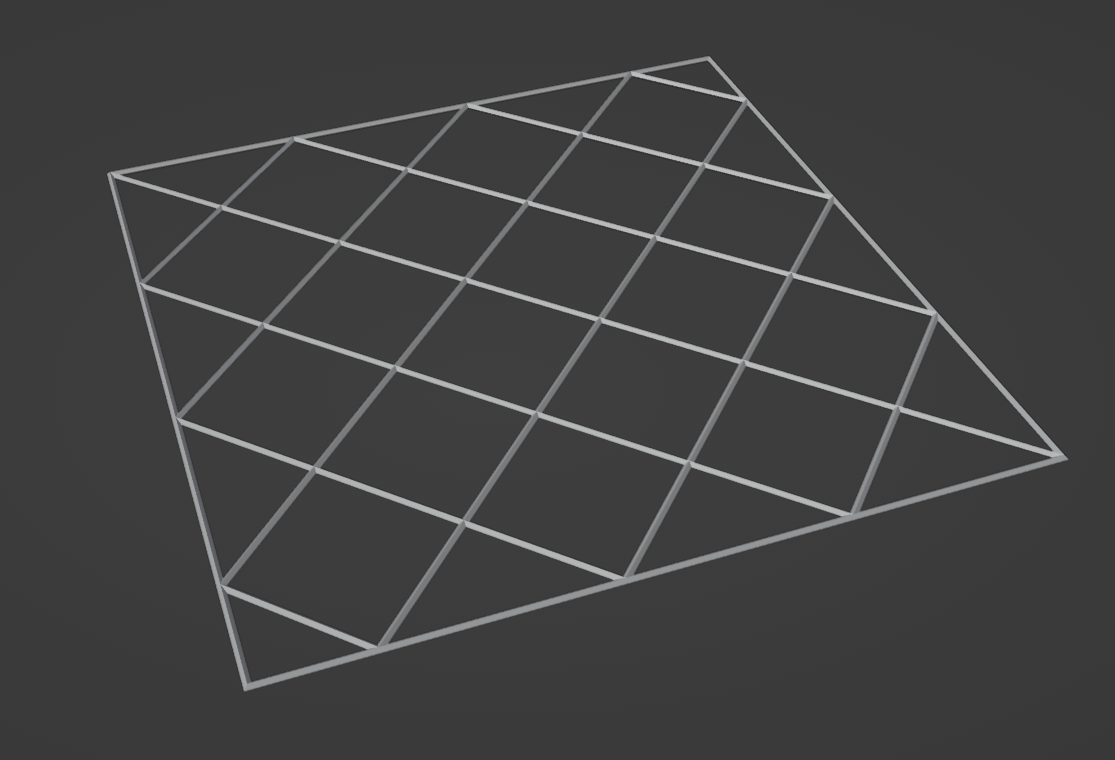
5. The result is a quick and easy wireframe mesh, ready for use as a fence or grill!
This is just a simple of examples of the use of the decimate modifier, the possibilities are endless.
In edit mode, there is also an un-subdivide tool that allows you to reduce the number of faces in your mesh in a very similar manner as the decimate modifier. This is a quicker way to un-subdivide your mesh if you don't require a non-destructive workflow, or if your geometry is generally modelled efficiently and isn't too complex.
With all of the relevant geometry selected in edit mode, press Ctrl+E and select Un-Subdivide from the list, or press Ctrl+E and immediately press U to select the option while the list is still open.
A quicker way to do this is to hit F3 on your keyboard to show the action show bar, start typing Un-Subdivide, select the relevant option and hit enter (usually the un-subdivide option pops up after only typing "unsu..."). Next time you hit F3, the option will already be entered in the search bar so you simply only need to press Enter.
After selecting the option, the action is carried out with a default of 2 iterations. To adjust the number of iterations, open the Last Action Settings panel that pops up on the bottom left of your screen right after selecting the tool.
It should be noted that this panel goes away after you click on any other object or window, and so the number of iterations can't be changed afterwards, although you can always just un-subdivide a second time in case you want a larger number of iterations.
The number of iterations for the un-subdivide tool work similar to the decimate modifier: an odd number of iterations changes the orientation of the faces while an even number doesn't.

Issues can arise quite often when working with more complicated meshes and trying to un-subdivide them, and this could be for a number of reasons.
The most common reason is the presence of extra geometry that might not be visible to the user, but makes it difficult for Blender to calculate and perform un-subdivision actions. This could, for example, happen if you extrude a part of the mesh and right-click to cancel it's movement: the mesh has been extruded and there are double vertices but they may not be visible to you.
To solve this issue of double geometry, go into edit mode and press A to select all the vertices/edges/faces, it generally doesn't matter which mode you are in. Press M and select "By Distance" to merge vertices that are within a certain distance of each other, hence deleting any duplicates.
Another reason might be due to the mesh being made of tris instead of quads, as this often interferes with un-subdividing. To avoid this, use A to select the entire mesh and press Alt+J to convert all tris to quads. Un-subdividing should now work properly again.
In the case that un-subdivide just doesn't work for any reason whatsoever, you can always switch to using the decimate modifier as outlined in the sections above.
Another fool-proof yet slightly more time consuming solution (depending on the complexity of your geometry) can also be re-topologising the mesh by manually deleting and creating new faces.
While un-subdividing sounds like something you'd only do to reduce the complexity of your mesh, we've gone over some additional ways in which you can get some interesting and unique effects with the un-subdivide tool and decimate modifiers as well. This can help speed up your process of modelling certain objects, and also help you with a non-destructive workflow over which you have full control through modifiers.
Thanks for reading!
