


Mixamo is a handy free tool that we can use to easily rig and animate our models. While we can do both of those inside of Blender, Mixamo speeds up the process quite a bit and comes with a ton of animations.
To use Mixamo in Blender, we need the Mixamo add-on and an account on the Mixamo website.
We'll go over the setup for using Mixamo in Blender. After we've done the setup we'll go over how to use Mixamo as well as the export and import process to get from Mixamo to Blender.
First navigate to the Mixamo in Blender page and click on the "Get the Add-on" button.
External Content: Mixamo in Blender
Take note of where you've downloaded the file and then head over to Blender. In Blender go to Edit > Preferences > Add-ons and click on the install button. Navigate to the location of your downloaded file and select it then click install Add-on.
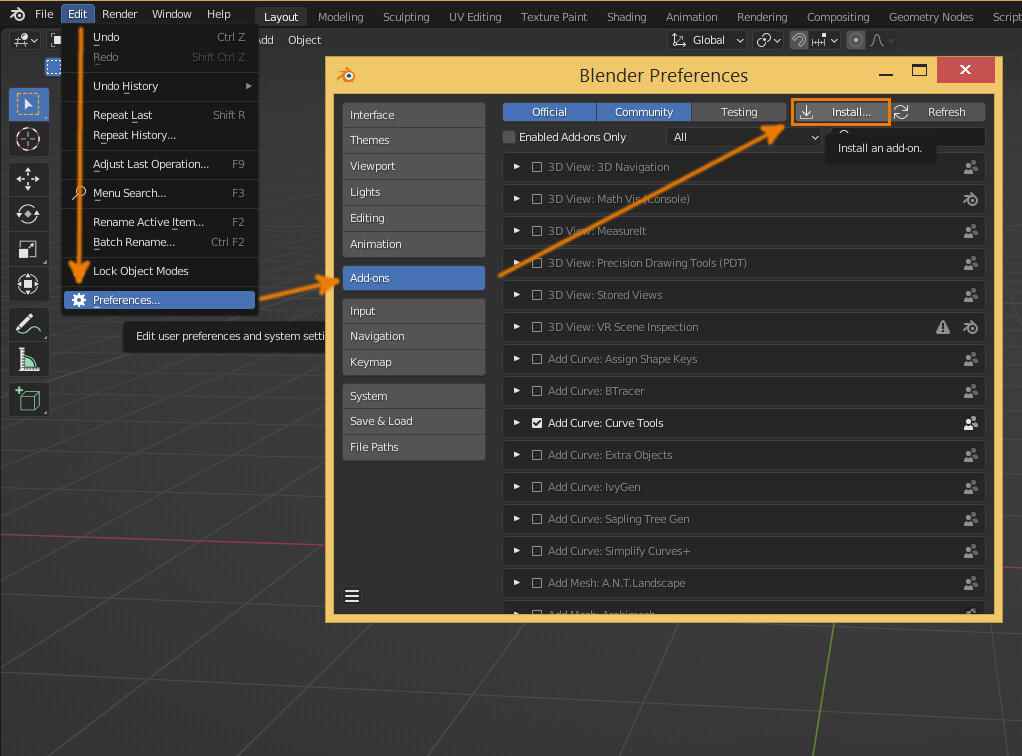
The browser window should close automatically and we'll now be back at the add-on list. Blender will pause for a second and then the add-on list should shorten to the Mixamo add-on we just installed and then we can enable it.
Now we can close the preferences window and in the 3D view press N to bring up the side panel. We should now have a new tab for Mixamo.
These are the steps we need to take when using Mixamo in Blender
Before we can use Mixamo we'll first need to setup an account. Mixamo is part of adobe so we'll need to create a free adobe account before we can continue. If you already have an adobe account, you can just use that to log in.
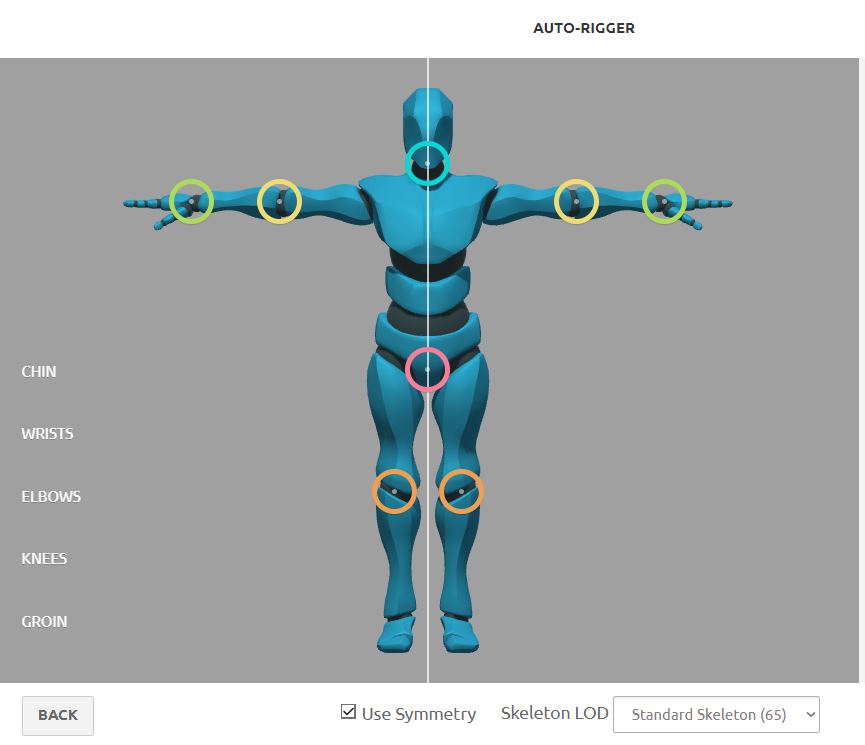
When we import a model if the imported model has a rig that Mixamo recognizes on it Mixamo will just use that. When we import a model that doesn't have a rig Mixamo will open a window that we can use to quickly rig the imported model.
Once we have a rigged model we can use the animation browser to select several animations to apply to our rig. First I recommend exporting the model in a default pose.
After we have our model exported in a default pose we can browse through the animation and export all the different animations we want.
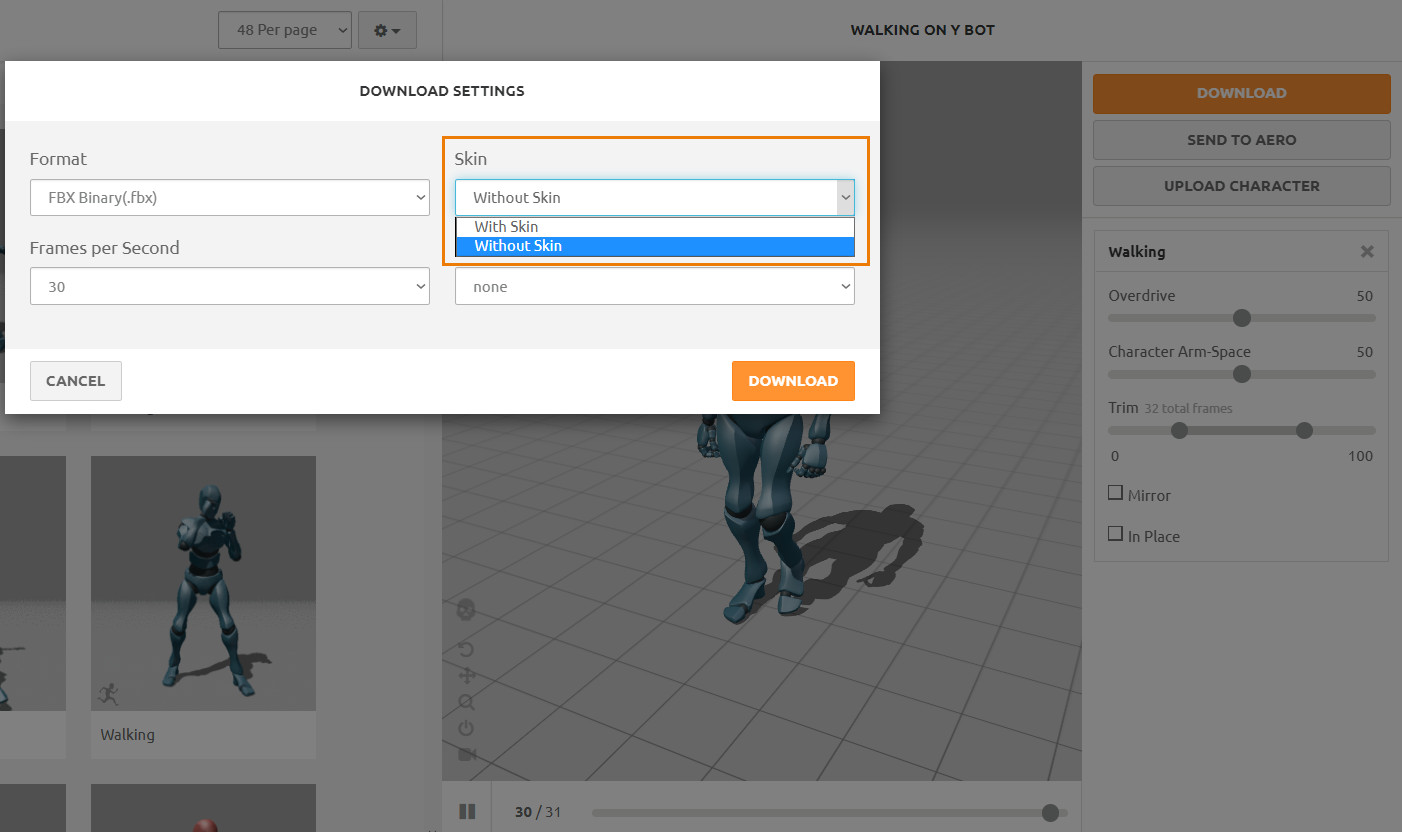
When exporting for animations we should set the skinning option to no skin. With skin enabled we'll be exporting the model with each animation, this is unnecessary and will just bloat file sizes and import times.
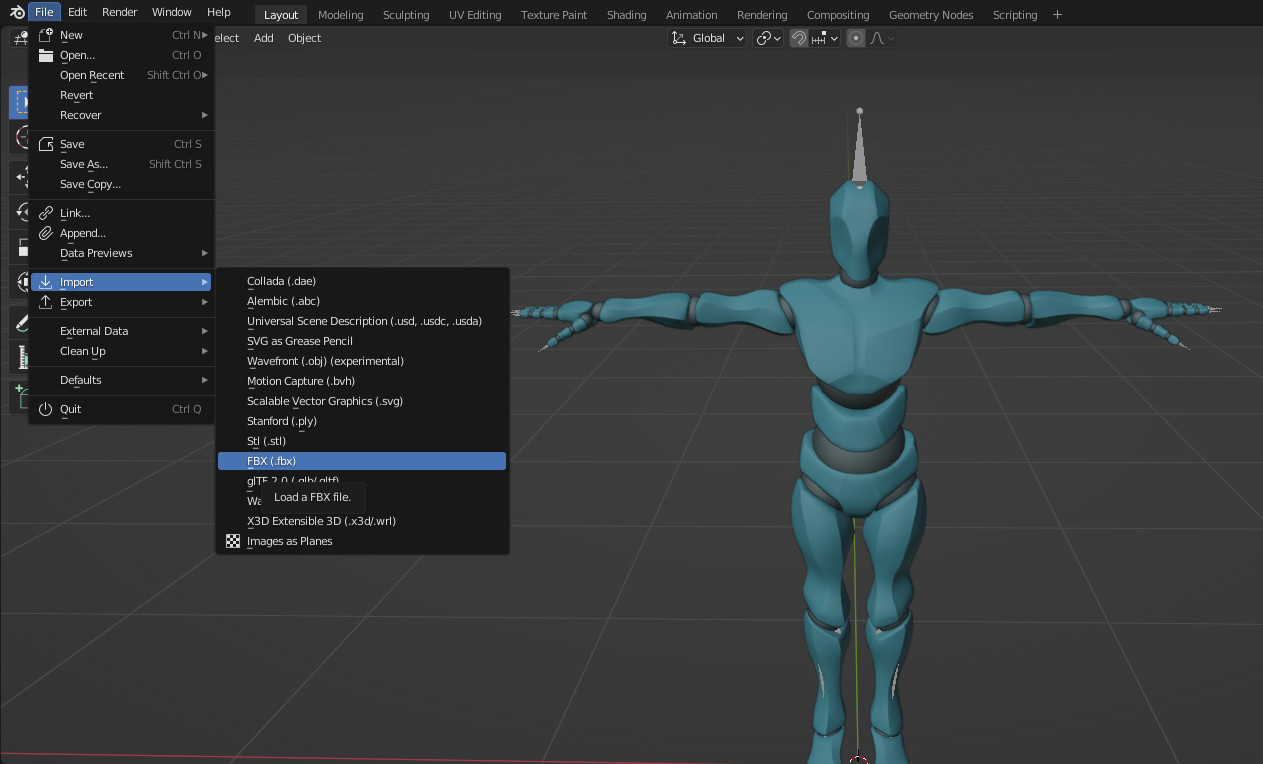
Once we have our model and any animations we want exported we can open up Blender. First, go to File > Import > FBX and import the default pose model.
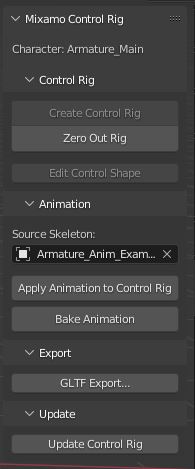
Next, let's set up the IK control rig using the Mixamo add-on. Press N to open the side and open the Mixamo tab.
Select the armature for the model we've just imported and in the Mixamo tab click on create control rig. Now we'll have a useable rig for manually posing and animating our model but will also allow us to import our animation to this rig.

First, let's go to File > Import > FBX and then navigate to the first animation we want to import. We can leave all the import setting default and just click import, now back in the scene view we should have a new armature.
Each animation will import as an armature with the animation applied to it. Back in the Mixamo menu with the original armature selected set the source skeleton to the newly imported animation armature.
Now we can press apply animation to control rig. Our main armature should now have the animation we just imported, this animation has also been imported as a separate action which will make importing multiple animations much smoother.

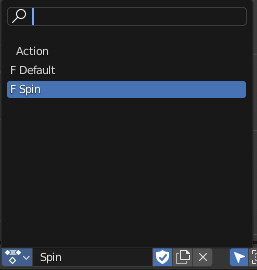
We can repeat this process for each animation we want to import. Once we have multiple animations imported we'll likely want to access and switch between them. To access them go to the animation workspace and in the dope sheet editor set the context to the action editor.
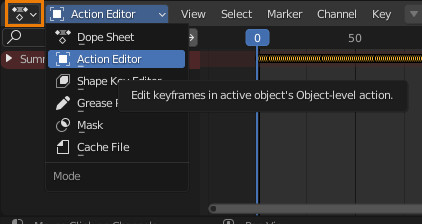
With the dropdown in the middle, we can now browse between all the animations we've imported. These can also be combined in the NLA editor but this is a bit beyond the scope of this article. Once we've imported our animations though we can delete all the extra rigs that were created when importing.
Note that we'll also want to set any actions we'll be using to fake users by enabling the little shield next to them. Setting our actions to fake will save them even if we aren't using them. By default any actions that aren't used by any armature will be deleted when we close Blender.

In the case our base model has any unwanted animations we can press zero out rig to delete all the keyframes from the current action. This is useful if we want the current action to be the default pose, this will also reset the pose of our armature.
With edit control shape we can adjust the objects that act as handles in pose mode. In pose mode we can select one of these handles and in the Mixamo panel we can click edit control shape to edit the handle.
Bake Animation will combine all animation layers in the NLA editor down into keyframes. This can be handy for exporting our models where NLA animations may not be exported properly or may not export at all.
With what we've covered in this article we should be able to use Mixamo in Blender now. Mixamo is a handy tool to have for 3D artists as it can get us a rigged and animated model much quicker.
The add-on generates a decent control rig which we can use to modify any imported animation or make our own animations and poses. Overall Mixamo provides plenty of tools to get us past some of the more tedious parts of animating.
Thank you for your time.
