


Blender has a handful of strip types that can be a bit confusing if you are new to editing video in Blender. But knowing how they work will be in your favor when editing.
A meta strip is a strip containing other strips, a scene strip is a strip containing another scene in the Blend file and an adjustment layer make adjustments to all strips below it.
Let's go into a bit more detail about how these strip types work and how they can be useful in different scenarios.

Let's look at the meta strip first. A meta strip is a strip containing one or more other strips. For example, we might have a sequence that we are done working with, like a B-roll segment with sound effects, music and voice over and we want to simplify that portion of the sequencer. In that case we can put all of the strips making up this segment into a meta strip.
We can create a meta strip by selecting one or more strips in our sequencer and pressing Ctrl+G.

We can also ungroup a meta strip and have the contents appear back on the timeline as individual pieces by pressing Ctrl+Alt+G.
We can find both of these options through the menu as well if we go to strip->Make meta strip or strip->Unmeta strip.
Once we have a meta strip, we also have the option to jump in and out of it by selecting it and pressing Tab. In this case, everything outside the meta strip will be hidden and we can only access the contents inside the meta strip.
Meta strips can also be nested. We can have multiple levels of meta strips within meta strips to organize our sequencer. But if we do, we must be a bit careful while moving up and down the different meta strip levels.
If you have a meta strip selected and press tab, you will traverse down into it. And if you are inside a meta strip and don't have a nested meta strip selected you will go back up a level. So your selection is important when navigating multiple levels of meta strips.
It is easy to accidentially create multiple levels of meta strips by pressing Ctrl+G multiple times. A meta strip can containt a single other meta strip, so by pressing Ctrl+G twice we nest our content two levels deep. So be a bit careful so that you don't accidentally nest multiple levels and make editing harder this way.
I would not recommend having more than two levels of meta strips at any one time. After that editing easily becomes much too complicated.
A meta strip is not just an organizational tool. We can use it to put effects on all contents of the meta strip at once as well as making transformations, cropping, or adding strip modifiers for example.
This is great when we want to apply the same effect to multiple strips at once. Simply nest them into a meta strip and apply the effect once.
A scene strip is a strip that contains another scene. It is not very common to work with multiple scenes in Blender, but it is a very useful tool. Especially if you are using Blender for video editing or storyboarding.
For example, you can use a separate scene for every shot in your storyboarding or create a separate scene for an effect, like a lower thirds or intro and have it play as a strip in the timeline. This allows you to separate different parts of your project and simply move them around in the timeline while also moving back and forth between scenes to tweak and change them.
We can use scene strips in most versions of Blender, but in version 3.3 some new features where released, and we will cover scene strips from this versions perspective even if it is currently in beta.
But first, briefly, a strip in the VSE is a container for some data. Depending on the type of strip it can contain different kinds of data.
So, a scene strip can only contain another scene. In earlier versions of Blender, we had to go to the header and create a scene in the top right corner. Now however, we can simply go straight to the VSE, press Shift+A to open the add menu and choose scene->New scene.
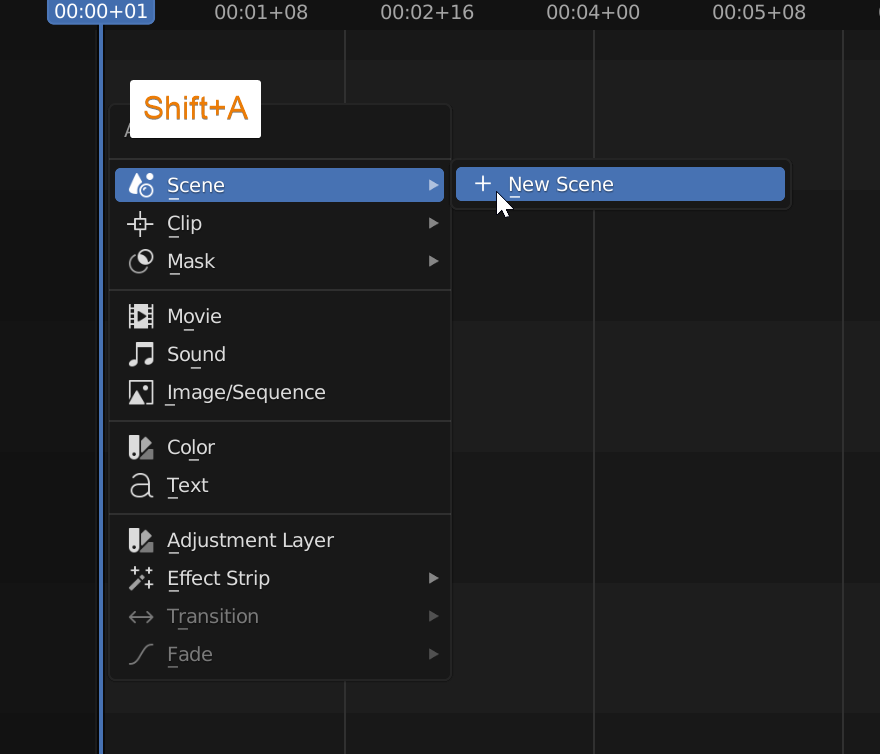
A new strip called scene.001 will be created with a scene inside of it that is also called scene.001.
We can change the name of the strip by pressing F2 in the sequencer or by going to the right-side tool panel, find the strip tab and at the top change the name of the strip.
To change the scene name, we can either go to the top right corner of the interface and select the newly created scene to go into it and change the name before we go back to the scene, we have our sequencer.
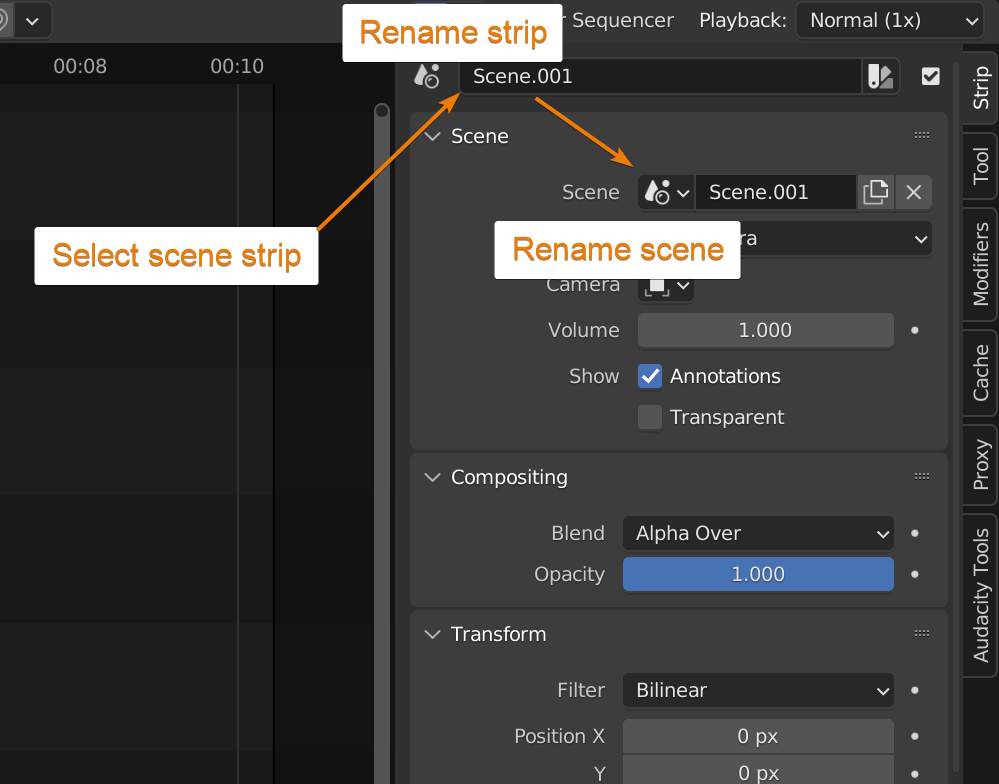
Or, we can just go to the right-hand side tool panel in the VSE and find the scene input and change the name there without having to first leave our scene. This is a much quicker workflow, but a quite recent addition.
We can also delete a strip and scene at the same time. Simply right click a scene strip and choose "delete strip and data". This was also not possible before version 3.3. We had to delete the strip first by selecting it and pressing X or go through the right click menu, then delete the scene from the top right of the interface.
Ok, so now we know how to add, remove, and rename scenes and scene strips together and relatively quickly. Only the renaming requires two different changes.
An adjustment layer is simply that, an adjustment layer. It will make an adjustment to all strips that are below it on the timeline.
We add it by going to the add menu or by pressing Shift+A and choose adjustment layer. This is useful if we want to add a quick adjustment to multiple strips or just a part of a strip or sequence of frames.
We can also use it to setup last minute adjustments wihtout having to change settings on our strips. We can just add an layer different adjustment layer strips.
An adjustment layer supports all normal transformations, cropping and modifiers that we find on just about any strip type. We can combine adjustment layers with both scene strips and meta strips as well.
Here is a simple example of a use case.

In this image I have offset each of the color strip, on the adjustment layer I then added a fade in and fade out as you can see by the curve on the strip. Next I added a color balance modifier on the adjustment layer with some extreme adjustments of demonstration purposes, and you can see that all strips shifted in color.
If we had a strip above the adjustment layer, that strip would not get the adjustment.
In this article we took a look at some of the strip types in Blender. The meta strip, scene strip and adjustment layer strip. Each of them go a bit beyond a regular image or video strip and has some useful functionality to organize and adjust strips.
The meta strip allows us to combine multiple strips into one. The scene strip allow us to bring in a secondary Blender scene and have it render as part of the timeline while the adjustment layer can adjust settings for all strips below it on the timeline.
Knowing how these strip types work can greatly enhance your video editing workflow in Blender.
Thanks for your time.
