


There are quite a few cases when we may want to transform an object relative to its normals in Blender, Blender provides us a few ways to do this. So how do we transform something relative to its normals in Blender?
To transform something relative to a normal:
In the rest of this article we'll go into more detail about transforming in both object and edit mode as well as a trick with scaling along normals as well as moving a vertices along an edge.
To align transformations to the selections normal:
To align transformations to a specific normal:
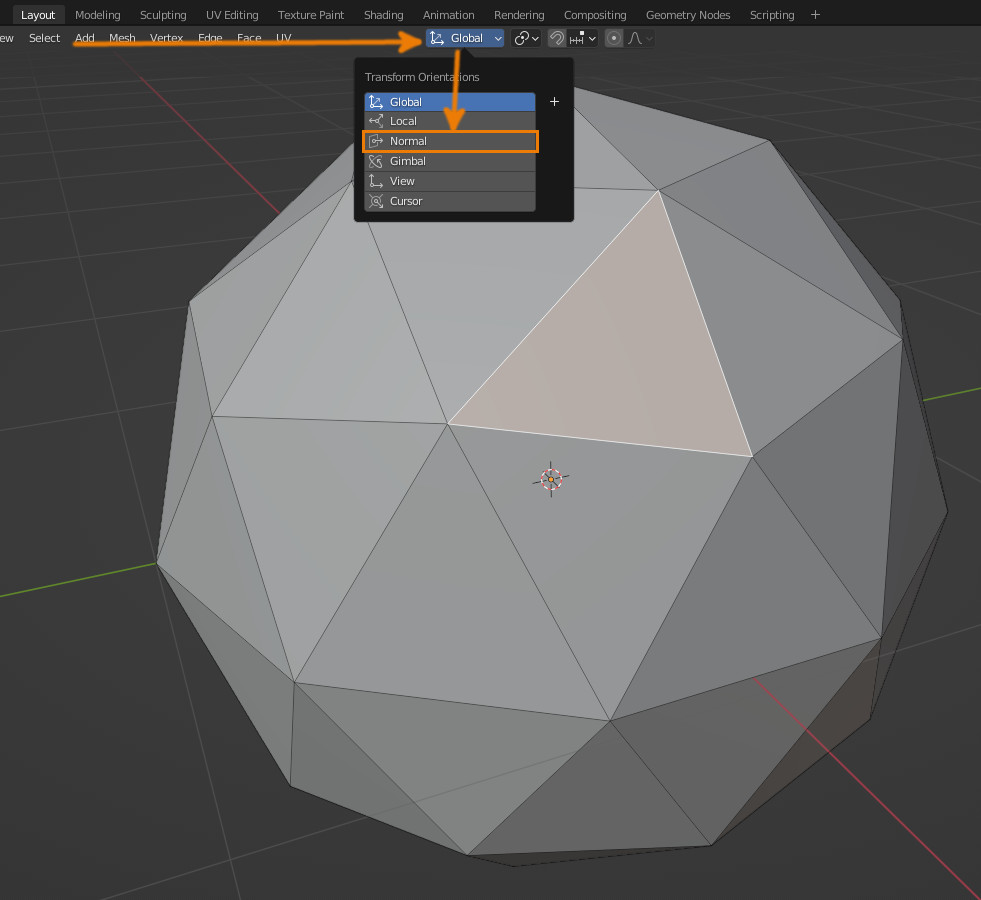
There are a couple ways we can rotate vertices, faces, or edges, the first would just be to set Transform Orientation to Normal. If there's a specific normal we want to use for our transformation we can add a custom orientation.
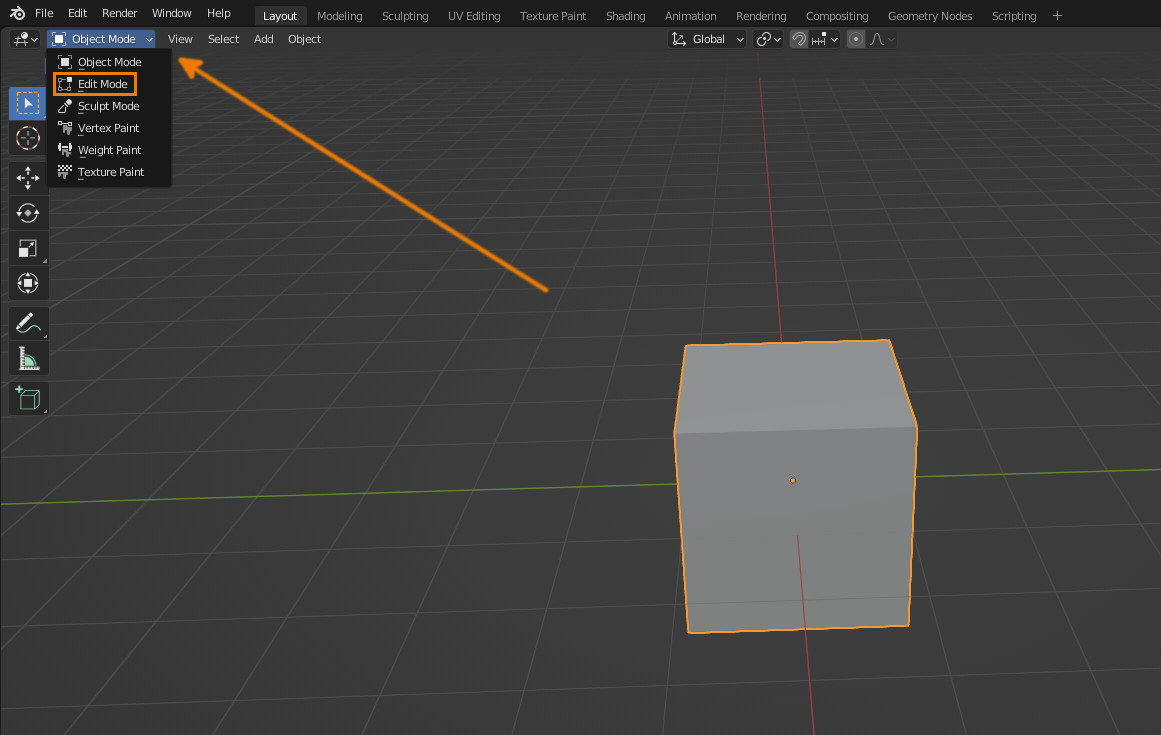
First select the object and set the object interaction mode to edit. Next either select the part of the mesh we are going to transform and then go to the transform orientation dropdown and set the orientation to normal.
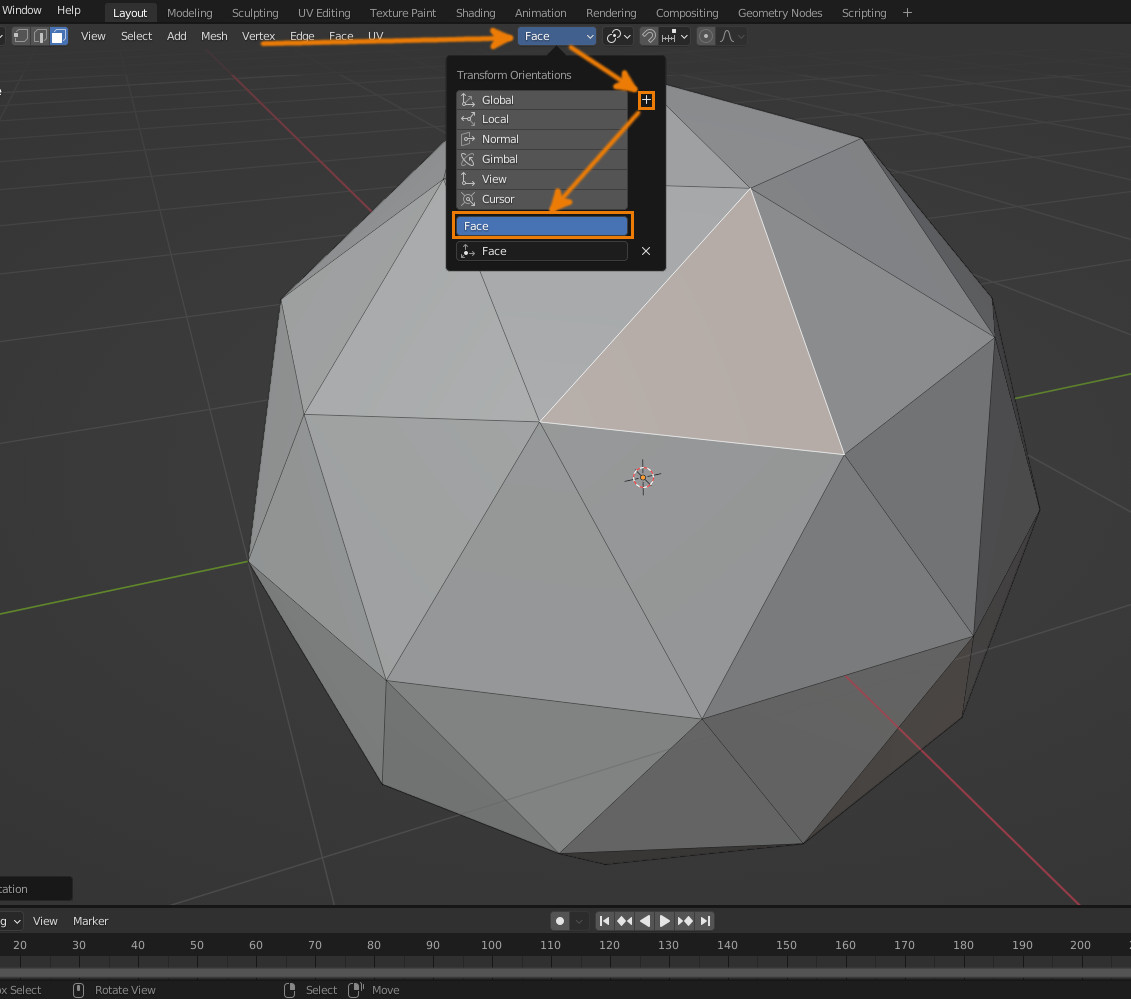
To use another normal we will have to create a custom orientation for that normal. While we're in edit mode we can select the part of the mesh that has the normal we want. Then go to the transform orientation dropdown and click on the + Icon to add the custom orientation.
we can now transform whatever part of the mesh we want with that normal. The orientations are also global so we could set it to be a normal on one object and use it to transform another object.
To align object transformations to a normal:
Since we're adjusting an objects rotation we will first need to specify the normal we want to align our transformations to. if we just to set the Transform orientation to normal the transformation would act like the local transform space so it would only alight to the object.
Instead we will create a custom orientation for the normal we want to align to. First select the object that has the normal we want to use and set the object interaction mode to edit.
Next just select the part of the mesh that has the normals you want to align to. I recommend selecting a face that has the normals since it'll be easier to figure out what direction we are going to be aligned to.
Next click on the transform orientation dropdown at the top of the window. The orientation is set to global by default. Click on the plus icon in the dropdown and we can see Blender has added our custom orientation to the bottom of the list.

We can now set the object interaction mode back to object. In the transform orientation dropdown set our orientation to the custom orientation we've made if blender has not already. Now all of our transformations will be aligned to the normal we set.
To scale an object along a normal:
Sometimes we may want to scale along a normal, just trying to scale an object doesn't achieve this affect and while we could manually setup a custom orientation or use the normal orientation and move each face individually blender provides a much easier way to do this.
First select the object we are going to scale and set the object interaction mode to edit. Next select the part of the mesh you want to scale and then press ALT + S to starting scaling along the normal. We can either type in a value or just drag the cursor to change the amount of scaling.

This is more of a tip but if we wanted this affect on the entire mesh with adjustable values we can achieve something similar by just adding a displace modifier with any texture.
The modifier will push all the vertices of the mesh along their normal by the displace value similar to scaling along the normal.

To move Vertices along an edge:
While we could use the custom orientation method to move vertices along an edge this will quickly become a hassle and Blender actually provides a much more convenient way to do this.
This can be done by first selecting the object we are going to adjust and setting the object interaction mode to edit if we have not already.
Select the vertices we want to move and double tap G to "slide" it along the edge. We can also press C to turn off clamping so that we can slide the vertex past the length of the edge.

There are many cases when the provided orientations won't work for what we want to do. With custom orientations we can use specific normals even if we don't have the actual normal selected.
We also don't have to go through the steps of creating a custom normal every time. For example sometimes while in edit mode the normal orientation will work just fine.
In the case of scaling and moving along edges, Blender provides a quick and easy to use solution. Knowing a few of these tricks can save us a lot of time and can also help us make better models.
Thank you for your time.
