


Vignette can be a nice subtle effect to add to our renders. Blender comes with a compositor that lets us create effects like this but there's no vignette node. So how do we create a vignette effect in Blender?
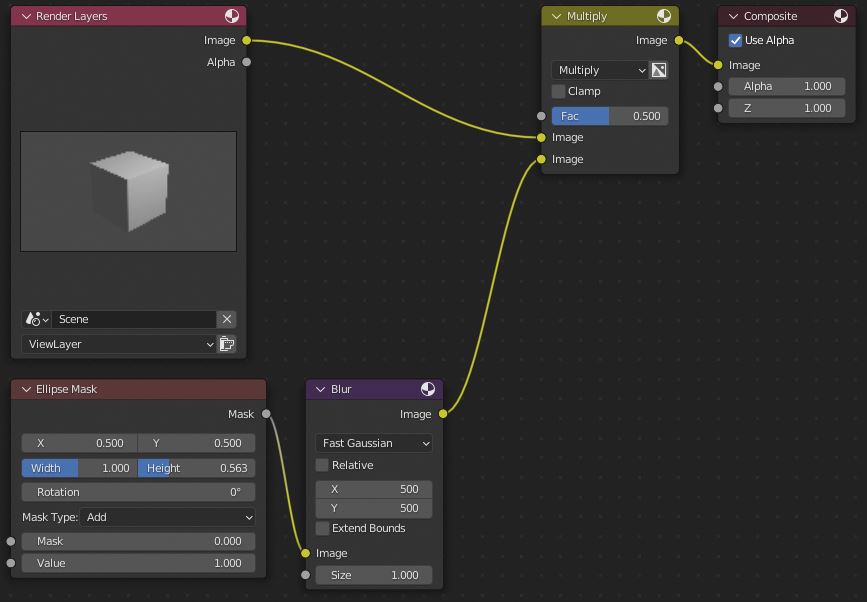
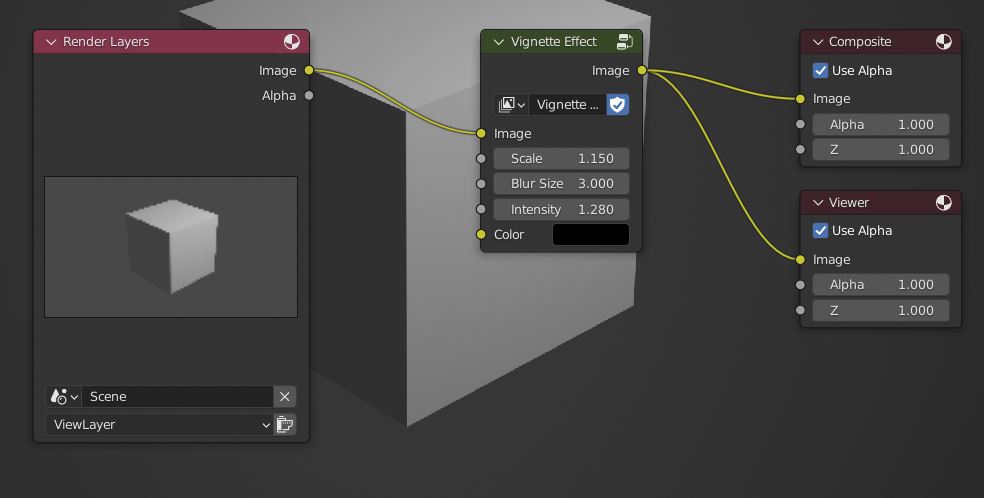
To create a vignette effect in Blender follow these steps:
In the rest of this article, we'll go into more detail about vignette and why you should use it. will also go over some positives and negatives. Finally, we'll go over how to refine this down to one easily adjustable node.
Vignette can help with the look of a render as well as helping us guide the viewers eyes towards a point of interest. Vignette can also be helpful for making a render look realistic.
While Vignette can look good it's important not to make it too intense or so subtle that it isn't visible. If the vignette is too intense it'll become distracting and take away from the render. At the same time we need to make sure it's intense enough to actually be visible.
In the guide we go over how to add a vignette in the compositor but this isn't strictly necessary for creating a vignette effect. We can also create a natural vignette in the scene by lighting it so that the focal point is brighter than it's surroundings.
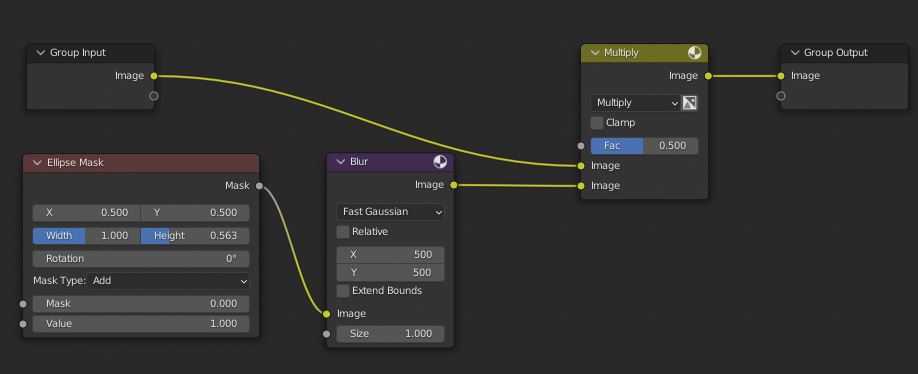
There are a few changes we can make to our node setup to make our vignette easier to control and more simplified.
Feel free to reorganize the inputs or rename them to whatever you think makes the most sense in the examples below. Make sure to keep the mix nodes order the same as they are in the example though or the vignette will not work properly.
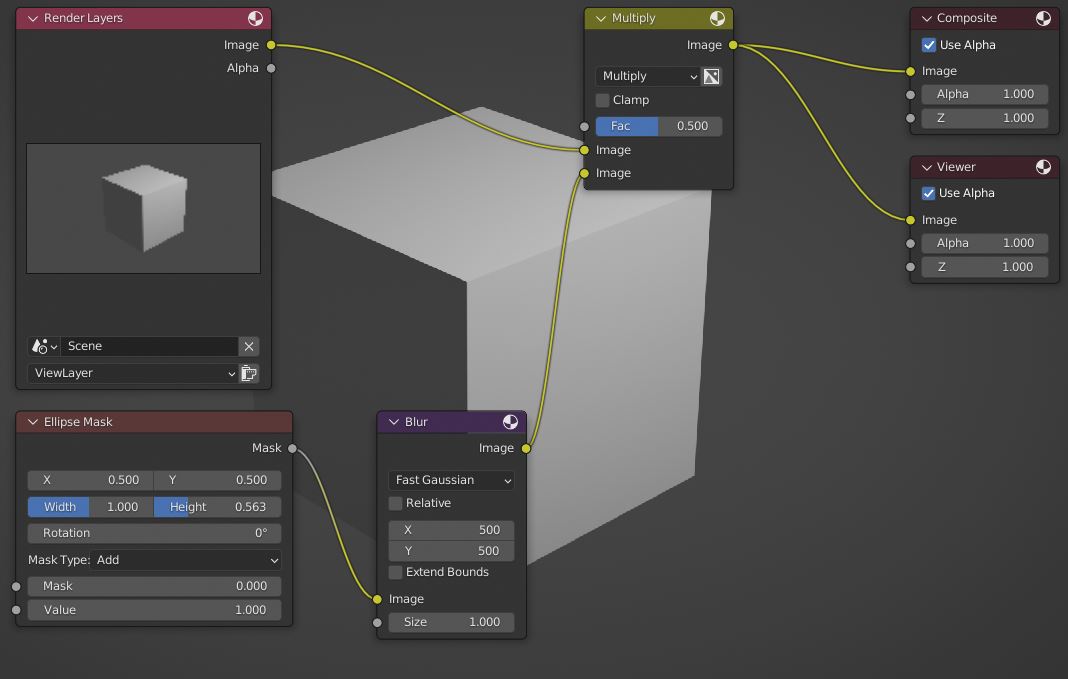
The viewer node will allow us to quickly preview changes. This allows to much more quickly configure the vignette to what we want it to look like.
Note that we'll need to render the scene first before the viewer will become active.
To create a group follow these steps:
Related content: How to work with node groups in Blender
Once our nodes are grouped we can press tab to exit the group and then if we select the group node and press tab we can enter the group again.
Each input we add inside of the group will show on the node just like the other nodes in Blender. This lets us control a bunch of different variables directly from the group node instead of having to go inside it adjust each node in the group individually.
To make the scale of the vignette adjustable follow these steps:
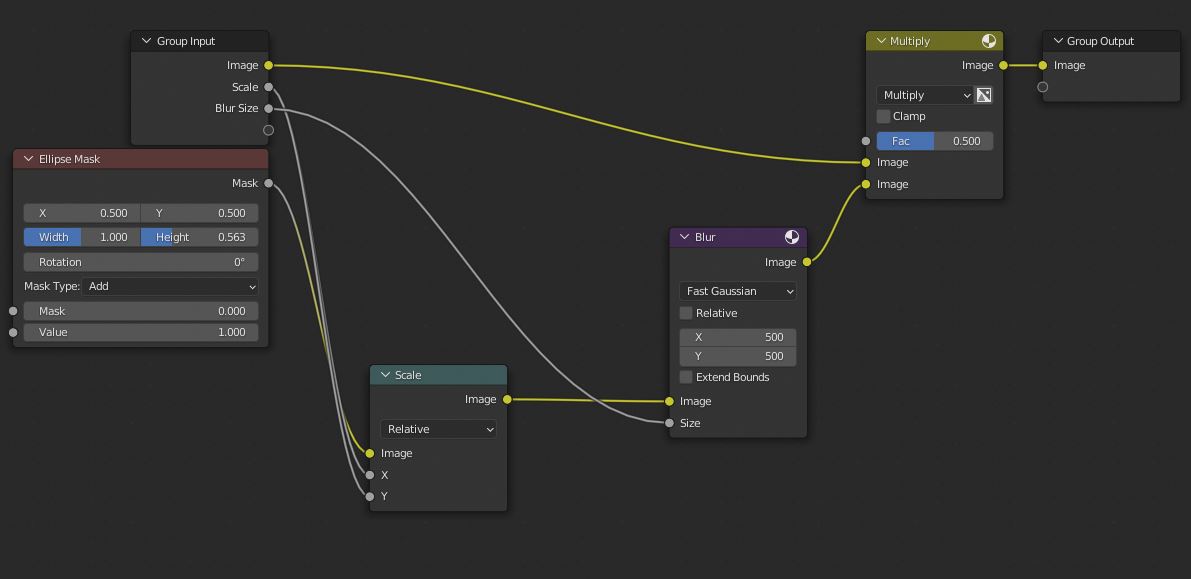
The reason we use a scale node to set this up is because the mask node doesn't let us adjust the with and height using its inputs. The scale node works just fine for this though and basically achieves the same effect.
We also set the blur node size in x and y to 500 so that the blur is already close to what would be used and we can use the size value for fine adjustment. Feel free to change this if it isn't intuitive.
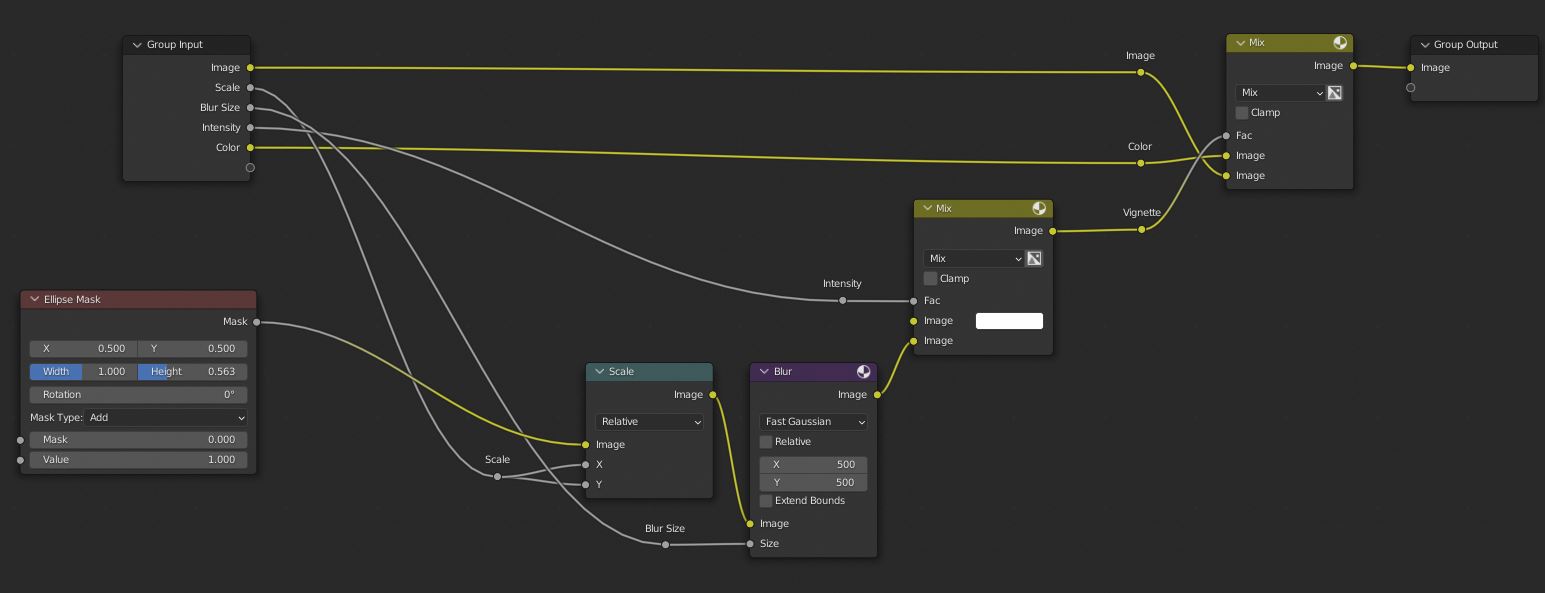
Note that in this example I used reroute nodes to organize the graph a bit. I also used their label text to show where each wire is coming from when needed.
With everything setup now we've simplified this effect down to one node that we can easily adjust and we can use reuse in multiple renders.
One thing we could change about this setup is using a box mask instead of an ellipse mask. This is up to you but if you want a vignette effect that surrounds the whole image use the box mask node. Just make sure to copy over the settings and connect it to the same inputs.

For the blur we set the mode to Fast Gaussian, we can achieve a better quality blur by setting this back to Gaussian but in the example, we use fast since we're working with such large blur values that would take longer to process if we had the mode set to Gaussian.
We can also just set it back to Gaussian once we're ready for the final render and we're done previewing changes.
Vignette can be a nice artistic effect to add to a render, it can also help with realism. With the example above we can add this effect directly in Blender.
The basic example we setup in the beginning is pretty versatile and should be adjustable enough to work in most scenes.
With the more adjustable vignette setup we can fine tune it even more if needed and it should be much more reusable and versatile. We could also expand on the example setup to achieve whatever kind of look we're going for.
Thank you for your time.
