


When we're setting up an armature or animation in Blender, we will often find ourselves using Inverse Kinematics. We may want to control the direction that an IK chain bends in. Pole targets can help us achieve this. So, what is a Pole Target?
Pole Targets are a Component of an IK chain that allows us to control the direction that the chain bends in, they are commonly used when posing and animating Legs and Arms as we need to make sure they bend in the right direction.
In the rest of this article, we will go over more details about what a pole target is. How to set them up, as well as how they relate to IK.

Now, what exactly is a pole target, and where do we find them in Blender?
In Blender, a pole target is used to define the direction that an IK chain will bend in. They can either be a bone in our armature or a separate object.
A common example of when we would use a pole target on our armature is when we're creating an IK rig for a leg so that we can change the direction the knee bends in. But in general, pole targets are a way of setting the direction that our IK chain bends.
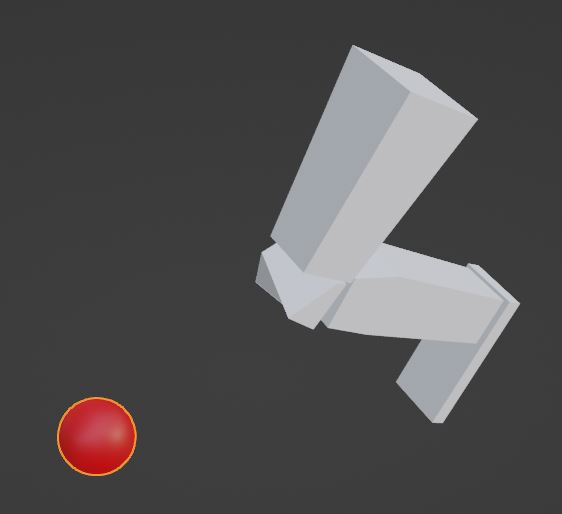
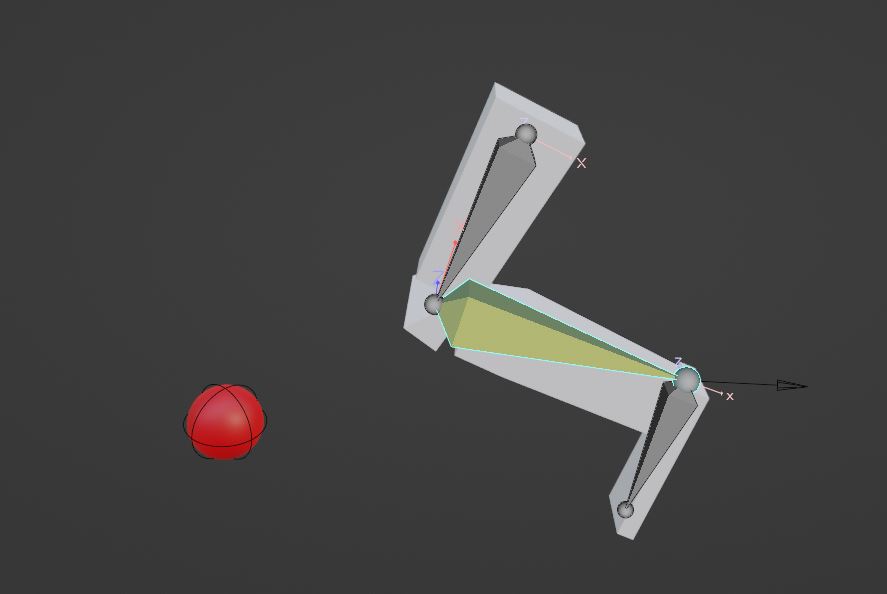
In the image above, the red sphere is the pole target, and the knee is configured to point towards its position. This way the animator can animate the position of the pole target to change the direction of the knee.
Related content: Forward kinematics and Inverse kinematics in Blender explained
We wouldn't want a character's knee to bend backwards or upside down. If the foot was far behind them, we would always want the knee to bend in the forward direction and we can use a pole target to point the knee.
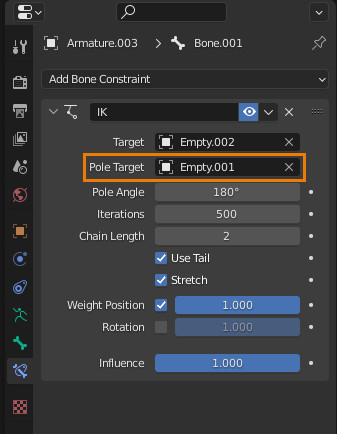
We can find the spot for assigning Pole targets in Blender in any armature that has an IK chain by going to Pose Mode and selecting one of the roots of an IK chain and viewing its bone constraints tab. The IK constraint will have both a Target and Pole Target option.
Now that we know what a Pole Target is we'll want to setup an IK rig to allow us to take advantage of Pole Targets. So let's begin there.
First, we need to setup an armature with an IK rig. We should have our Armature already setup but in case we don't we can add an armature by pressing Shift + A and selecting armature or going to the add menu and selecting armature.
Once we have an armature object, we can change the to edit mode and extrude whatever bones we'll need for posing.
After we have our armature setup, we can change Object Interaction Mode to Pose.
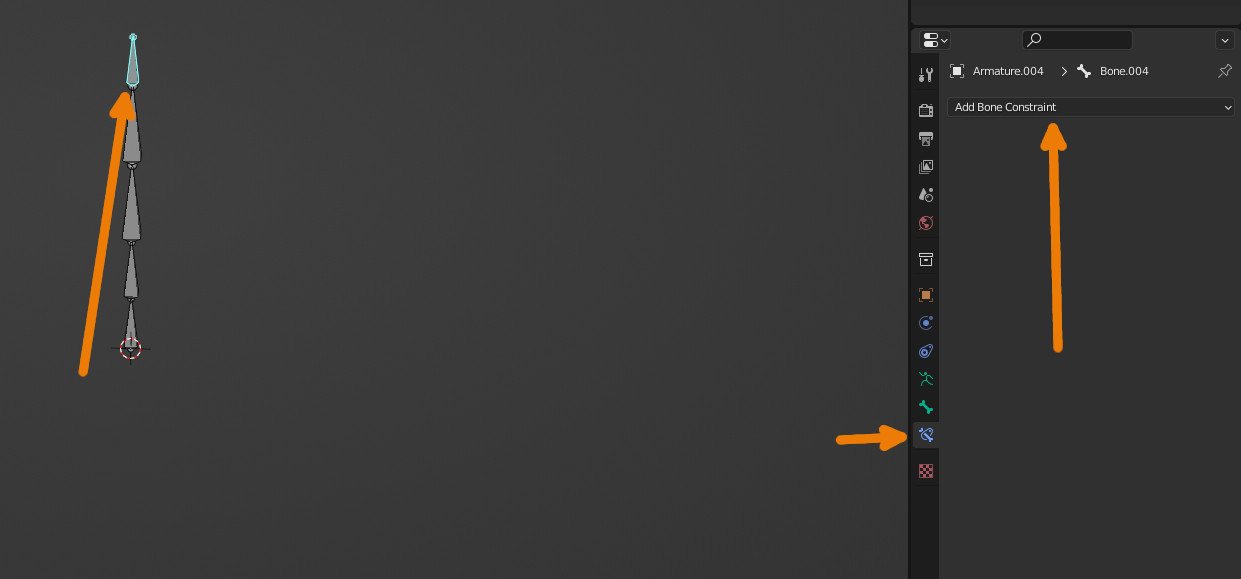
Finally, we select the bone we want our IK chain to start from, going to the bone constraint properties, clicking Add Bone Constraint and adding Inverse Kinematics.
Now that our IK chain is setup we can use the Pole Target option to set the Pole Target.
Our Pole Target can either be an object or a bone in any armature including the current one, which one to choose will likely depend on your use case. Objects will allow for posing outside of pose mode and setting it as a bone means you can easily reset it to its default pose if needed.
Before we continue keep in mind that you must also assign a target for your Pole Target to function as well as adding a small amount of bend into your pose. If you don't do this the IK chain will remain perfectly straight.
If assigning our pole target results in the rotation of our IK rig being incorrect, we can use pole angle to change it to be correct.
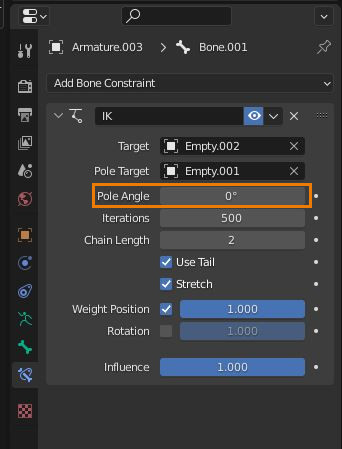
In this sample the knee was facing away from the pole target so I set the pole angle to 180 so that it would face the pole target instead.

If you're having trouble visualizing the orientation of the bones in your IK chain you can enable a helpful Axis display that will show the orientation of each bone, this can be done by selecting our armature, going to Object Data Properties > Viewport Display > and Enabling Axes.

Once we've setup our IK Chain and Pole Target It's fairly simple to test. Move your IK Target so that there's a bend in the IK Chain and then drag the Pole Target around, if the bend in our IK Chain turns to face the pole target, then we've set up our Pole Target correctly.
If you have any issues refer to the second section of Pole Target Setup as well as the information about Pole angle as these are usually what cause our Pole Targets to behave strangely.
Throughout this guide we've mainly been using Inverse Kinematics to access and make use of Pole targets, this is because Pole Targets are usually a component of Inverse Kinematics, while we won't be going into full detail about what Inverse Kinematics, we will go over a quick summary of the concept.
Inverse Kinematics is one of two methods for handling the rotation and position of bones in an armature. The other being forward Kinematics.
Inverse Kinematics will work backward up a chain of bones and proportionally rotate each so that the bending matches both the Target and Pole Target if either are assigned. If there is no Target or Pole Target each bone will bend to reach the IK chain root bone.
Related content: Forward kinematics and Inverse kinematics in Blender explained
Pole targets are an important part of Posing and Animating as they give us more control over how our models bend, they can allow us to quickly modify and fix any strange IK bending and help us make better use of IK chains, and in general they make the results of IK much more predictable.
Thanks for your time.
