


Sometimes you find yourself trying to do a nice-looking render and when the rendering time has finished it turns out that the image is completely black!
Here are some possible reasons why your render is black:
While there might be many different issues we can run into as we render, a black render is one or the more common ones. So, let's explore the most common causes for this to happen.
If you have other render issues you might want to also look at this article:
Related content: 4 Common render problems in Blender and how to solve them
Let's dive in.
This is a common problem that the artist actually causes themselves. I have done this many times. As we hit render, we see Blender completing it, image becomes clearer and clearer but just when it finishes it turns black.
This is caused in the compositor when the composite node, which is our output node, does not have any input to display as the final render result.
When this is the issue, you do not have to render again. The render is there. It is just not connected to the output.
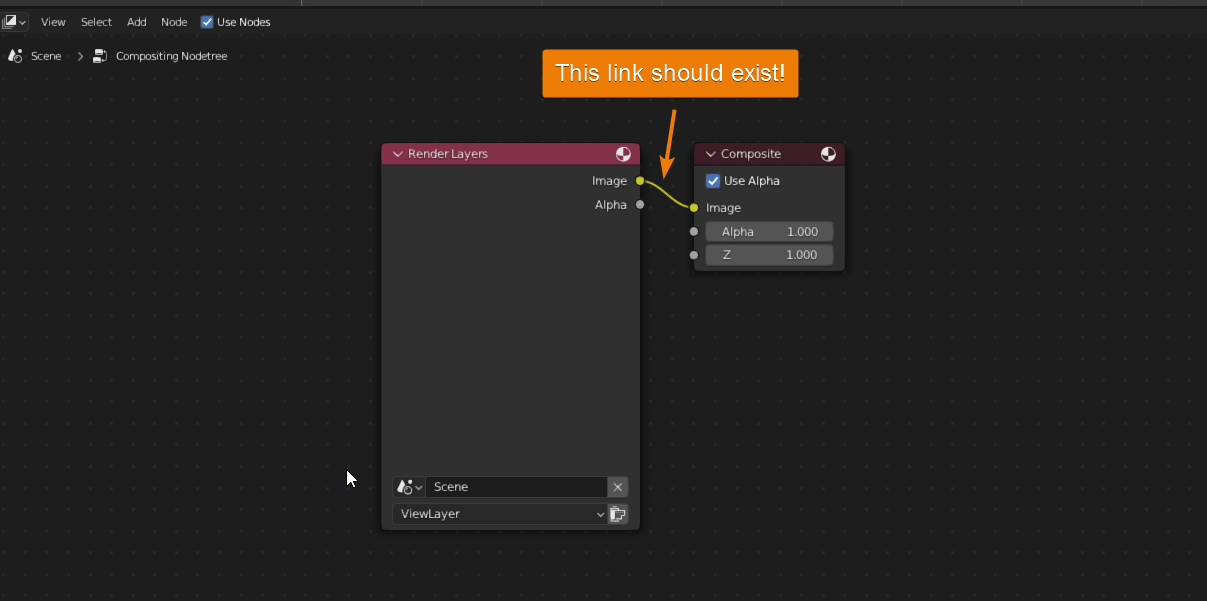
If we don't do any post processing in the compositor by adding other nodes, the connection of the "Render Layers "node with the "Composite" node is what will give you the output image.
That connection exists by default if we check "use nodes" in the compositor but sometimes this link might be missing if we made a mistake.
Below the render view you can pull up a window and click on the editor type icon, and from the drop-down menu click on "Compositor":
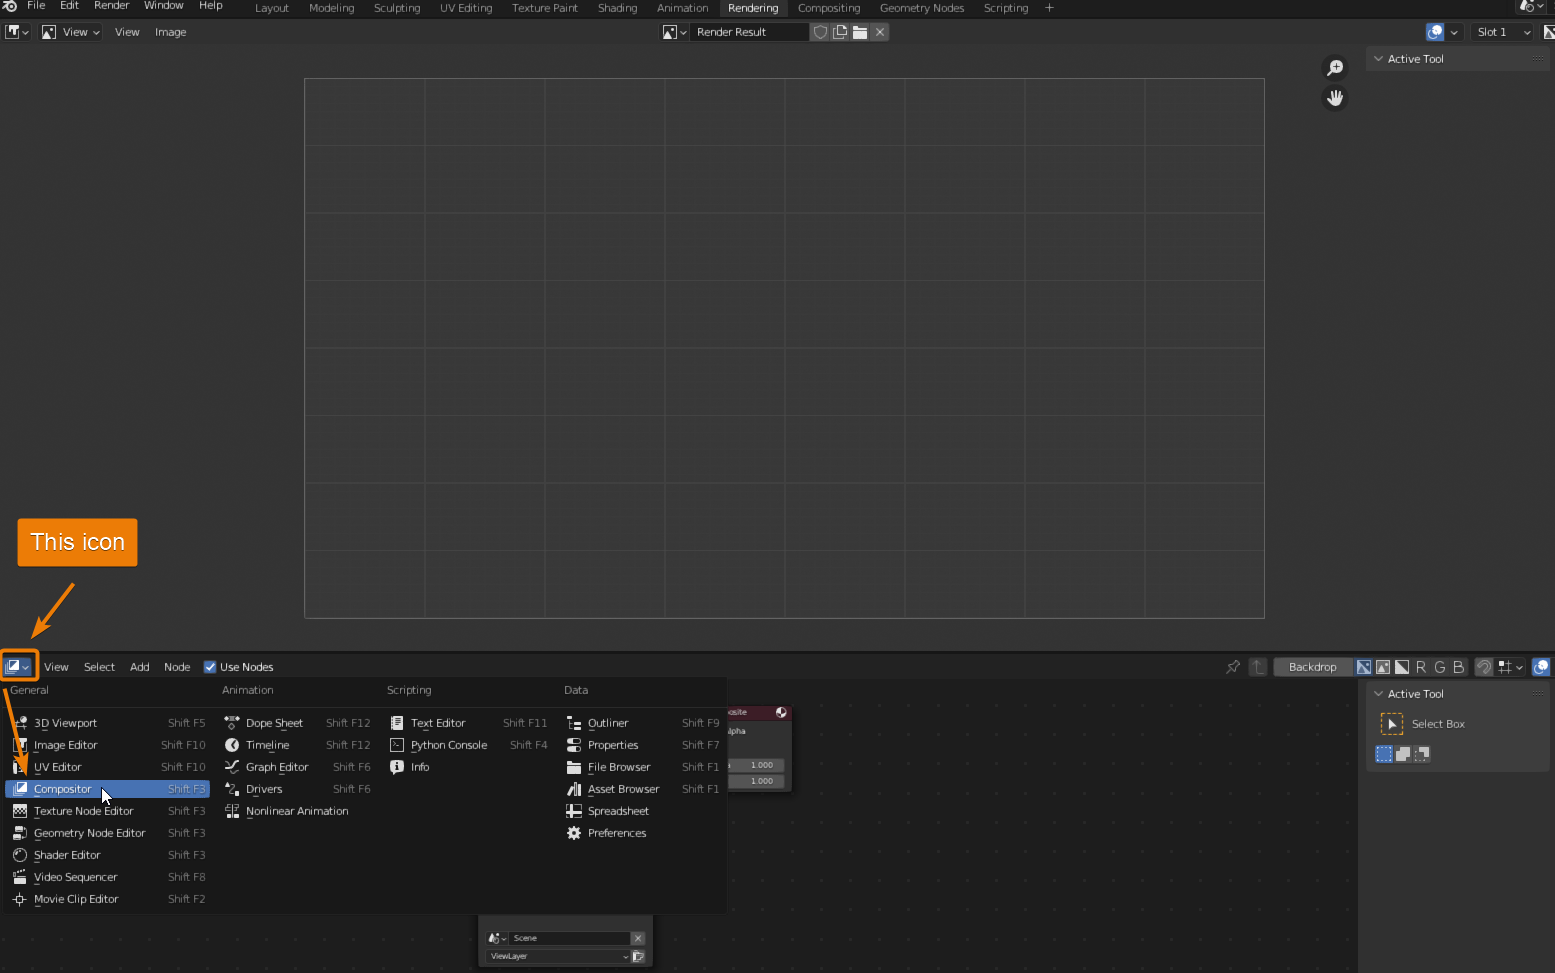
Then you will be able to see two nodes, a "Render Layers" node and a "Composite" node. Make sure that the link between "Image" in "Render Layers" and "Image" in "Composite" exists. Otherwise, you would need to drag one to the other to connect them. Remember that without this connection your renders will still be black.
Also, even if you do see the connection here, try reconnecting it again, it could be an update issue where Blender just needs the noodle to be reconnected.
There are two other ways we can fix this as well. If we don't intend to use the composite nodes, we can uncheck "use nodes" in the header of the compositor so that the output simply does not go through the compositor at all.
Another way is to disable the compositor from the properties panel. Go to the output properties tab. That is the white icon that looks like a printer. Expand the post-processing section and uncheck "compositor" and the compositor will be bypassed and send the rendered image directly to your output.
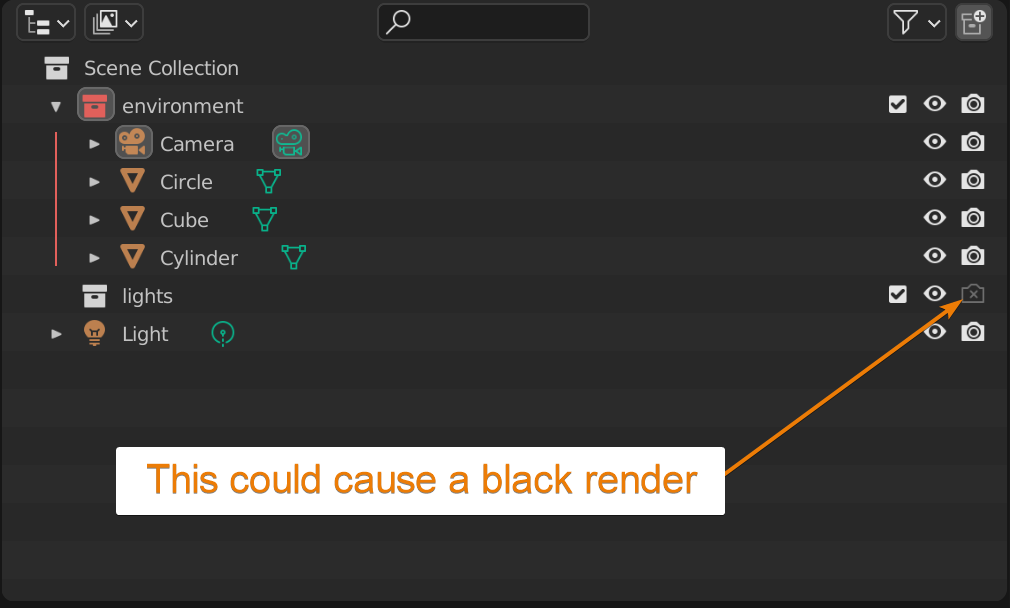
Another common error that could cause our renders to be black is that our objects are hidden from rendering and therefore cannot be seen by the camera. But more likely, it is the other way around. We might have hidden an object in the 3D viewport that is active for rendering and is in the way for the camera or the camera sits inside of it and cannot receive light.
In the outliner, check for objects that has the camera icon turned on but the eye icon turned off. You can also just click Alt+H to unhide all objects in the 3D viewport to make sure that there is no hidden object there.

There are some occasions in which you have already checked that the composite node exists and that your objects not in the way of the camera, but you still have a black render output.
Well, another common mistake is that you either forgot to add lights to your scene, the power of your lights is set to zero or they are disabled for rendering. Also, you put all of your lights in a collection, and you accidentally disabled that collection for rendering, your scene could potentially render black.
First, make sure that you got at least one light in your scene and that the light is active for rendering. That is by making sure that the camera icon next to the light object is white.
If the light is inside a collection, also make sure that the camera icon is active on the collection and any other collection above it in the hierarchy.
If you are not lighting your scene with light objects, but are using emission shaders on mesh objects, you might want to try to add a lamp object temporarily just to make sure that there isn't something wrong with your emission shader.
This might sound obvious, but our light needs to be illuminating our object. It might also be that your strength is too low or that the lamp might be positioned too far away in your scene.
Select your light and go to the properties panel in the light properties check that "Power" or "Strength" (when your light is a "Sun" type) is not set to zero (you can put the value you want depending on the amount of light you want in your scene, just do not make it zero!)
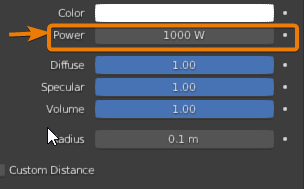
Also check your lights position in the scene.
If you want to read more about how lights work in Blender, you can read more here:
Related content: Blender lighting
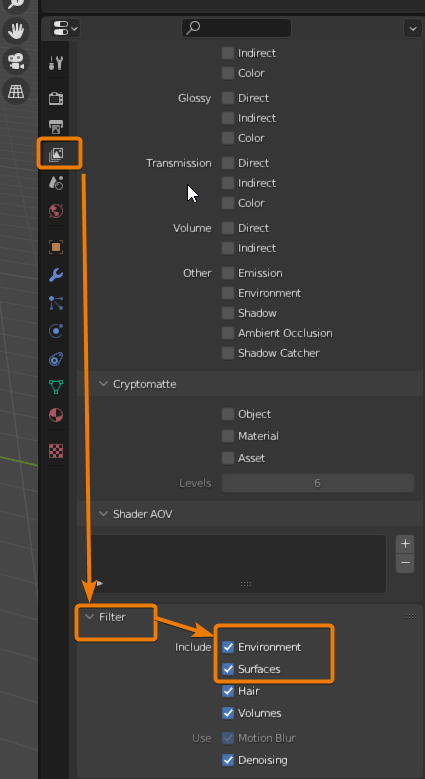
When you are rendering using Cycles, sometimes the error could be that "Surfaces" and "Environment" filters are disabled.
To enable them, once having selected "Cycles" as your render engine, you need to go to the "View Layer Properties" tab in the outliner; scroll all the way to the bottom; click the drop-down arrow on "Filters", and check that both the checkboxes of "Environment" and "Surfaces" are enabled.
The clip distance of the camera is what allows the camera to see within a distance range. When the clip start, and end distance are set incorrectly then you will not be able to see your objects in the render. The objects that are either too close or far from the set distance will not be able to get rendered.
To verify that the parameters of the clip distance of your camera are right, you need to select the desired camera, go to "Camera Properties" and click on the drop-down arrow in "Lens". Inside "Lens" you will be able to set the clip start and end.

Remember that the scene should not be neither too close nor to far if you want your scene to render correctly.
There is also a clip start and end setting for the viewport. You can find this in the N-panel of the 3D viewport. Press N to open it, then go to the view tab. At the top inside the view section you will find clip start and end. If these values work well for you in the viewport, it is likely that similar values will work for your camera.
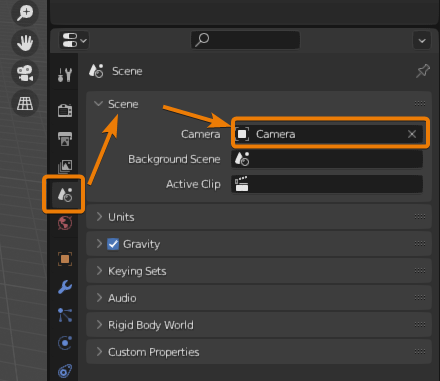
Another problem that could be making your render come out black is that you have selected the wrong camera in the "Scene Properties" tab.
In order to check that the right camera is selected click on the "Scene Properties" icon, then click on the drop-down arrow next to "Scene" and verify that the camera set is the one that you are expecting.
In case you have the wrong camera selected just click the drop-down menu in the "Camera" text box and select the right one.
If you have a clip on the timeline in Blenders VSE it could render on top of your 3D scene. To check this, open a video sequence editor and make sure that there are no clips on any of the channels in the timeline.
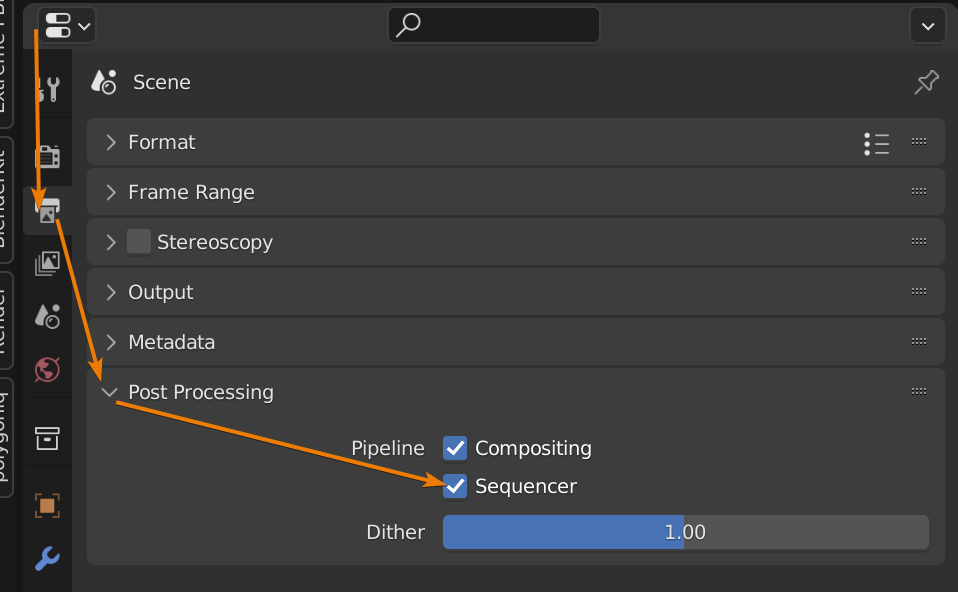
You can also bypass the VSE entirely by going to the scene tab in the properties panel and in the post processing section, uncheck the sequencer checkbox to skip processing the sequencer after rendering.
To sum it up, when getting a black render, remember that there is not just one single cause that could be leading to this result. You have to be sure that:
Remember that there is not really an order in which to check all that we have explained above, but as you read through the possible causes, you might recall something you did earlier in your file that could take you in the right direction or simply check all possible solutions.
Thanks for reading!
