


When you start learning Blender, getting a good grip on how viewport navigation works is a big deal for your confidence. Constantly getting stuck with the seemingly simple things can be detrimental for your learning experience. That is why it is important to learn how to solve common viewport navigation issues in Blender.
When viewport navigation is not working press the Home button. This will reset your view on the scene.
Let's explore some more specific problems and how we might solve a few common situations so that you don't quit Blender even before you start modeling.
Sometimes we may get lost in our scene. We navigated too far away from the objects in our scene and we cannot orbit around to see the scene or get back to where we were.
In this case we can press Home as described above to recenter the view on the objects in our scene. This operation is called frame all and can be found in the view menu in the 3D viewport.
We can also press Shift+C if it is easier to reach on your keyborad. This shortcut frames all objects but also reset the 3D cursor to the center of the world.
Related content: How to use the 3D cursor in Blender
We can also use the outliner, which is the window in the top right of the interface that lists the objects in our scene. Select an object in the outliner and press period on your numpad. This will center the view on the object you select.
Blender's navigation revolves around an invisible point in front of the camera. This is most notable when you hold your middle mouse button or scroll wheel and move your mouse to rotate around in the scene.
If we scroll the mouse wheel we will zoom further in towards this invisible point, but the zooming will slow down.
Likewise, if we use the scroll wheel to zoom out the zooming will stop at some point.
In order to zoom past these two extremes, we need to move this invisible point that we are zooming in relation to.
We can do this while we zoom, or rather move the camera backwards and forward. Hold Ctrl+Shift+Middle mouse button to have this invisible point move with you as you zoom.
You can also select an object, press number pad period to focus on an object and the invisible point will now be at the same position as the object you focused on and you can now zoom in and out from this position.
You can also turn the view on the side and pan by holding Shift+Middle mouse button. While panning, the invisible point will follow the view. So now you can orbit the view by holding middle mouse button and moving the mouse again and you will have a new point in space to orbit.
If your view suddenly appears on an angle, it can be very hard and frustrating to navigate, and you need a way to get back to a leveled view. In this case you can press 1, 3 or 7 on the numpad to get back to front, right or top view and continue navigating from there.

The view can tilt to an angle if you for example hold Shift + numpad 4 or Shift + numpad 6. It can also happen if you have aligned the view to something. For example, in edit mode, you can select a face and press Shift + numpad 7 to have the camera point exactly at the face. Or Shift + numpad 1 to view exactly from the side.
Clipping distance is the furthest your camera object or view can see and the shortest distance your viewport or camera object can see.
If you are working with larger or smaller scenes, you might need to adjust the clipping distance both for the viewport and for your camera object.
For example, if your objects clip away when you get too close or too far away. While modeling, it is common to need a smaller clip start value.
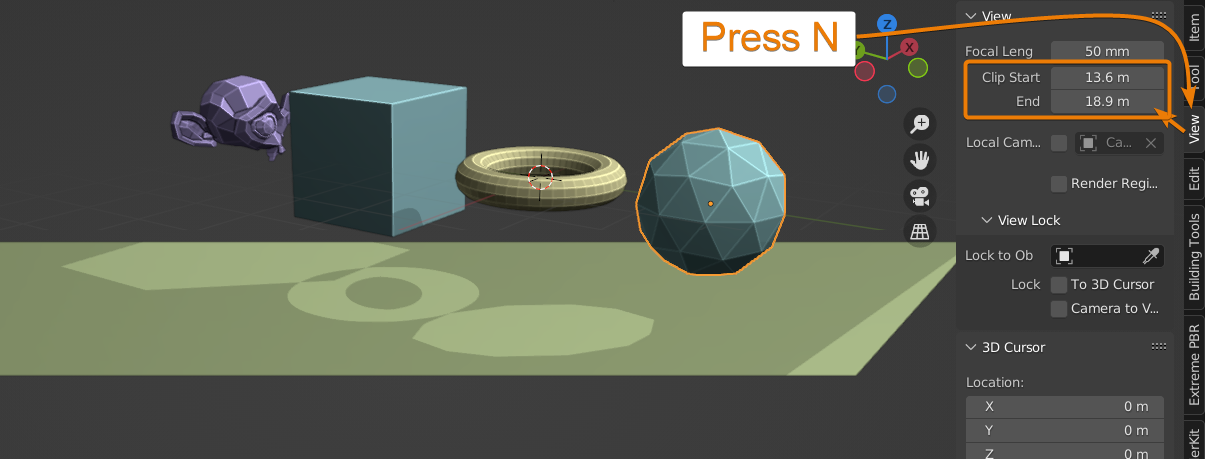
To adjust the viewport clipping distances, press N in the viewport to open the right-side toolbar and go to the view tab. At the top you will see clipping start and end. Adjust these values to fit the scale of your scene.
Also, if you have lipping errors in your final render, you can adjust the clipping distance for your camera.
To change the clipping distances for your camera object, select the camera and go to the properties panel below the outliner and go to the green camera icon. In the lens section at the top you will find clipping start and end, adjust these values to fit the size of your scene.
If the clipping start is too small for really large scenes, you can start to get artefacts on mesh surfaces. This is most notable while moving the view as they flicker.

To fix this, increase the clipping start value. For example, if you have a scene that requires a clip end to be 5000 meters, you might have imported map data over a city for example. Then change the clipping start to be perhaps 10 meters.
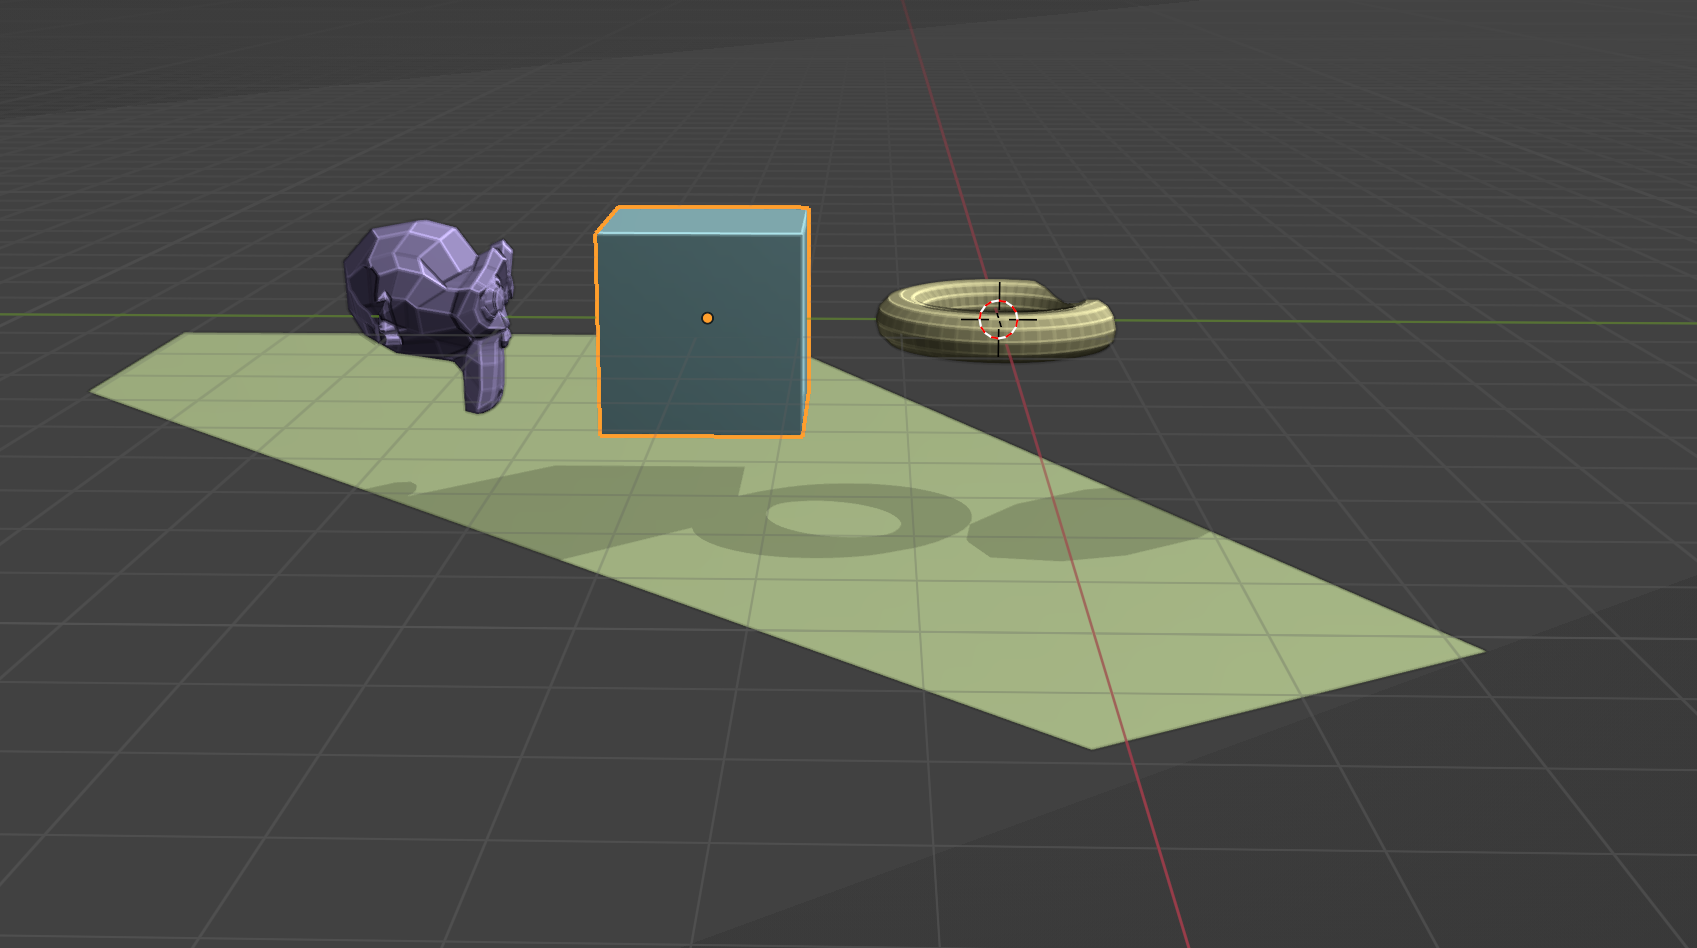
When you hold middle mouse button and move the mouse in the 3D viewport, we orbit around a point. We want this point to be aligned with the object we are currently focusing on or working on.
The best way to align these points are to press number pad period. You can also find the frame selected option in the view menu.
If you don't have a number pad you can change this shortcut by right clicking this menu item and choose "change shortcut" and press the shortcut you want to use for this action.
The invisible point we orbit also follows along as we pan the view with shift + middle mouse button if we want to move it along manually.
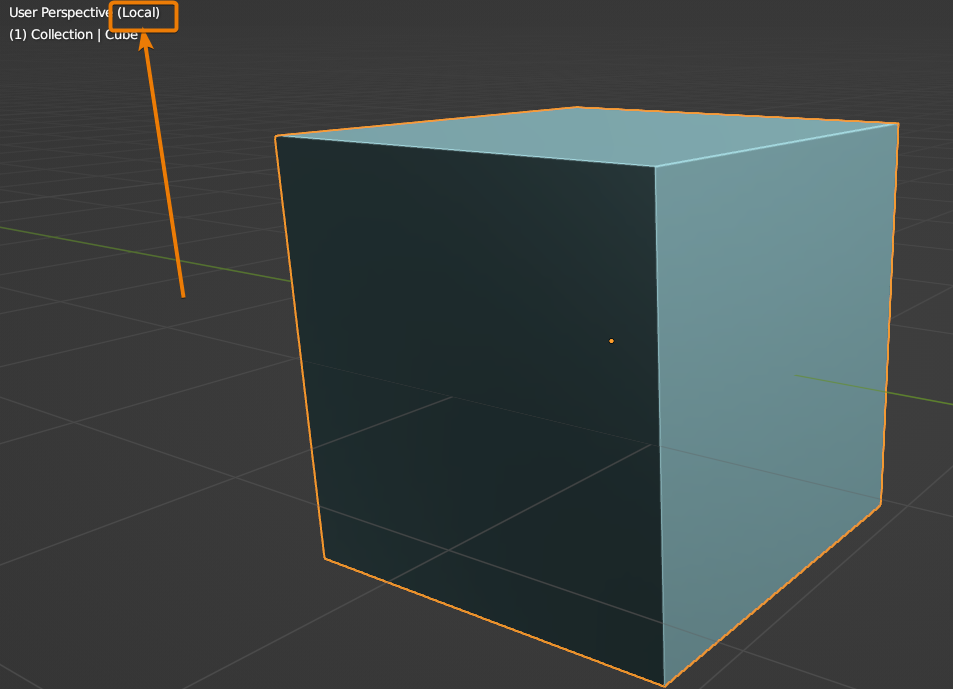
If you can only see one object in your scene it is likely that you entered local view. Local view can be toggled with number pad / or by going to view->Local View->Toggle local view
You might be in local view for one or more objects at a time depending on the selection you had while entering local view.
You can see if you are in local view in the top left corner of the 3D viewport It will say (local) in parenthesis in the status text.
You might find yourself in a situation where you have a beam of lighter gray in your scene, and you can only see what it is inside of it. Everything outside of it is hidden. In that case you have activated clipping region.
To clear a clipping region, you can press Alt+B
You can find the settings in the view menu under view regions and clipping region.
There is an alternative to this and that is render region that you can also find in this menu. A render region is a rad box and when in rendered view mode, selected from the top right corner of the 3D viewport, you can only see the portion of the viewport that is inside the render region if this is active.
Create a render region with Ctrl+B and clear it with Ctrl+Alt+B. This is good if you have a scene that renders slowly but you still want to preview a portion of it, you only have to render that portion.
We now covered most problems you might run into while navigating the 3D viewport.
If you only remember a handful of things from this article, I would definitely try to remember that the home button reset the view to frame all and number pad period focus on an object. Simply refocusing the view solve a lot of the more common navigation issues.
But even so, just learning about what might go wrong gears you up for solving any potential issues you might run into.
Drive that viewport safely.
Thanks for your time.
