


For the longest time I did not use the knife tool as part of my Blender modeling workflow. But it has become a more frequent tool since I have started to discover how versatile and easy it is to use.
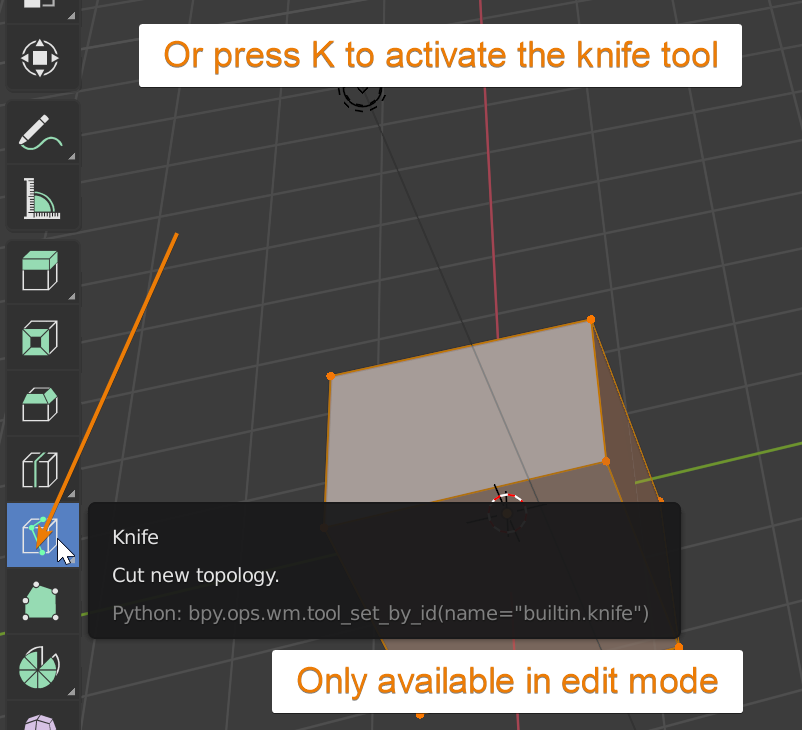
To use the knife tool in Blender press tab to go into edit mode, then press K on your keyboard. You can also find the knife tool in the left side toolbar. Click on one or more points to create a new vertex at this location and Blender will automatically create edges between each of them. Press enter to confirm
This is the basics on how to use the knife tool but there is more. We will cover the different options and a few examples where this tool can be very handy.
Related content: More than 30 Blender modeling tools explained
The knife tool is only available in edit mode for mesh objects. Since Blender version 2.80 we can enter edit mode for multiple mesh objects at once, but the knife tool will only work on the mesh belonging to the active object.
The active object being the last selected object with a lighter orange outline before we enter edit mode.
We can access the knife tool through the tools panel on the left side of the 3D viewport. If this panel is hidden, we can toggle it with T. We can also press K on the keyboard to active the knife tool.
Like with most modeling tools when we have activated them, we get a shorthand reminder of the possible settings in the status bar at the bottom of Blenders interface.
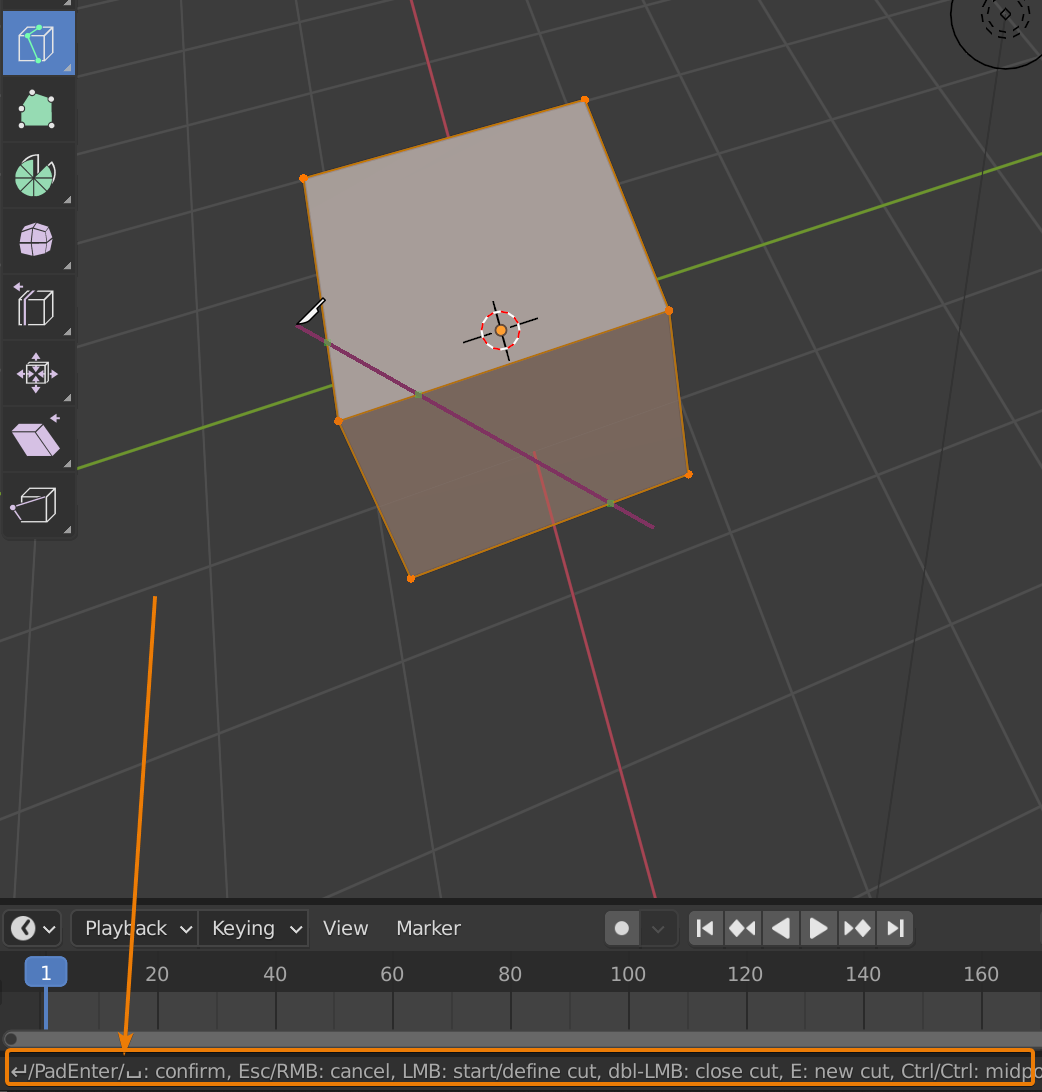
If you have never used the tool before though, it can be hard to decipher exactly what it means. It is more of a reminder with status for the different settings.
When the knife tool operation is complete there is no operator panel to adjust any settings afterwards. The only option we have after the operation is complete is to use Ctrl+Z to undo and Ctrl+Shift+Z to redo an undo step.
When the knife tool is active, we can click on any kind of element, be it vertices, faces or edges to start creating a cut. Every click creates a new vertex along the cut, but if it starts on the middle of a face, we need to end it there as well so that we don't create invalid topology. More on that later.
During the knife tool operation, your selection does not matter by default. We can cut through both selected and deselected mesh. In some cases though, you may want to limit the knife tool to only cutting in your selection. In that case, make a selection and activate the knife tool with Shift+K instead. In this case the knife tool will use the selection as a mask.


As you hover the mouse over a vertex or edge you can see either a green square with red border indicating that the existing vertex will be used if you cut here and above an edge you will see the edge highlighted in green. This menas that Blender creates a new vertex at the mouse cursor intersecting the edge and splitting it in two if you choose to cut. This behavior is a bit like snapping but not to be confused with the snapping control features you can read about in this article.
Related content: How to use snapping tools in Blender
If we don't want Blender to snap to these edges or vertices, we can hold shift to temporarily disable snapping.
If we hold Ctrl, we can extend the snapping to also include the middle of an edge as we hover the mouse over it.
To end a cut, we either press Enter to confirm the knife operation or press E to create a break in the cut without confirming. We can then continue to create multiple independent cuts without confirming the operation until we are done.
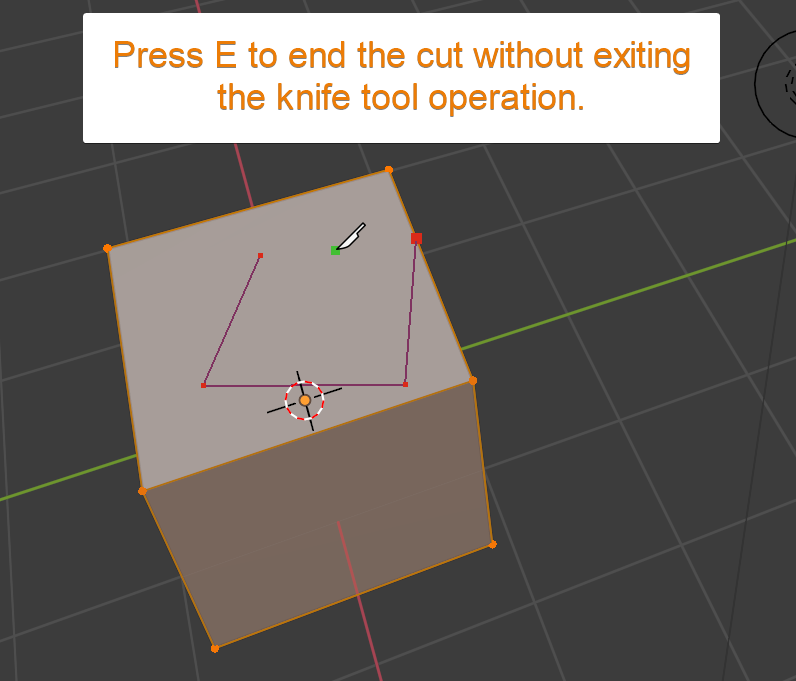
We can also double-click to create the end of a cut. If we do, Blender will cut and then make a straight cut back to where we started, finishing as a loop and release the cut without confirming, just like when we press E.
The last feature I want to cover is the cut through option. You activate it by pressing Z. When active the knife will cut through all mesh, not only the mesh that is visible from the camera. This is useful for instance when you want to cut a loop on a sphere in a certain angle and the loop cut and slide tool isn't giving you the exact angle you want.
The cut through option will still respect your selection if you activated the knife tool with Shift+K. This can be useful when you want to cut through a mesh but you have several layers behind that you don't want to cut.
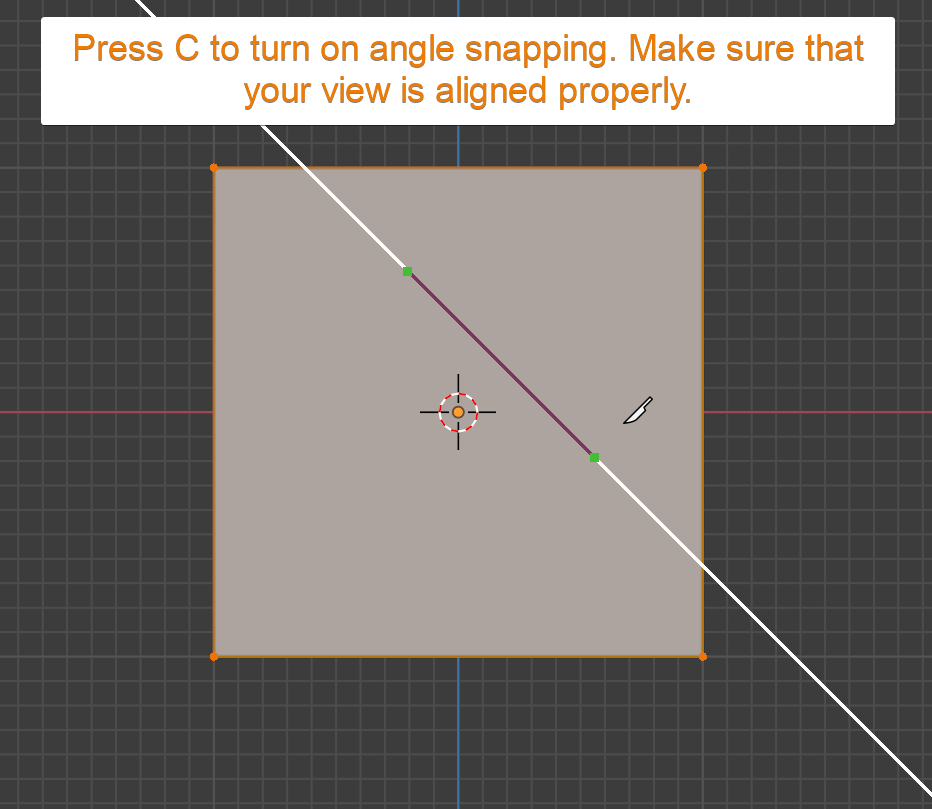
An especially useful feature of the knife tool is to be able to cut a straight line. When the knife tool is active, press C to constrain the knife tool to 45- and 90-degree cuts.
This feature works from the cameras point of view but while the knife tool is active our camera options are limited. For instance, we can't use the number pad to go into the top, bottom, left, etc., orthographic views.
Related content: Blender 2.8 Viewport navigation
So, make sure that you are at the correct view angle before you activate the knife tool.
There are primarily two instances where I use the knife tool. Most commonly I use it when I build the mesh. For instance, when I need to have an equal number of vertices on two sides that I intend to connect or if I need to change the edge flow.
In these cases, the knife tool is perfect because we get much control over where to put the cut.
Another example is towards the end of a modeling phase. We can use the knife tool to create damage or irregularities to an object by easily cutting and inserting mesh level detail.
We can create cracks, irregular bevels or cut an edge irregular.
When doing this though we need to be careful not to destroy our mesh in a way that creates shading artefacts.
A common beginner mistake is to assume that the knife tool is a "fix all" solution to geometry problems. But if you don't use it properly and plan for how your topology will look after your cuts, you can end up with a mesh that is hard to work with.
For instance, it is easy to create n-gons and triangles in a quad based mesh, breaking the edge loop flow thanks to a cut that isn't thought out properly.
While it is fine to break the edge flow, you must first be sure that you don't create structural changes that make it unnecessarily hard to continue working on the mesh.
The knife tool also has some technical limitations. One example is if cuts end in the middle of a face the edge and vertex won't be created. Faces need to have a closed perimeter of edges and vertices around it. One or more edges that cut through a face must divide it in two faces or the geometry can't properly be represented.
Also, if you use the knife tool to cut a hole in a single face, Blender will automatically connect the hole with the face perimeter through a couple of edges to already existing vertices.
The knife tool is powerful and can solve many topology problems where we would need multiple tools otherwise. Its settings and features make it useful in many situations, but it has a bit of a learning curve since it is easy to destroy the mesh and create shading artefacts.
The knife tool becomes more useful once you are past the beginner stage of learning how to model in Blender.
Thanks for your time.
