


In this article we will cover vertex editing tips that ever 3D modeler should know. Everything from simply toggling to vertex selection(that is a simple one) to merging, snapping and connecting vertices. Here is the complete list of tips.
Continue reading to learn all the vertex tricks you need to 3D model effectively in Blender.

Let's start with an easy one. To switch between selecting vertices, edges and faces we first need to be in edit mode, you get to edit mode by pressing Tab on your keyboard or by going to the top left corner of the 3D viewport and select the mode from the mode menu.
When in edit mode we can either press the number row 1,2 and 3 to switch between vertex, edge and face selection in that order.
If we also hold shift will doing so we can activate and deactivate multiple selection modes at a time.
Related content: How selecting works in Blender
Sometimes when we are modeling, part of the mesh might be in the way so that we cannot see what we are doing. We might also be in a situation where geometry is so tightly packed togehter that it is hard to select the right thing. In those cases it is handy to be able to hide and unhide parts of the geometry.
To hide and unhide one or more vertices in Blender, follow these steps:
We can also do the same for edges or faces or entire objects while in object mode. On the object level we can also use the eye icon in the outliner to hide entier objects from the viewport or the camera icon to hide the object from render.
In some 3D software the word chamfer is used. But in Blender this operation is called bevel or beveling. There is both a bevel tool and a modifier in Blender.
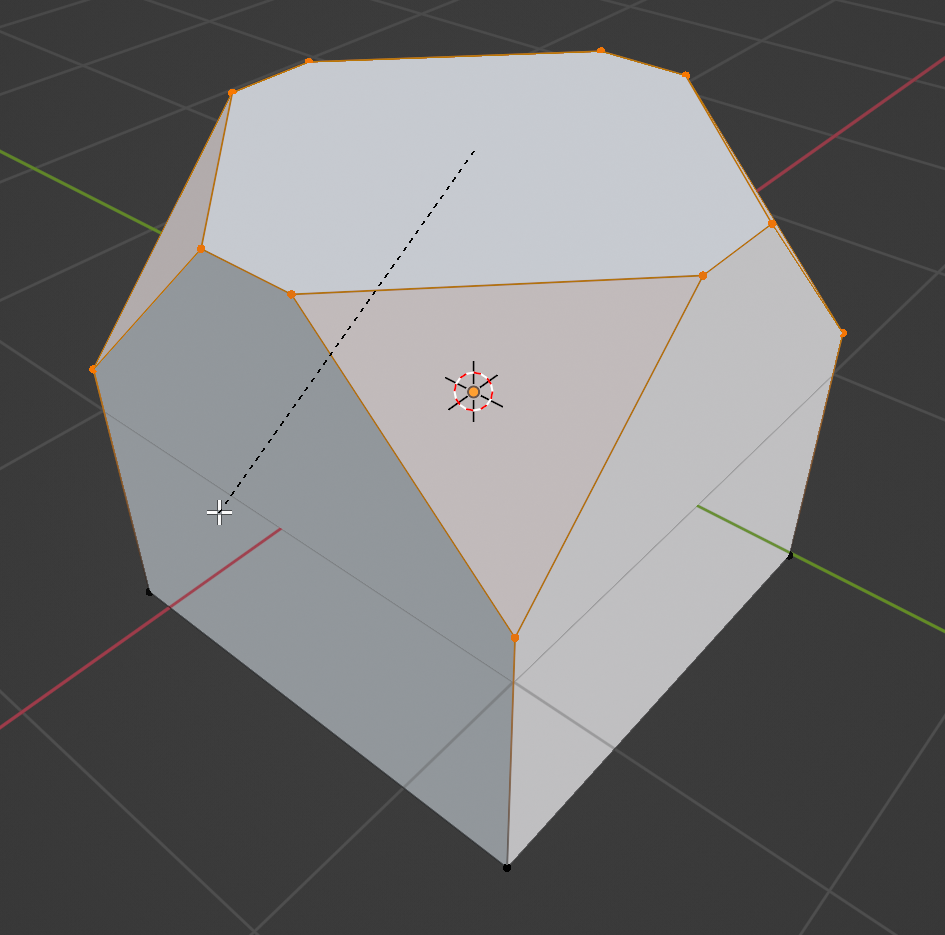
You might be familiar with the bevel tool that we use to bevel edges. We can also use it to bevel the selected vertices.
To bevel vertices in Blender follow these steps:
Keep in mind that if your beveling does not behave uniformally or behave in some weird way, tab to object mode, press Ctrl+A and choose scale. This will apply the objects scale and this solves most issues. You can read more about it here:
Related content: How and why do we apply scale in Blender?
You can access additional bevel tool features right after you confirmed the bevel tool operation. In the bottom left corner of the 3D viewport you can expand the operator panel to see these settings. You can also press F9 to bing this menu up right at the cursor in the viewport.
Related content: How to bevel in Blender using the tool and modifier
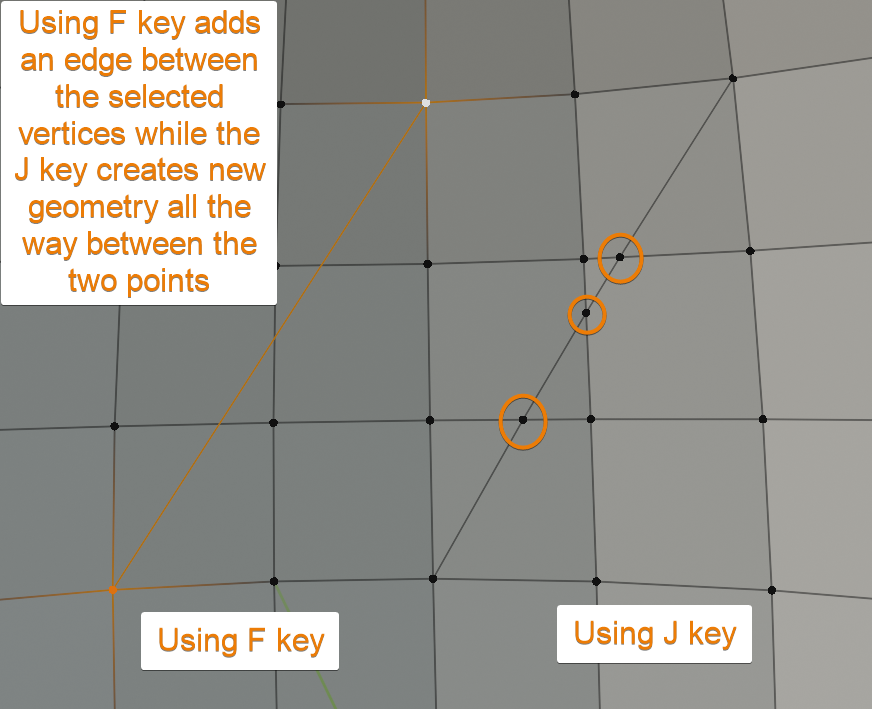
A vert common modeling operation is to join or connect vertices with an edge.
To connect or join two vertices in Blender follow these steps:
If there is a face between the vertices Blender will create an edge that runs through and split the edge when using the J key to connect the vertices.
If you don't want the edge to split any face between the vertices, instead use the F key to fill instead of join.
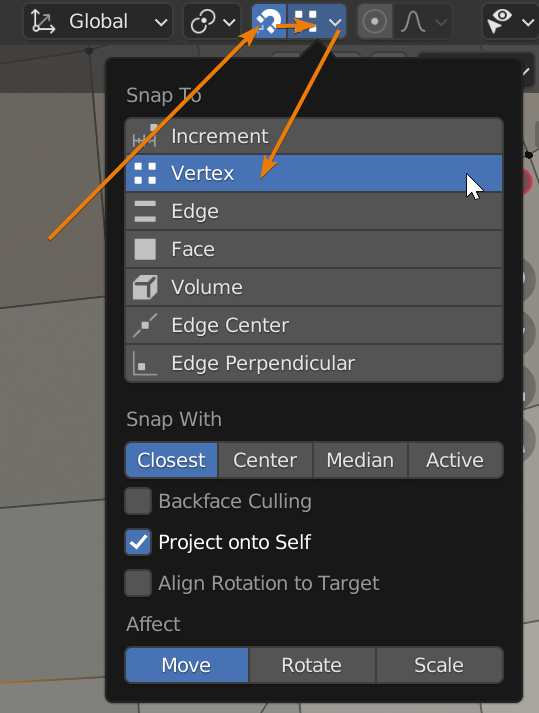
We can also snap our selection to a vertex. This is most useful, for example, when we have one vertex that we want to snap to another to then merge the two vertices.
To snap to a vertex in Blender, follow these steps:
Instead of clicking the magnet icon to activate snapping we can temporarily activate snapping by holding Ctrl on the keyboard while moving our selection efter pressing G.
Snapping is a very useful feature that is covered extensively in this article if you are interested in reading more.
Related content: How to use snapping tools in Blender
Sometimes we end up with two or more vertices on the exact same location or at least very close to each other. Often we want to merge these vertices to clean up the geometry.
To merge two or more vertices in Blender, follow these steps:
Blender will give you a brief report in the status field at the bottom of the interface about how many vertices that was removed. If it seems to be more or less than you expected, you might want to undo using Ctrl+Z and investigate what happened before continuing so that you don't accidentally remove more than intended.
This is a process most commonly used as a way to clean up geometry. Now let's look at an option that we are more likely to use during the modeling process.
We can use the merge menu that we access using the M key to merge vertices regardless of the distance between them. In those cases we can choose one of these options.
The last two options, merge at first and merge at last is probably the most common options when merging vertices. These allow us to essentially move one of the first vertices to the position of the other and merge at that point.
The requirement of one vertex to be active just means that we have to shift click the last of them in order for it to be the active element. Then these two options show up in the menu.
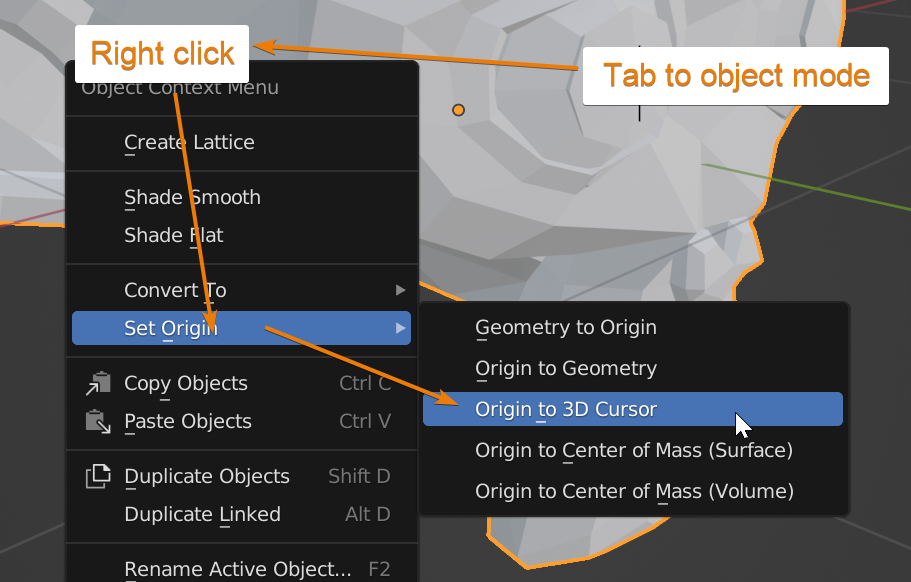
We can choose to set the origin of the object to an exact vertex position. This can be useful, for instance, if we are using the origin as a pivot point. Let's say that we are modeling a door and we want to rotate it around the hinge. In that case it is common to put the origin point of the object at the hinge and rotate around that point to open and close the door.
To set the origin to a vertex in Blender, follow these steps.

The first step positions the 3D cursor at the position of the selected vertex. Since the origin belongs to the object, we then have to go to object mode and set the origin to the position of the 3D cursor.
If you are interested in more of these kinds of settings you can read this article.
Related content: How to center objects, origins and pivot points in Blender
Sometimes when we 3D model it is easy to end up with a floating vertex that isn't connected to anything in the mesh. From time to time it can be a good idea to make sure that there is no such floating loose geometry left over.
They may create problems for us if we are not careful. For example they may mess up simulations or unnecessarily clog up our objects.
To select all of them you can start by selecting everything that you want to be part of your object in edit mode and then invert your selection. You can do this by following this step.
Any geometry, including single unconnected vertices, will now be selected. You can now press X and choose delete.
The key to delete in Blender is either delete or the X key. The shortcut brings up a menu that allow us to choose what element we want to remove. We can choose between Vertices, faces and edges along with Only faces and Only faces and edges.
Choose vertices to delete any selected vertices.

You can also choose to dissolve. This means that Blender will try to delete the selected element while piecing together any surrounding geometry. For example, a vertex that is connected to two other vertices via edges that is dissolved will leave a direct connection between the two vertices that are left.
There are primarily two ways to display vertex count. The first way is to display it in the status bar. This is the bar at the bottom of Blenders interface.
If the vertex count isn't visible on the right side of the status bar you can right click it and check scene statistics. Just make sure that you right click on the far right side of the bar or you will get a different context menu.
The other way is through the overlay menu in the top right corner of the 3D viewport. Click the down arrow on the right side of the overlay toggle and check statistics.
Related content: How to use 3D viewport overlays in Blender 3D
This way statistics will be displayed on the top left side in the 3D viewport.
While in object mode the scenes total number will be displayed. While in edit mode you will see two numbers. The first number is the selected number of vertices and the second number is the total number of vertices inside the current object.
For more advanced users there is also a vertex index. This is a number that is used to identify each vertex in the mesh. This can be used for example when scripting or programming tools and add-ons for Blender or when using geometry nodes.
To display vertex index, first go to Edit->Preferences and go to the interface tab. Here, check developer extras. Next go to the overlay menu in the top right corner of the 3D viewport while in edit mode. A bit further than halfway down the settings you will find the developer section where you can check "indices".
This will display the index of each vertex in the 3D viewport.
The fastest way to extrude a vertex is to select it, hold CTRL and right click in the 3D viewport.
This is not very exact, but it is the fastest way. If we want more control, we can select one or more vertices that are not connected and press the E key to extrude it without creating additional adjacent geometry other than the edge connecting the original vertex and the new one.
If you need to learn more about the extrude tool and how it works you can read this article.
Related content: Extrude in Blender: Basics, along curve, circles, manifold and more
We covered a lot of tools and techniques that are essential for 3D artists to master in order to be effective when 3D modeling. Everything from selecting the right mode to be able to select vertices in the first place to how to extrude them or even show their indice.
We also looked at merging, joining and beveling vertices to give some examples of the most common questions for beginners.
Thanks for your time.
