


Blender's shader editor is incredibly versatile as it provides a ton of nodes to create just about any material you can imagine using the combination of procedural and image textures. One essential aspect of this is transforming these textures in order to get the desired look for your material: and this can be done with the mapping node. But how does it work? Let's take a look!
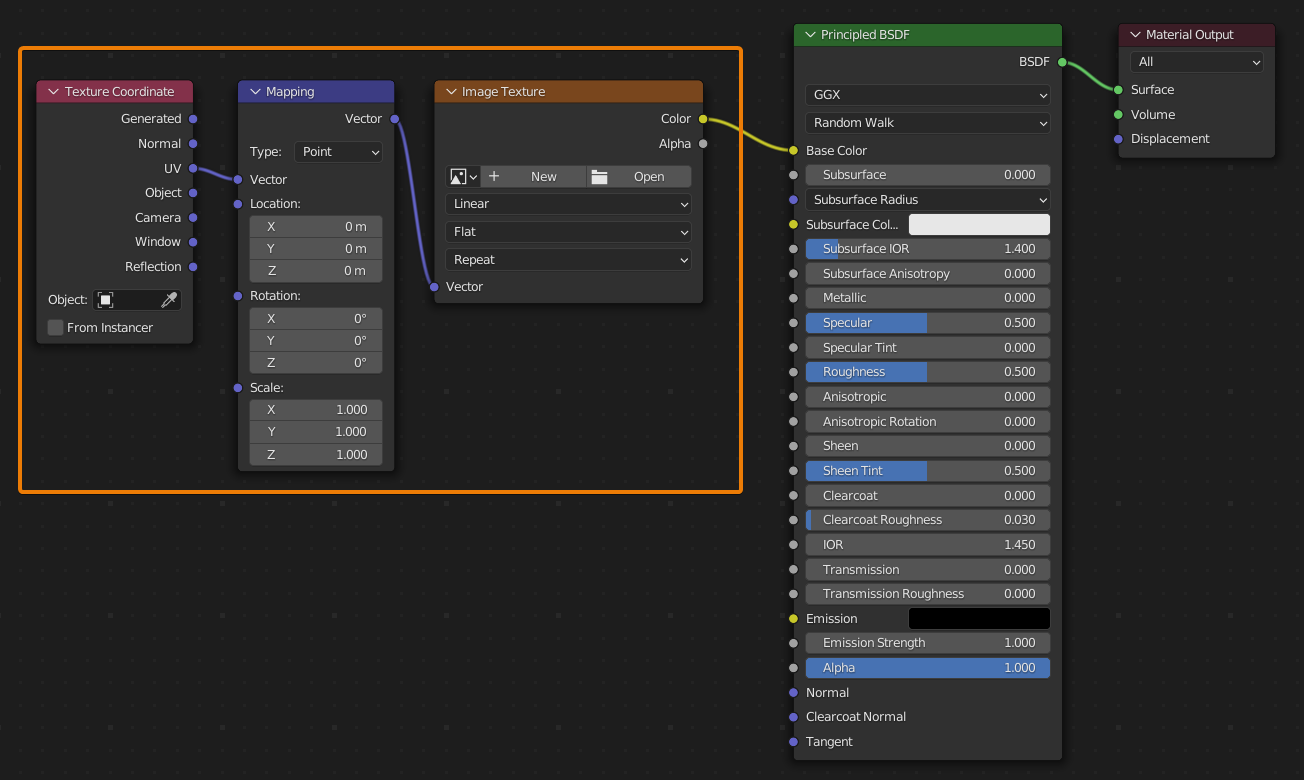
To use the mapping node, head to the shader editor and go to Add > Vector > Mapping (or press Shift+A > Vector > Mapping). Drop in the mapping node and plug its vector output into the vector input on any image or procedural texture. Next, press Shift+A > Input > Texture Coordinate, and plug the 'generated' or 'UV' outputs into the vector input on the mapping node. Now you can transform the texture by adjusting the location, rotation, and scale values on the mapping node.
In this article, we'll take a closer look at how the mapping node works and explore some of the creative possibilities it offers.
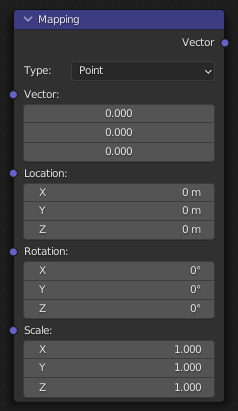
The mapping node is used to manipulate an image or procedural texture using vector properties. This essentially means that you can move scale, stretch, compress, or rotate a texture about any axis.
In most cases, the mapping node is used in combination with a texture coordinate node, which provides vector coordinate data for the object. With the texture coordinate node, you can choose between different types of coordinates to use for mapping the texture. The most commonly used options is the "Generated" coordinates, which generates them based on the locations of vertices, and the "UV" coordinates, which work hand-in-hand with the UV map of the object.
The mapping node itself has 3 more important inputs: location, rotation, and scale. Each of these can transform the image texture in the respective axis. For example, increasing the location for the Y axis will move the texture from left to right in the y-axis.
For the scale inputting, scaling up or down in all 3 axes simultaneously leads to an overall increase or decrease in the texture or image size. However, if you only scale up or down along one axis, it will give a compressed or stretched effect:
As can be seen in the images above, simply changing the location, scaling, or rotation of a texture using a mapping node can help you achieve many unique effects.
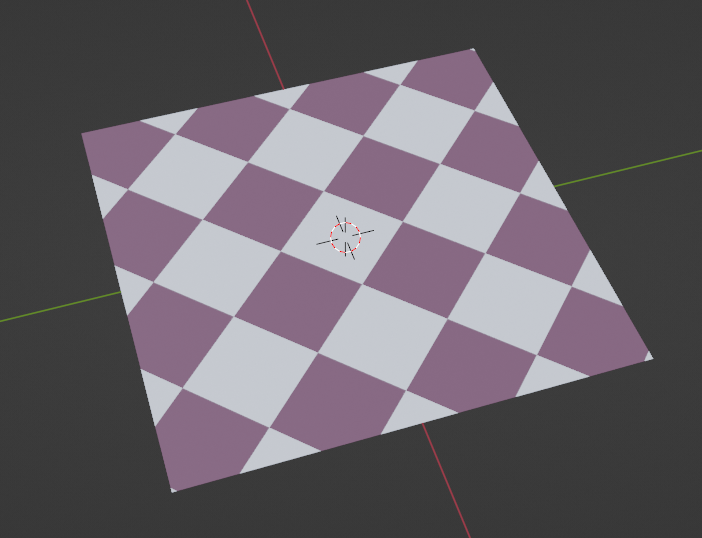
The mapping node is quite helpful when working with image textures, and is incredibly easy to set up:
The final setup should look something like this:
Related content: The definitive tutorial to UV mapping in Blender
As mentioned above, you can now easily transform the image texture by changing the mapping properties.
The UV map is essentially a 2D representation of the 3D model, where each point in the UV map corresponds to a specific location on the model's surface. By adjusting the UV map, you can change how the image texture is wrapped around the model.
To scale, relocate, or rotate a texture using UV maps, you can simply select the UV islands of your mesh in the UV editor and transform them as needed. This would mean that it will have the same effects as changing the vector properties of the texture using the mapping node.
So when should you use one or the other?
Adjusting the UV map requires manual manipulation of the map's points, while the mapping node can be adjusted more dynamically and accurately using numerical values. Hence, for multiple high-accuracy changes, the mapping node is preferred.
Moreover, adjusting the UV maps of an object is local: it will affect the texture for only that one object. If you have the texture applied to multiple meshes, the others won't be effected until their UV map is changed too. Alternatively, transforming the image texture using the mapping node will affect the overall material, and hence is useful when manipulating the image for application on multiple objects with the same material applied.
On the other hand, changing the UV mapping can be quite useful when finetuning or making miniscule changes to certain parts of a mesh, especially if it is complex with many faces that each require different transformations to the texture. Transformations made with the mapping node can generally only affect the entire mesh.
Quite often, it can be helpful to change both the UV mapping and adjust the transformations using the mapping node. This way the texture on the individual faces of the mesh can be finetuned and the overall location, scaling, and rotation of the texture can be changed with much ease.
In this case, do make sure to have the UV output of the texture coordinate node plugged into the Vector input for the mapping node.
The mapping node can be used with any of Blender's procedural textures as well, in a way similar to image textures:
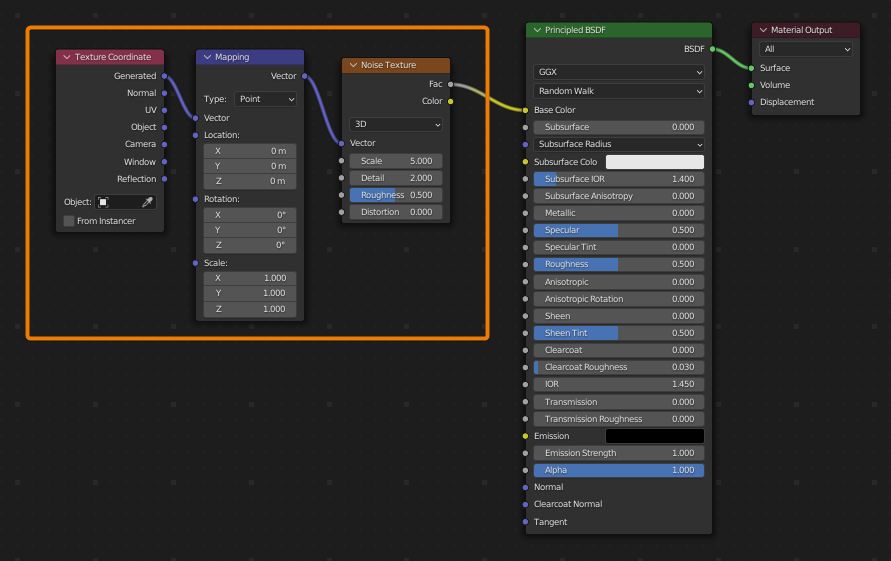
Now you can transform the procedural texture however you want by adjusting the location, rotation, and scale values on the mapping node.
Do note that increasing the value of the scale leads to an overall decrease in the size of the texture. This means that if you change the scale from 1.0 to 3.0, it leads to the entire texture decreasing by a factor of 3, and hence looking 'smaller' in general.
Similarly, if you change the scale from 1.0 to 3.0 on only one of the axes, it will become smaller in only that direction, and hence seem 'squished' along that axis.
The main differences between using the mapping node with procedural textures rather than image textures is that procedural ones are in a 3D or even 4D space.
This means that you can also adjust the scale in the Z-direction, even if the texture is applied on a flat plane that has essentially no depth in that axis. This can help you achieve lots of different and unique effects with your textures.
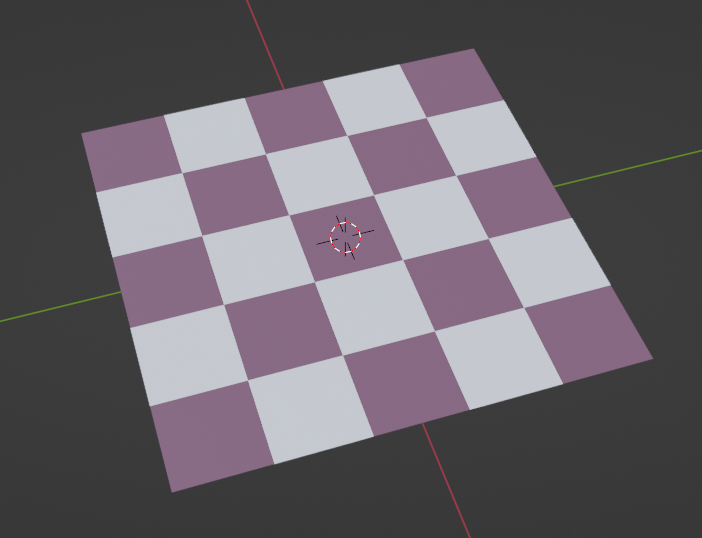
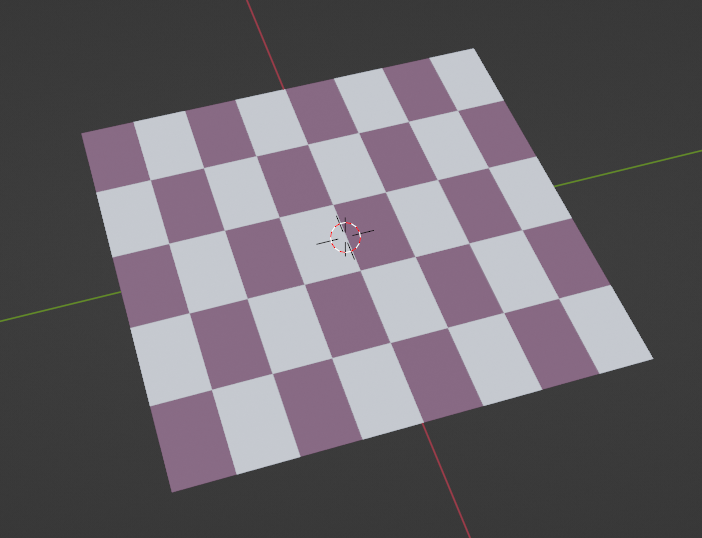
For example, when using a checker texture on a plane, using the mapping node to change the scale of the texture along the Z-axis helps you quickly invert the colors of the checker pattern:
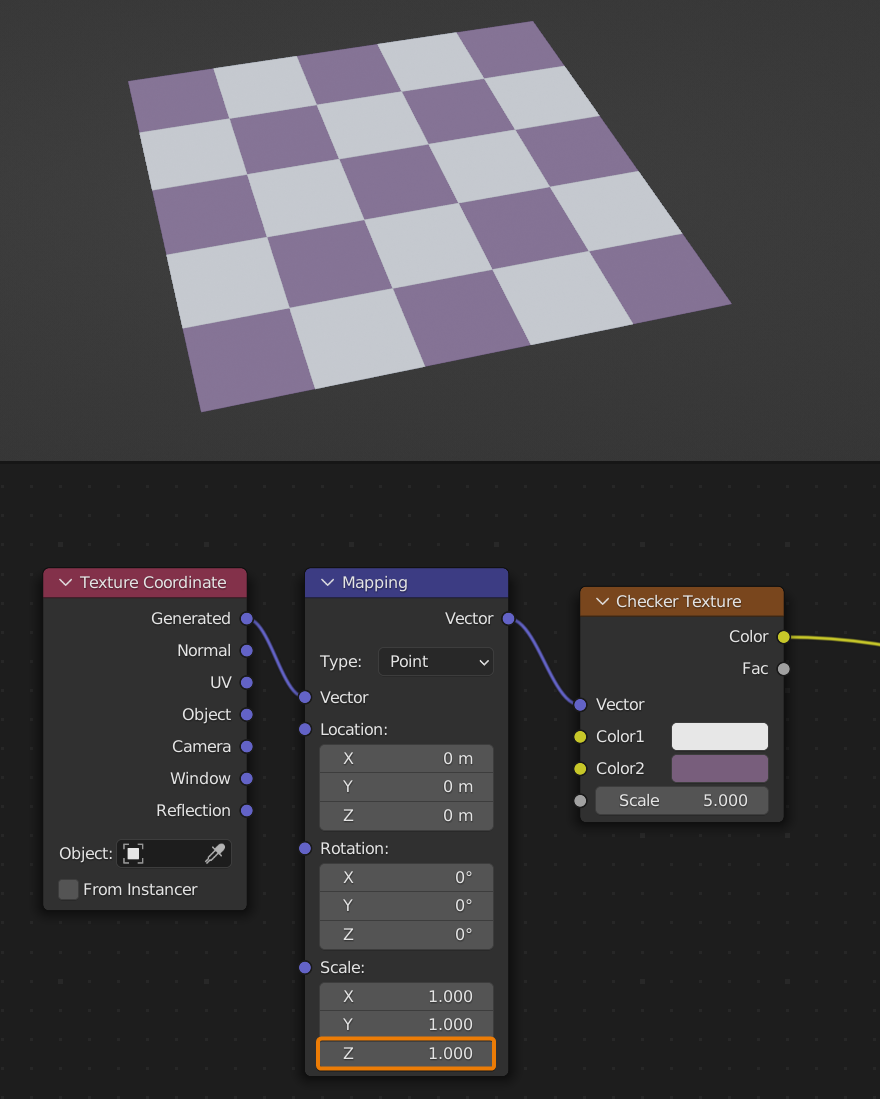
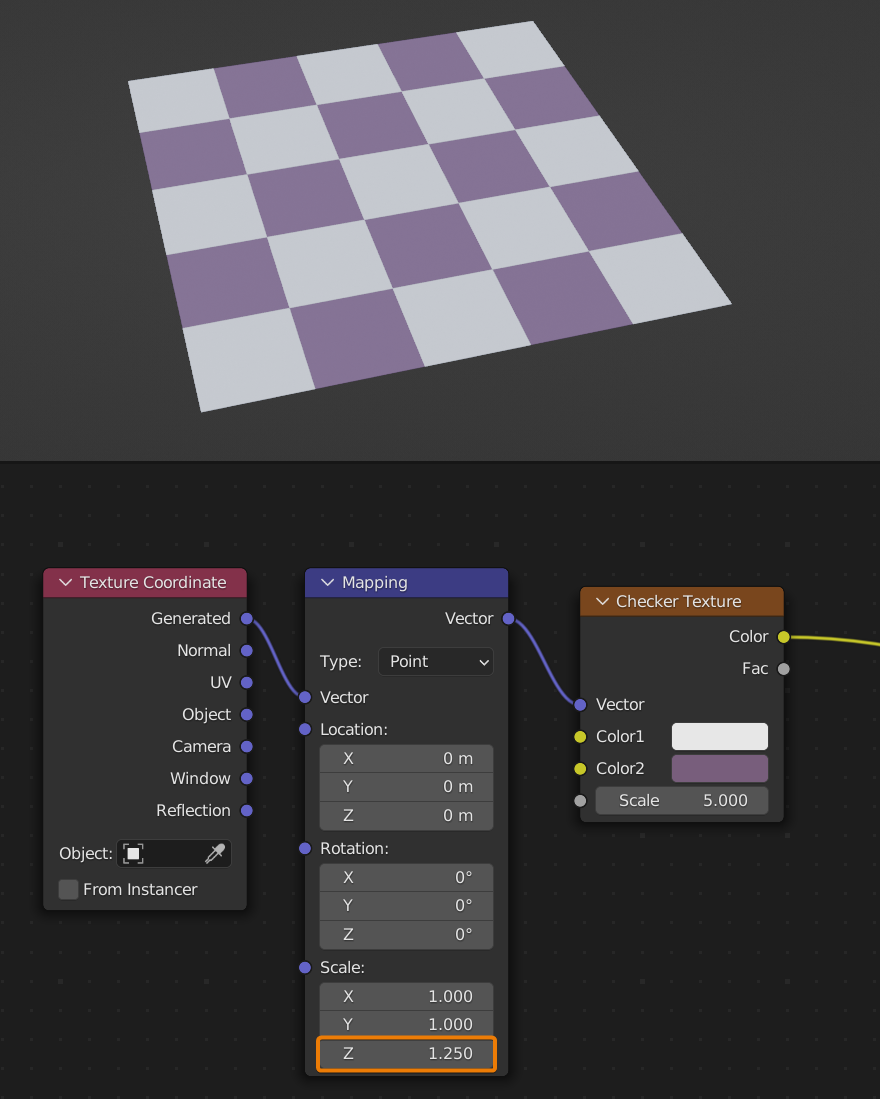
In this case, do make sure to use the generated coordinates using the output on the texture coordinate node.
A similarly "shifting" effect can also be applied to some other textures, including the noise and Voronoi textures
There can be numerous reasons the mapping node may cause issues or may not work at all. Generally speaking, the most common of these reasons is that the mapping node is connected to the wrong input on your image or procedural texture, so always make sure it's plugged into the texture's 'Vector' input.
Moreover, it's always good practice to use a texture coordinate node in combination with the mapping node, as mentioned in the sections above. Quite often, issues may arise if you have the wrong coordinate type selected, which may cause the mapping node to seemingly not make any changes even if its properties are altered. Try cycling between the different coordinate types until you get a result of your liking.
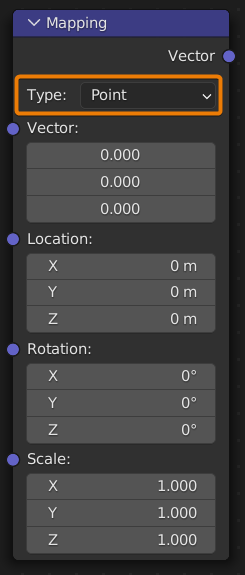
The mapping node could also behave in an unexpected manner if the mapping type is changed to a different type: the 'Point' mapping type is the most convenient for most general cases:
Lastly, you might encounter cases where changing the location, rotation, or scale on any 1 axis applies to a different axis instead. For example, you might have the scale changing along the Y-axis of the 3D world whereas you are only changing the scale along the X-axis using the mapping node.
In this case, it means you might have rotated your mesh and not applied the rotation, and so the mapping is being applied relative to it's original orientation. To solve this, simple select your mesh in the 3D viewport and press Ctrl+A > Rotation to apply the new orientation and have the transformations apply in the correct direction.
With some creativity and experimentation, the mapping node can be a powerful tool for creating unique and visually stunning materials in Blender. Whether you're adjusting image texture in a dynamic way or you're creating intricate patterns by transforming different textures, it can all be done using this simple yet versatile node.
Thanks for reading!
