


By default when using Cycles or Eevee in Blender, there are no post-processing effects, including glow. This means that no matter how bright an object is it will not radiate that glow effect that we so often see in a regular photograph when a bright object is present. So how do we set it up?
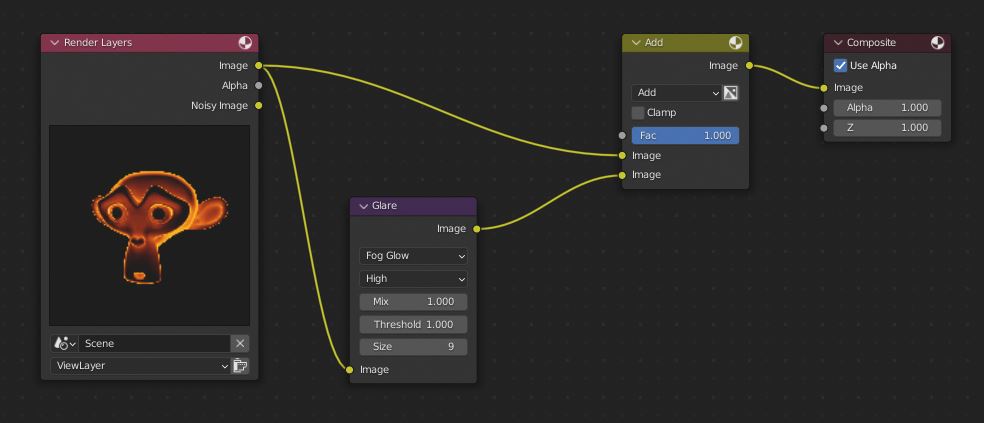
In general, we use the compositor to make a glow effect in Blender. We do this by setting up a glare node set to fog glow and connect it between the render layer and composite output node.
In the rest of this article we expand our explanation on this basic setup and we'll cover a few methods for creating glow as well as their options.
To have a prominent glow effect in a scene we either need a bright light or an object hit by intense light.
Depending on the render engine we use, the way to produce glow differs. In Eevee we have a bloom effect in the post processing render settings.
Related content: A guide to Blender Eevee render settings
In Cycles we need to use the compositor to create the glow effect. Since there are no post-processing effects in Cycles by default.
However there is a custom build maintained called K-CyclesX that has a few post-processing effects including a glow for Cycles. You can get it here:
External content: Blendermarket - K-Cycles
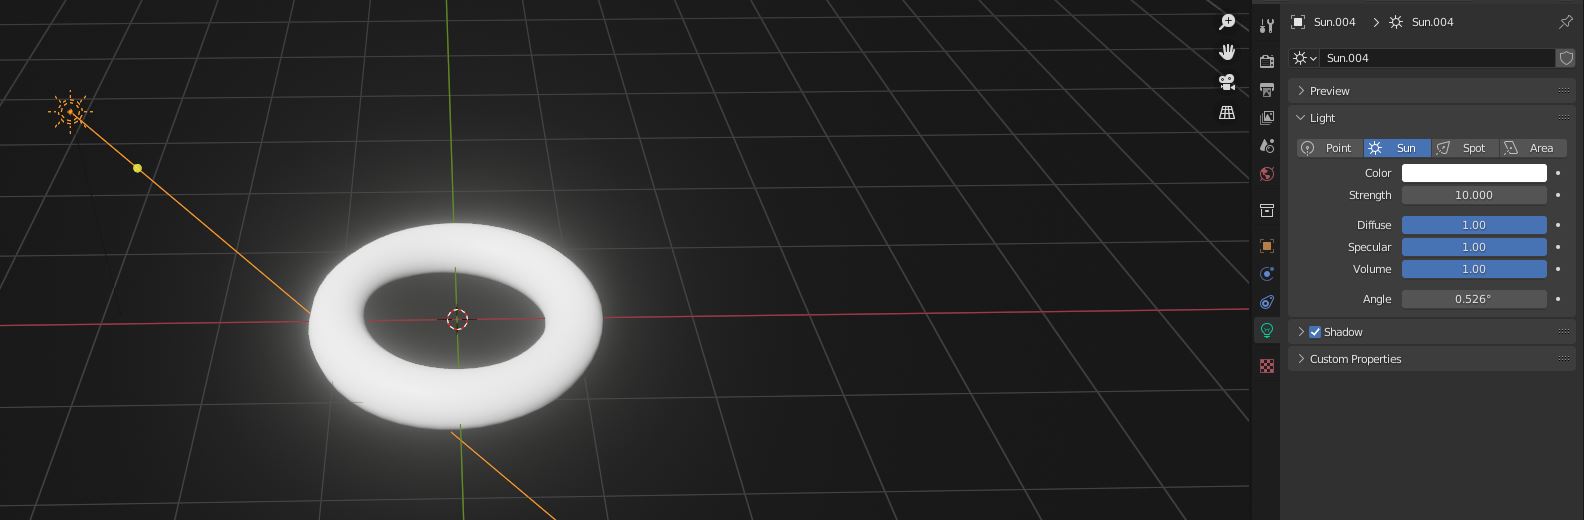
The first thing we'll need for a glow effect is a proper scene, this will need to include either a very bright light shining against an object or an emissive material.
For this example, we can use a sunlamp and set its intensity fairly high. For this example, I set it to 10, any light should work though as long as the intensity is high enough.
Related content: Top 10 lighting add-ons for Blender
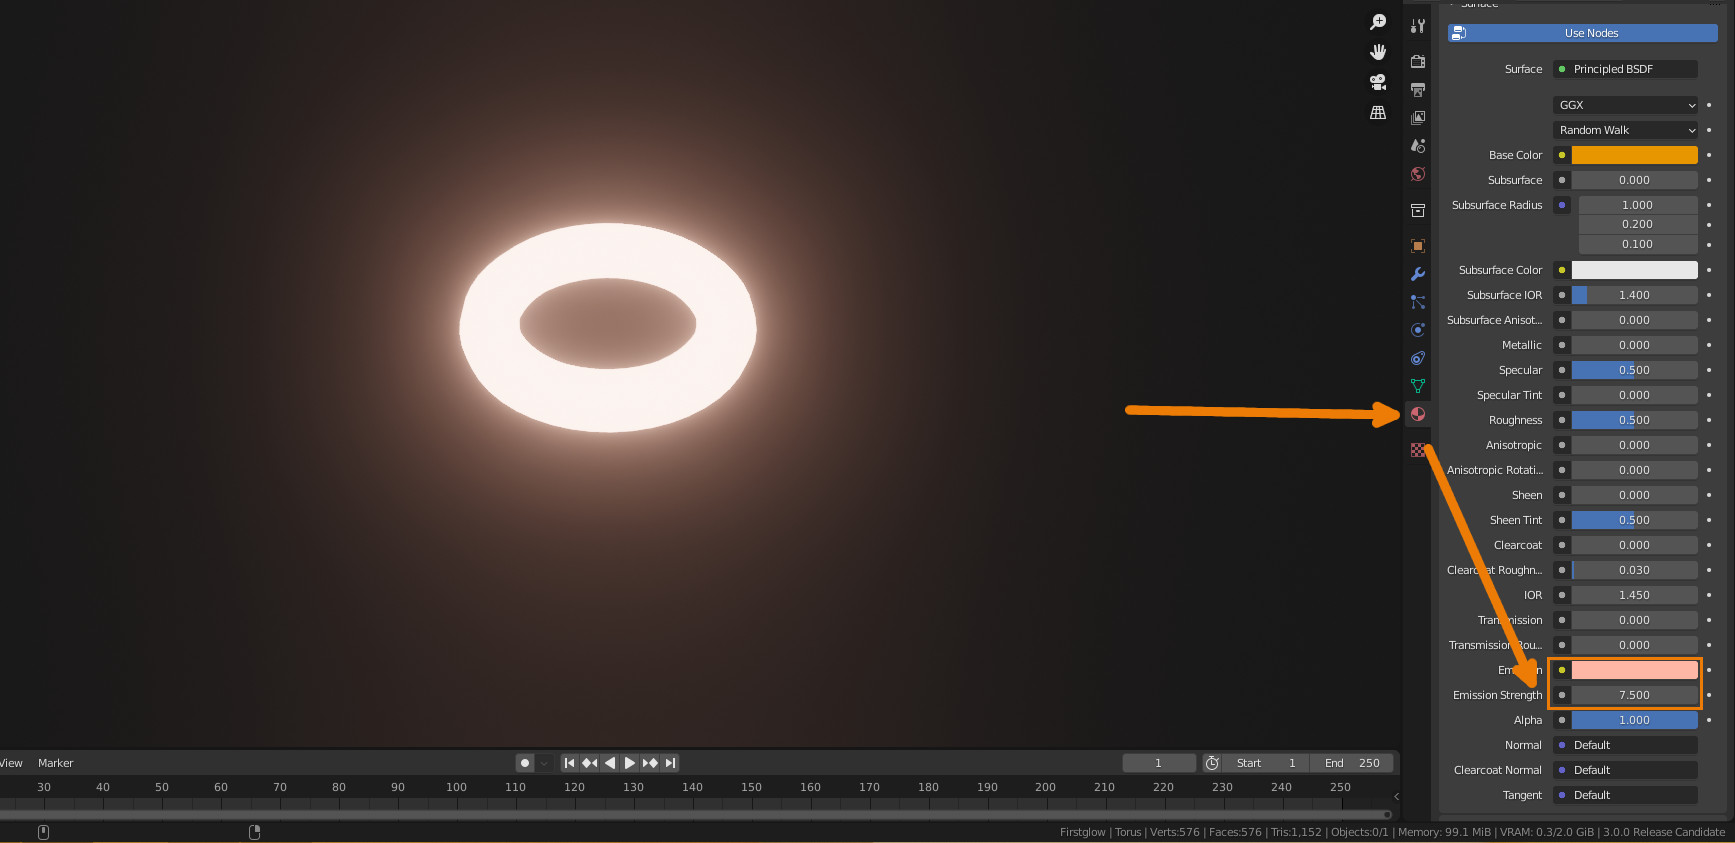
We can also setup an emissive material to create the glow by going to the material and increasing the emission color value as well as increasing the emission strength.
Note that I've just used a newly created material for the example below so that I can quickly adjust the Principled BSDF node values without having to go into the shader editor.
Related content: Blender emission shaders guide
The first method we'll go over for achieving a glow effect is the compositor, this method will work in either Eevee or Cycles, and allows us to control.
To setup a glow effect with the compositor:

Let's take a look at what options we have on the glare node to adjust and customize our glow effect.
We have the option to change the quality of the image that is sampled when creating the glare effect, by default it is set to medium but high will sample from a full resolution copy of the input, in this case, the render.
The quality will also indirectly affect the glow radius, lower quality will result in a higher glow radius.
Mix is the factor that the original image and the glow are blended by. -1 would be only the original image, and 1 would be only the glare. We can use this value to affect how intense the glow is.
Using the mix factor, we can sample only the glow effect by setting it to 1 and then use a mix node set to add to composite it over our render.
This will give us the same results as the glare node would by default but will also allow us to make any compositing changes we'd like to the glow effect.
For example we could connect a Hue Saturation Value node to the glare output and change the color of the glow, we could also blur, the glow to increase the radius of it past the limit. So this is an alternative setup that gives us more flexibility.
Next, Threshold will limit what parts of the image can glow, higher values will result in less glow.
Last, we have size. This will change the radius of the glow.
Another way we can create a glow effect in Blender is by using Eevee's built in post processing effects. We can use the same bright light or bright object setup and then just enable bloom and it will create a glow effect around the object.
To do this go to the Render Properties and Enable Bloom.

We can also use the values provided to adjust how our glow looks.
Threshold will set the limit for how bright something has to be to glow. While Knee will change how smooth the edges of the glow are.
Radius changes the size of the glow effect, while Color changes the color. However, by default it uses the color of the material that is glowing but we can also manually change it using this setting.
Intensity will change how intense the glow is. Clamp is in turn used to set a limit on how bright the glow can be.
We can also create a glow effect using subsurface scattering in our materials principled BSDF shader node. By having a very bright backlight as well as increasing the subsurface factor. Here is an example.

Besides the subsurface value we also have Subsurface Radius and Subsurface Color. Subsurface Radius lets us change the radius per color. The three values represent, Red, Green and Blue, in that order, if we increase the Red value it will cause our subsurface glow to look more red as well as increasing its radius.
Subsurface color will also give us control of the color without changing the radius.
You may notice that by default in Eevee light doesn't properly shine through objects. We can fix this by going to the material properties and enabling subsurface translucency for that material.
We can also achieve a similar effect using translucency, translucency behaves similar to subsurface scattering but not exactly the same. Applied to basic objects it will appear as the inverse of diffuse, being lit on the shaded side and dark on the lit side, if we apply it to a more complex object it looks something like this:
Compared to normal diffuse lighting:
To make something glow with translucency in Blender follow these steps:
Note that for translucency we will need a brighter light or a lower limit on what can glow for the material to glow. In the example below I've increased the sun light's intensity, you could also modify the color being used by the translucency by increasing it's intensity, for a solid color this can just be done by changing its color value.

You can increase this value past one by selecting it and typing the value you want it to be.
A glow effect can really help emphasize just how bright an object is, without it objects may not look as bright as they are. Glow can also help soften an image. In Blender we have multiple methods for achieving it and knowing how each one works can help us achieve the effects we want with much more ease.
Thanks for your time.
