


There are many times in Blender where we will need to setup vertex groups and weight paint, whether we're creating an armature or setting up a vertex group to distribute particles. So how do we weight paint?
To Weight Paint in Blender:
In the rest of this article, we'll go into more detail about weight painting, a few tricks we can use to streamline the weight painting process and explain the weight painting process for armatures.

To understand weights, we will first need to go over what a vertex group is, for a more in-depth explanation on Vertex groups check out the article linked below.
Related Content: How to use vertex groups in Blender
Vertex groups are a collection of values for each vertex on a Model, they basically let us assign a "weight" to each vertex that we can later use for example to distribute particles.
Vertex groups are like masks for each vertex of a model, modifiers use them to control which vertices are modified and armatures create a weight map for each bone that will tell the model which vertices to move with which bone.
We cannot weight paint on a model unless it has a vertex group setup.
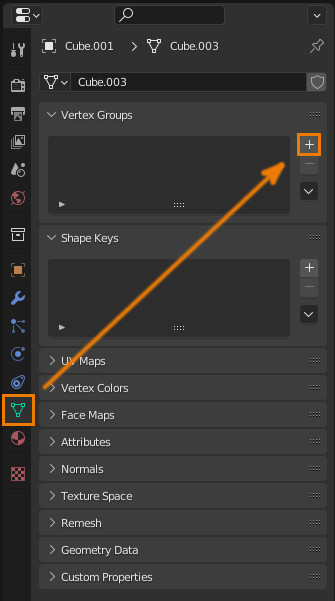
To setup a Vertex Group first select the object you want to add a vertex group to. Go to the properties > Mesh Data > Vertex Groups and click on the + Icon.
From here we could tab into edit mode and manually assign vertex weights using this window but that should only be used if for example we want to remove a select from a group or assign a certain weight to an area. Instead, we'll be using Weight Paint mode to visualize the weight map as well as adjust it.
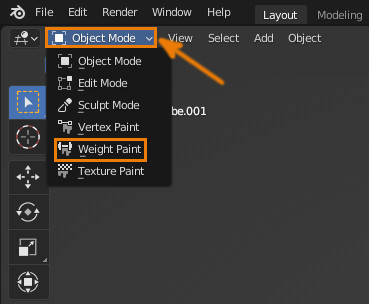
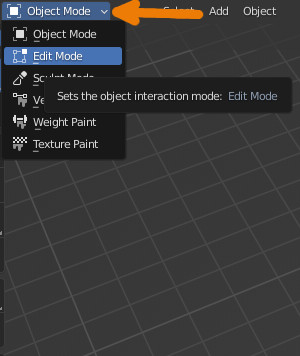
To weight Paint select the object we are weight painting and set the object interaction mode to Weight Paint.
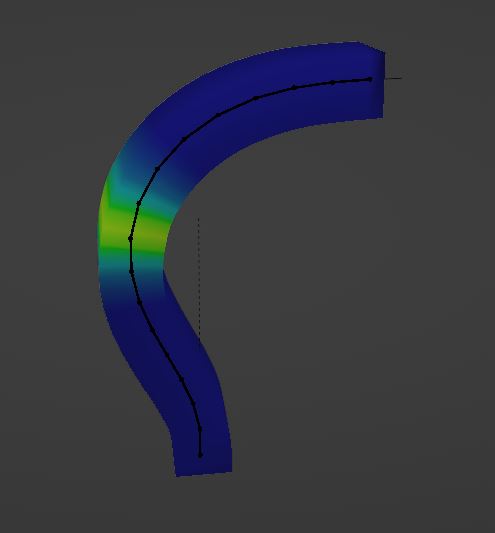
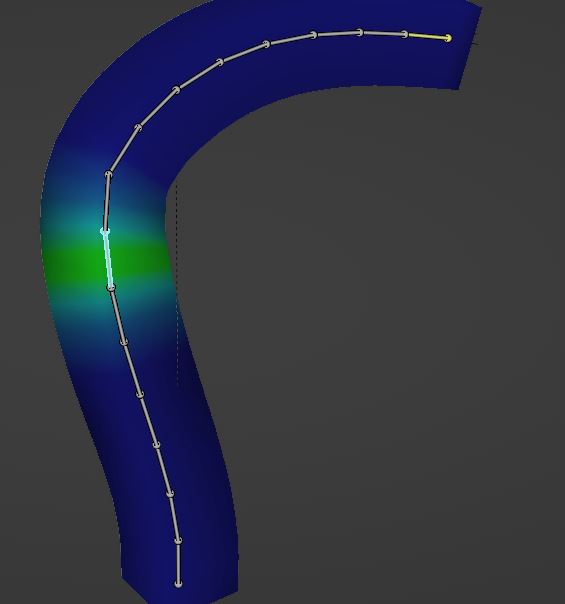
Now that we're in weight paint mode we can see the models weights, this will usually turn the model blue and when we paint weight with the brush it will turn it red. Red is basically full weight or 1 and blue is 0.
The main settings we'll use when weight painting are Weight, Radius, Strength.

The weight option will adjust what the weight value we paint, it will act as a limit for how strong of a weight we can paint, strength acts like the opacity of the brush.
We can also change which Vertex Group we're painting by navigating to Properties > Mesh Data > Vertex Groups and select another vertex group if we have one.
If we want to manually adjust weights we can do so by switching the object interaction mode to edit, selecting the vertices we want to adjust and changing the weight and clicking assign in the Vertex Weights panel.
For an in-depth explanation of each option available in Weight Paint mode checkout the Blender Manual.
External Content: Weight Paint - Blender Manual
Just to give a quick summary of how weight painting works with armatures, each bone gets it own vertex group, when we move a bone Blender will move each vertex using its weight as the factor.
While we could manually set all of this up Blender will automatically handle the weight groups if we use the right parenting option for our object.
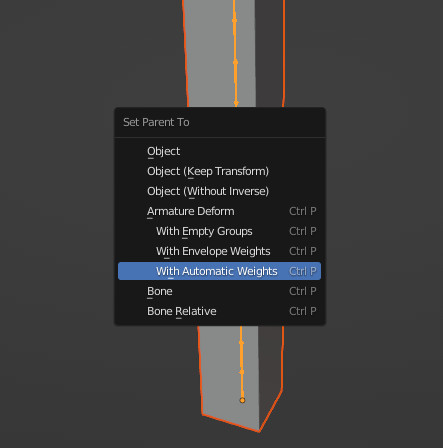
First let's parent our object to the armature. To do this select the object first and then select the armature. We'll know that we have the selection right when the object outline color is orange, and the Armature is yellow.
Press Ctrl + P and select automatic weights which will try to automatically set the weights for each bone or empty groups if you want to manually paint the weights for each bone.
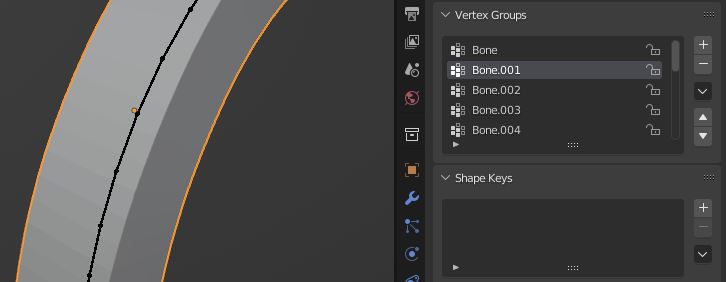
Next select the object and set the object interaction mode to weight paint, on the right you'll see that Blender has created a vertex group for each bone. We can switch between these vertex groups to paint the weight maps for each bone.
As long as a vertex has any amount of weight it will stick with a group even if it doesn't have a combined weight of one. the weight is only taken into account when another vertex group also has a weight for that vertex.
While switching through vertex groups is fine for less complex armatures it can quickly become cumbersome. To Speed up this process we can instead just select the bone we want to weight paint for.
To set this up first select the armature and then the object we're weight painting and set the object interaction mode to Weight Paint. We can now select a bone and blender will automatically select the Vertex Group for that bone.
If we have our armature selected while we're weight painting we can also automatically assign weights for that bone again by select the bone then going to Weights and either selecting assign Automatic from bones or assign from envelop.
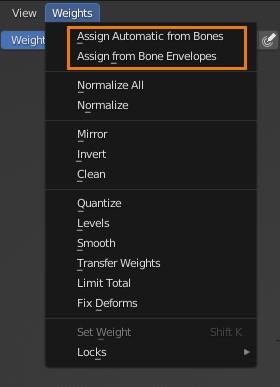
Assign from envelop is kind of like a radius around the bone that will have weight applied to it, we can adjust this radius per bone by selecting the armature, going to edit mode and selecting the bone we want to edit. Go to the properties tab > Bone Properties > Deform and here we can adjust the Envelope Distance and Weight.
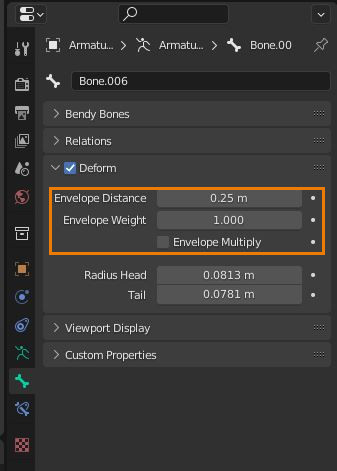
The distance will affect how large of a radius around the bone gets weight and the weight will adjust how much weight that radius gets.
Depending on the complexity of the model the automatic weight can be a bit weird and cause issues with deformation. Sometimes the automatic weights will grab vertices from seemingly unrelated parts of the model but only at a very small amount of weight.
The quickest way to fix this issue is to first select the object and set object interaction mode to edit
Select the affected vertices then navigate over to Properties > Mesh Data > Vertex Groups.
In the Vertex Groups panel, we can go ahead and remove the selected vertices from any groups we don't want it to be affected by, if there's too many groups to go through, we can also just remove the selected vertices from all groups, but we'll have to go back and reconfigure their weights.
To remove vertices from all groups click the dropdown just under the + and - buttons in the Vertex Groups panel and select Remove From All Groups.

Another thing to note is that if two vertex groups have a weight of 1 for the same vertex Blender will average out their influence, if you have a weight set to 1 but the vertex isn't sticking with that group make sure that there isn't another vertex group that has influence over it.
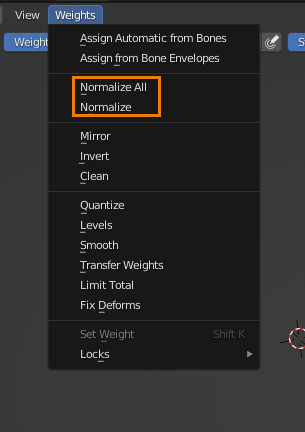
One quick way to make sure that no vertex has a combined weight of more than 1 is to normalize the weights.
In the weights tab we can select normalize all when we have a weight map selected, this will subtract from any weights that combine to be more than 1. When we select normalize all Blender will subtract from all other weights so that no vertex has a combined weight of more than 1.
Note that Blender does this internally, normalizing the weights is helpful for visualizing how Blender adjusts the weight values to bring them down to 1.
Vertex Groups and Weight Painting are both very useful and knowing how they work can allow us to achieve more with Blender and speed up our workflow.
Having an idea of how to weight paint as well as how normalizing and multiple weight groups interact makes working with armatures a little more intuitive and helps us get better deformations on our models.
Knowing a few tricks like how to select a bone while weight painting can help with speeding up the process of weight painting. It also helps with achieving a better result and knowing how fix some of the common issues we run into while weight painting.
Thank you for your time.
