


When I was first testing dynamic topology, I was confused. I had learned that topology was so important to get right, and here was a tool that completely neglected all of that while sculpting in Blender.
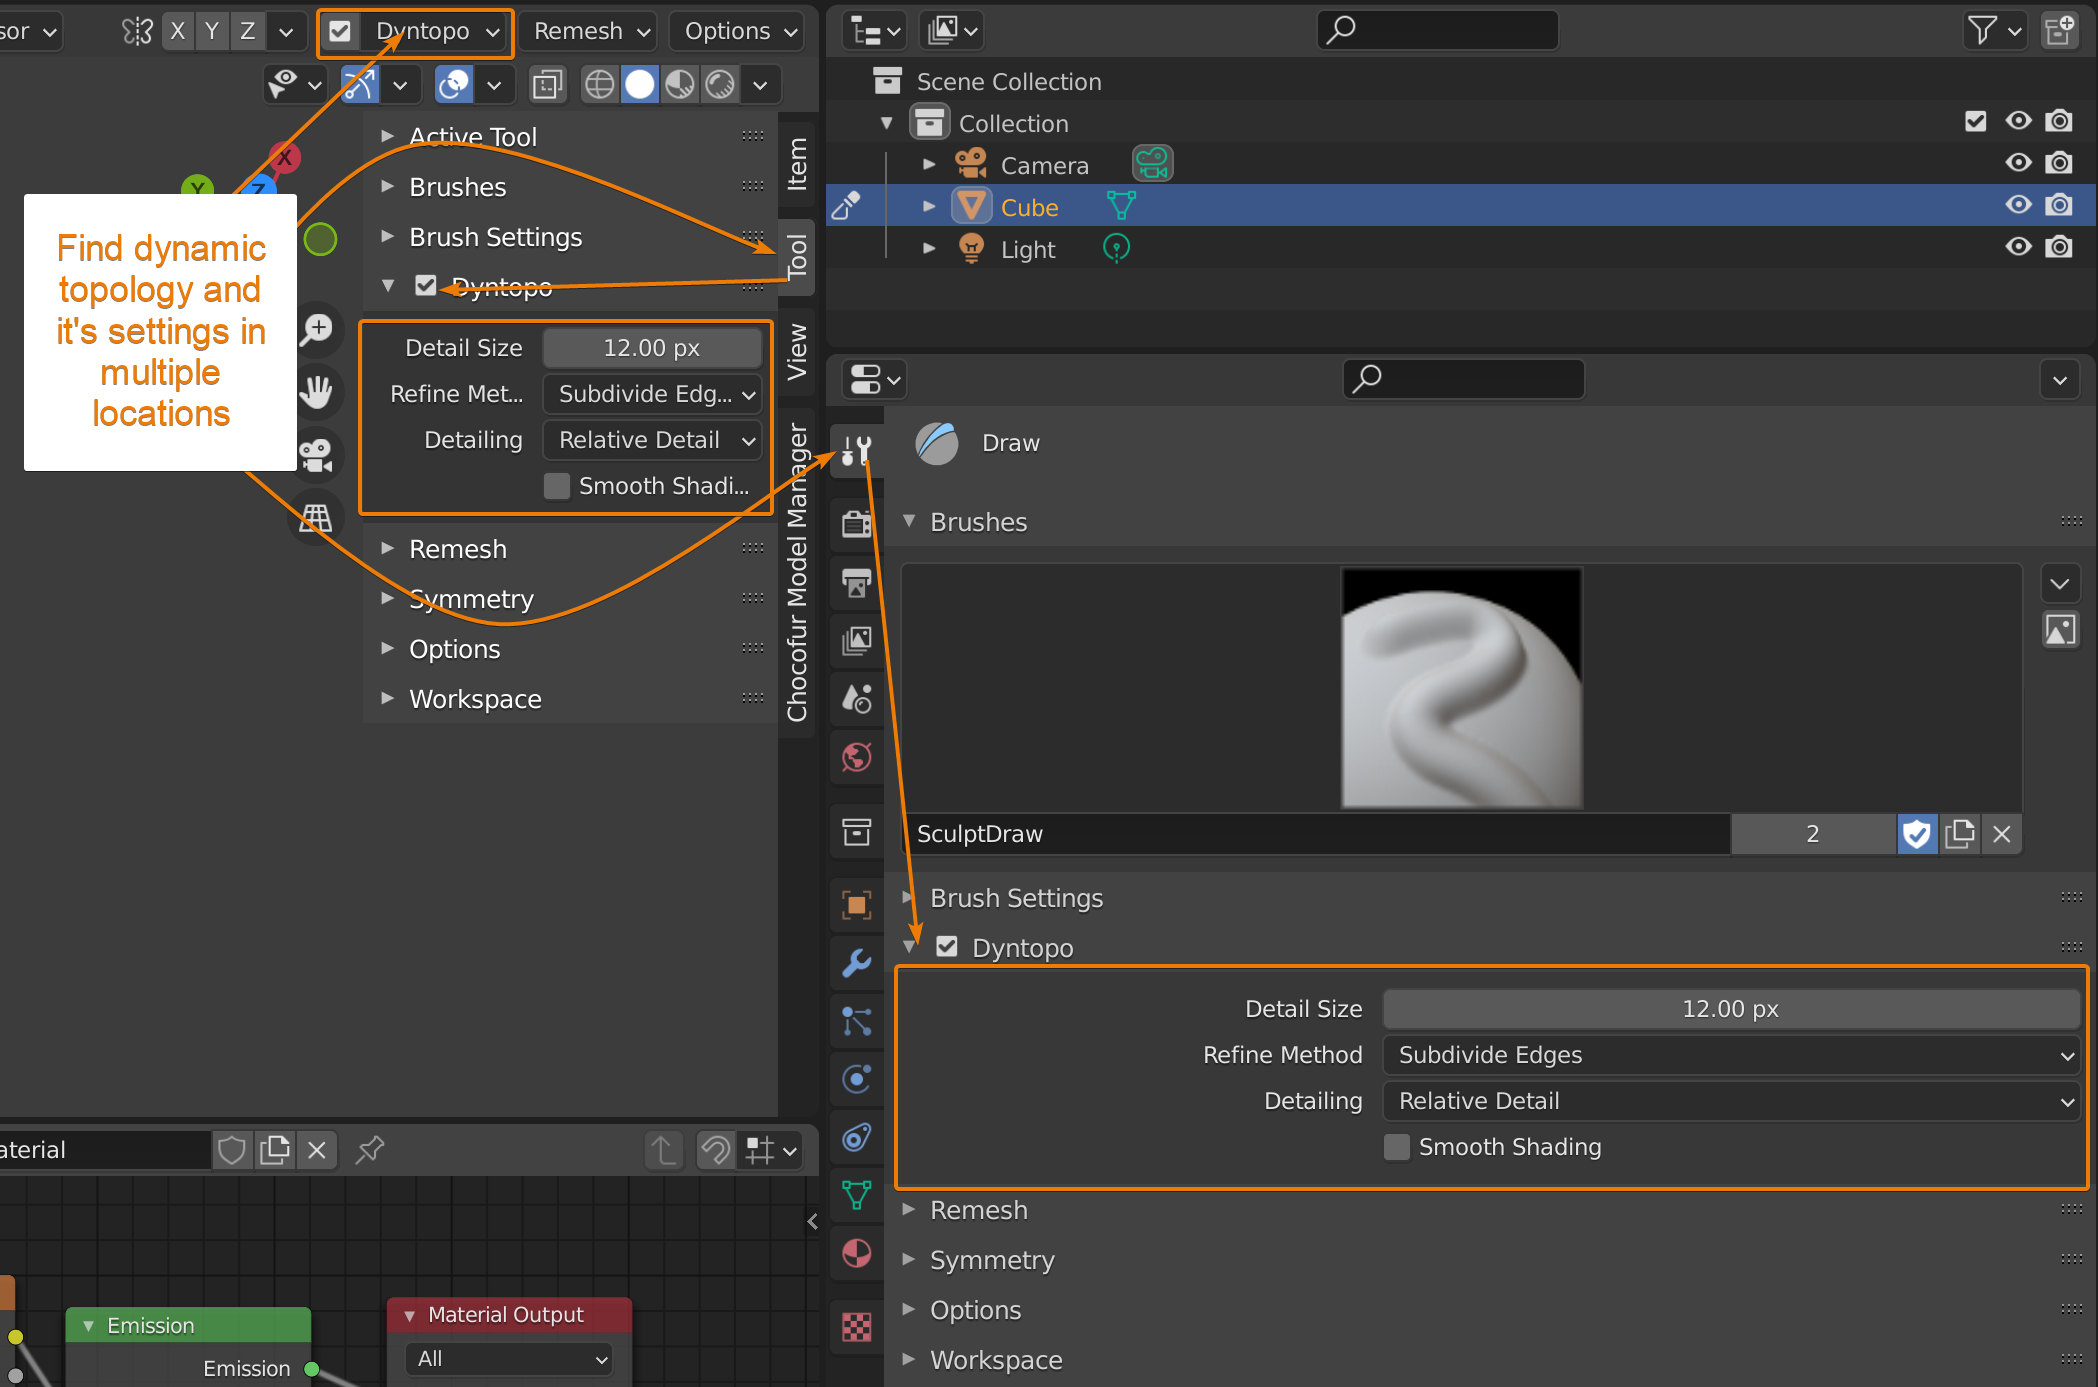
Dynamic topology, or Dyntopo is a tool that automatically subdivide your mesh while sculpting so that more detail can be had without having to deal with the topology itself. To use dynamic topology, in sculpt mode, find the Dyntopo on the right side in the header of the 3D viewport and check the checkbox.
Now, there is a lot more to dynamic topology than merely enabling it. Let's dive into the settings, features and how we can approach this tool in Blender.
Dynamic topology is a sculpt mode tool in Blender. It automatically subdivides the mesh so that we can have more detail without thinking about the topology as we sculpt.
Traditionally when we 3D model, we deal with the shape and topology at the same time during the modeling process. Dyntopo separate the shaping of an object and management of topology into two separate tasks.
This makes sense during sculpting since it is a much more organic form of modeling with focus on the shape to a much higher degree than traditional 3D modeling.
The topology management is pushed forward to a later stage in the 3D modeling pipeline, and we call this stage retopology. In some cases when the quality of the mesh isn't important, this can also be done automatically through remeshing or just by simply leaving the topology as it is. But this makes it much harder to texture and almost impossible to animate. So, there is a tradeoff.
Dynamic topology has a handful of settings dictating how the mesh is subdivided or un-subdivided as you make brush strokes.
We can also fill the entire mesh with a certain mesh density all at the same time.
Here is a breakdown of the various settings. You find these settings by going to sculpt mode, and in the header find the dyntopo menu on the right side.
The same settings are also available both in the active tools tab in the properties panel or in the right-side toolbar in the 3D viewport during sculpt mode. It does not matter where you change the settings, change it in one location and it will change in all locations. There is only one set of settings.
Personally, I most often use these settings:
With these settings I can set the detail level manually and sculpt, knowing what level of detail I will be at. As I work through the sculpt, I increase the resolution to match the level I want to sculpt at.
I also know that if I touch an area with higher detail with a lower resolution, in case I need to go back up to a lower resolution I won't ruin the sculpt.
But let's now cover the settings.
Let's start from the top.
This can be called detail percentage or resolution as well depending on the detailing method that we cover below.
In essence, it dictates the length of edges. This in turn translates to the level of detail that is possible to achieve. The shorter the edges, the more edges and more detail.
First, we have the option of subdividing edges which instructs Blender to subdivide an edge if the size of our brush is greater than the detail size. Blender will subdivide the edge to achieve the finer detail that we want.
Second, we can select collapse edges which will instruct Blender to collapse/join short edges to form one single edge. Blender uses the detail size to determine whether an edge is too short or not. This helps us in evening out the topology of our mesh it also removes any fine details we may already create.
Third, we have subdivide-collapse option which is the default option for Blender’s Dyntopo tool. As the name suggests, the subdivide-collapse option first subdivides our edges and collapses them as we sculpt. This means that whatever we touch with the sculpt brush will end up at the topology size set by our detail size or resolution option.
the third option is slightly more tricky. But essentially it is the perspective from which the detail size should be set.
Relative detail is set as the Default in Blender. Using this option, your screen pixels are used to define the detail size you can affect. So, if you zoom out, the edges in your mesh become smaller. If you zoom in, the edges become relatively large, and this allows to subdivide them and sculpt in finer details.
Second, we have the constant detail option in which the detail size remains the same whether you zoom in or out. To achieve this, Blender sets the detail size as a percentage of the base unit which is set in the unit section in the scene tab accessed from the properties panel.
In selecting constant detail, Blender also gives you an eyedropper which allows you to set the edge lengths of your current region to match that of another region within your mesh.
Third, the brush detail option allows you to add detail depending on the percentage you have set for your brush cursor. You are able to increase the edge length by increasing the radius of your brush cursor. So, if you want to add finer details to your mesh you should reduce the radius of your brush.
Lastly, we have the manual detail option in which the edge length in your mesh is fixed based on the resolution value you selected in the detail size. The level of detail here is fixed and is not dependent on the size of your brush cursor or the zoom preferences you want.
As you work with and get familiar using dynamic topology you may run into some problems at times.
One of them is being unable to see any differences in your mesh as you sculpt. This is usually because not all your sculpting brushes in Dyntopo will dynamically add fine details as you sculpt. So, you should change the sculpt brush you are using or select the “Detail Flood Fill” option in Constant Detail.
You might also get a vertex data warning as you turn on the Dyntopo tool. The image below shows this:
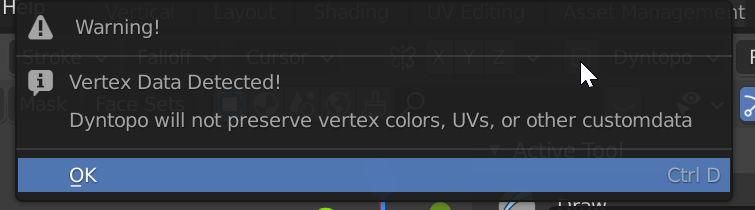
This warning informs you that the dyntopo tool will permanently change the topology of your mesh. So, any vertex colors, UVs or vertex groups that your mesh previously had will be permanently altered. You can click OK if you want to continue with Dyntopo.
The Dynamic topology tool is not the only tool that allows you to sculpt finer details in Blender, there is also the Multiresolution (multires) modifier.
The multiresolution modifier is a modifier you add to the modifier stack.
Related content: How modifiers work in Blender, an overview
It allows you to subdivide the mesh evenly and multiple times. At each stage you can add detail and sculpt your object before subdividing again and move to even more detail. You can then access the mesh at any sculpting level.
At first, dynamic topology can be a bit tricky to understand. I suggest that you test the options and play with it in sculpt mode to get a feel for how the different settings work.
We covered how to enable dynamic topology, it's settings such as detail size, resolution, and detailing method.
Thank for your time.
