Occasionally we need to deal with objects that has a completely unworkable mesh in Blender. It can be anything from a sculpt made with dynamic topology to a photo scanned object. In those cases, remeshing can be a quick way to help ease up or even solve the problem. Especially if the manual way of retopology isn't a viable option.
Remeshing is a tool that help you rebuild topology automatically as opposed to a manual rebuilding through retopology. With the goal to create a mesh that s improved over what you previously had while maintaining the shape of the object.
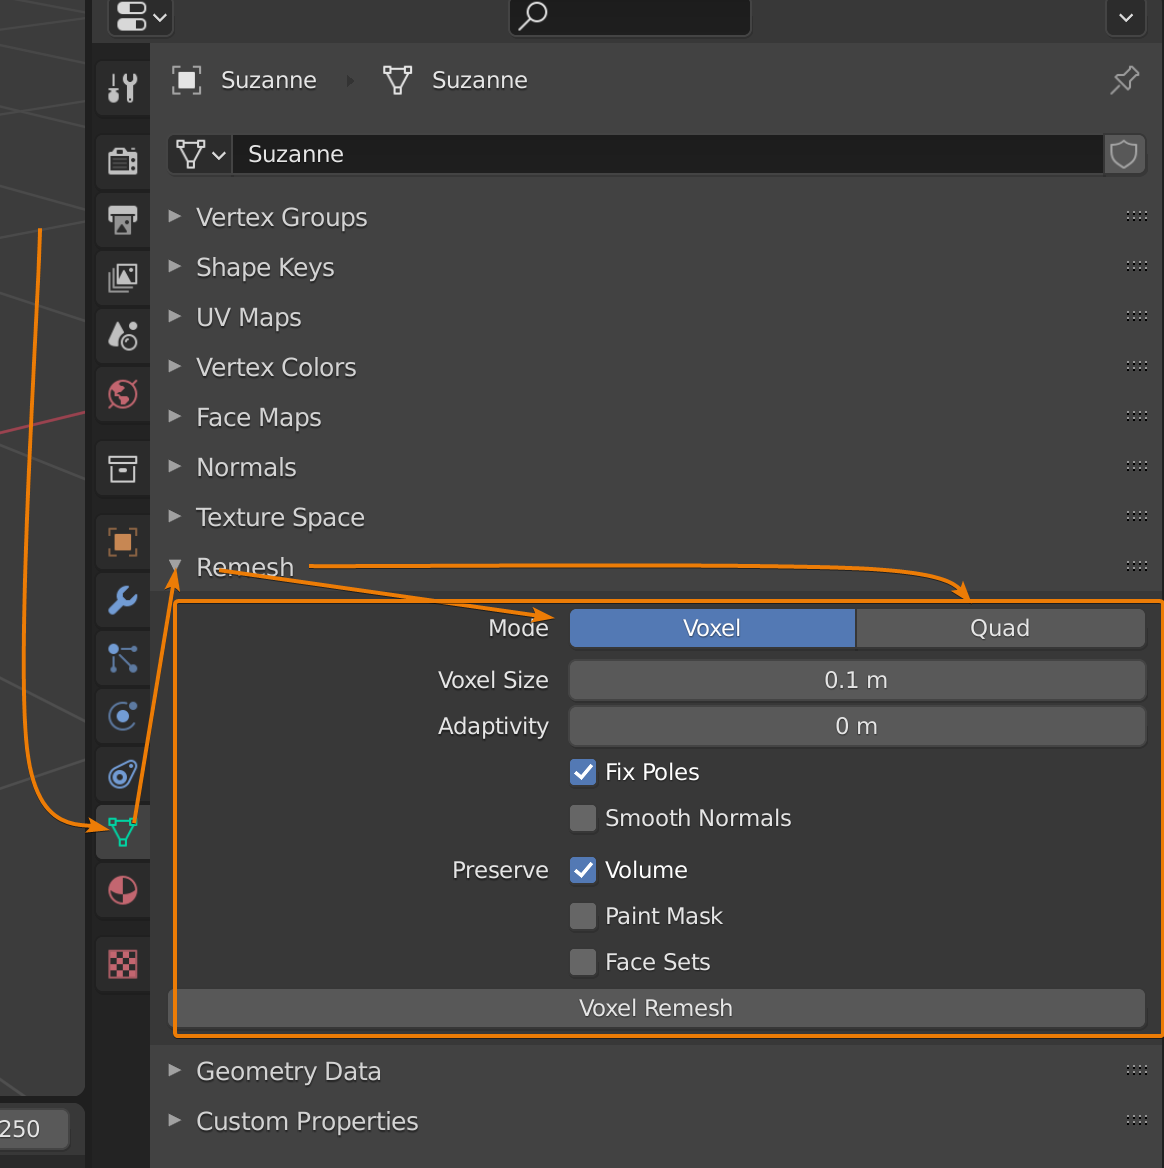
To use remeshing in Blender, select your object, go to the properties panel and find the object data tab (green icon). Expand the remesh section and find the voxel and quad remeshing options. Click the remesh button to remesh using the selected method. An alternative is to use the remesh modifier.
Let's dive in and learn some more of the details of remeshing in Blender.
Remeshing is when we take a mesh object, most often a sculpted or photo scanned object and run it through an algorithm to automatically generate a cleaner mesh. Most often this cleaner mesh is made up of a quad only topology, but not always.
Here are some common goals for remeshing:
Related content: How to smooth the shading on an object in Blender?
Related content: Blender text object: A complete guide
Blender has several tools to achieve this. There are two different types of remeshing available through the object data tab in the properties panel. Voxel and Quadriflow. These are the newest additions to Blenders remeshing toolset.
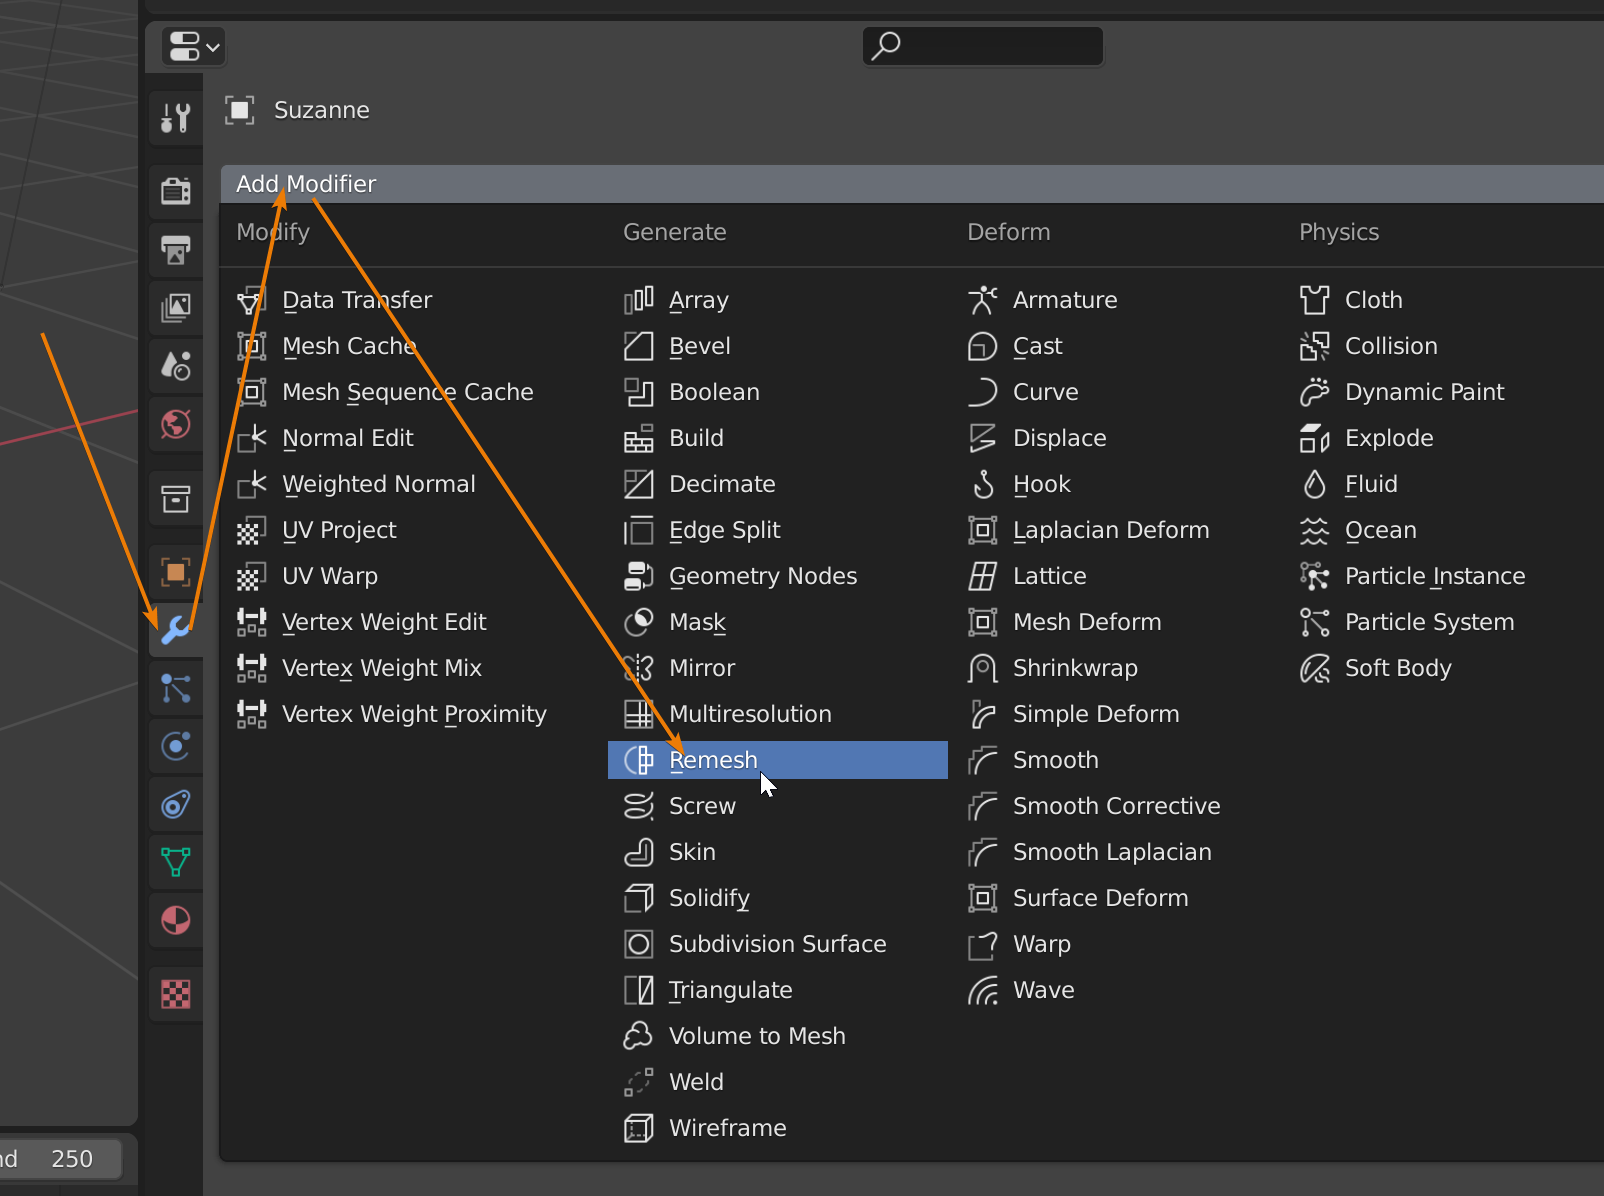
There is also a remesh modifier with four different remeshing options.
Related content: How modifiers work in Blender, an overview
Note here that even if there is a voxel remesh option available in both the object data properties and the modifier, the result from each is different and the destructive option found in the object data tab is often more accurate and generate a better result.
For example, the voxel option in the modifier does not generate a quad only topology while the voxel option from the object properties does.
There are also an add-on available for Blender called Quad remesher. This is a paid tool that you can find here:
External content: Quadremesher website
The last option is a stand-alone program called Instant Meshes. With this, we can import an .obj file that we export from Blender and remesh using this free open-source tool.
External content: Instant meshes github project page
Voxel remesh is primarily a tool for sculpting in Blender. It is fast and reasonably accurate. Much more accurate than the remesh modifier.
It is available as a shorthand in the header of the 3D viewport while in sculpt mode. You can also press Ctrl+R to run a remesh operation from within sculpt mode. This is likely how you will interact with it most times if it is used as a sculpting tool.
The voxel remesher is often used while sculpting as an alternative to dynamic topology. It is accessed while in sculpt mode. With this tool, you can manually set the level of detail you want by adjusting the voxel size. If you want a higher level of detail, you reduce the voxel size.
You are able to maintain uniform topology as you sculpt in finer details. The voxel remesher achieves this while retaining the volume from the original mesh.
For a detailed explanation on how voxel remeshing works, you can watch this video by Pablo Dobarro.
Quadriflows goal is to create a topology that follow the original shape of the object. Maintaining a better edge flow than, for instance, the voxel remesher is designed to do.
It needs some more development as it often has a hard time finding symmetry and sharp edges.
It can be hard to know what the right settings should be and is mostly a trial-and-error approach. For instance, I find that the "Use mesh symmetry" often produce a worse result on meshes with symmetry than if it is turned off.
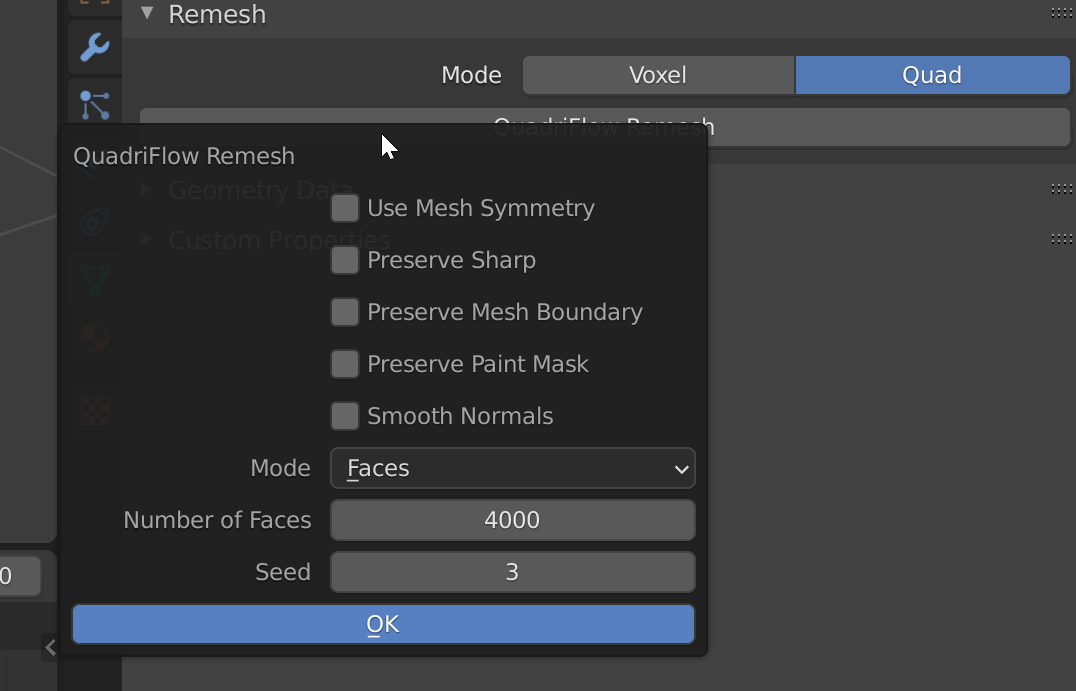
It is down to trial and error. But the options I find to have the most impact on the result is preserve sharp, preserve mesh boundry and mesh symmetry.
The mode setting allows you to change how you tell the algorithm how much geometry there should be in the result. When this is set to ratio, you cannot add more geometry to the mesh. You can view it as a percentage value to reduce the amount of geometry.
We can also set the number of faces directly with a mode of face or use a more dynamic approach and select the edge length and quadriflow will determine the amount of faces in the final mesh based on that.
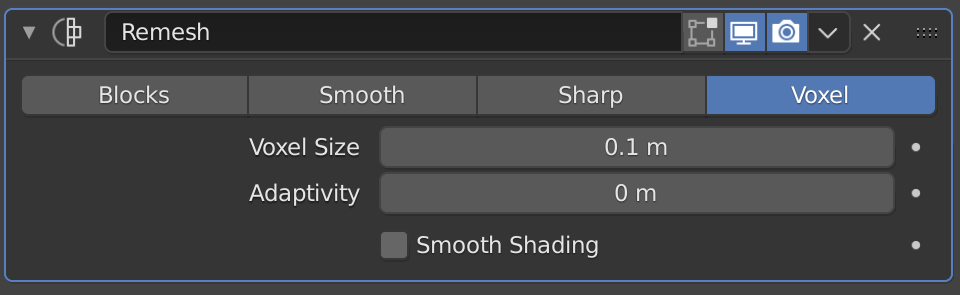
The remesh modifier has four different modes. Blocks, Smooth, Sharp and Voxel. All except voxel use the same underlying algorithm with different amounts of smoothing applied.
The blocks option can be useful when creating blocky and minecraft style art. Sharp and Smooth are pretty much deprecated at this point as the newer Voxel and Quadrimesh options are both better. But there are some edge cases when it is still useful since it is a modifier and therefore non-destructive.
For instance, we can add the remesh modifier to a text object and remesh it non-destructively, creating a much better topology for our text without having to first convert it to a mesh object.
Remeshing is an automatic process while retopology is the equivalent manual process. With retopology we manually create the final mesh of an object by following the shape and curvature of the object we want an improved topology for.
Both remeshing and retopology aim to fix bad topology. However, making it manually with retopology tool will give you a much better result with much more work, compared to using a remesh algorithm.
We have covered remeshing in Blender and how you can incorporate it in fixing bad topology in your meshes. Blender has various remeshing options and each has a specific use case. When sculpting, you should use the voxel remesher in Sculpt mode. To fix bad topology, the remesh tools in object data properties are suitable. The remesh modifier should be used to create block-stylized art and create quad-based topology. The voxel remesher in the modifier and the one in the object data properties are interchangeable.
Thanks for your time.