


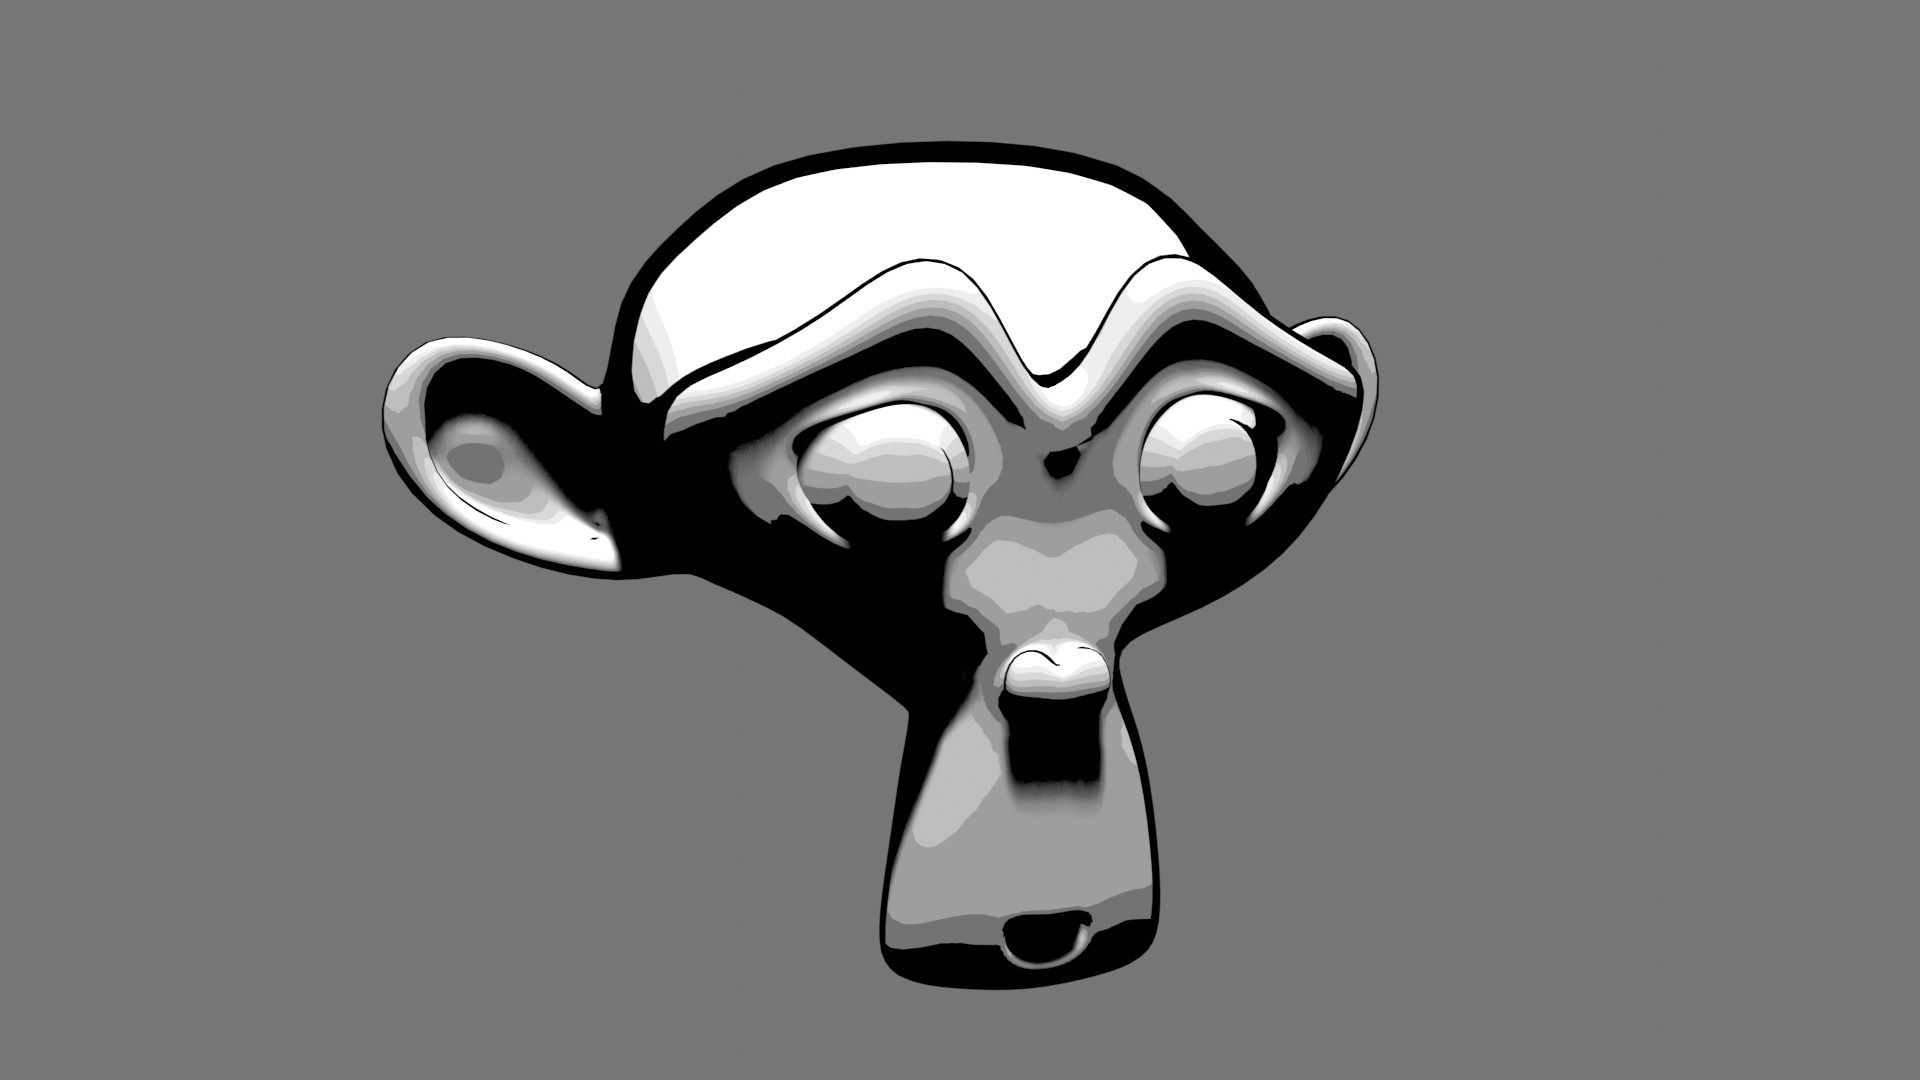
Blender is very good for creating photorealistic shaders and renders, but sometimes we may want to create a more stylized or cartoonish shader in Blender, this is usually achieved by using a CEL shader.
A cel shader sometimes also called cell shader, is a non-photorealistic shader that uses simplified shading to convey form. It is often used to mimic the style of comic books or cartoons.
In this article we'll go over more details about Cel Shaders, how to create them, as well as how to create a Toon Shader.

Before we get into the specifics of making a Cel Shader we'll go over some general information about what a Cel Shader is, as well as where the term originated from.
Cel Shading, Cell Shading, and Toon Shading are all terms used to refer to a type of Stylistic Shader that is often used to recreate a hand drawn or cartoon look.
The term Cel, short for celluloid originates from the traditional animation technique of drawing/painting frames onto a transparent sheet of celluloid which is then set over the rest of the footage.
Lately cel shading has become more common with many different indie games and animations taking advantage of it to achieve a more stylized and appealing look without having to spend the time making very detailed and photorealistic art for their games and animations.
With the digital tools we have today it is easier than it has ever been before.
Cel Shading can be very useful for creating stylized artwork that looks good without having to spend time that we would often spend trying to make decent looking high definition or photo real artwork.
In general the simplification of colors means we don't have to focus as much on getting or texturing just right and can make our artwork look more cohesive.
The outlines we usually see with cel shading also help define the shapes of objects which can save us a lot of work adjusting the composition of the scene. It also makes shapes a lot more readable.
While Cel Shading likely won't directly decrease render times, the ability to use lower quality and resolution textures on our model means less time will be spent loading textures into memory and may help with render times.
As a result, we also most likely need less complicated shaders when working with Cel Shading which will also help with render times.
Another artstyle with similar benefits would be low poly art.
In short, we will follow these steps to create a cel shader in Eevee.
To start we'll go over the methods for creating a Cel Shader in Eevee, Eevee is the ideal render engine if we're going to work with Cel Shading as the less realistic lighting will work just fine, as well as benefitting render times, we also have more options available for adjusting our Cel Shader since we can use the Shader to RGB node.
Related content: A guide to Blender Eevee render settings
First we will need an object with a material on it, if you haven't done so yet make sure to add a material to your object, we'll also want to make sure our Render Engine is set to Eevee.
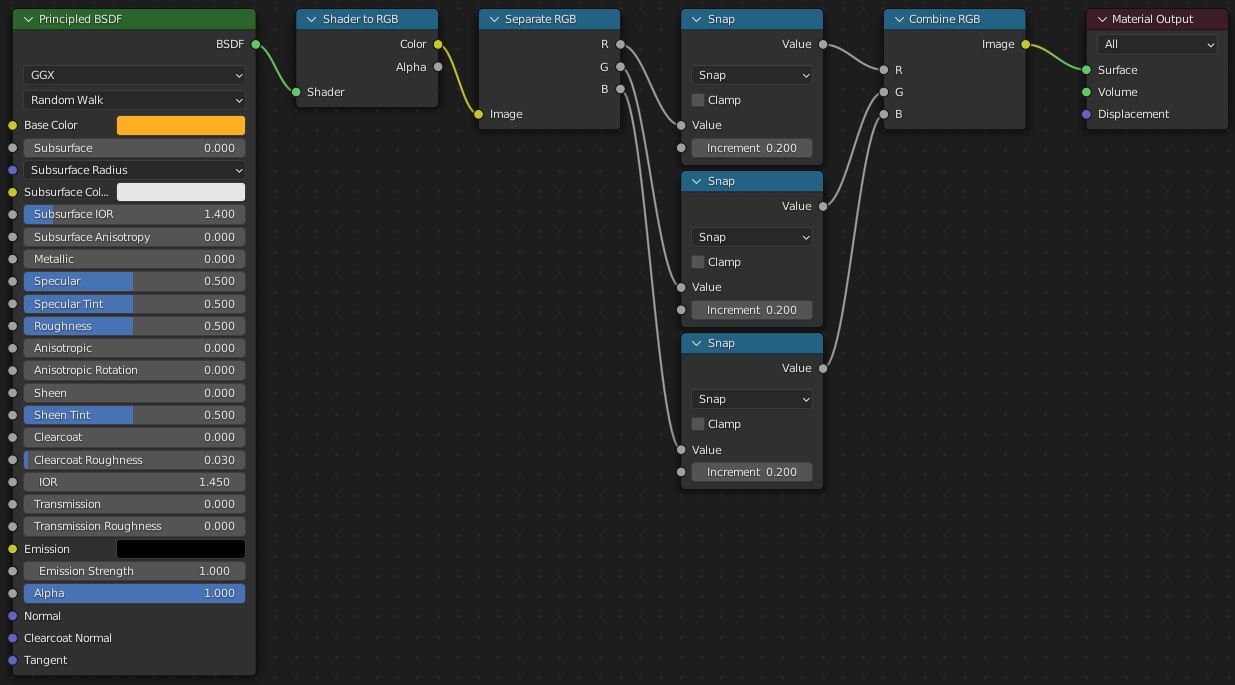
After we have our object setup go to the Shading Workspace, the first node we'll want to add is a Shader to RGB node, this can be done by either pressing Shift + A while the cursor is over the Shader Graph and searching for a Shader to RGB node or using the add menu on the top of shader graph and searching through that menu.

We'll then want to separate the RBG values so that we can modify each channel, this can be done with a Separate RGB node which can be added in a similar way.
Then we'll want to create three math nodes for each output from the Separate RGB node, each of them should have their operations set to Snap.
Next we'll recombine our colors using a Combine RGB node and connecting the outputs from each math node to their respective color channel.
Finally we can take the Image Output from our Combine RGB and connect it to the Material Output Surface Input.
We can use the Increment Value on each Snap node to modify how much the colors are simplified by. Note that these should all be the same.
The reason we connect the RGB output directly to the Surface Input instead of routing it through a Diffuse BSDF or any other kind of shader is because when routing a color output to a shader input Blender will automatically assume an emission shader with a strength of 1.
Related content: Blender emission shaders guide
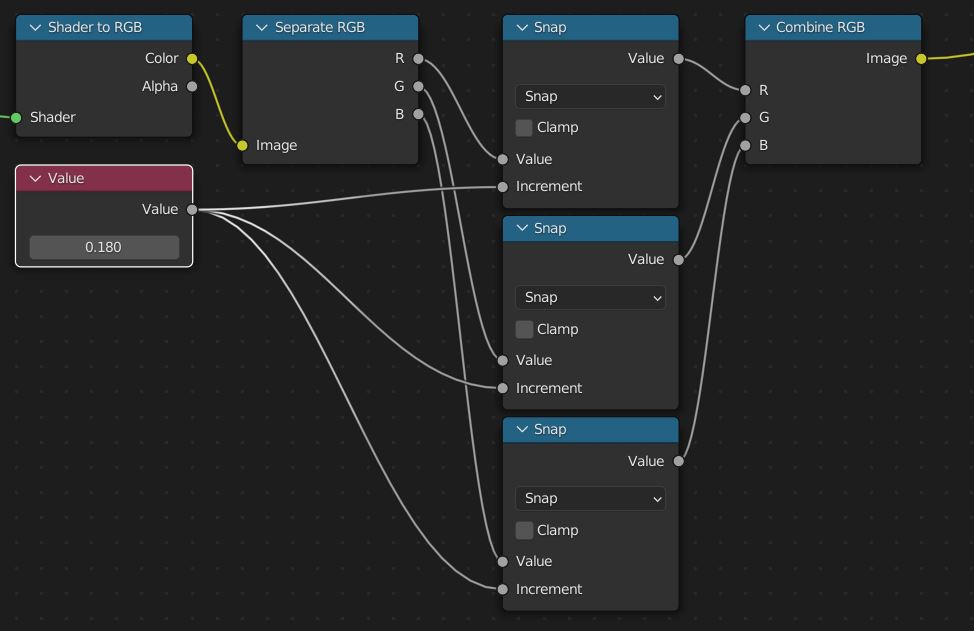
Here's a sample of what the description above should look like, since I mentioned that each value should be the same we may want to make it more convenient to adjust each value at the same time, we can do this by using a value node and connecting it's output to each one of the increment inputs.
Now that we have the colors for our Cel Shader setup we'll also want to add an outline on our object, there are a few methods for achieving this in Blender but in this article we'll go over two of the most common methods, both of which can be used in either Eevee or Cycles.
To create a Cel Shader Outline for Blender we will need a Mix Node, ColorRamp, Math Node, and Fresnel Node.
Once we have those in our Node Graph we can connect the Fresnel output to the first input of the Math node. Next, connect the Math node output to the ColorRamp input.
Then we can connect the Color output of the ColorRamp to the Factor of the mix node and connect the color from our Cel Shader Color.
If this is shader based for Cycles instead use a mix shader in place of the Mix Node and use a diffuse for the outline color.
Finally Connect the output from our Mix Node to the surface input of the Material Output Node. Set the ColorRamp interpolation to constant and set the math node to multiply.
We can then use the Math node to adjust the thickness of the outline and use the Color2 to input of the mix Node to adjust the color of the outline.
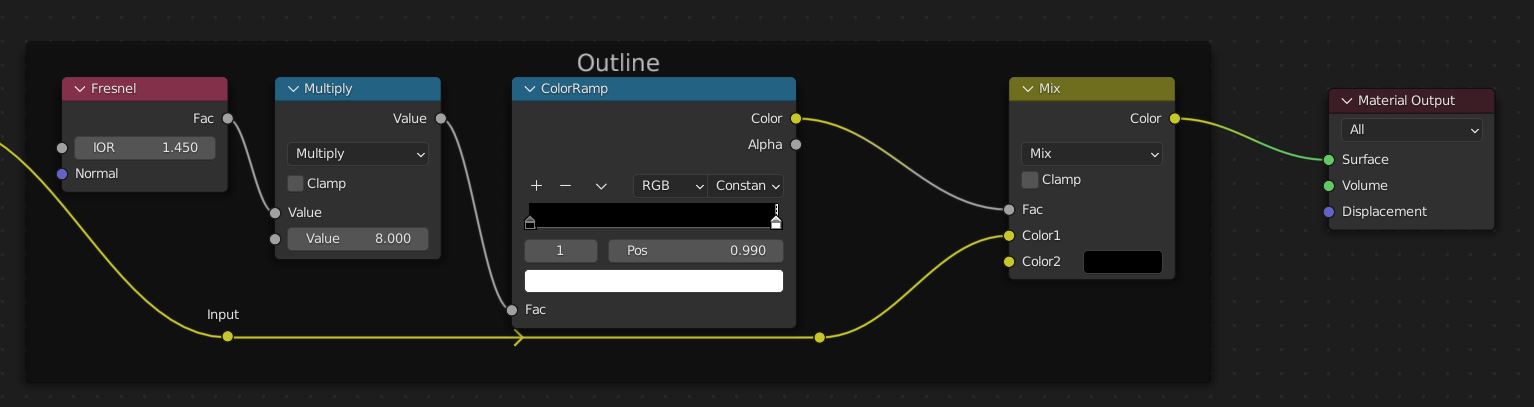
Here's a sample of what all those nodes should look like, the rerouted color Input being the Cel Color Sample shown earlier in the guide.
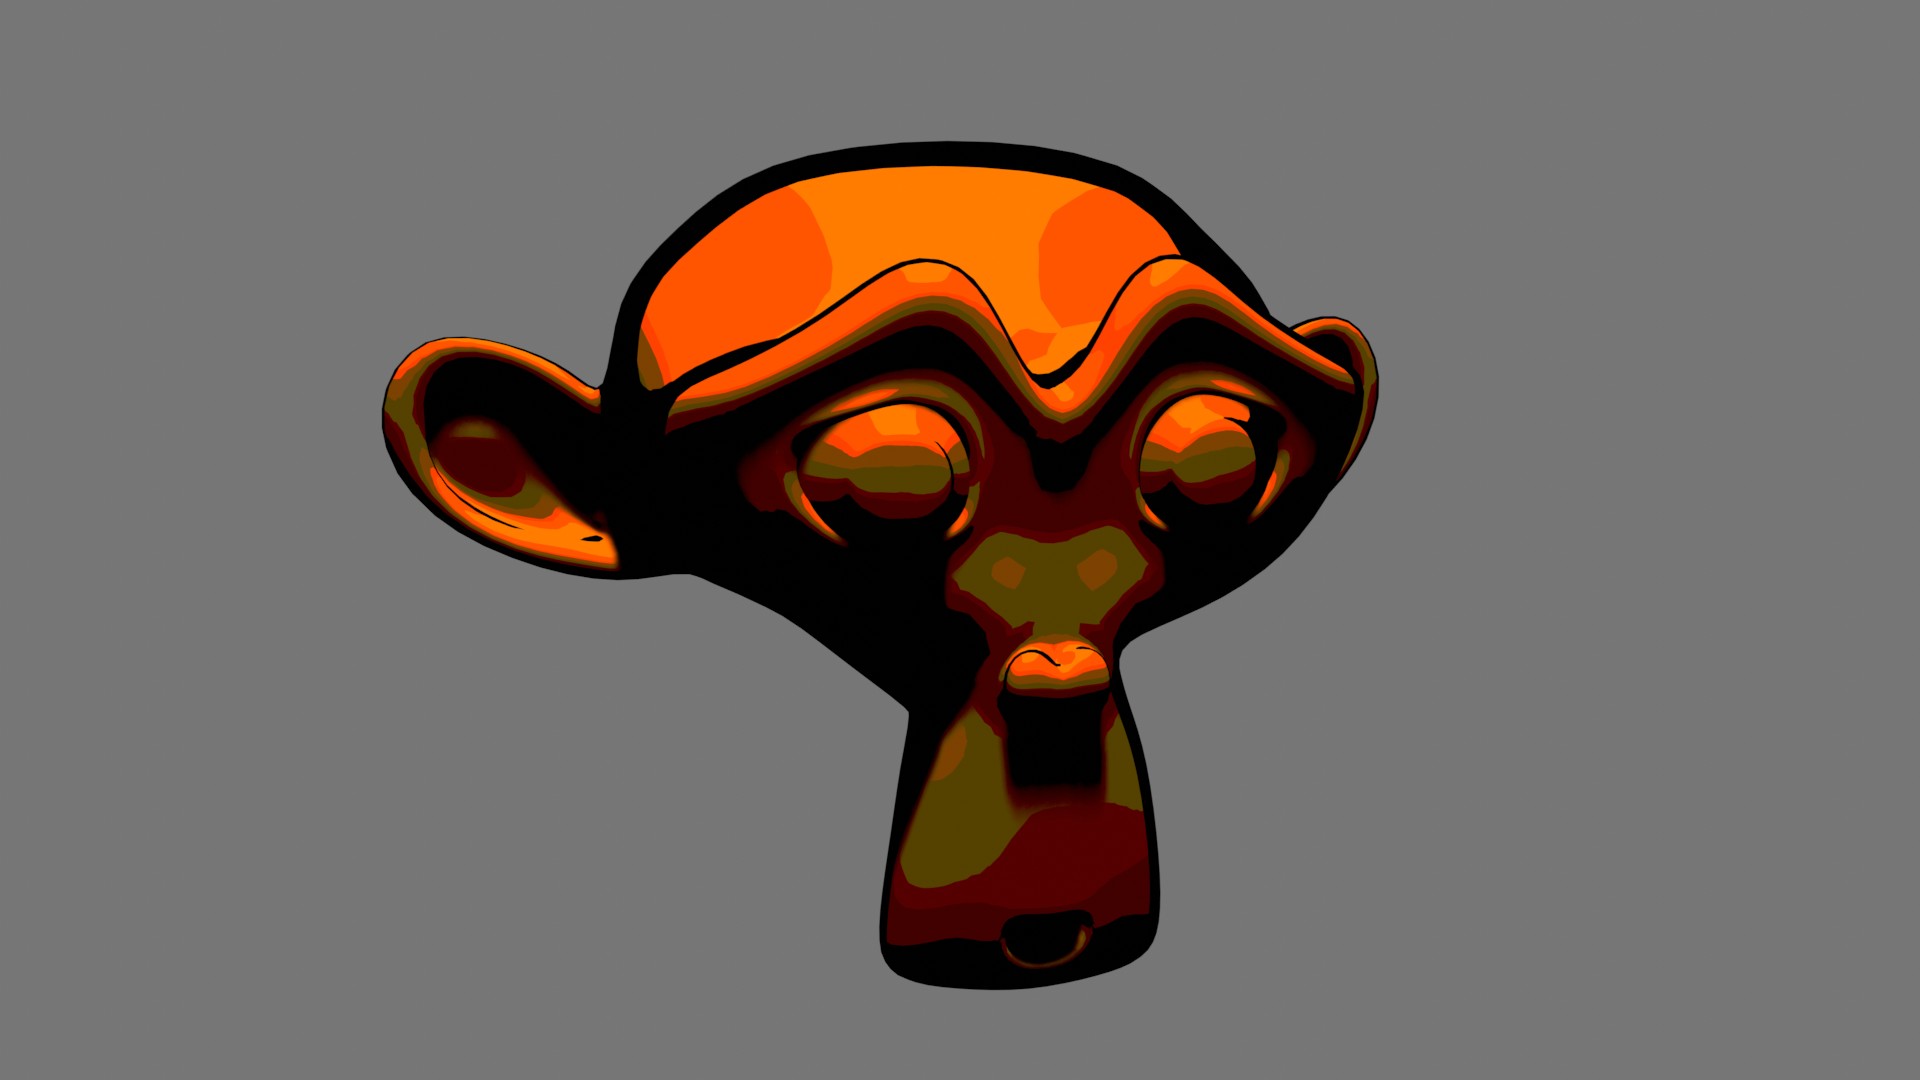
With our color and outline finally combined we should have a pretty decent looking Cel Shader that also comes with a few options for customizing to achieve the look we want.
There's also another method for creating that Cel Shading style outline which can then be exported out of Blender or used as is.

To achieve this effect we will be creating a duplicate of our model, applying a dark material with back face culling and inverting the normals of the model and then inflating it slightly so that it just shows around the edges of the object.
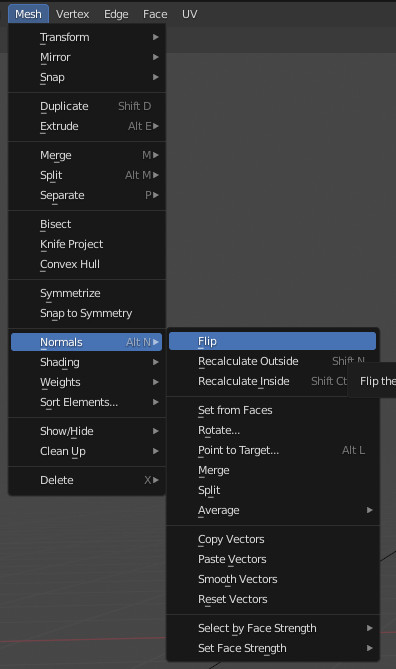
To do this duplicated the object you'd like to give an outline, set the Object Interaction Mode to edit, select all of the mesh by tapping A once or going to Select > All, then go to Mesh > Normals > Flip, then we can set the Object Interaction mode back to Object.
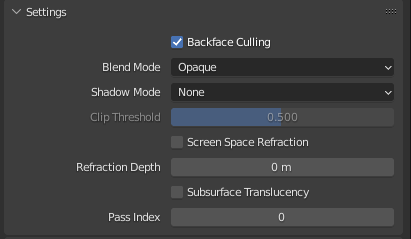
Next create a new material for the object in the Material Properties Panel, we can use the principled BSDF view to set our values.
Mainly settings the color to black and setting the Roughness to 1 and Specular to 0 for this example then we can scroll down to settings and enable Backface Culling, and setting Shadow Mode to None.
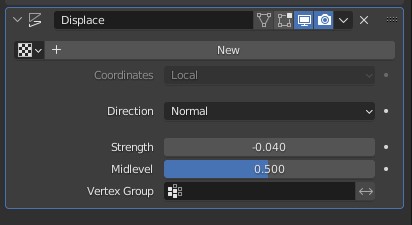
Finally we can go to the object's Modifier properties and add a displacement node and use the Strength to adjust the thickness of our outline, this will likely need a negative value since our normals are inverted.
In short we will follow these steps to create a cel shader in Cycles.
We'll go over how to achieve a similar Shader in Cycles since the Eevee Shader currently does not work in Cycles.
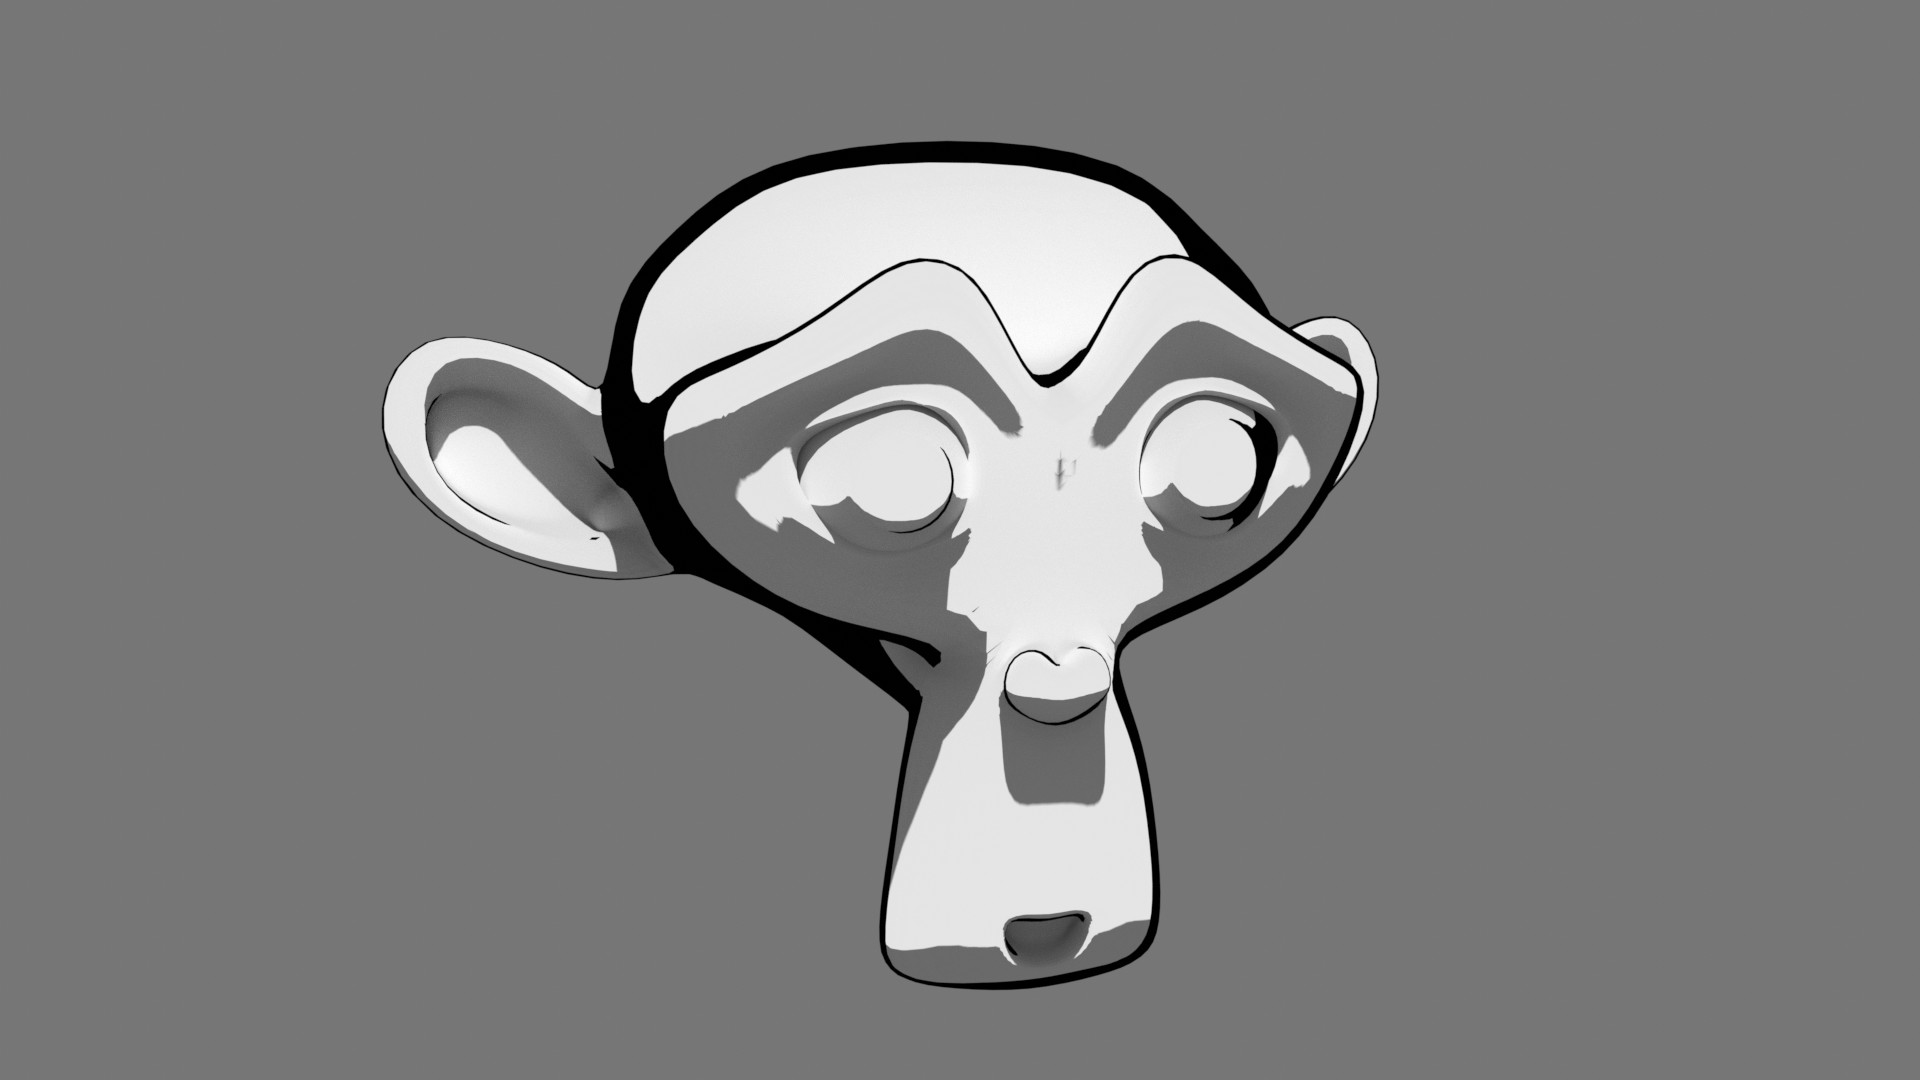
Since cycles does not support the Shader to RGB node we will instead be using the Toon BSDF Shader to simply the colors of our shader.
To do this add a Toon BSDF Shader and connect it to the surface input on the Material Output Node. This will create the colors for our material.
Then we can use the same outline node setup that we used in the Eevee shader, this time mixing the Toon BSDF shader with a Dark Diffuse using a Mix Shader node with our outline as the factor.
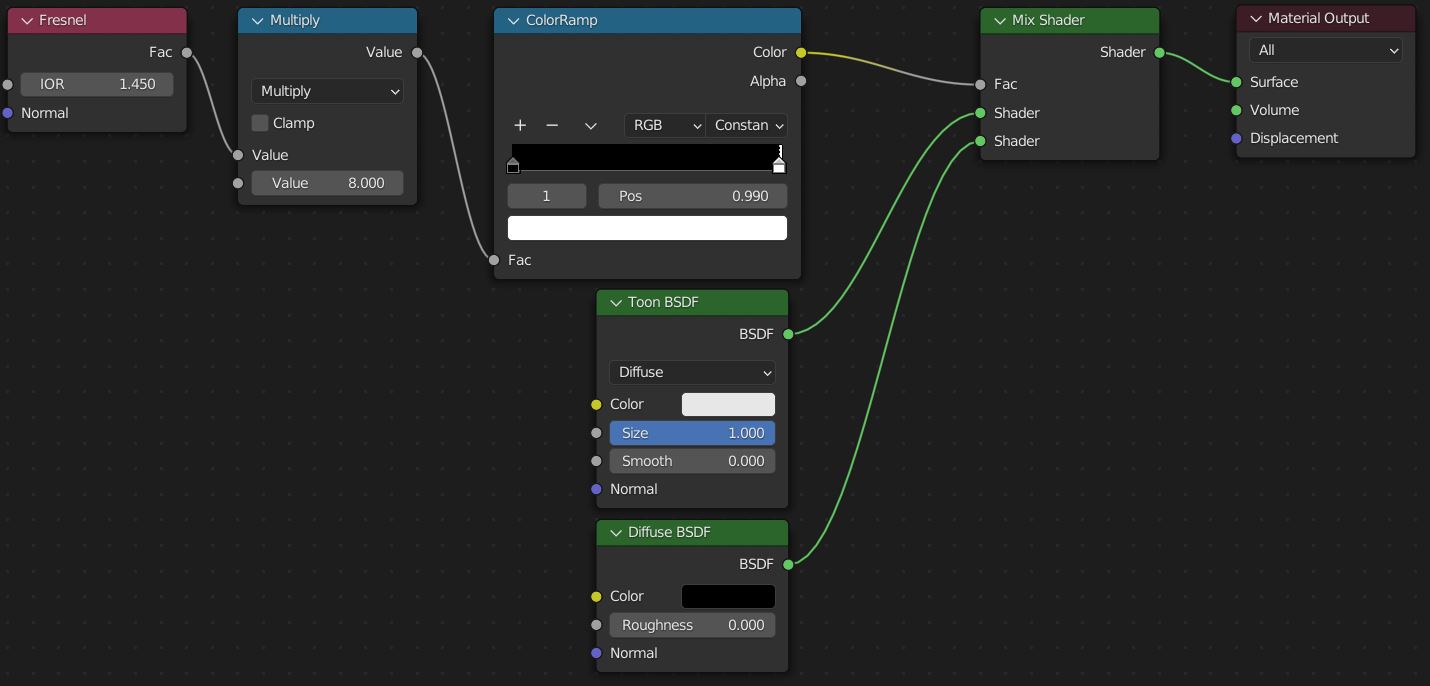
This is what the node setup for that should look like. Of course you can adjust the toon BSDF and diffuse BSDF to your liking.
Cel Shading can be a very visually pleasing art style that is easier to achieve than many more realistic styles, it can save us time and help improve the visual quality of artwork that might otherwise not look the best, it's can also just look nice in general, avoiding an uncanny look by being very stylized.
Thank you for your time.
