


For many beginner Blender artists, normals can be hard to understand. What effect do they have on our 3D models? How do we control them and what kinds of normals are there that we need to worry about?
A normal is a perpendicular vector of an object. In Blender, the object is usually a vertex or a face. Vertex normals control the shading of an object but vertex normals are also influenced by the face normals.
Let's dive in and explore the details.
Normals is data living at the mesh level. In Blender there are primarily two types of normals that we care about. The first one is vertex normals and the other is face normals.
The face normals are easiest to understand. The normal is simply the direction the face surface is pointing.
We can visualize the normals in edit mode by going to the overlay menu in the top right corner of the 3D viewport and enable face normals. If you turn on face normals, you will see a teal line drawn from each face. This is the direction the face normal for the given face is pointing.
Related content: How to use 3D viewport overlays in Blender 3D
Related content: How selecting works in Blender
In object mode we can select an object, right-click and choose either flat shading or smooth shading. This is a high-level control of vertex normals.
Let's look at some basics first, like how to view normals and fix normals that point in the wrong direction. Then we will continue with some more details and normals relations to shading.
We can view the normals in Blender in two ways. Both available from the overlay menu accessed in the top right corner of the 3D viewport.
We can check the Face orientation checkbox. This will color the front side of each face blue and back side of each face red. This allows us to quickly detect flipped normals. Face orientation is available in both object mode and edit mode.

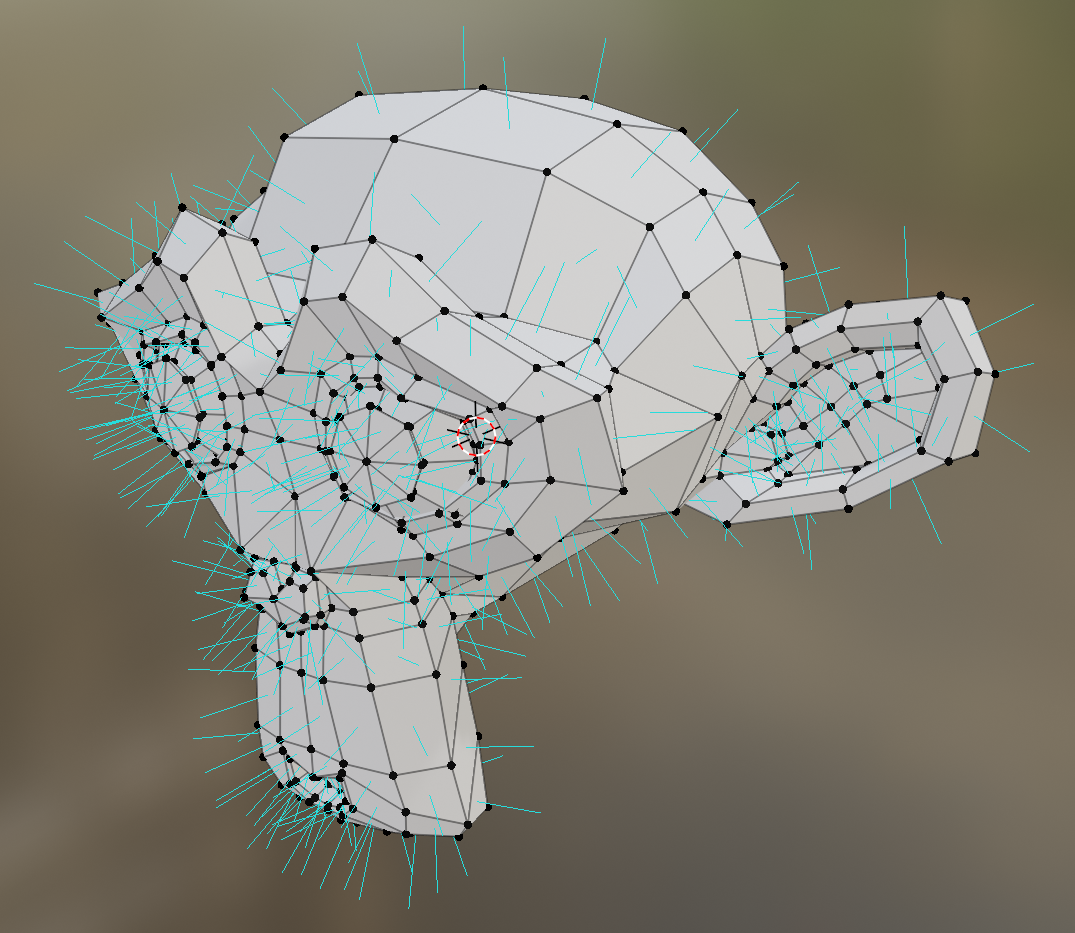
The second way is to check the normals section further down the overlay menu. This is only available in edit mode. But it gives more detailed information.
We can check to view split normals, average normals and face normals. We can also change the length of the drawn lines by adjusting the size. If we want to length of the drawn lines to be in relation to the view, we can check the right side button.
The size parameter is especially useful if we want to find out the correct max ray distance when baking normals from a high poly to a low poly mesh. We can then view the distance with the size parameter and when it is correctly set, we can copy it to the max ray distance in the bake settings.

To fix inverted normals in Blender we can use one of two ways to correct them.
If Blender flips all normals the wrong way, or if Blender simply doesn't recalculate the faces that face the wrong direction, we can flip manually.
If Blender first recalculated all normals in the wrong direction, we could then flip everything manually by having everything selected while we do the operation.
Flat shading is achieved with something we call split normals. This means that we have one normal direction for each connected face. Each normal point has the same direction as the face it belongs to.
By default, all objects are shaded flat when we add them to the scene.
With smooth shading turned on, Blender will use the average vertex normal direction instead of one for each face to calculate shading. This creates a smooth transition between faces instead.
Related content: How to smooth the shading on an object in Blender?
By averaging the vertex normals direction between the normals of the connected faces we can make the distinction from one face to another smooth out and the underlying sharp edges between faces become invisible.
On the one hand we often come across normals together with phrases like smooth shading and flat shading. But they also appear when we dive into creating materials and the concepts of PBR. In those cases, we often hear about normal maps.
The normals we come across in the shading world are primarily the vertex normals. But the face normals also play a role.
We briefly touched on split normals before. This is a vertex normals concept and it is when a vertex has more than one normal attached to it. The result of split normals is flat shading with a clear difference in shading between faces that aren't exactly on the same flat plane.
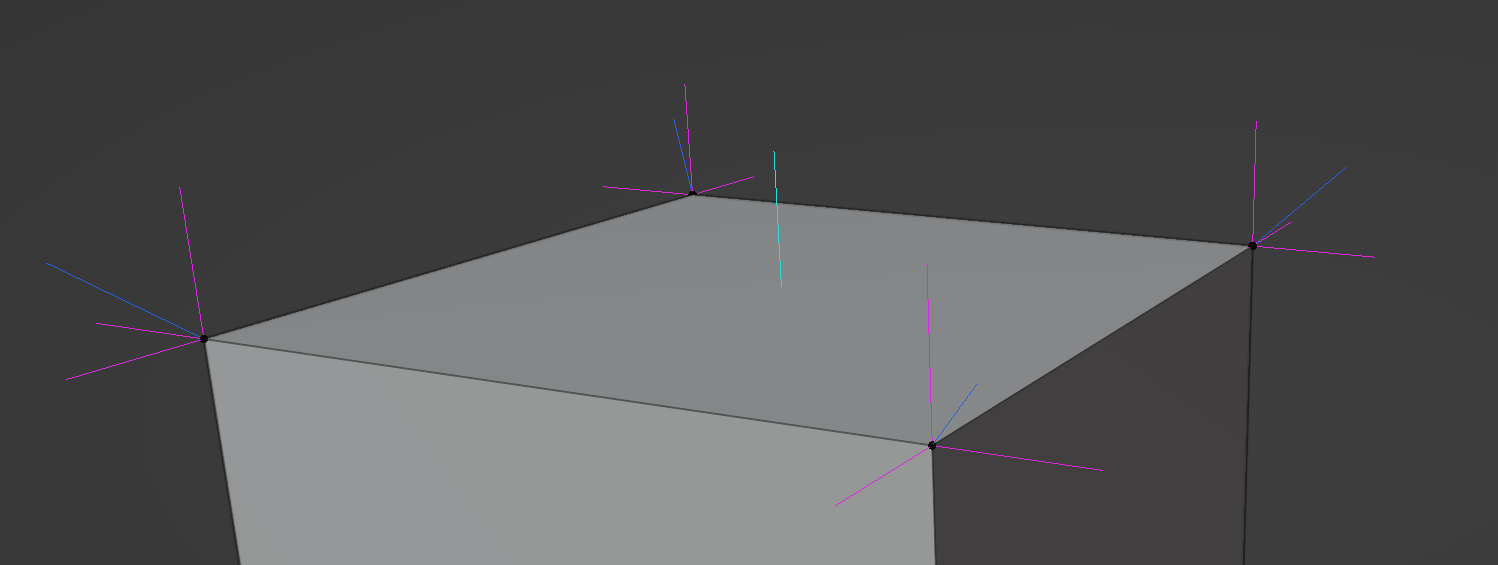
We can view the split normals by going to the overlay panel and turn them on while in edit mode. They are indicated by multiple purple lines drawn from each vertex. One line for each split normal corresponds to one connected face.
Split normals can be used in a variety of ways. Most commonly it is used when creating low poly art styles.
But we can also use it to more easily see what the topology looks like during modeling and sculpting.
When taking a closer look at split normals though, my testing seems to indicate that Blender always use split normals, but when using smooth shading, all split normals are aligned to the average normal of the surrounding faces.
The conclusion we can draw from this is that if we want a seamless transition from one face to the next, the split normals need to align. But we can tilt it away from the average normal to give one face more weight than another.
This brings us to auto smooth and the weighted normals modifier.
Auto smooth shade any edge smooth that has an angle that is lower than the one specified. Essentially, this will let Blender smooth edges with a low angle. This is usually faces on round surfaces and spheres where we just angle each face a little so that they all together can start to form round shapes.
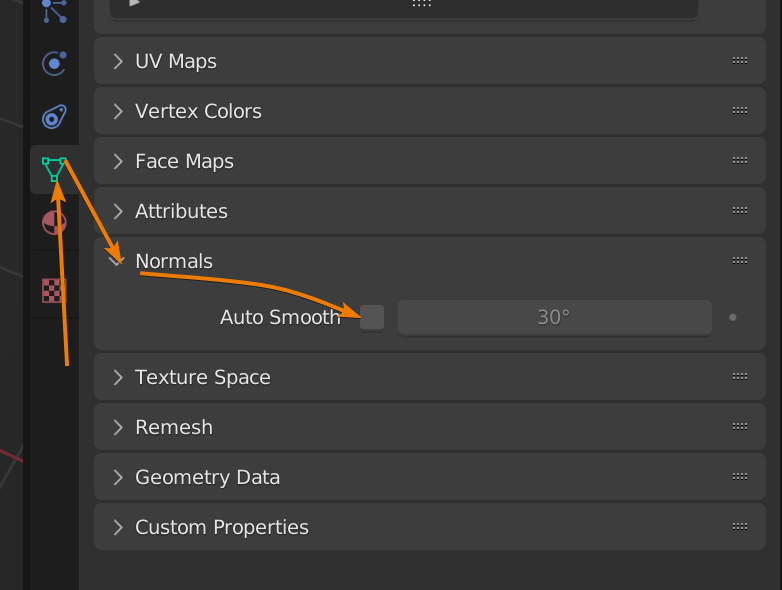
Auto smooth can be found in the object properties data tab in the normals section. While enabled we can also set an angle. For auto smooth to work, we need to first set the object to smooth shading. There is no warning if we don't set smooth shading first, it will just not work.
Smoothing the shading on these shapes allows us to have rounded shapes without the faceted look that flat shading gives. Here is an example.
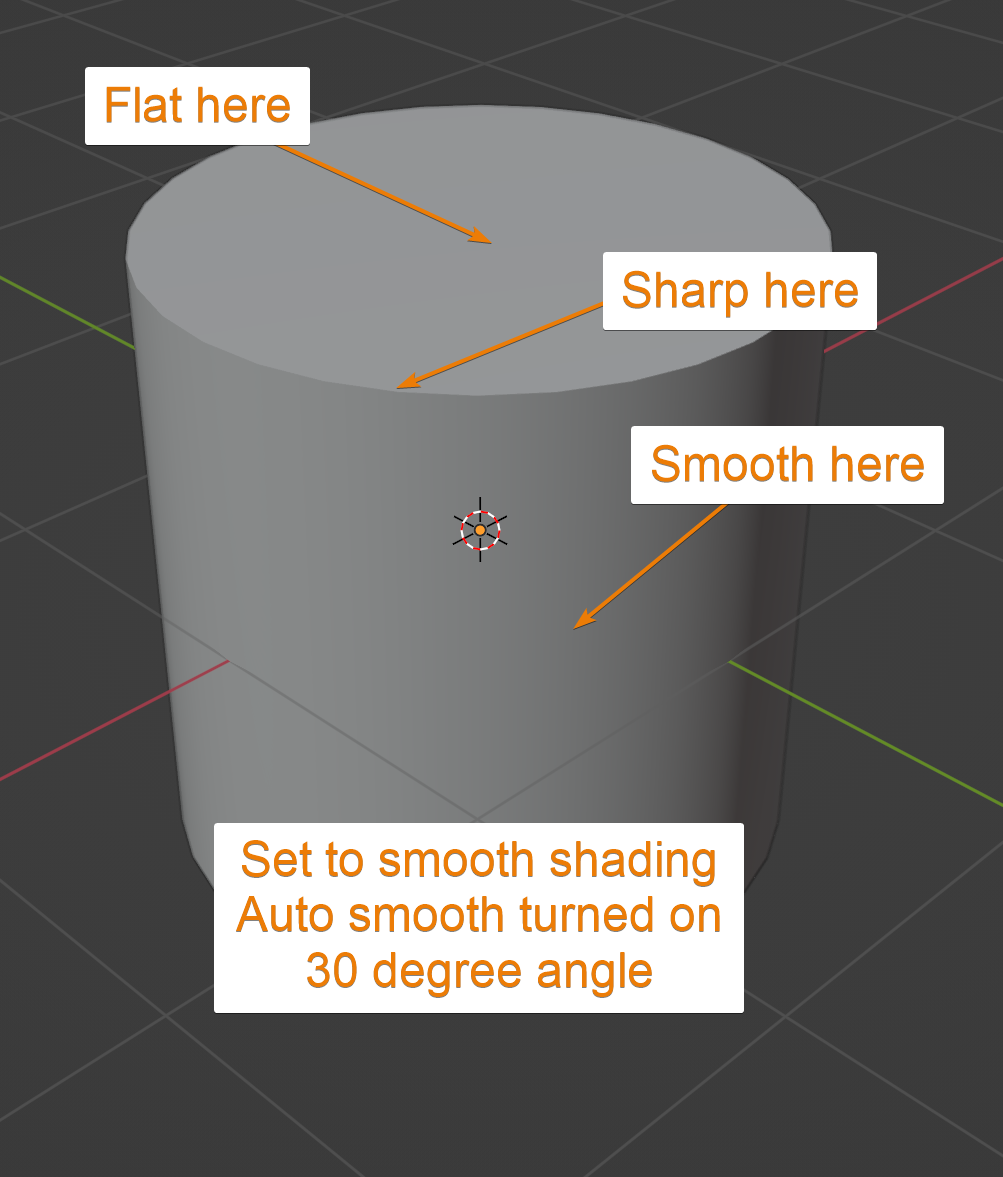
With auto smooth on we then also get the sharp edges we want where we actually have sharp edges without having to configure this manually.
Smooth shading also enables custom split normals. This means that we can override the auto smooth default behavior of using an angle and instead use something like the weighted normals modifier to customize the normals in a more advanced way without much effort.
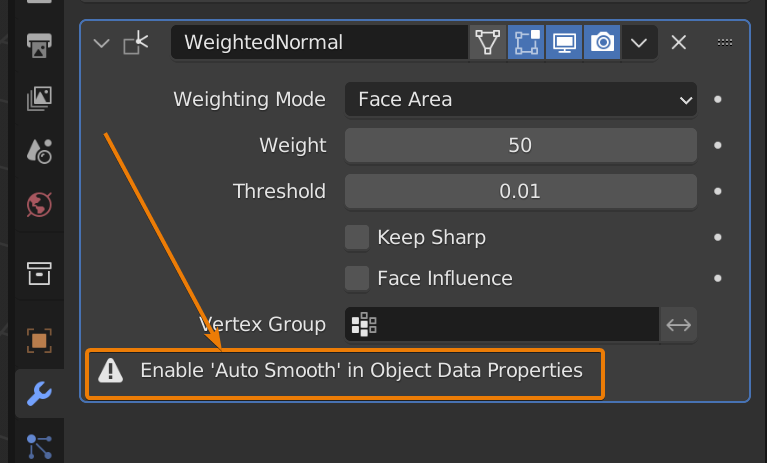
There are several features in Blender that require auto smooth to be on, but generally there will be a warning in the interface like this if it is required.
That brings us to weighted normals. We can manipulate normals in several ways. One way is through the weighted normals modifier combined with auto smooth.
The weighted normals modifier will give each face a weight. This menas that larger faces will have a higher influence on the direction of the normals. In many cases we can just add the modifier to the modifier stack, and it will do its job.
In other cases, we may have to adjust some settings for the modifier to weight the normals correctly. In those cases, you can learn more about the weighted normals modifier here:
Related content: Top 10 Blender modifiers and how they work
You can also view the video to learn about its settings.
If you are completely new to modifiers you can learn how they work here:
Related content: How modifiers work in Blender an overview
Related content: How to apply modifiers in Blender
We can force an edge to be shaded sharp even if we have smooth shading turned on by marking an edge as sharp. Typically we do this for an entire edge loop. Marking sharp requires the shading to be set as smooth and auto-smooth to be turned on.
Related content: Blender edge marking guide
Turn on auto smooth by going to object data properties, expand the normals section and check auto smooth.
Next go to edit mode and go to edge select by pressing 2 on the numberrow or by pressing edge select in the top right corner of the 3D viewport.
Then select the edges you want to mark as sharp. Hold Alt to select an entire edge loop.
Related content: How selecting works in Blender
Right click and choose to mark sharp. You can also clear sharp from this menu.
You may have come across the phrase "harden normals". This is a feature in the bevel modifier. This feature helps us give more weight to the flat faces surrounding the beveling made by the bevel modifier. If you turn it on it will tell you that it requires auto smooth.
Related content: How to bevel in Blender using the tool and modifier
It gives a slightly different result from an auto smoothed mesh and the weighted normals modifier. The weighting is a bit different. But it is essentially a weighted normals modifier built into the bevel modifier that gives a slightly different result.
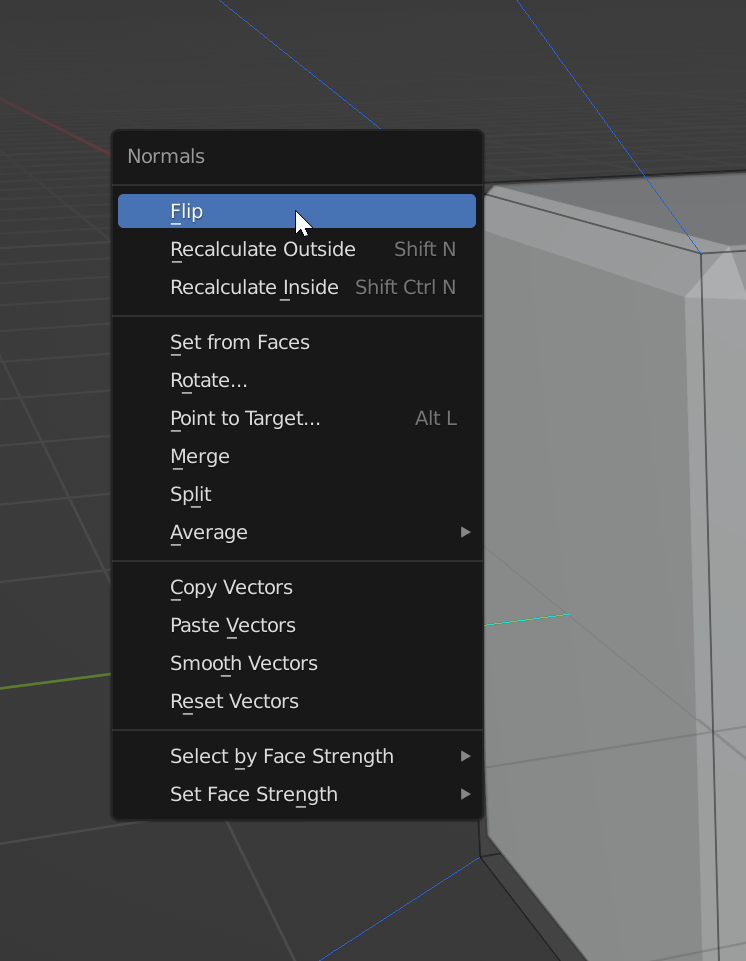
Recently, Blender has received a lot of updates that help us edit and control normals. We can access most of these features easily through the normals menu.
In edit mode, go to the mesh menu->normals or press Alt+N to bring up the normal menu.
You can find information about the settings in the Blender manual. But we will also discuss and cover some of these here.
External content: Blender manual: Normals
We have already discussed flip and recalculate. Here you can see that there is a recalculate inside and outside. The difference is the direction that is supposed to be the "outside" direction, or the direction that faces the "world".
In some cases we may have a large geometry that we are enclosed inside, like a sphere acting as a sky dome. In those cases we can use recalculate inside to have the normals be recalculated on the inside of the volume.
Next, we have a section with these settings:
With Set from face you need to select at least one face. Blender will use the face normal direction and set the vertex normals to the face direction.
With rotate you can freely rotate the selected vertex normals direction. You can use X, Y or Z to limit the rotation to any of the axis just like when using normal transformation tools.
With point to target we can have the normals point in a certain direction. While the operation is active we get a message in the status bar telling us waht options are available. For instance we can Ctrl+Click to change the position of the 3D cursor and point the normals in the same direction, or we can press O to have the normals point at the object origin.
We can merge and split normals. This will enable auto smooth, and splitting will also mark adjacent edges as sharp.
We can also average the normals based on custom normal, face area or corner angle. If we have split normals this will make them point in the same direction. The direction depends on the choice we make between custom, face area or corner angle.
Next, we can copy and paste one vertex vector to another using the copy and paste options. We can also reset and smooth normals.
The set face strength allow us to mark faces as strong, medium or weak. This is then used by the weighted normals modifier if the face influence is checked on the modifier settings.
Stronger faces will make the normals point in the direction of the face while weaker won't have influence. We can also select faces by strength from here.
While geometry based normals handle shading, we can complement this with a normal map. A normal map alters the shading interpolation across a face by using a texture that we usually call a normal map or normal texture.
A normal map is an image that is intended to be read as vector data instead of color data. Altering the direction of incoming light based on the values stored in each pixel of the normal map. This way we can fake small scale detail in a material just by changing the direction of the light based on a texture instead of having actual geometry in place.
For example, instead of having RGB color stored in the texture, we use the Red, Green, and Blue channels to store a direction. A 3D vector. We do this by mapping Red to X, Green to Y and Z to blue.
Here is an example of a normal map. They are generally quite blue and purple in their color.
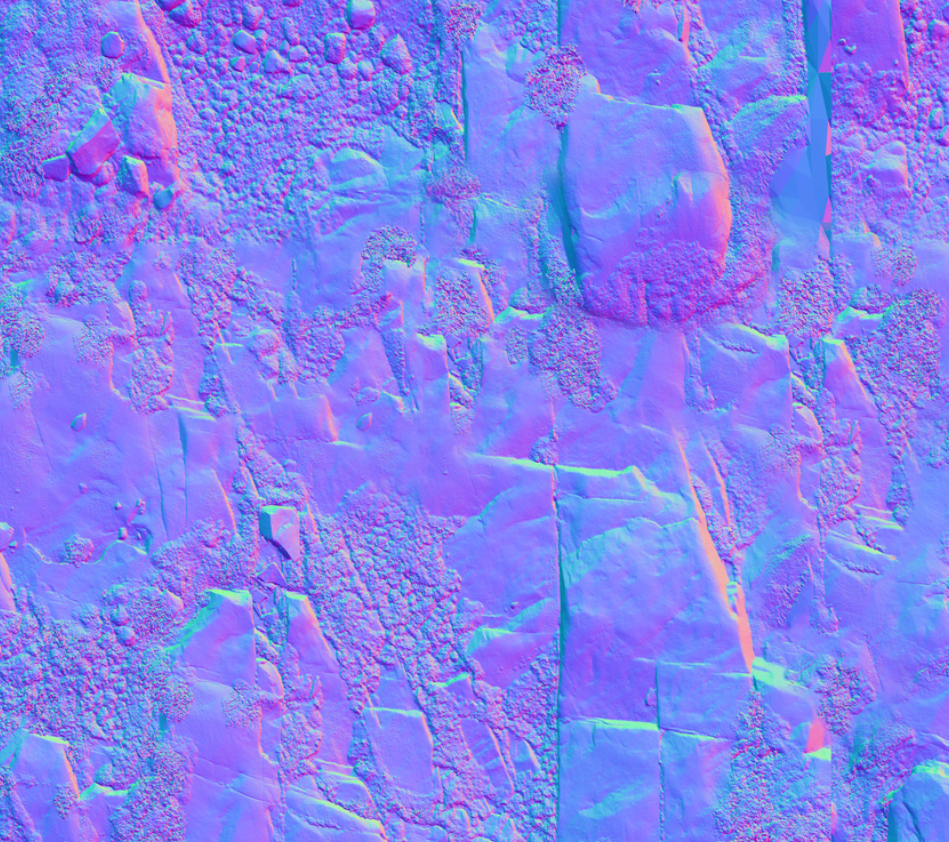
You can find the full material for this normal map here:
External content: Poly Haven - Aerial Rocks 02 Texture
We then tell Blender to use this as vector input for our shader in the material. It can look like this in the shader editor.
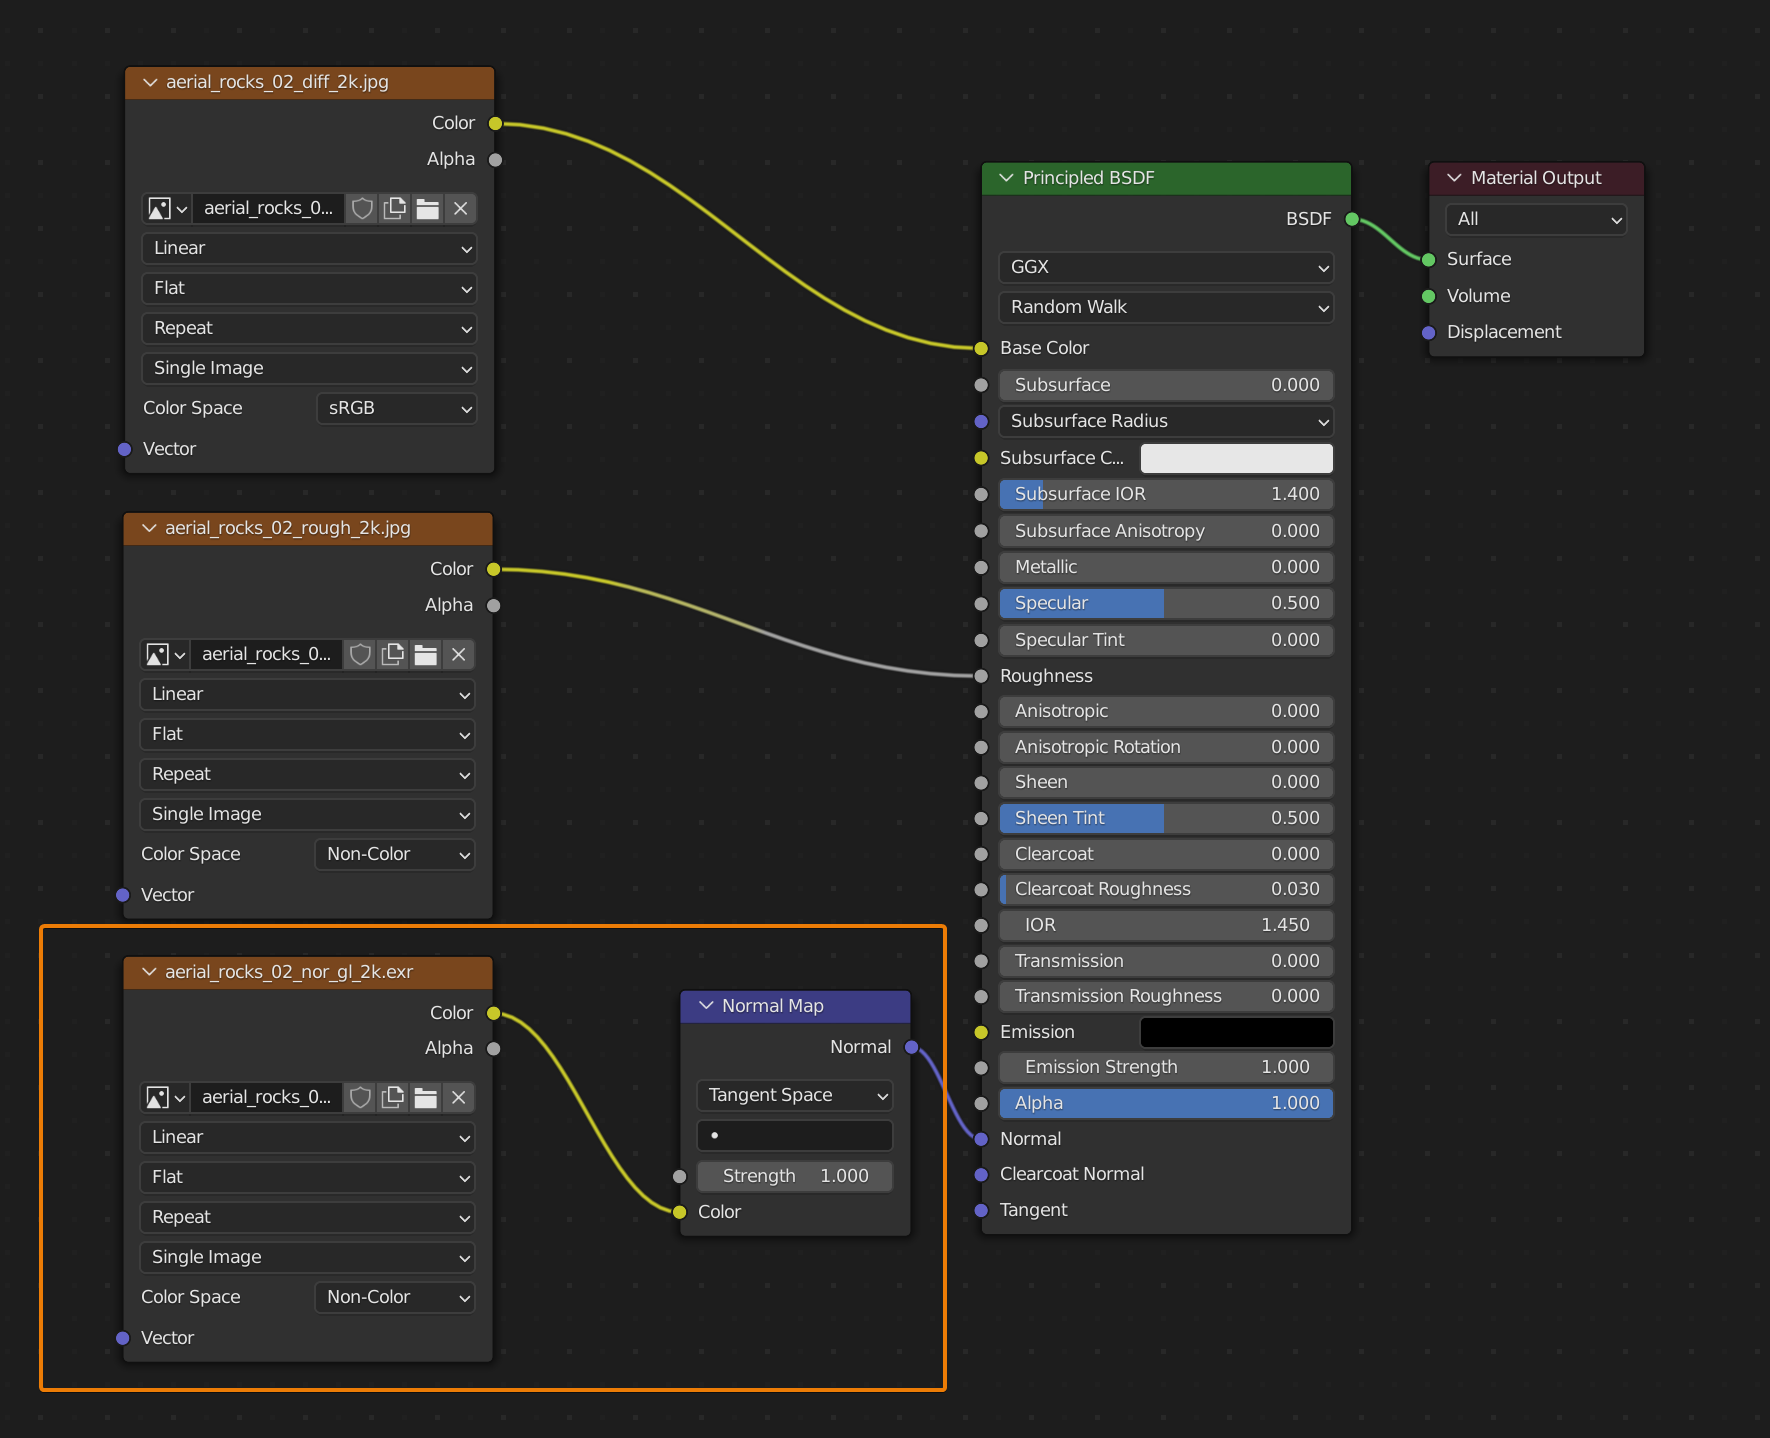
Note how the normal map texture is connected to a normal map node to convert the color output of the original normal map texture from color output to vector output. We can then use this converted data as vector input to change how incoming light bounces from the surface.
You can read more about materials, PBR vectors and normal maps in this shading guide.
Related content: The complete beginners guide to Blender nodes, Eevee, Cycles and PBR
You may also have heard that normal maps can be baked. In this guide I show you how you can bake textures, including normal maps in Blender.
Related content: How to bake textures in Blender
There is also another kind of baking where we take a high poly object, like a sculpt and bake the details into a low poly version that has been created through retopology or remeshing.
Related content: Remeshing in Blender
The geometry based normals and the normal maps we add to our shaders work together to give the renderer the final data needed to decide how light, and reflection bounce off the surface. This can result in hard or soft edges both based on the normal map and the vertex normals.
Normals is a hidden and mysterious topic for most beginner artists. In this guide we covered vector normals and face normals. We learned how we can control them and the effects they have.
We also learned about normal maps and how they work together with geometry based normals to create the final shading left for the renderer to interpret and create the final shading and reflections from.
Thanks for your time.
