


Normal maps is commonly used in 3D art but they can seem quite complex so we may be intrigued to dive a bit deeper into them. In this article we are going to cover some tips that you can do with normal maps that may be useful in your Blender projects.
These are the normal map tips we will cover.
Let's dive in!
Related content: What are normals and how do they work in Blender?
Sometimes there is a need to combine multiple normal maps. Perhaps we have an overlay in the form of a normal map that we want to be overlayed to an existing normal map. For example a normal map that creates droplets over a wooden surface or similar.
A simple and accurate solution is to use a node group from Blendswap that you can find here:_
External content: Blendswap combine normal maps node group
To get it you need an account but other than that it is just a Blend file to download and a nodegroup to append to your project. This however is not the fastes method.
The node group is a compositor node group. This means that we have to combine the normal maps and save the result before we can use it in a material shader.
For a faster approach that is most often good enough is to use a mixRGB node set to overlay to combine the two normal maps.
The node setup looks like this:
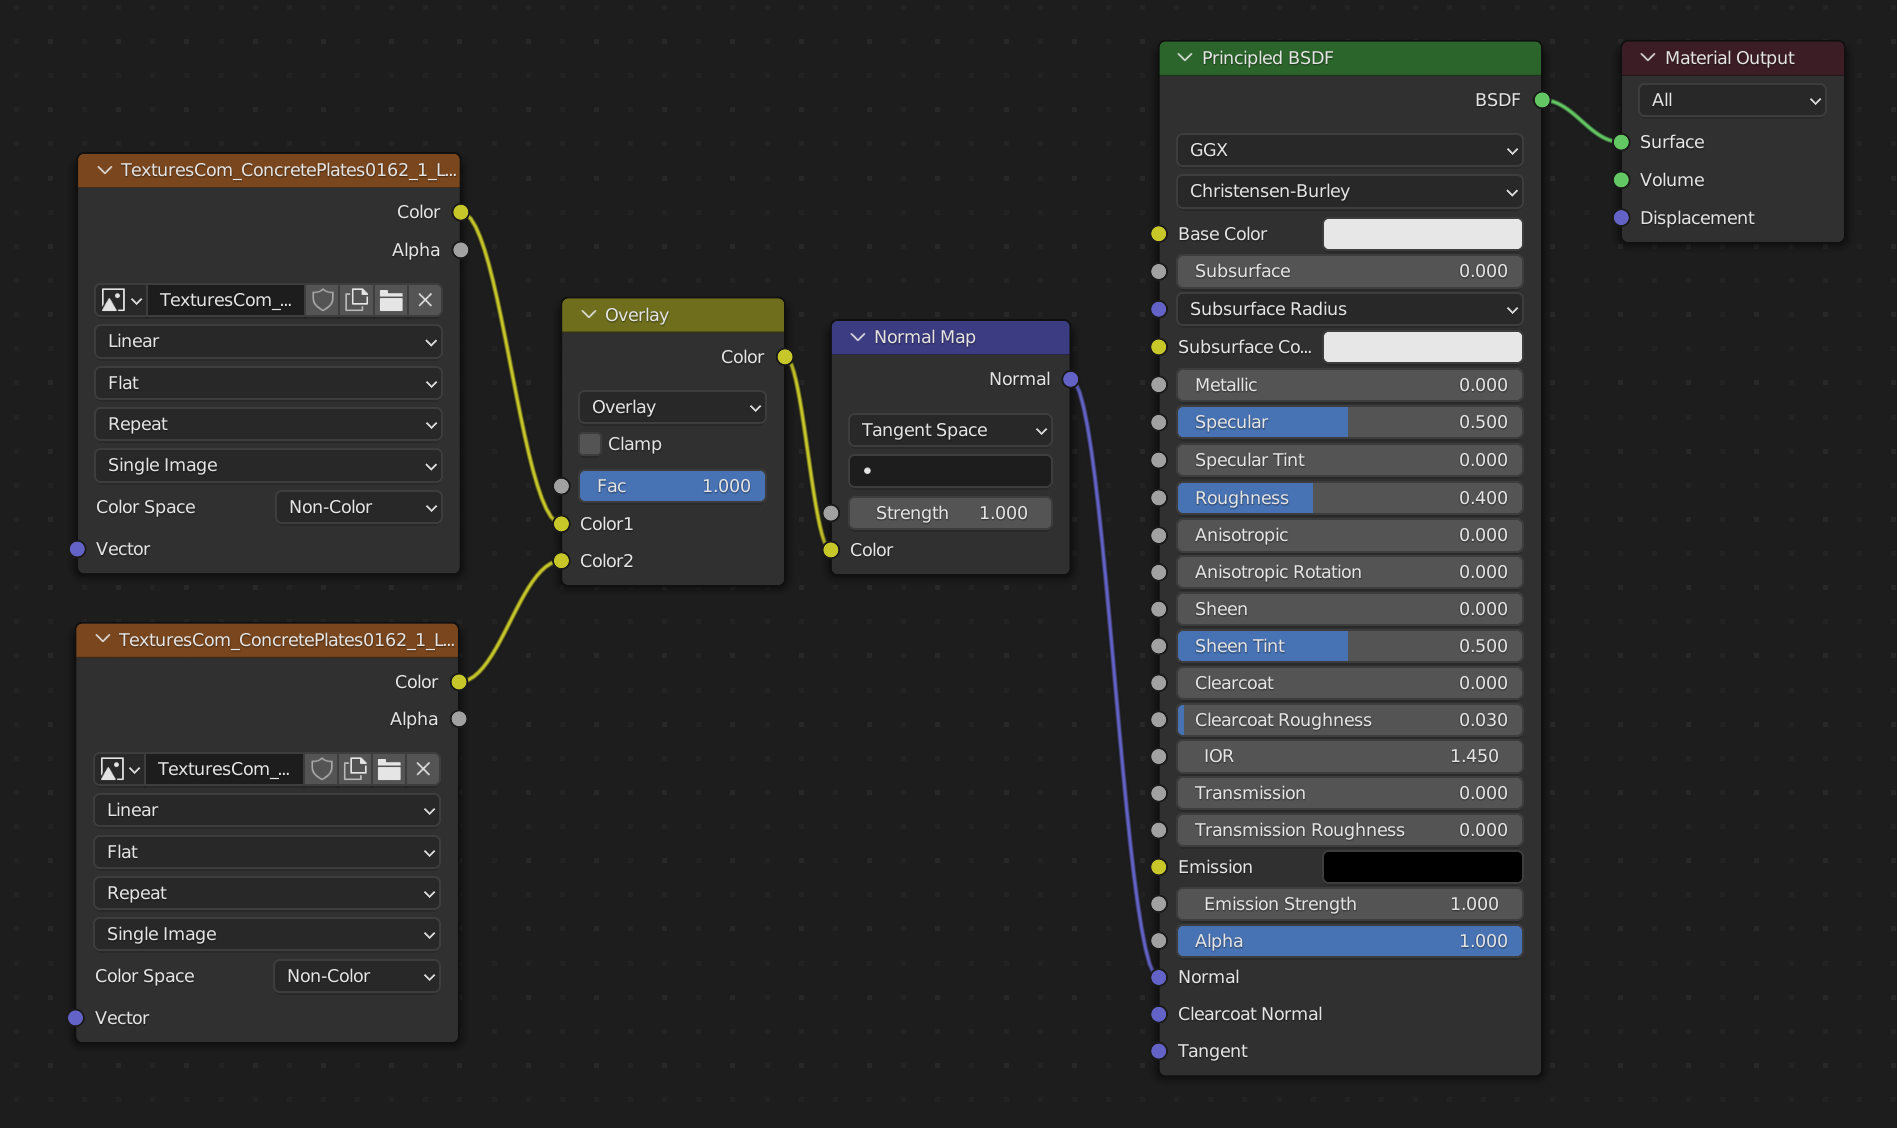
There has been several attempts at combining normal maps. Personally I mostly use this method. It is accurate enough for most tasks and if I need a more exact solution I will use the node group from Blendswap and combine the normal maps in the compositor first.
For more information there is a good thread on Blender stackexchange that you can find here:
External content: Blender stackexchagne: How to combine two normal maps
Sometimes we just want to see what the result of a normal map is by itself without the rest of the material. I have found that the easiest way to do this is to simply render the scene with a clay or white diffuse material.
If we are working on a single or just a handful of assets we can simply add a new Principled BSDF or Diffuse shader into our node graph, pipe the normal map output to the normal input of the newly added shader and plug the shader into the material output node and render using the shaders otherwise default settings.
However if we have hundreds or thousands of objects this might not be practical. What we can do instead is to overwrite all our materials at once. This is quite limited since we can only use a single normal map for our entire scene but let's look at this solution first. To do this, follow these steps.
Now note that this method is only usable if all our objects use the same normal map. We could achieve this through baking.
Related content: How to bake textures in Blender
Another method is to turn to the compositor. I have found this method to work pretty well.
You can view the node setup in the image below.
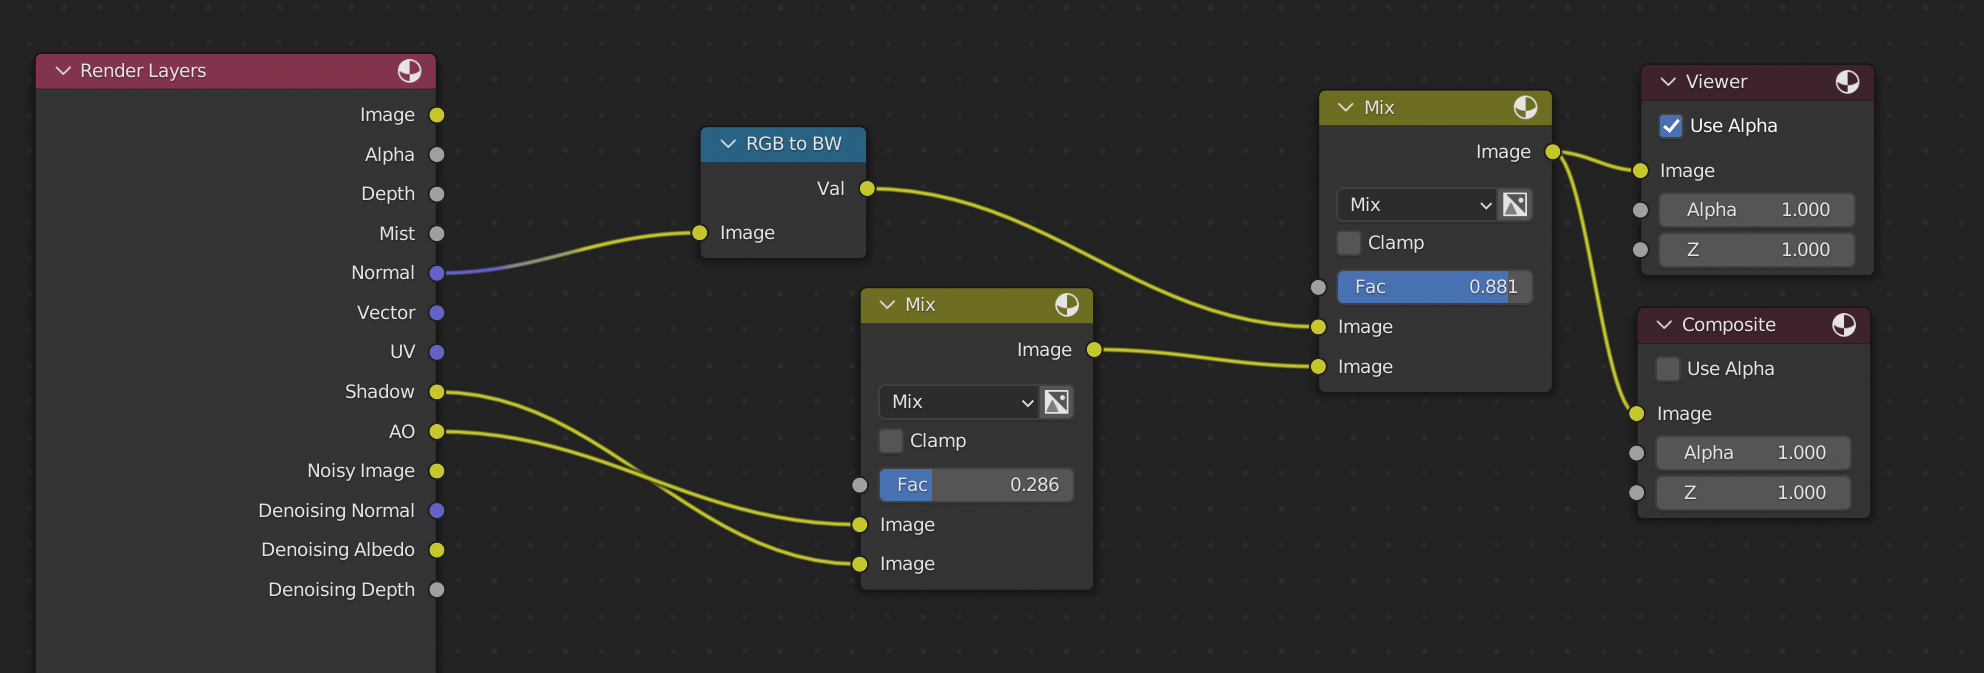
You can play with the fac input of both mix nodes to get the result you want.
If you didn't know there are two types of normal maps available. One version is for OpenGL and one is for DirectX. For example, Blender uses OpenGL but other applications, most notably Unreal Engine, uses DirectX.
The only difference between these versions is that the Green, or Y channel in the normal map image is flipped. So if you see that your normal map appears to be inverted it might be that it is a DirectX normal map that you are trying to use in Blender.
To convert the normal map from OpenGL to DirectX or vise versa, follow these steps:
It should look like the node graph in the image below.
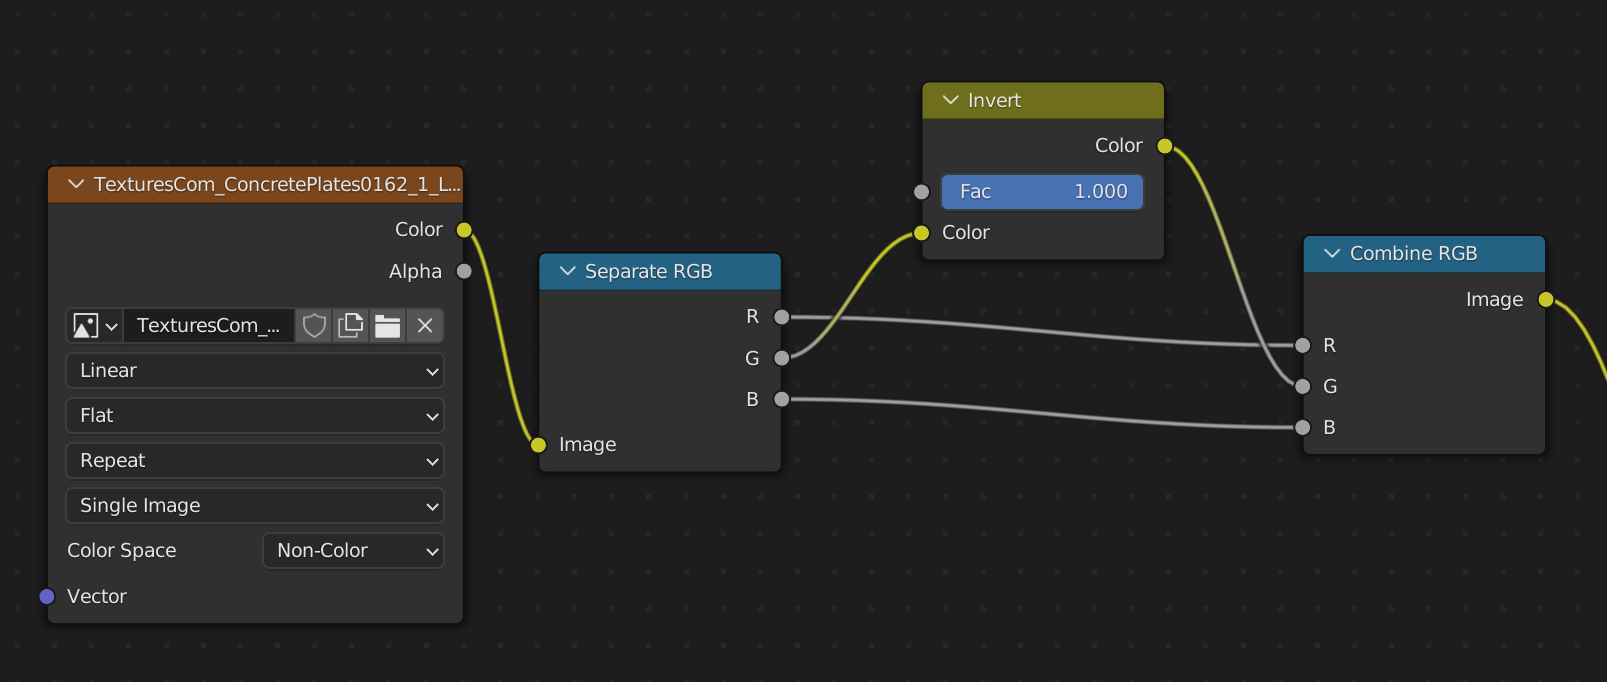
The same node setup is used for converting both ways. The image output from the combineRGB node then goes to the normal map node that connects to the shader normal input slot.
This is a feature that few artists know about, but you can actually quite easily bake a normal map using a matcap in Blender. Here it how it works.
Start by going to solid shader view in the 3D viewport and set the matcap to the one that looks like a normal map.
Related content: Blender viewport shading guide
Add a plane to your scene and subdivide it multiple times. You can go to edit mode, select everything with A and right click and choose subdivide. In the operator panel in the bottom left of the 3D viewport you can type in the number of subdivisions. Try to start with something like 20.
Tab back to object mode, right click and set the shading to smooth.
Related content: How to smooth the shading on an object in Blender?
Set the output resolution to something square like 2048 by 2048 for a 2k texture or 4096 by 4096 for a 4k texture. Go to the camera settings and change the camera from perspective to orthographic.
Move the camera to view the plane from top view and make sure that the whole frame is covered by the plane.
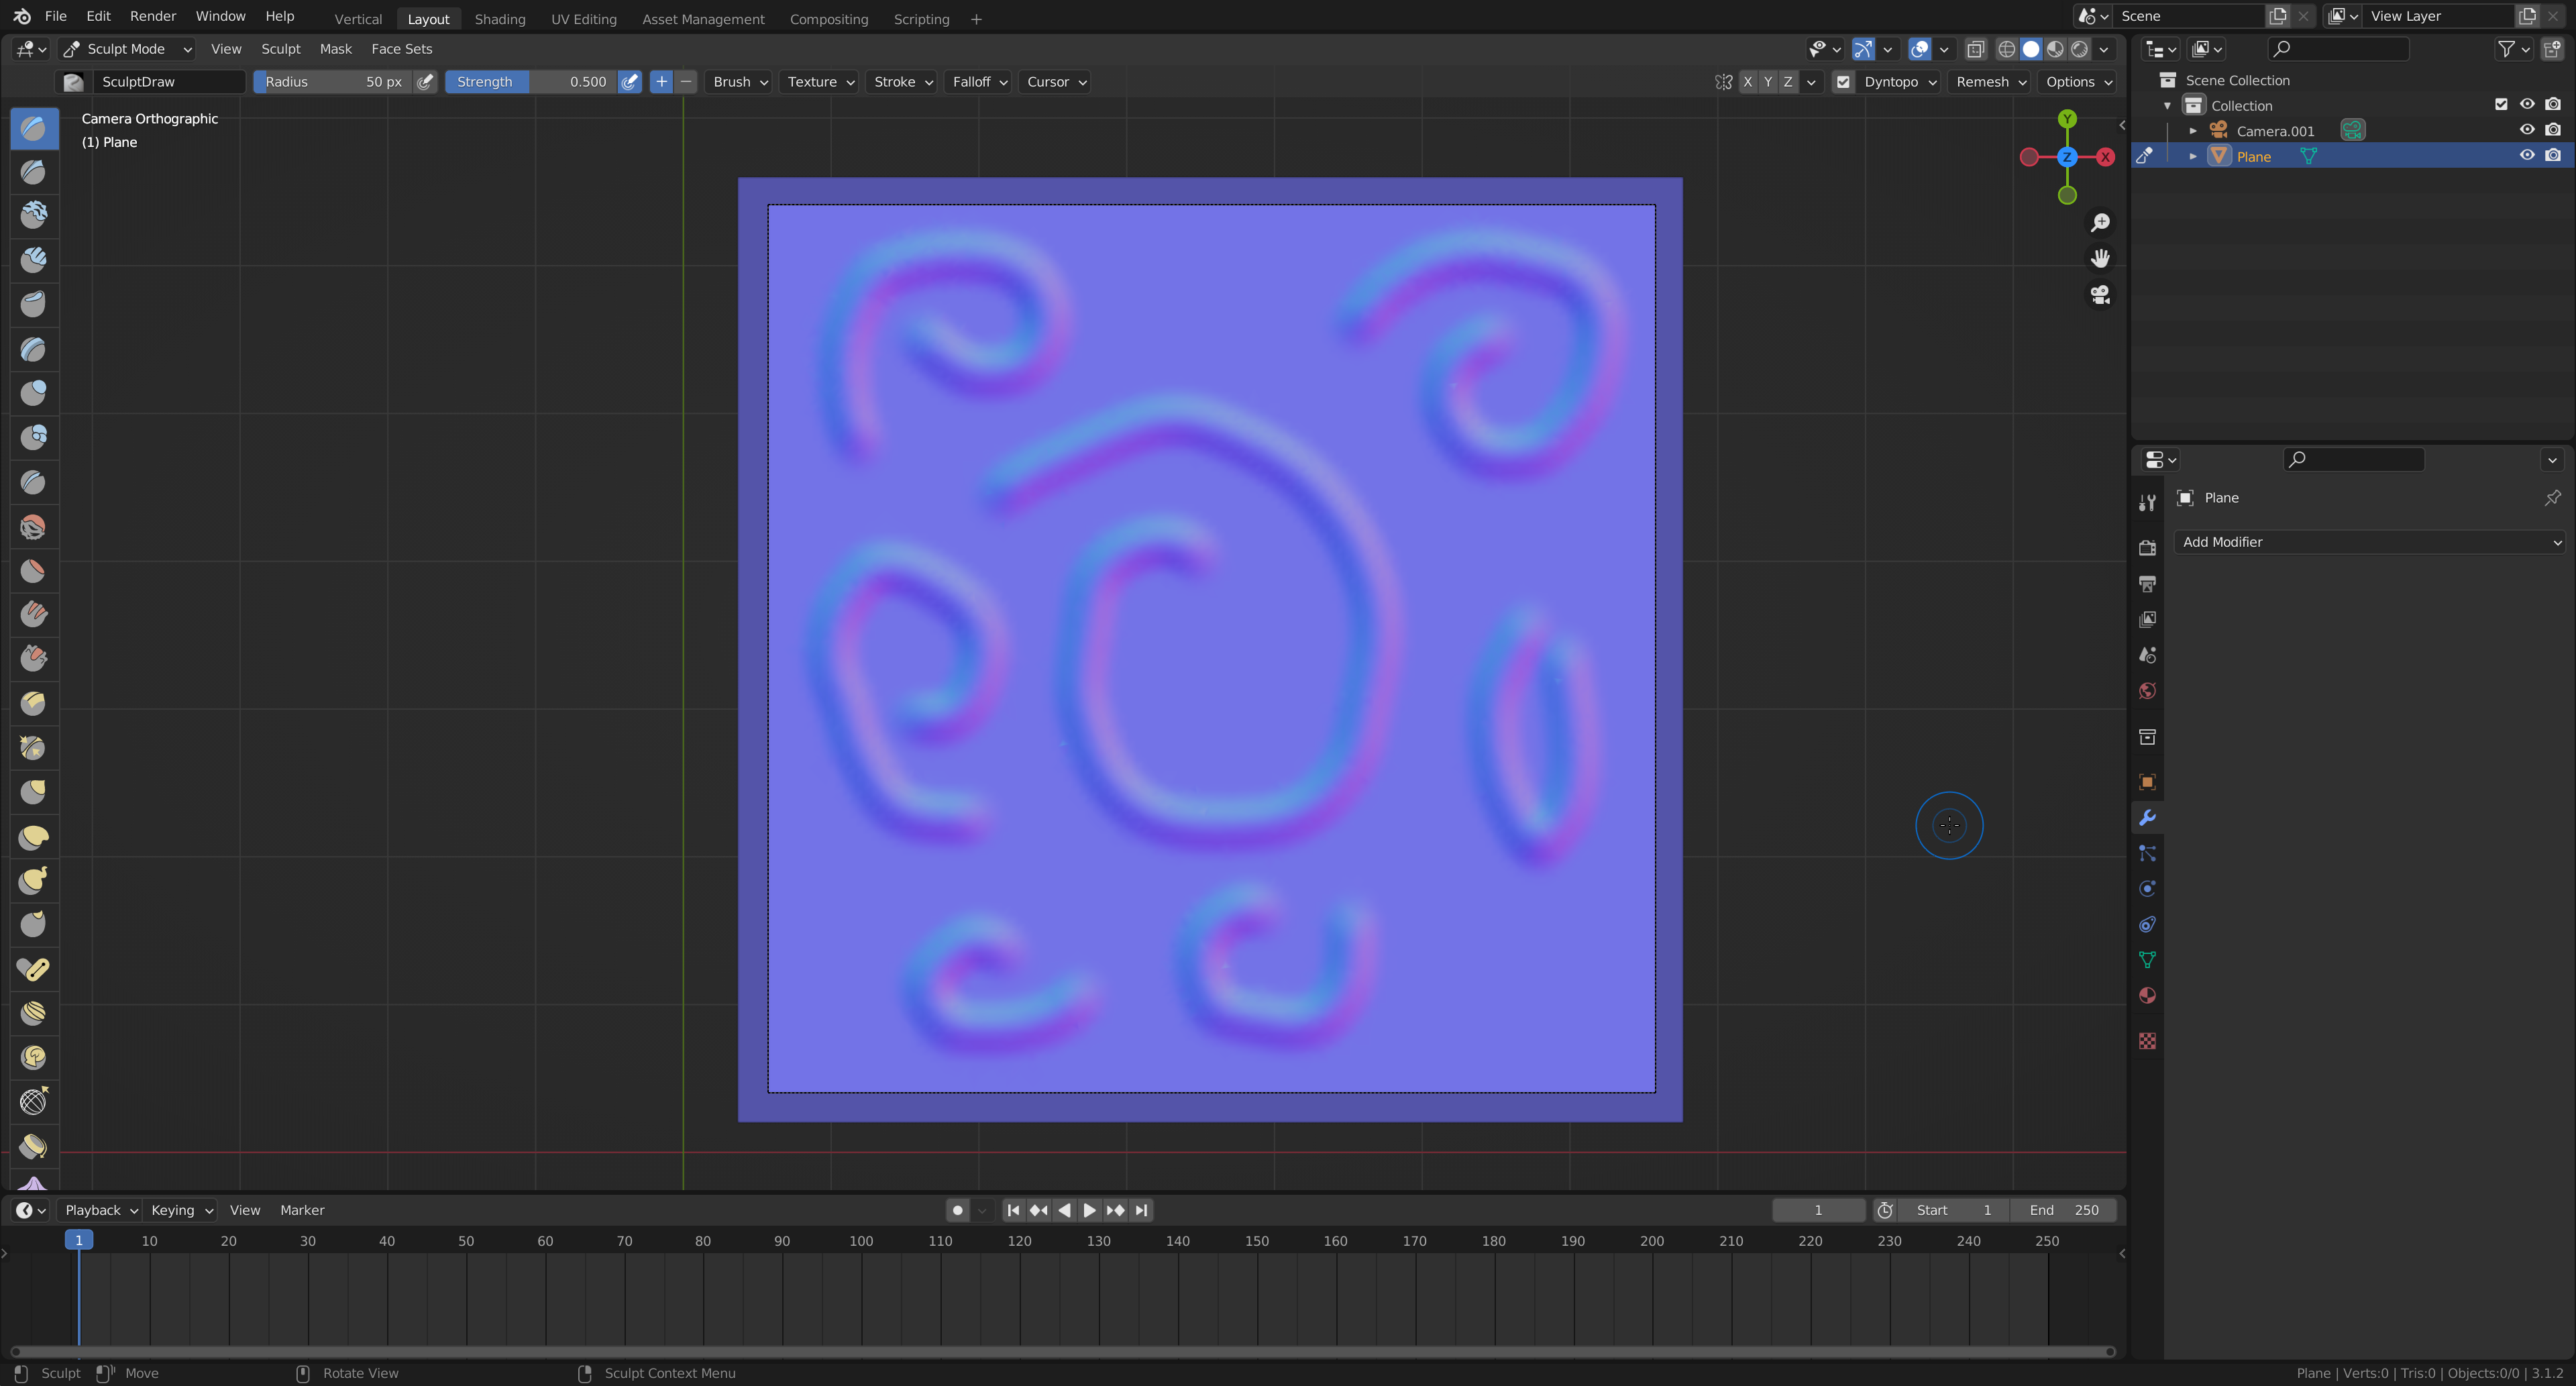
Now we can go into sculpt mode and turn on Dynamic topology.
Related content: Blender Dynamic topology: What, where, how and problem solving
Now you can use any sculpting tool to sculpt the normal map that you want, including textured brushes and alphas.
When you are finished, go to view->Viewport render image and Blender will render the viewport as you see it with the matcap overlayed to create the normal map automatically.
This tip is not directly related to normal maps, but is a more general tip for normals.
We have two different kinds of normals to worry about, the shading normals that is calculated as a base coat on our mesh depending on if we set smooth or flat shading or if we do something more advanced with custom normals direction.
Sometimes we need to see what direction these normals are pointing. We can do this by going to the overlay menu in the top right corner of the 3D viewport while in edit mode. Almost at the bottom you will find a normals section where you can activate the normals for vertices, edges and faces. We can also se a size. This is how far the line visualizing the normals will be drawn.

To make this tip a bit more related to normal maps, we can use this to know the ray distance we should use when baking normal maps.
If you set your render engine to Cycles and navigate to the bake render settings in the properties panel, you can set the bake type to normal and when we are baking from selected to active, this is when we are baking a normal map from a high resolution mesh such as a sculpt to a low resolution counterpart, you can see that we have a max ray distance value slider.
If we set this to the same number as the size from the normals overlay menu, we can visualize how far those rays are going to be cast. This can help us make sure that we get a good value from the start so that we avoid multiple bakes and issues because of too far or too short ray casting.
Related content: How to bake textures in Blender
Those are my five tips for Blender normal map enthusiasts. We have learned how we can combine multiple normal maps using multiple techniques.
We looked at how we can use different methods to visualize normal maps, from manipulating our shader to overrides or by using the compositor.
We also covered that there are multiple types of normal maps for OpenGL and DirectX based graphics software and you might have the wrong type sometimes. We learned how to turn a normal map from one type to the other and back again.
After that we learned how we can create custom normal maps pretty easily and how we can, for example, sculpt detail and later render the viewport directly to create the final normal map.
At last we looked at how we can visualize normals directly in the 3D viewport and see their direction. We also learned that we can use this while baking normal maps to easier see how far our rays are cast.
Thanks for your time.
