


Wood is a texture that doesn't require a too complex shader to recreate procedurally. But it can be a bit difficult to know exactly how to arrange the shader nodes. So how do we create a procedural wood texture in Blender?
To create a procedural wood texture:
In the rest of this article we'll go into more detail about create a procedural wood material as well as more options for customization.
If you are completely new to shader nodes you can check out this beginners guide.
Related content: The complete beginners guide to Blender nodes, Eevee, Cycles and PBR
For an image texture based wood texture setup you can also check out this guide.
Related content: How to make a wooden floor material in Blender?
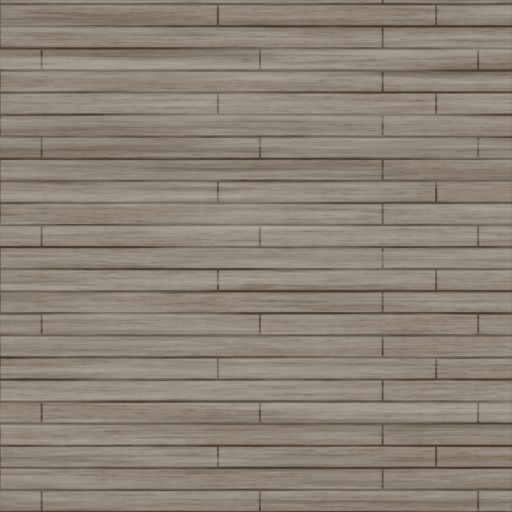
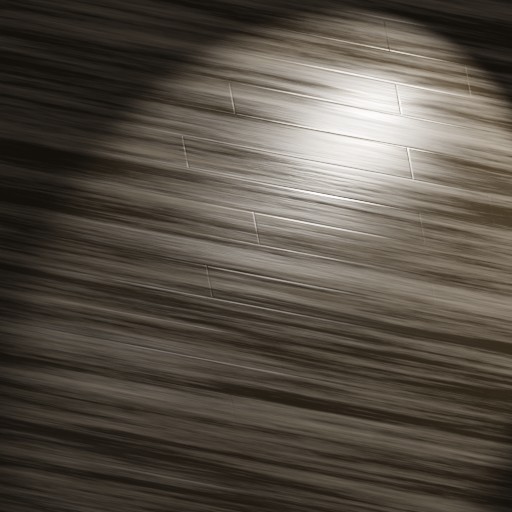
To create the wood grain for our procedural wood texture we will be creating a noise texture and then stretching it out using Blender's mapping node so that it looks like this.

First we will create each of those nodes in our shader graph. To access the shader graph first select the object we're creating the texture for and make sure it has a material. Go to the top of the Blender window and select the Shading Workspace.
In the shading graph we can go to Add > Search we can then search for whatever node we need and drop it into our graph. You can also press Shift+A while your mouse is inside the node graph to bring up the Add menu at your cursor position.
For the wood texture we will need a noise texture, mapping node, and texture coordinate node.

Choose a Coordinate from the Texture Coordinate node. For our example we can use the UV coordinate and connect it to the mapping node vector input because I have a UV map setup on my object.
Related content: The definitive tutorial to UV mapping in Blender
If you don't want to rely on UV coordinates, you can also try object or generated coordinates.
Connect the mapping node vector output to the noise texture vector coordinate.
The axis we need to scale our noise texture will depend on the object but usually this will be either X or Y. I recommend shrinking the scale of one axis and keeping the scale of the others the same.
In this example I will decrease the scale on the Y axis to -0.02 as you can see on the mapping node in the image below.
To preview our noise texture we can connect the noise texture to a color ramp and then connect that to the Principled BSDF color. For this example I've changed the color to more closely match wood and adjusted the color ramp.
Related content: How the color ramp node works in Blender

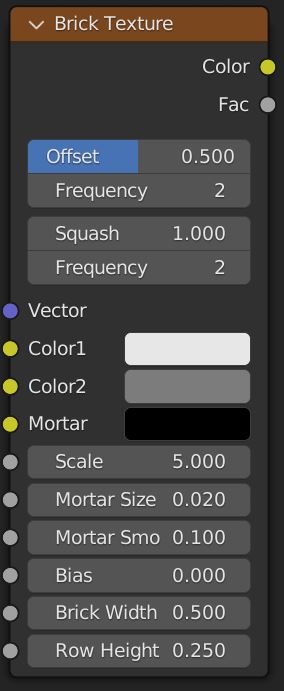
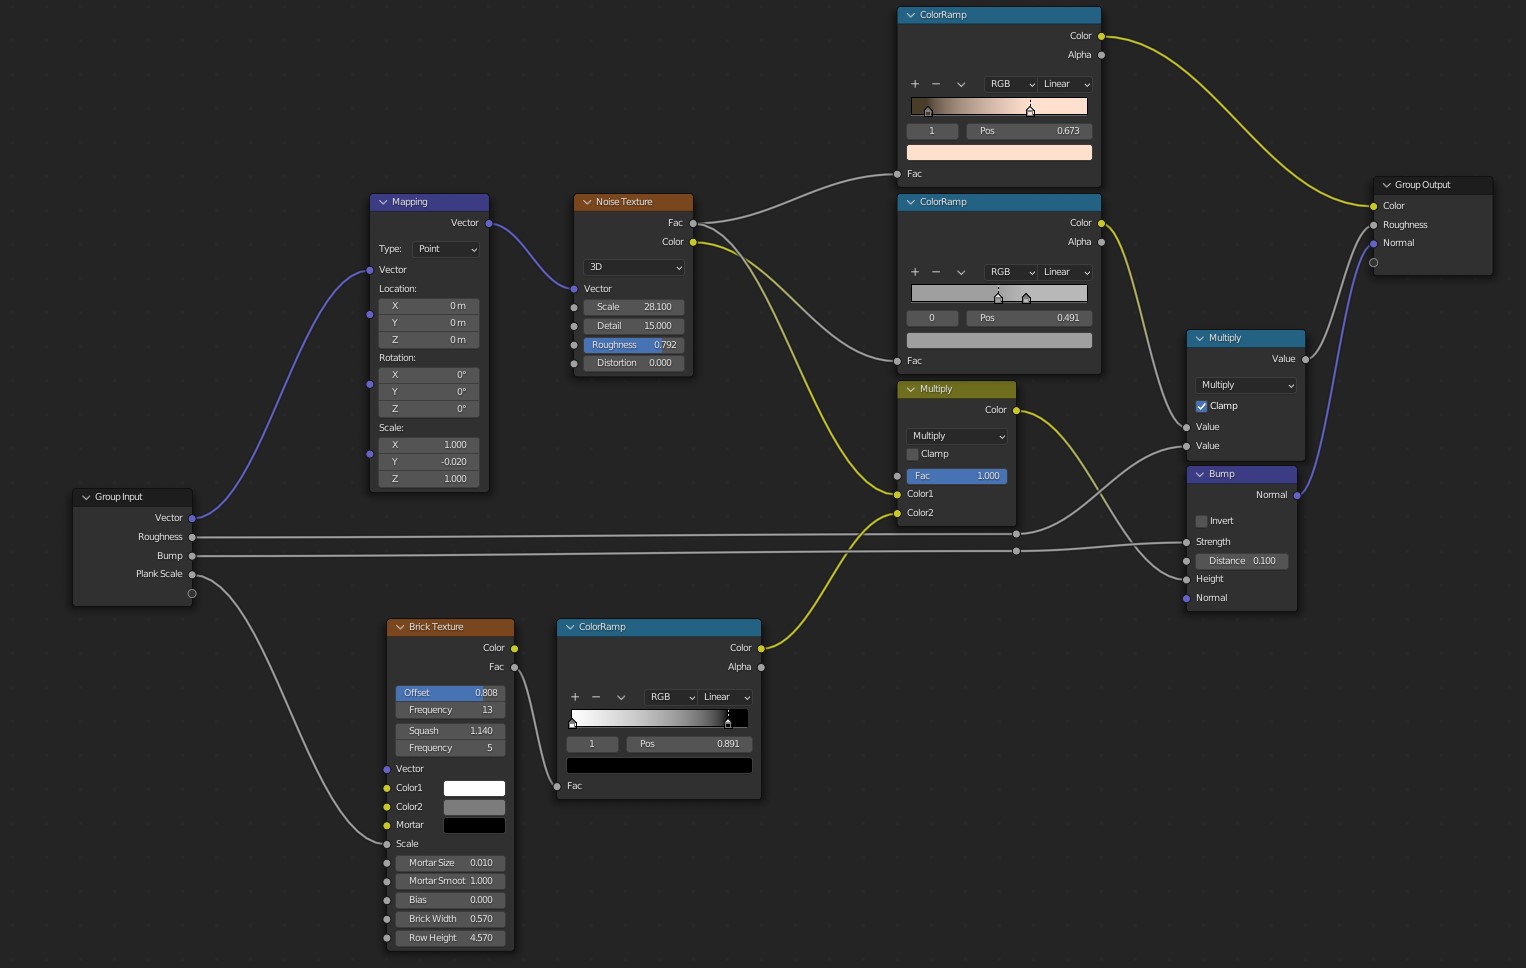
We can fairly quickly create a wood plank effect using Blenders brick texture node. We will mainly be using the brick texture to add bump detail to our material as well as darkening the texture we use to create the wood grain.
First we'll want to make sure we navigate to the shading workspace and then in the shader graph we can go to Add -> Search and search for the Brick texture node. Add that to the shader graph as well as a mixRGB node.
Connect the wood grain effect you plan to use for the first node of the mix node or you can set its color. Connect the brick texture to the second input of the mix node. Connect the mix node output to the Principled BSDF color input.
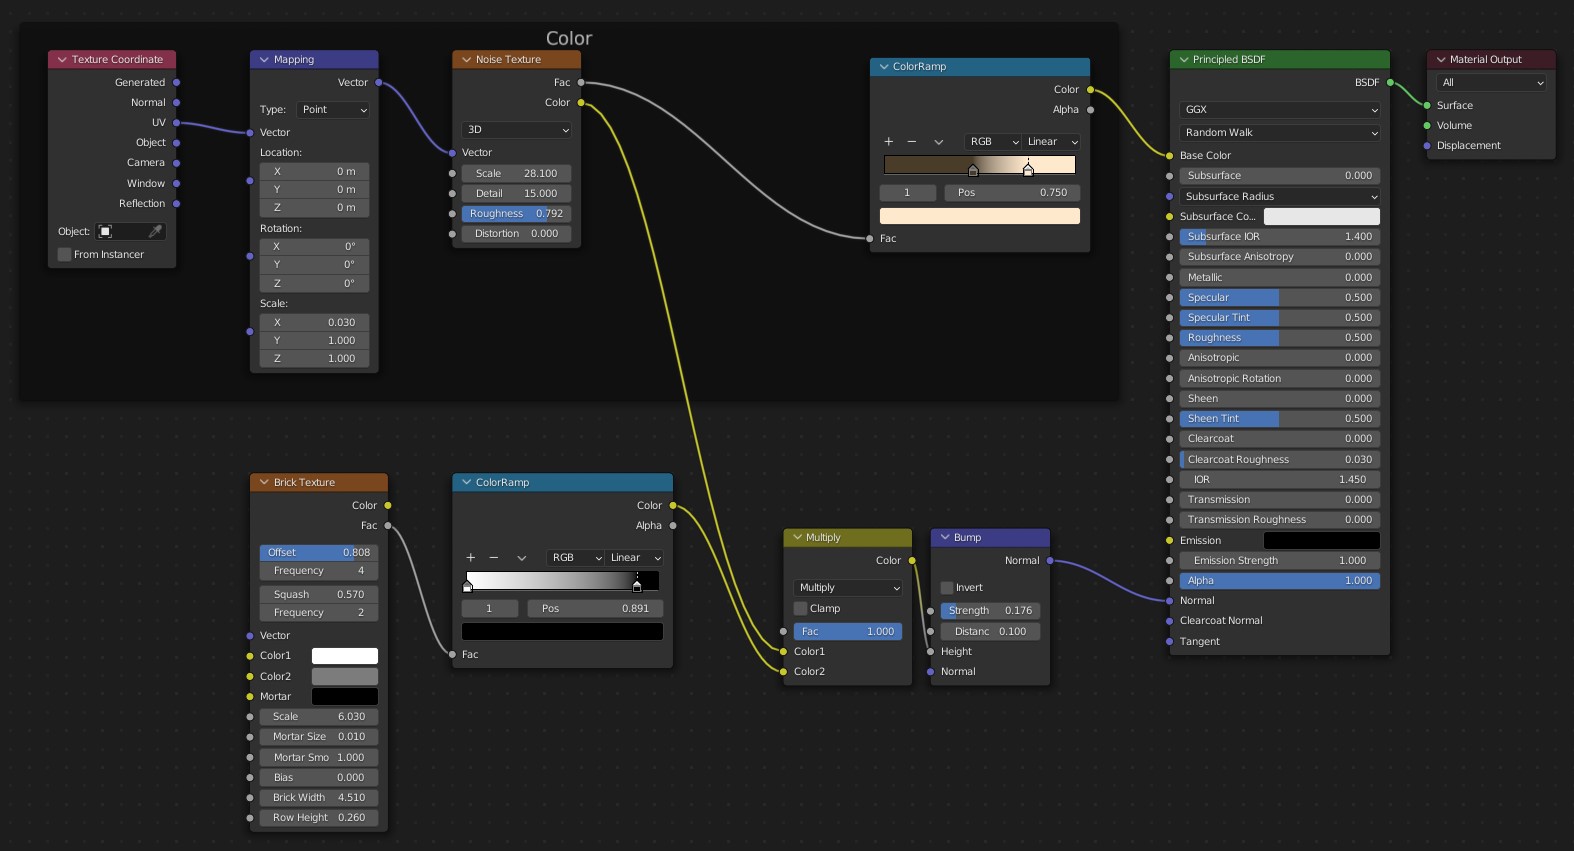
We can now use the Brick Texture factors to adjust the scale of our planks. The frequency and offset values can be used to adjust how uniform the planks are. Mortar size can be used to adjust the size of the gap between planks.
Another aspect of our wood material we may want to control is roughness. By adjusting the roughness values we can give our material more detail as well as making the wood more glossy or rough.
In the shading workspace go to Add -> Search and search for a colorramp node. Connect the wood texture to the colorramp input and connect the colorramp output to the Principled BSDF roughness input.

We can now use the ColorRamp to control the roughness values. I recommend first flipping the nodes around so that the darkest parts of the texture are the lightest making them the roughest and the lightest parts of the wood are the most smooth making them the darkness.
To fine tune the roughness of our wood material we can change the color value for each handle in the ColorRamp. Keep in mind that 0 is the least rough while 1 is the most rough. While this isn't necessary it is helpful if we want to ensure no part of our wood is completely smooth or rough.
As we begin to build a more complex node tree for our wood texture it may become a bit of a burden to handle. With a node group we can combine all of the nodes we've created into one node that we can adjust the values of instead.
Related content: How to work with node groups in Blender

To create the node group select all of the nodes used for creating the texture except for the Principled BSDF, texture coordinate, and Material Output.
I recommend excluding the Principled BSDF so that later on we can mix other textures with our wood texture if we'd like and leaving the texture coordinate out means we can switch which texture coordinate we use without have to open the node group again.
With our nodes selected we can go to Node -> Make Group. When the group is created the shader graph will transition to the nodes inside of that group which we can enter and exit by pressing the TAB key.
While inside of the Node Group we can bring up the properties tab by pressing the N key. We can then go to the group properties and adjust the settings for the input and output values as well as adding and removing inputs.
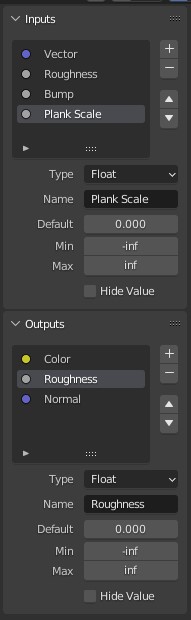
For this example I've added adjustable values for the Roughness, Bump, and Plank Scale. In the outputs I've set the roughness to be a value output to match the gray socket of the roughness input on the Principled BSDF.
You may notice that I added the ability to adjust the roughness of the texture, this was achieved by adding a math node set to multiply and multiplying the roughness texture with the value. The math node was clamped since roughness should only go from 0-1.
Procedural textures can be a great way of creating highly customizable and detailed materials. Especially if we don't have access to the equipment or the source to capture photos of the material we'd like.
While they may require a bit more setup then just connecting image textures they have quite a few advantages compared to image textures.
With Node Groups we can easily turn a complex node tree into a simple set of values that we can use to adjust our textures making them more versatile and reusable.
Thanks for your time.
