


The poly build tool in Blender helps the artist with polygon modeling and retopology. We can use it on its own or combine it with other tools in Blender to get the most out of it.
Poly build is an edit mode tool. We primarily use it with snapping when doing retopology. Enable it in the left side toolbar and mouse over an edge, click and drag to extrude. Hold shift to delete and Ctrl + drag from edges and vertices far additional methods of creating geometry.
Let’s dive into the details of the poly build tool as well as what other functionality can help us make the most of it.
When we are in edit mode and we select the poly build tool from the left side toolbar, it kind of acts as its own mini mode inside edit mode. Let’s start with how to add geometry and we will deal with the pitfalls later.
Generally, we start with a plane, a single edge, or a similarly simple geometry. The tool is primarily suited for a polygon modeling workflow as opposed to a box modeling one.
Related content: 10 Different types of 3D modeling techniques
We can hover our mesh to see different parts of it highlight in blue. Edges will get a blue widget indication and vertices, while a bit harder to see will get a small blue dot overlayed when we move the cursor close.
By clicking and dragging an edge, we will extrude it while clicking and dragging a vertex will move it.
If we hold CTRL while clicking and dragging an edge, we will get a triangle indicator if the face the edge is connected to is a quad or n-gon.
If the face is a triangle, Poly build will expand the triangle into a quad face.
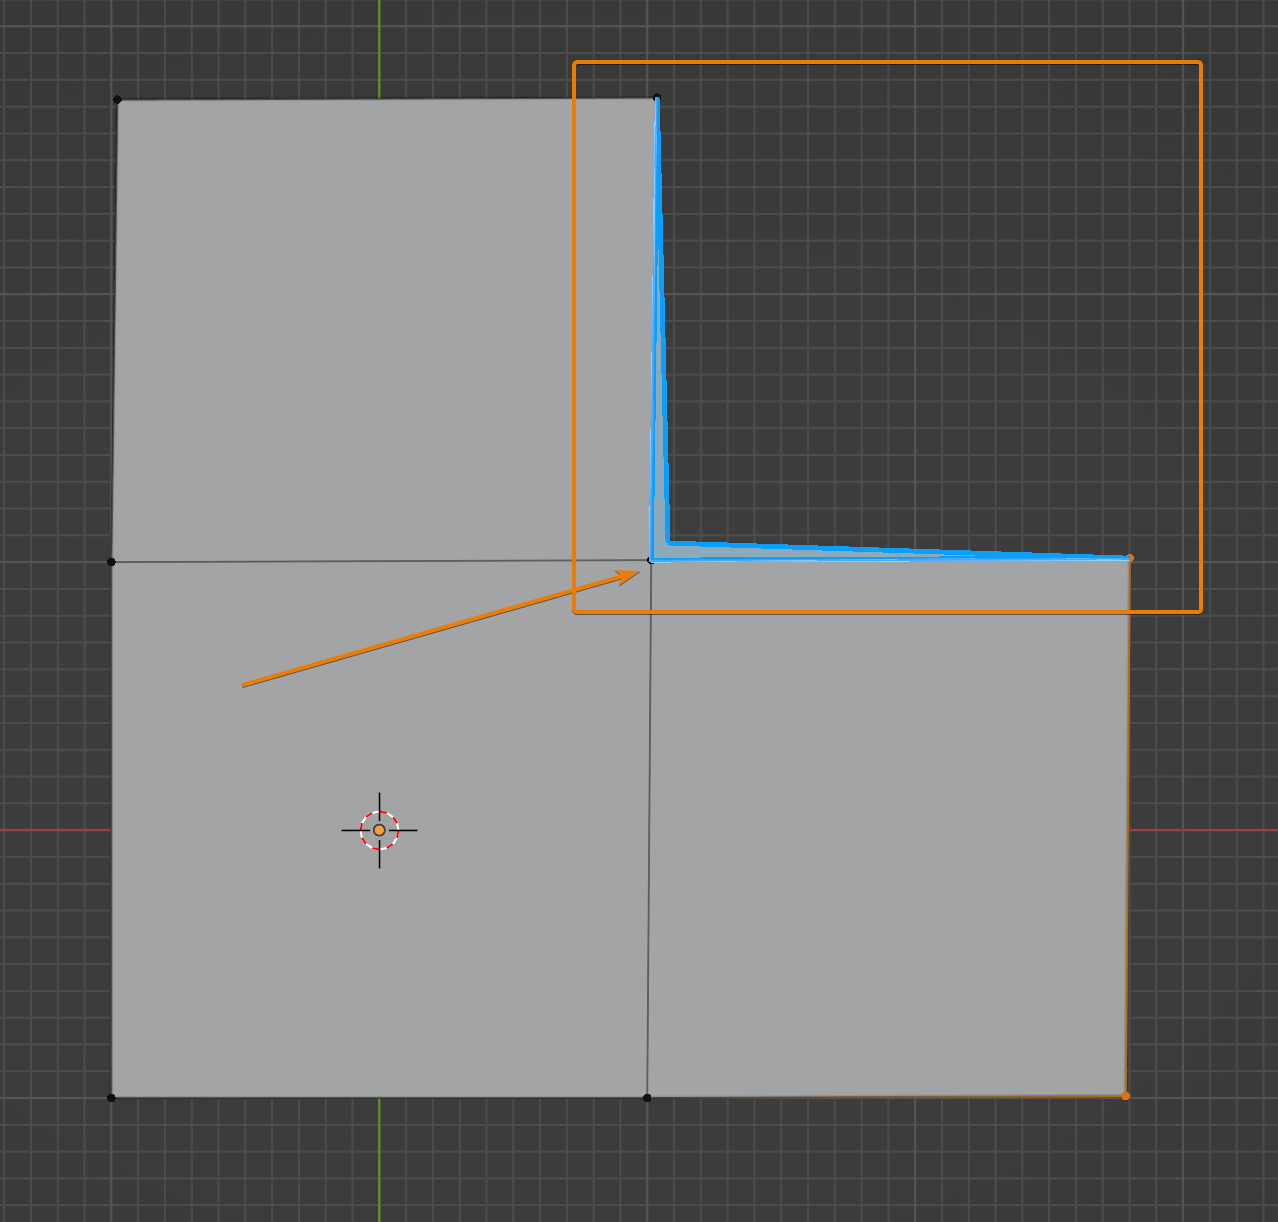
While holding CTRL we can also work with vertices. If we hover close to a vertex that is sitting between two faces, we get an indication that we can pull out a new quad.
This is useful when we have a geometry with a corner like this.
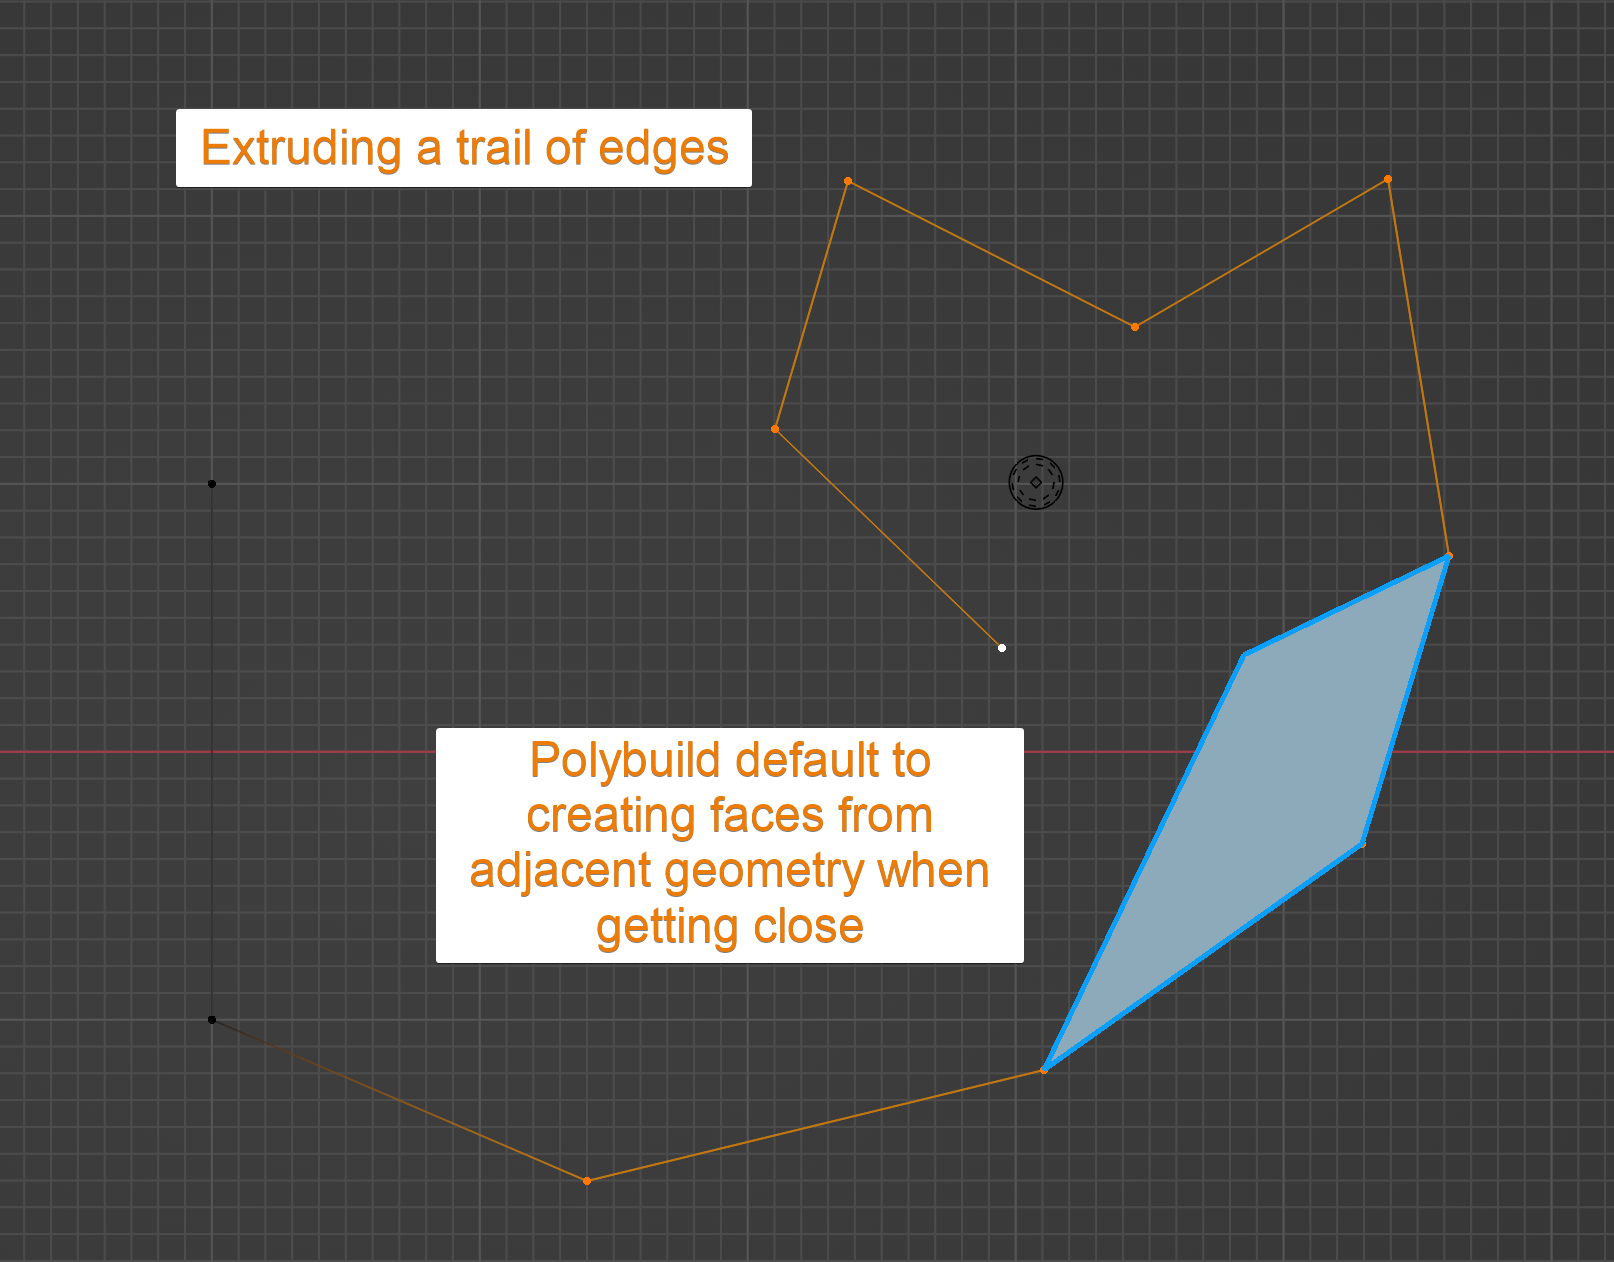
If we have an edge ending with a vertex with no other geometry around, we can also use CTRL+Click to extrude a new edge continually to create a trail of edges. But if we ever get close to other parts of the geometry, poly build will default to creating new faces instead.
This is very similar to how we can work with the extrude tool. The difference is that we likely have a selection tool enabled from the tools panel and use CTRL + Right click to extrude to the mouse cursor.
Related content: Extrude in Blender: Basics, along curve, circles, manifold and more
We can also delete geometry while the poly build tool is selected. Hold shift while hovering faces or vertices that don't have a face connected and you will see a red outline on faces or a red dot covering the vertex you hover with your mouse. Click to delete.

When doing this with a vertex, Blender will actually dissolve the vertex and try to reconnect any edges directly that was previously connected to the now removed vertex.
The poly build tool isn't designed to move geometry around very much without simultaneously creating geometry.
The only option to move geometry when it is turned on is to hover a vertex without modification keys pressed, click it and drag to move. We can use this to our advantage if we combine it with vertex snapping and auto merge. Something we explore more in the next section.
In all other cases we move the geometry as it is created, or we use the regular move tool to select and move the geometry.
Related content: How selecting works in Blender
Poly build becomes more powerful when we combine it with other tools. A common technique is to use it with snapping and auto merge.
Related content: How to use snapping tools in Blender
We can set the snapping tool to vertex snapping so that when we click to move a vertex. We can snap it to another vertex and with auto merge the two vertices will simply merge into one and all vertices will be connected without stray geometry.
Snapping can be turned on in the center of the header of the 3D viewport. Press the menu button with the down arrow icon next to it to reveal snapping settings. Set it to vertices and make sure that "project onto self" is checked. Otherwise, it will only snap to vertices contained in other objects.

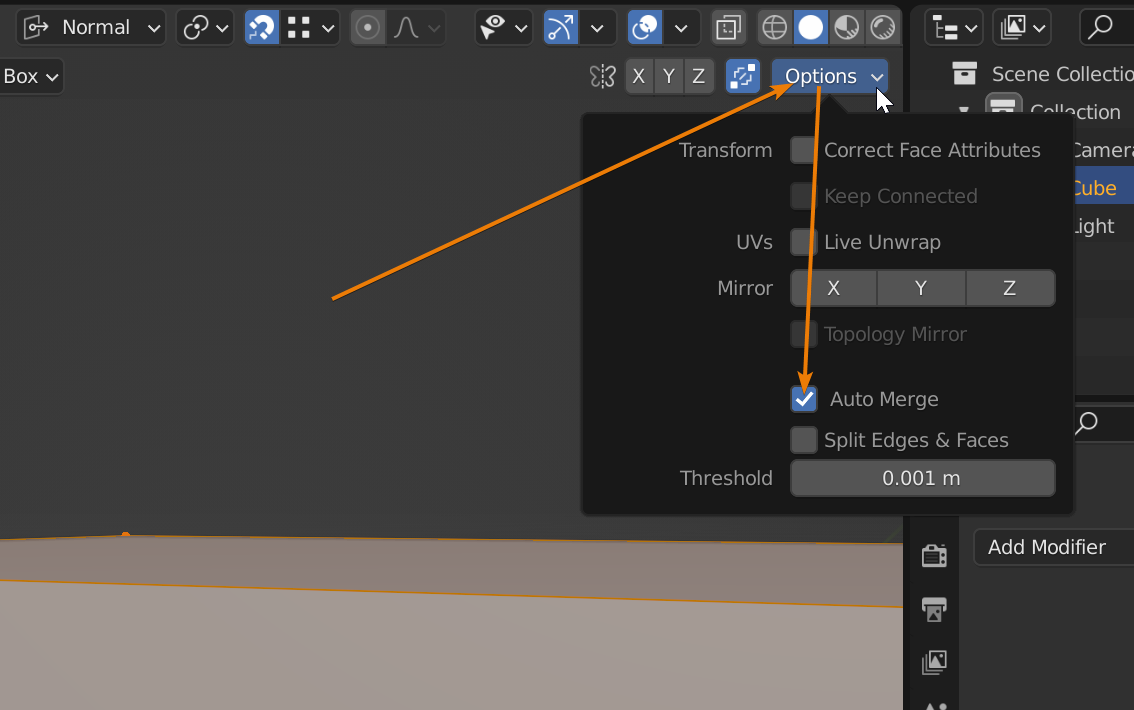
We can turn on auto merge from the options section either by pressing option in the top right corner of the 3D viewport to open the menu and check "auto merge" or we can access it from the tools and workspace tab in the properties panel. That is the white icon with the wrench and screwdriver above the render settings tab.
There is however one problem regarding snapping with this setup. If we want to use the poly build tool for retopology, and arguably that is one of the primary intentions of the tool, we may not be able to use vertex snapping because instead we want to snap to the surface of the object, we are doing a retopology of.
So, instead setup snapping with face snapping and turn off "project onto self" so that we snap to the high poly mesh object instead.
This leaves us with the problem that we cannot easily merge vertices while the poly build tool is active.
To work around this, we can setup a shortcut for Poly build. For instance, we can setup the D key to switch to poly build and W will then switch back to the default box selection tool so that we can quickly switch in and out of the poly build tool.
Just right click the poly build tool in the tools panel and choose to assign shortcut.
Related content: Blender shortcut keys: How to find, manage, change, and reset
An alternative is to setup poly build in the quick favorite's menu. This can also be done through the right click context menu. Quick favorites are accessed with Q.
With snapping we also need to keep in mind that the poly build tool is heavily dependent on the CTRL key for modifying its behavior. Snapping is simultaneously toggled with CTRL so we may want to have snapping turned off so that we simultaneously turn on snapping.
Experiment with this to get the behavior that best suits you.
The poly build tool gives you options when doing retopology and in polygon modeling workflows. However, since it shares modifier keys such as CTRL and Shift with other tools that activate at the same time it can be a bit tricky to setup comfortably.
But once you have found a system that works for you it can help you become more efficient at polygon modeling and retopology since it requires fewer button presses to perform the same tasks as with more conventional workflows.
