Using a lattice is a simple way to deform a mesh object in Blender and we can use it in many situations. In this article, I will explain how you can use a lattice in your Blender project to shape objects without changing the geometry.
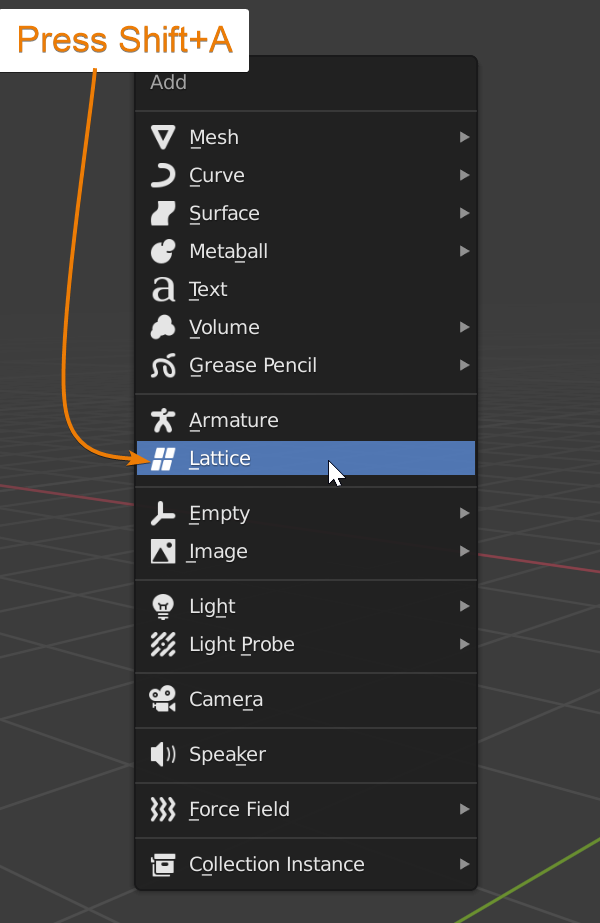
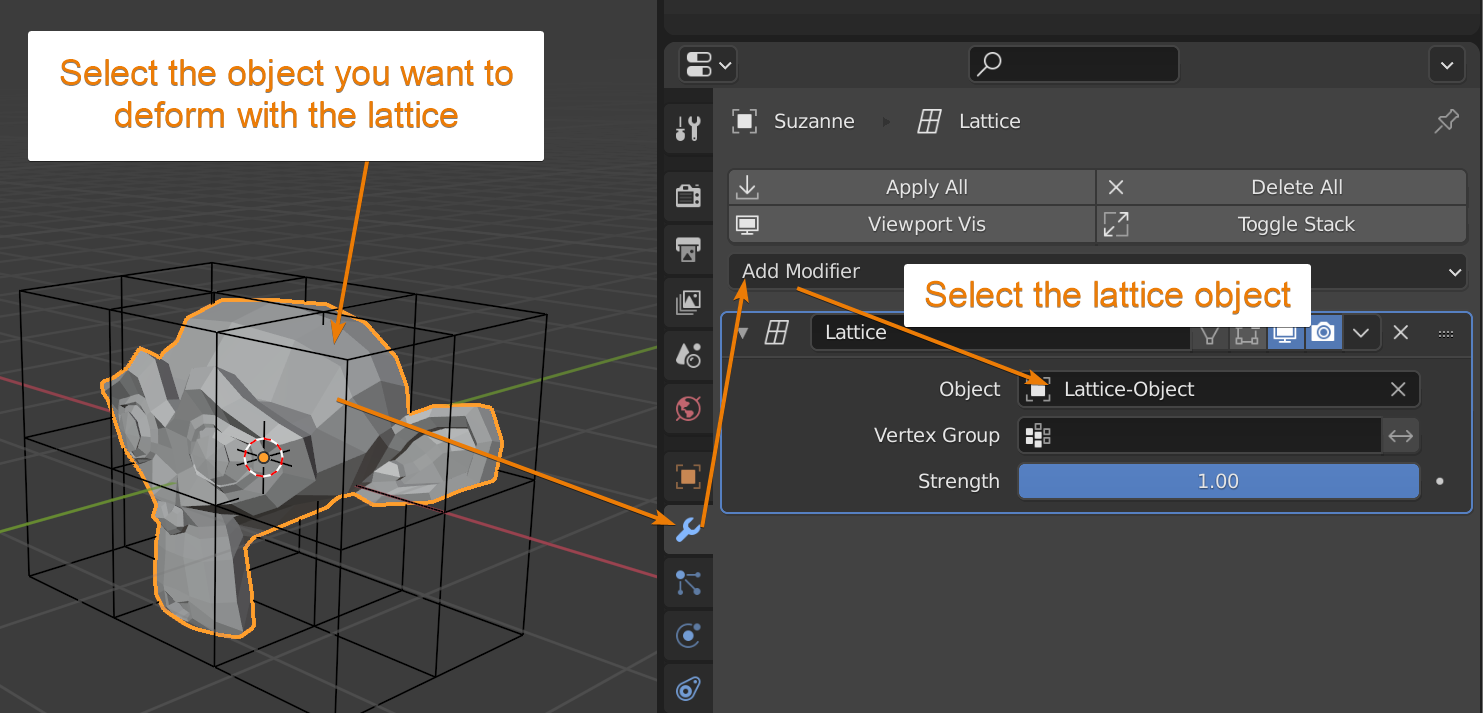
Click Shift+A to open the Add Menu and select ‘Lattice’. Move and scale the lattice in Object Mode to fit it around your target object. Add a Lattice Modifier on your object and link it with the lattice. You can then transform your lattice in Edit Mode, and the target object will follow with it.
There are many reasons that you may want to use a lattice and how it can be beneficial when working on a more complicated mesh. Continue reading this article for more detailed information on lattices and different ways they can be used to speed up your workflow. We will also discuss examples of how you can use a lattice, and an add-on you could use to speed up the setup process.
A lattice in its basic form is a framework, or structure fastened as a grid.
In Blender, a lattice is a 3 dimensional grid container or cage. On its own, a lattice would serve no purpose and cannot be seen in rendered mode. A lattice’s main use is to manipulate another object/s without deforming or affecting the object’s mesh until applied. Lattices are implemented in Blender through the the lattice object and modifier.
An example of where a lattice could be useful is, for instance, when shaping a cloth or blanket, or even in animation and character design, to add more personality to a cartoon character.
The lattice will allow you to do these things easily and without needing to change or deform the mesh itself. You can read the article below for an example of how you could use a lattice for cloth simulation to create a thick blanket.
Related content: Blender cloth simulation: Making a thick blanket
Follow the below steps on how to set up a lattice for a mesh object in Blender.
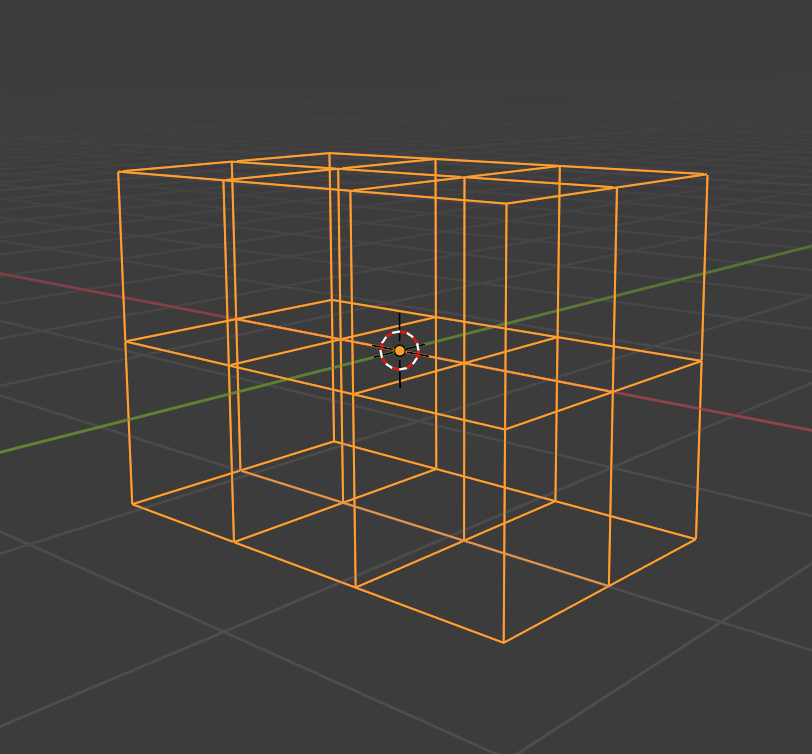
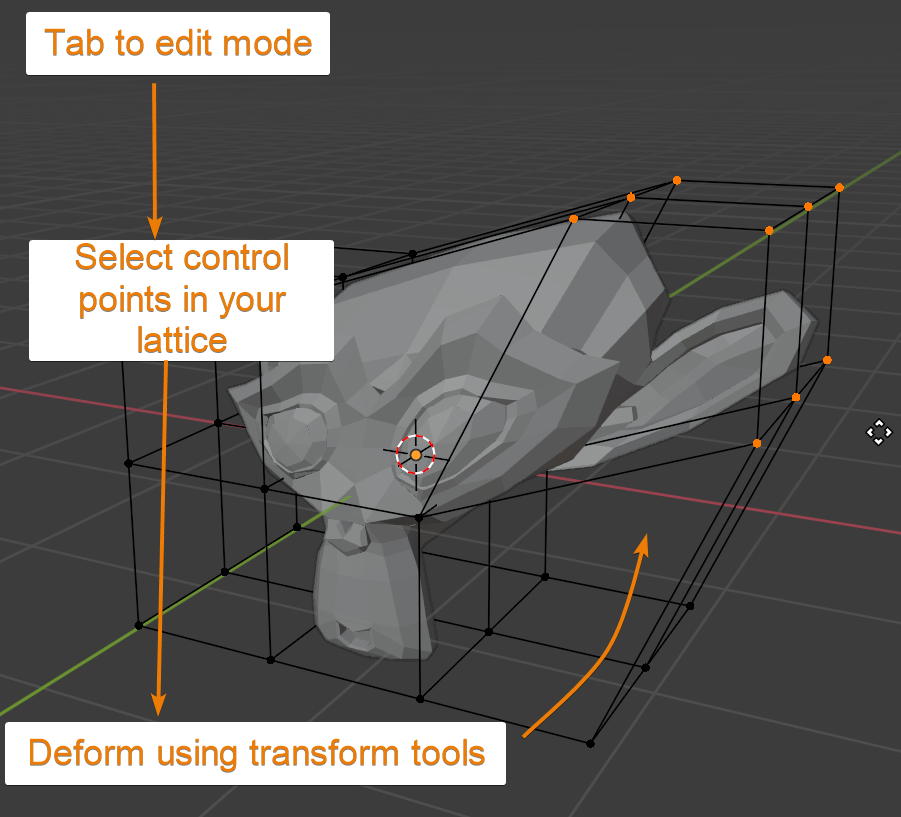
When adding a lattice, it appears as a wireframe of a cube. You can then move and deform the lattice using the default transform tools. The control options; snapping, proportional editing and pivot points options work with a lattice just as any other object type.
However, an important point to keep in mind is to ensure that you move and scale your lattice in Object Mode instead of Edit Mode when linking it to your mesh object. Moving and scaling your object in Edit Mode would deform your object instead of the lattice, whilst using Object Mode would affect the lattice only.
Something to keep in mind is that your mesh object must also have enough geometry in order to be able to deform with the lattice since lattices cannot bend the edges of your mesh. To avoid this, you could add more edges to your object by adding subdivisions or using loop cuts.
Another simple way is to apply a Subdivision Surface Modifier to your object to create this extra geometry, as long as you ensure that your Subdivision Surface Modifier is before/above your Lattice Modifier.
Related content: How modifiers work in Blender, an overview
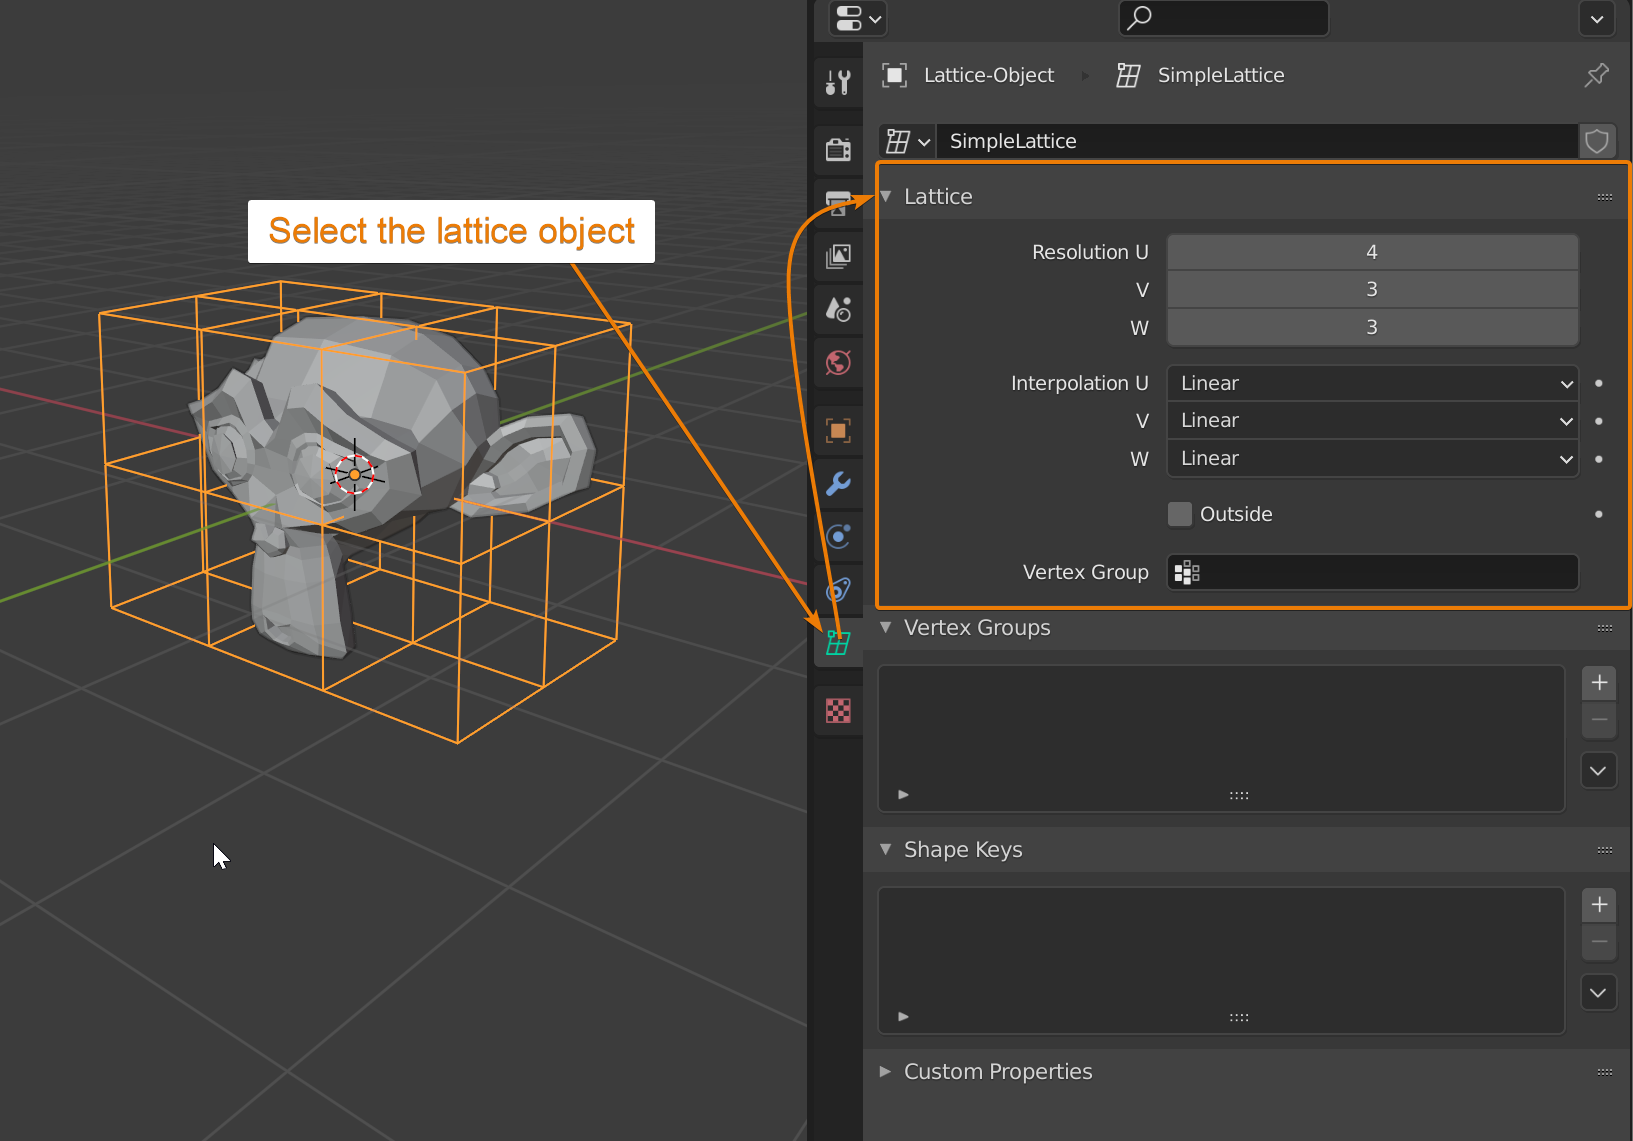
If you click on the Object Data Properties for the lattice, you have a few different settings that you can change and adjust. You can refer to the image below for where to access this menu.
Under Resolution U, V and W, you can change the values to create and adjust subdivisions of the lattice along its different directions. Adding more subdivisions to the lattice will give you more control points and allow you to deform your mesh in more detail.
You can play around with the different interpolation modes to see which mode is better for your project and achieve the look you are going for.
Checking the box for ‘Outside’ will prevent you from being able to deform the inside points of the lattice, which can be helpful to keep the deformation more simple if you have no need to manipulate those areas of the mesh. A lattice object can also have a modifier stack or even soft body physics.
To apply the object’s deformation that the lattice has created, you can click the menu drop-down and use Apply on the Lattice modifier in the Modifier Properties tab.
Applying the modifier will disconnect the object from the lattice and permanently apply the object’s deformation. You can then delete the lattice without affecting the object, or even reuse the lattice on a different object if you wish.
Image of where to access the Lattice Object Data Properties.
There is an add-on bundled with Blender called the Simple Lattice Add-on, which will allow you to easily create a lattice around your object. To use the add-on, select a mesh or curve object, then go to Object -> Create Lattice. This will automatically create a lattice that fits around the bounding box of your selected object.
This add-on would be useful for you if you decide to use lattices often in your workflow, and saves the time of having to create a lattice and shape it manually. You can find further information and detail about the Simple Lattice Add-on and how to set it up via the link below.
External content: Blender-addons.org Simple lattice add-on
To sum everything up, the lattice can be a handy tool for deforming an object without actually affecting the mesh of said object. This can be helpful in many situations where you would want to manipulate an object easily and be able to remove any changes by simply unlinking the lattice.
In this article, we also explored the different settings of the lattice modifier and how to apply the modifier to set the deformation to the object permanently, and also about an add-on that you could download to automatically and easily set up a lattice for you. Have fun and experiment with using lattices to see how it can be advantageous to your workflow.
If you think this content was helpful, please consider sharing it on your social media platforms or with others that you think may benefit from knowing this.
Thanks for your time.