


Proportional editing is one of the basic tools in Blender to start creating simple organic shapes.
We can turn on or off proportional editing in Blender by pressing O on the keyboard. While on, proportional editing works together with a transformation tool such as move, rotate, or scale. Make a selection and press G, R or S to start the move, rotate or scale operation. Next move your mouse and objects or geometry around your selection will be affected proportionally. Left click to confirm.
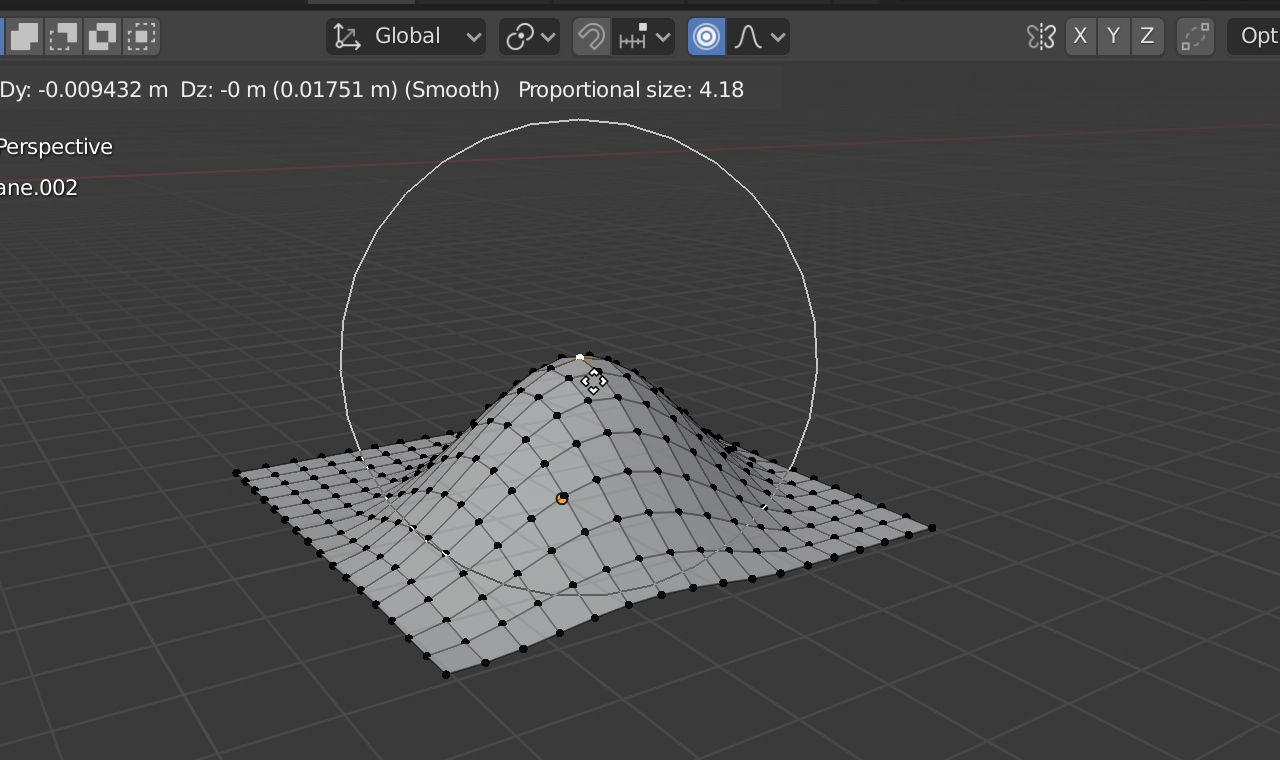
To adjust the area of influence, or strength of proportional editing, scroll your mouse wheel while a transform operation is ongoing. You can see the area of influence change by the change in size of the white circle appearing in the viewport when proportional editing is turned on.
We will now explore some use cases, settings and potential problems and solutions that we may encounter while working with proportional editing. We will start from the very beginning.
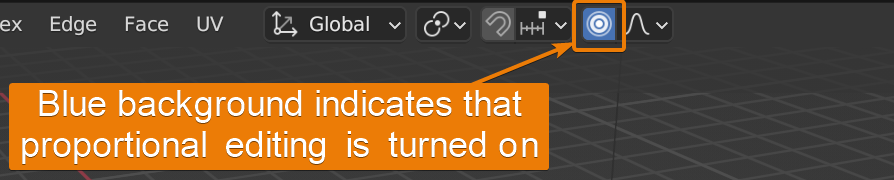
In the 3D viewport you can find proportional editing here with a toggle button. When the button is blue, it means that proportional editing is truned on.
Proportional editing is available both in edit mode and object mode. In edit mode we influence surrounding faces, edges, and vertices while in object mode we influence all objects whose origin points fall within the influence of the proportional editing transform.
To use proportional editing follow these steps:
Proportional editing is a feature that is toggled on or off and works together with our regular transformation tools. That is the move, rotate and scale tool. However, we cannot, for instance, proportionally edit an inset, loop cut or extrude operation.
Also, we toggle proportional editing on per mode. For instance, I may be in object mode and turn proportional editing on by hitting "O". But then I may tab to edit mode, and, in this mode, proportional editing is still turned off. Pressing tab to switch back to object mode once again also turns on proportional editing since it is on for that mode.
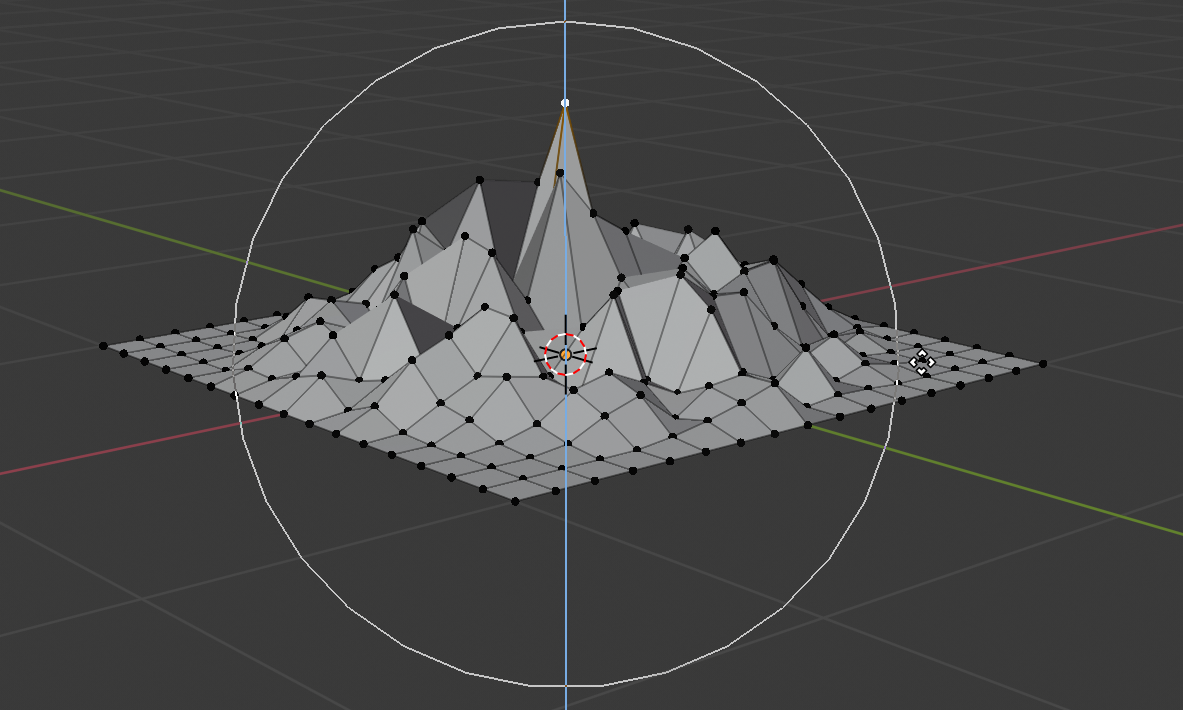
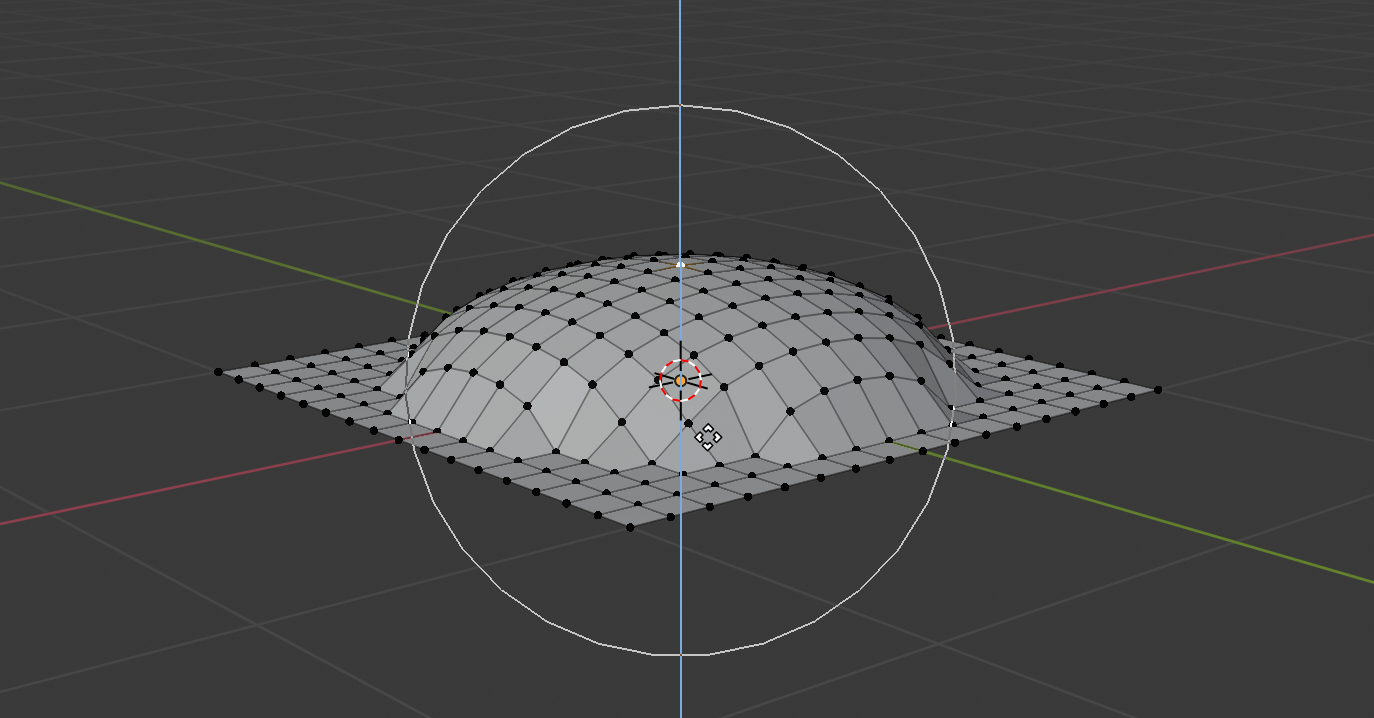
When referring to the strength, size or influence area of proportional editing they all mean the same thing. How large the area around the selection proportional editing will influence.
We change the size of influence by scrolling the mouse wheel up or down or by pressing page up or page down on your keyboard. If the increments are too big, you can hold shift while scrolling or pressing page up/down to change the influence in smaller increments.
The white circle around the selection is what indicates the strength or size of influence.
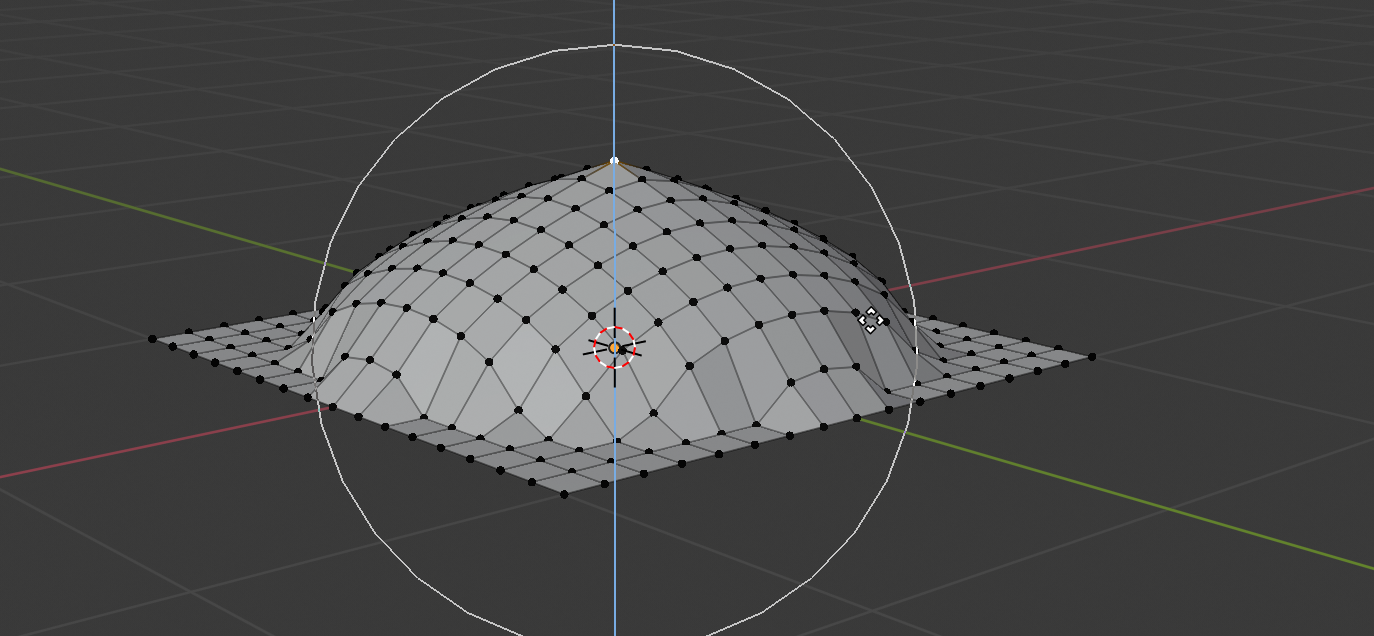
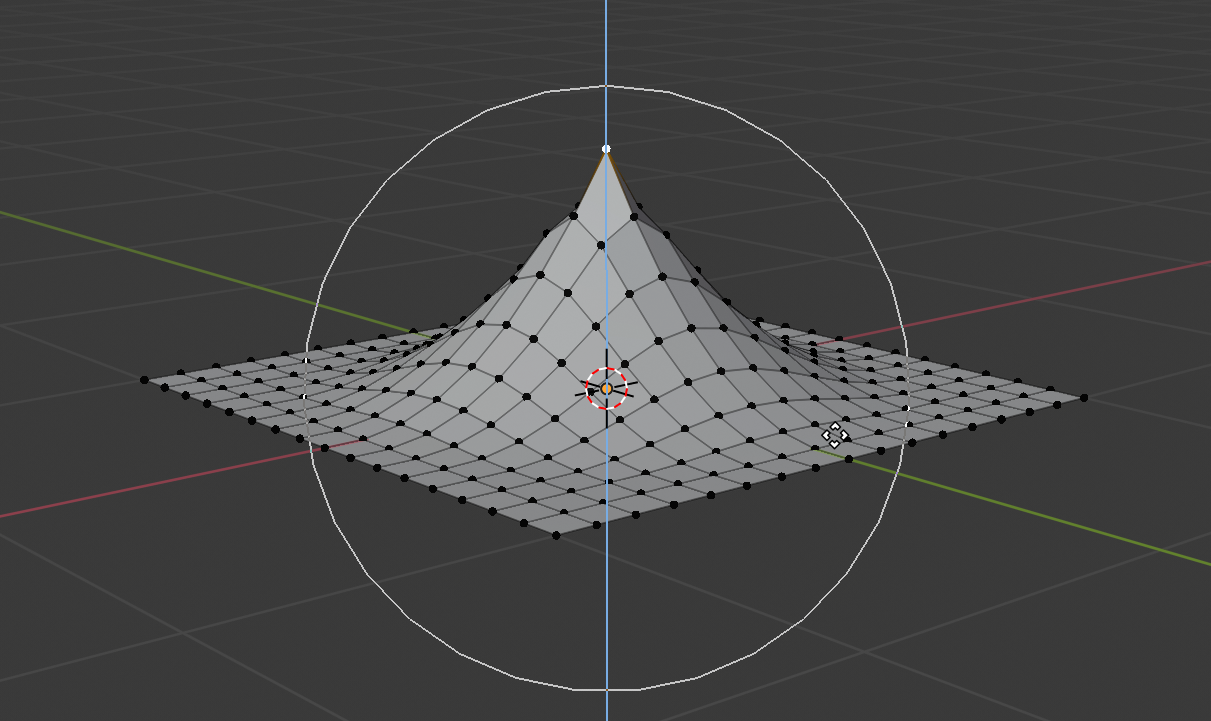
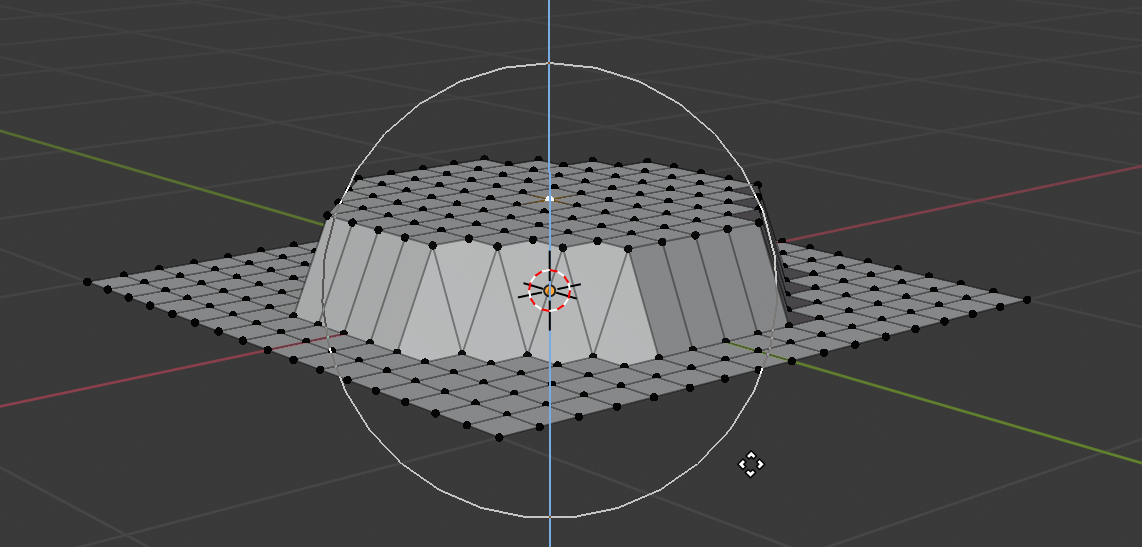
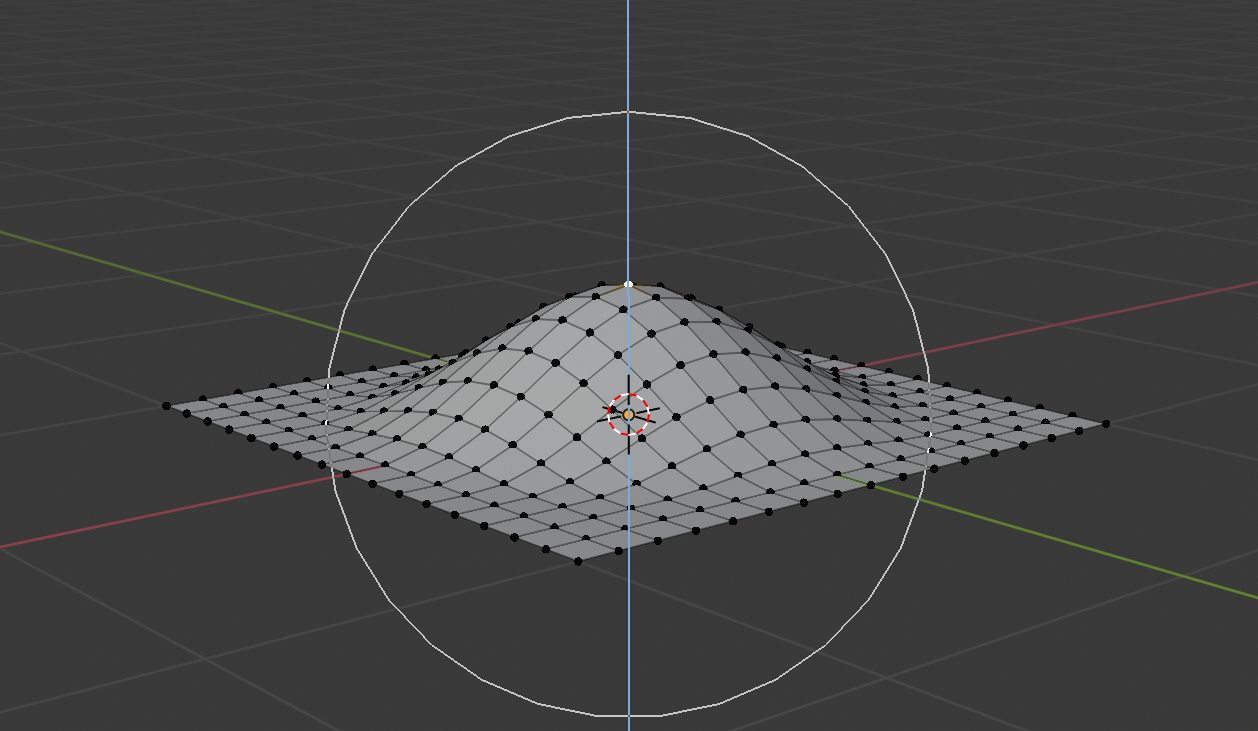
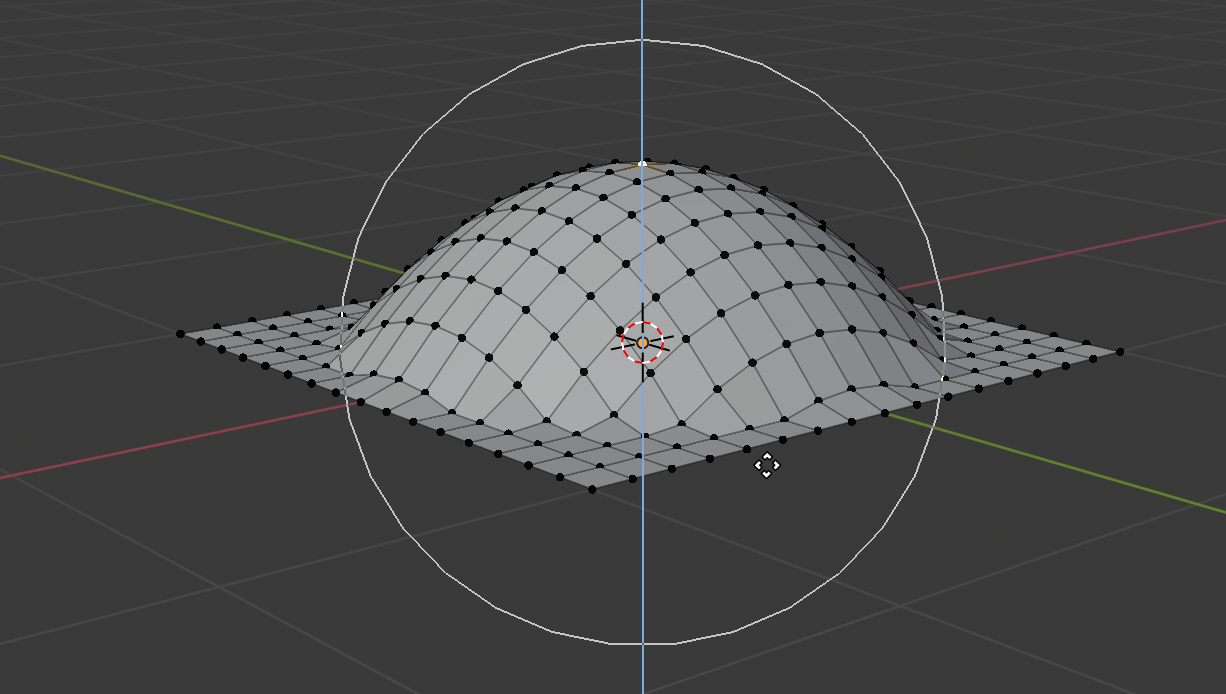
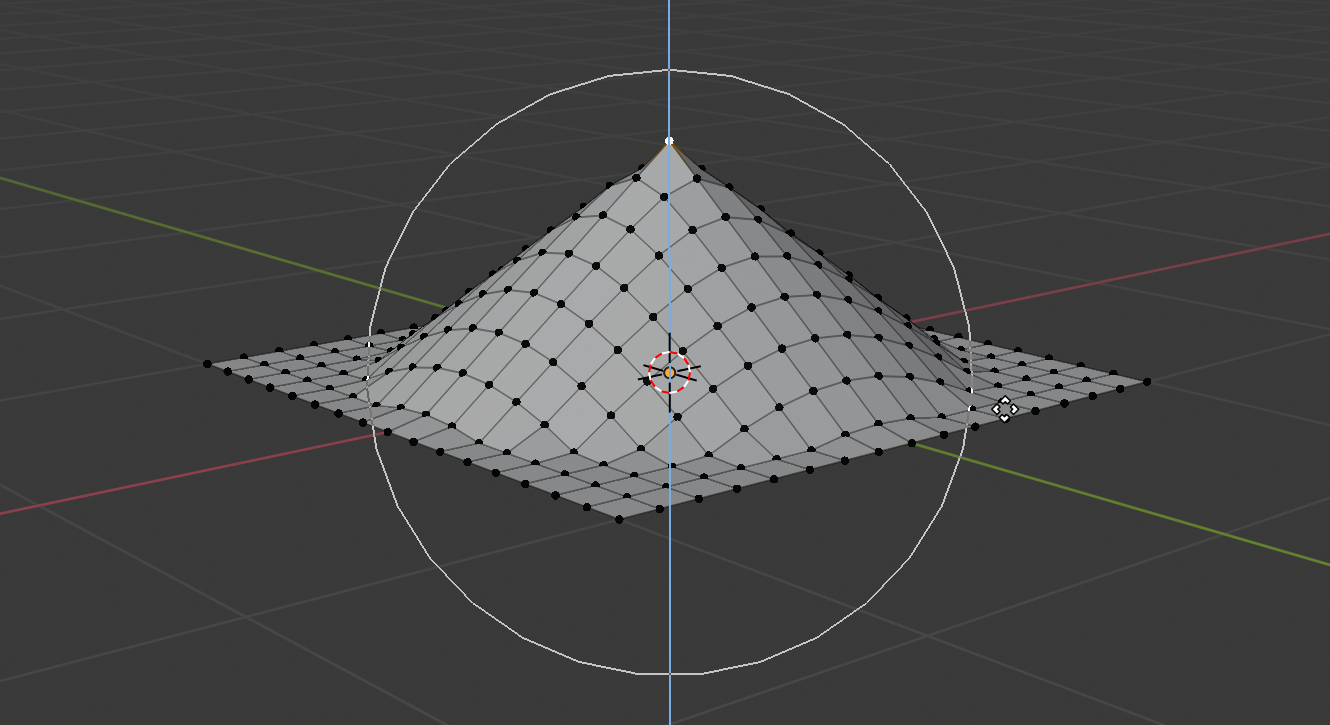
For all modes mentioned above except edit mode there is only one more setting, the fall-off. These are the options:
The images below show the effect of each one.
In edit mode we also have these other settings:
We can reach these settings from the menu next to the proportional edit toggle icon in edit mode.

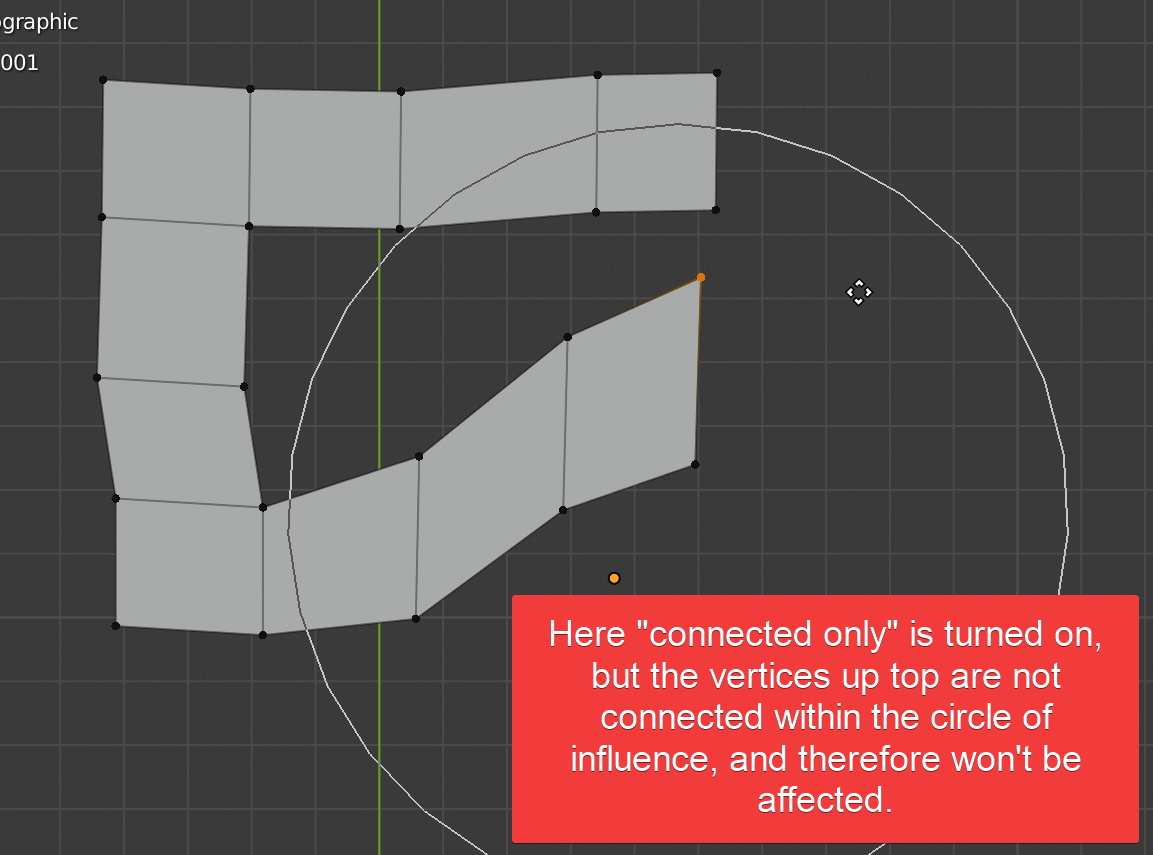
The connected only setting will allow you to only affect the vertices, edges and faces that are connected to your selection. Keep in mind though that the connection also need to be in the circle of influence. Here is an example where "connected only" does not work if we want to influence the upper part of this mesh.
Also, when we are in edit mode, and we have separate pieces of mesh within the same object. The connected only stops us from manipulating anything that does not have at least one element selected.
The "Projected from view" setting works best when we are in one of the fixed orthographic views such as front, back, right or top etc. Toggle these views with the number pad 1,3 and 7.
I will demonstrate this with a subdivided plane.
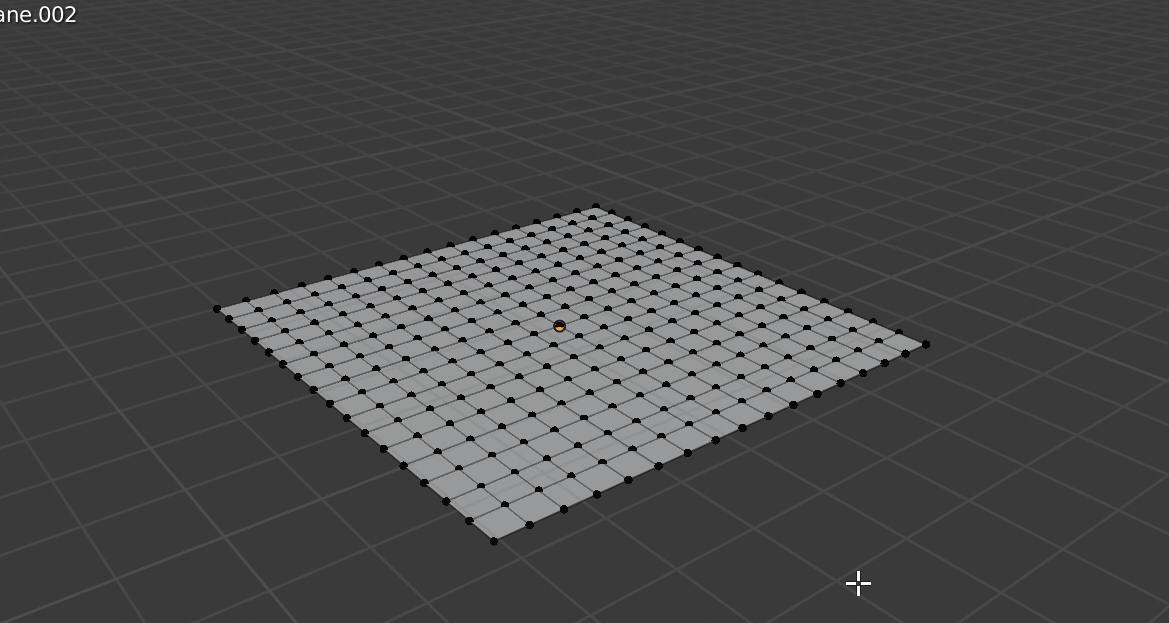
If I now select the middle vertex and go to front view with number pad 1 with proportional editing on and "Projected from view" checked and perform a move transform, it will look like this.

It will ignore the fall-off on the depth, and we get a proportional edit only along the Y axis.

Keep in mind that "Connected only" and "Projected from view" does not work very well together. Therefore, make sure that you use one or the other. For instance, with the above example, if we keep both of them turned on the "Projected from view" won't have an effect.
Proportional editing is not only available in the 3D vierwport. It is available in all these editors:
Proportional editing works the same in all these editors, the difference is what we edit. For example, in the UV editor we can use proportional editing to edit UV space.
In the Dope sheet and Graph editor we instead edit keyframes.
When the proportional editing feature isn't working properly it is most likely because of a misunderstanding of how the tool works.
The first step to take after you made sure proportional editing is turned on is to make sure that it works together with the move tool.
Tab to edit mode and select one vertex. Now press G so that we can move the vertex around and scroll your mouse wheel so that you can see a well sized circle of influence. At this point the surrounding geometry should get moving.
If you have a problem with this, make sure that "Projected from view" and "Connected only" isn't active and try again.
Once you get this to work, you can increase the complexity by trying scaling and rotating.
If you run into a problem that you didn't expect, make sure that your snapping isn't turned on and that you have the pivot point that you intended. You can check both of these settings to the left of the proportional editing tool in the 3D viewport header.
Proportional editing is one of those tools that once you learn it, it opens up many possibilities and ideas. At least in theory. In practice, it kind of falls in between sculpting and hard surface modeling. But for simple organic shapes that just need a curve to it or those times when organic shapes are introduced into otherwise hard surface or man-made objects it is a great tool.
It is also a great tool when manipulating graphs in Blender even if we didn't cover it here.
If you are interested in other modeling tools and how they work, this article will cover every edit mode tool you need in Blender.
Related content: More than 30 Blender modeling tools explained
Next to the proportional editing tool is the magnetic icon representing the snapping tool. If you want to learn more about that you can read my article on snapping here.
Related content: How to use snapping tools in Blender
Thanks for your time.
