


We often hear about normals and normal maps when working with 3D art. You may also have heard of terms like tangent normals, object normals and world normals. Let's dive a bit deeper into these terms and explore the differences.
Here are five kinds of normals we come across when doing digital 3D art:
Here we look at the differences of these kinds of normals but if you want to dive deeper into how the most common normals work for shading and normal maps, you can check out this guide.
Related content: What are normals and how do they work in Blender?
Let's dive into these different types.
We start with face normals, these are probably the first kind of normal you come across as a beginner 3D artist.
Face normals are the directions that each face points in. A face has a front and a back side and the normals always point to the front side. This is the side that is intended for viewing.
If you see shading issues in your mesh, it is probably because one or more of your faces is pointing in the wrong direction. This is a common error that we can fix by recalculating the normals.
To recalculate the normals, tab to edit mode, press A to select everything and hit Shift+N. If the mesh is intended to be viewed from the inside, instead press Ctrl+Shift+N.
If you want to view the face normals you can go to the overlay menu in the top right corner of the 3D viewport while in edit mode. In the geometry section you can find face orientation. The blue indicate the front side while red indicate the back side.
Further down the overlay menu you can also find visualization for vertex, face and edge normals.
Here you can check the face icon to see a line drawn on the front side of each face.

As you can see in this example the face normals always point directly away from the face or towards it depending on the direction without interpolation.
Face normals contribute some to the shading of an object. But primarily it is the vertex normals that handle the base shading of an object. But a face facing the wrong direction will in turn rotate the vertex normals as well, that is why we get the shading artefacts when faces face the wrong direction.
Let's look at the vertex normals next.
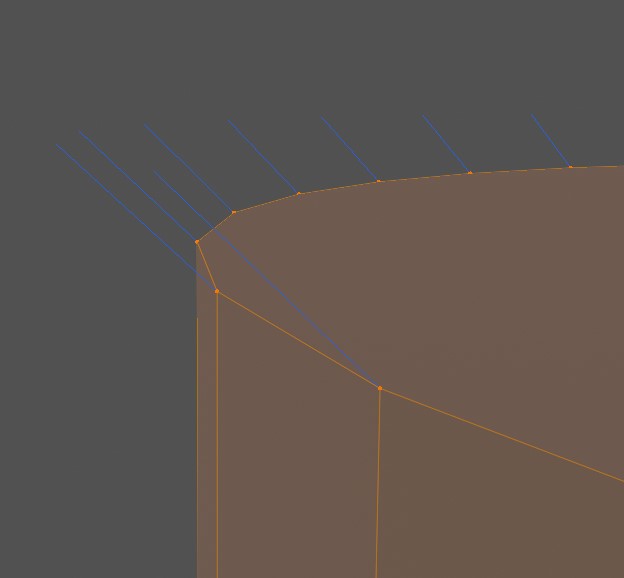
Vertex normals are the direction a vertex points in. A vertex can have one or more normals. When it has more than one normal, we call it split normals. When a vertex has a single normal, it calculates its normal by averaging the direction of each surrounding face.
Split normals is what we get when we choose to shade an object flat. The vertex normal is duplicated and will have a normal for every connected face pointing in the same direction as that faces' normal direction.
This creates the abrupt difference between one face and the next.
On the other hand, with a single averaged normal, we get a smooth shading with no hard edge between faces.
We can also customize the direction a vertex normal is pointing. When a vertex is not connected to any other vertex its normal is set to point away from the origin of the object.
We can also customize vertex normals in edit mode by going to Mesh->Normals or by pressing Alt+N to bring up the normals menu. Here you will find multiple tools to customize normals.
Related content: How to smooth the shading on an object in Blender?
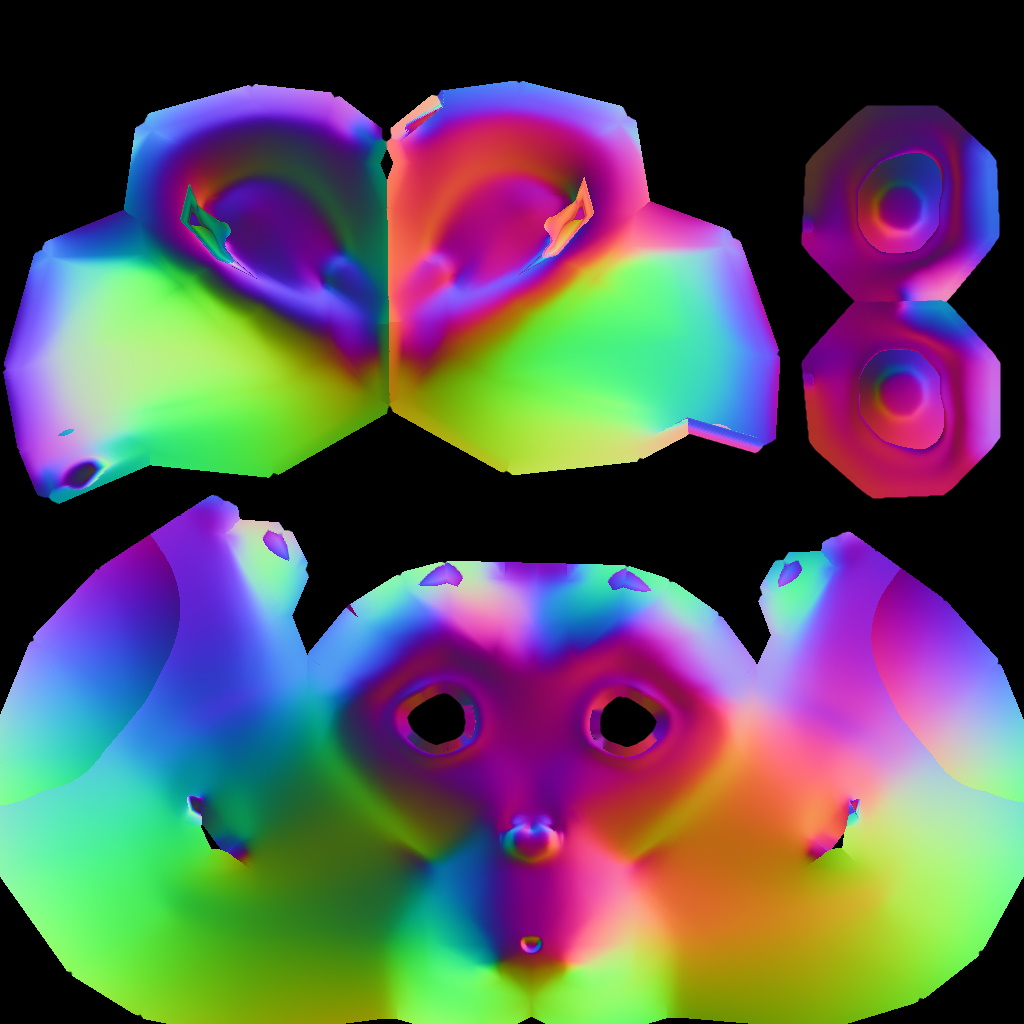
Tangent normals is a term that we often hear together with another term, namely normal maps. A normal map is an image texture that contains angle data, namely different directions across a surface.
A tangent is a direction going out from something else. For instance the face normal discussed above is going of into a tangent direction in relation to the face.
A tangent normal is kind of the same. In it's default state it goes straight out from the surface it is projected from.
In a tangent normal map we have the Red Green and Blue channel. Instead of storing color data we hijack the color storage and store a vector for each pixel. This is why a normal map looks like this when viewed like an image.

Related content: How to bake textures in Blender
The benefit of this is that we can tell incoming light to go out into a different direction. This is a very performance friendly way of creating extra detail instead of adding additional geometry. When viewed straight on, we cannot see a difference between detail added through a normal map and real geometry if the normal maps resolution is high enough.
Related content: Top 5 normal map tips for Blender artists
But if viewed from the side we can easily spot the trick. The normal map cannot give us silhouette detail and the illusion breaks down. So we need to be careful where we use this trick compared to real geometry and weigh it against how much performance we need.
Object normals are like tangent space normals but do not take into account object deformations. Since they're object based they support object transformations.
Object space normal maps do not support deformation in Blender since they have the normal direction baked into them.
These type of normal maps tend to have a rainbow look to them.
This type of normal map can be useful if we're baking details to an object that doesn't need to move. The downsides however are often too great for the small benefits and you will rarely see this kind of normal map.
In most cases tangent normal maps can achieve the same result while also being a lot more versatile and not much work to setup.
We can also use object normals if we want the normals of an object to face a certain direction without it taking into account the actual mesh. But this is really an edge case scenario.
Another edge case scenario is when transferring objects between 3D applications but the support for them can be limited.
In the case that we want to use them for games its also important to note that they do not compress as well as tangent space normal maps.
World space normal maps are similar to object space but do not take object transformations into account. This also includes a Blender space version which is designed for textures baked using Blender.
In pretty much every case we will either use tangent space normal maps or even object space normal maps but occasionally you may come across a world space normal map. They look similar to the world space normal map.
World space normal maps do not support deformation similar to object space normal maps but also do not support scaling or transformation of the object.
One example of how a World space normal map might be used is when exporting a model to another 3D software. Since tangent space can vary between 3D programs we can use world space normal maps since they tend not to vary between programs.
Knowing about these types of normals can be useful in a few different cases and knowing how some shading effects are created can help us resolve problems or make better use of normals.
The different types of normal map methods can be useful depending on the look we want but it can be a bit unclear how each of these methods affects the normal maps.
Knowing which normal maps to use is very helpful as there tends not be to a lot of information about these different types of normal maps. knowing the advantages and disadvantages gives us more tools to achieve the effects we want.
Thank you for your time.
