


If you've ever used the particle system before you've likely aligned the particles to the normal of an object at some point. We can do this in geometry nodes and with a much nicer setup.
We won't need to mess with object rotation beforehand and we have more options for distribution and rotation. The only issue is that it's a little bit more complicated to set up in geometry nodes compared to the particle system.
In the rest of this article, we'll go over how to rotate objects with geometry nodes. Next, we'll go over how we access the different normals of an object in geometry nodes. Finally, we'll go over how to combine both of these to align some object instances to the normal of an object.
Related content: Blender geometry nodes fundamentals guide
Related content: How to scatter objects with geometry nodes in Blender
First, select the object, go to the geometry nodes workspace, and then go to add > search and find the transform node. Connect the group input geometry output to the transform geometry input then connect the transform geometry output to the group output node.

Now all we need to do is change the rotation value and the object will rotate. For instances or objects, we've created inside of geometry nodes we just need to connect that object's geometry to the transform geometry input.
For instances, we'll instead want to use the rotate instances node. Add a rotate instances node then connect the instance on points instances output to the rotate instances, instances input.
This will rotate all the instances individually. When local space is disabled, it will rotate all the instances together as if they were one object.
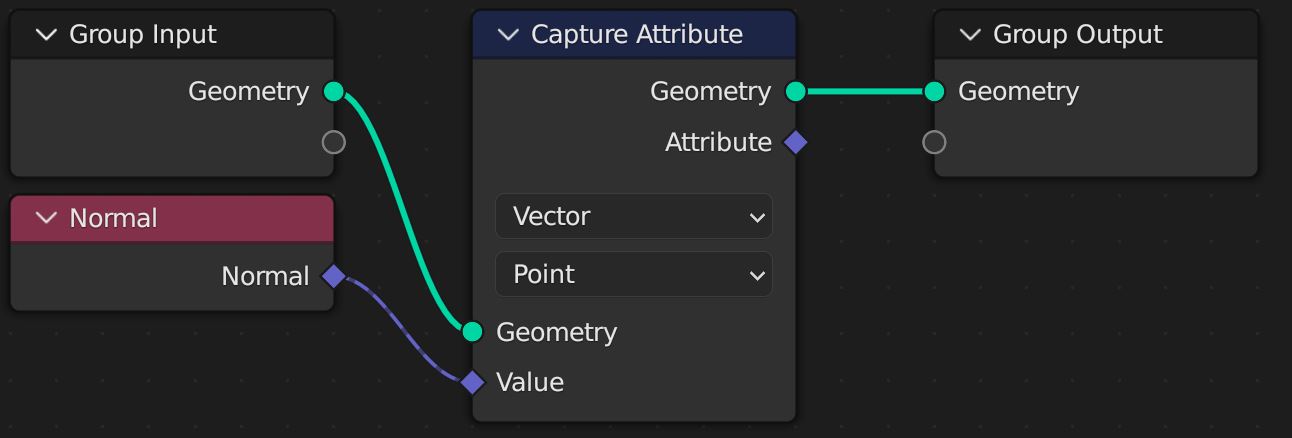
To get the normal of an object we'll need a capture attribute node and a normal node. To add these to the graph go to add > search and then place the node in the graph. On the capture attribute node change float to vector.
Connect the geometry output of the group input node to the capture attribute geometry input. Next, connect the normal output of the normal node to the capture attribute node value input. Note that for the capture attribute node to work we'll need to use the geometry output.
Once we've set up the node, we can switch point to whatever part of the geometry we want to capture the normals from. Depending on what we're using the normal for we may not even need to use the capture attribute node.
Especially when we're distributing points, some of the nodes that generate points also output the normal.
Before we can create any instances, we'll first need to capture the normal of our object. Go to add > search > capture attribute and place it into the graph, repeat this for a normal node.
Connect the geometry output from the group input node to the capture attribute geometry input. Change float to Vector and then connect the normal node output to the capture attribute value input.
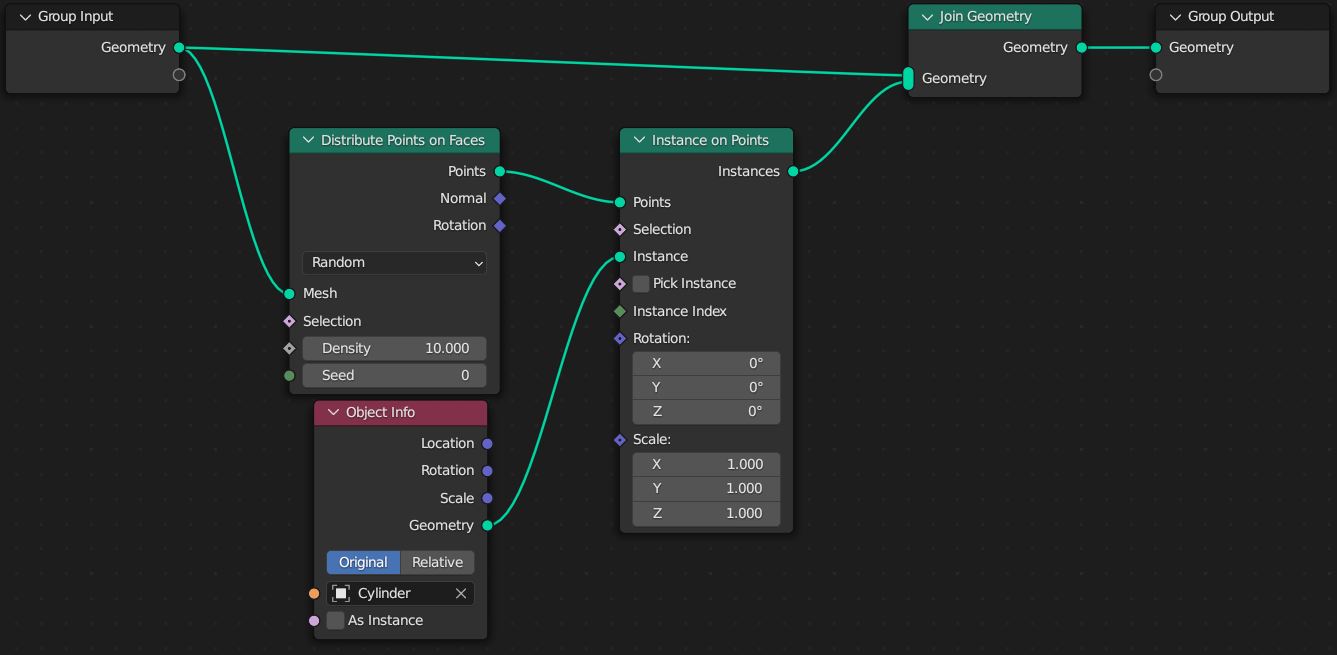
Now we can distribute some points onto the object we want to add the instances to. Go to add > search > distribute points on faces and place it in the graph. Next, connect the capture attribute geometry output to mesh input on the distribute points on faces node.
Next, we'll need to generate some instances on those points. Go to add > search > instance on points and place it in the graph. Connect the distribute points on faces points output to the instance on points points input.
We'll also need to get the object that we want to instance. To do this create an object info node, and set the object to the object we want to use. Take the geometry output and connect it to the instance on points instance input.
Before we start aligning the instances it'll help to output the geometry so we can see what's happening. We can either just output the instance or create a join node and then join the original object to the instances. Whichever you choose connect the geometry output to the group output geometry input.
Note that there are also more nodes for distributing points on our object. Most of these nodes can be found in Add > Point. We can also just type point to search to get most of the nodes that distribute points.
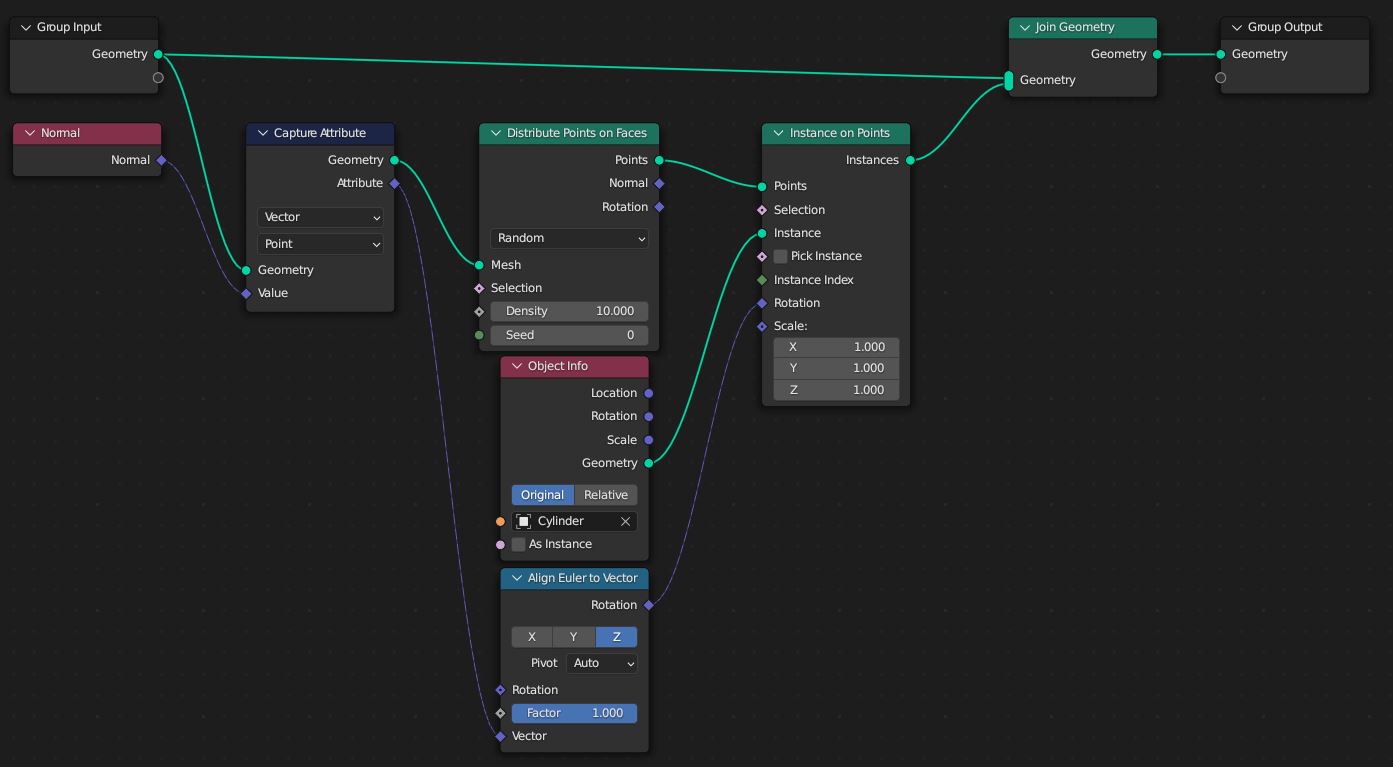
To align the instances to normals first add an Align Euler to Vector node. Connect the capture attribute, attribute output to the align Euler to vector, vector input. Set the axis to align to Z and connect the rotation output to the instances to point rotation. Now our instances should be aligned to the surface of our object.
Related content: Align euler to vector geometry node explained
We can also change the axis to align if Z doesn't align our object correctly. Finally, we can also add a rotate Euler after the Align Euler to Vector node if switching the axis doesn't work or we want to do some slight adjustments. It also can help to switch the base orientation to local.
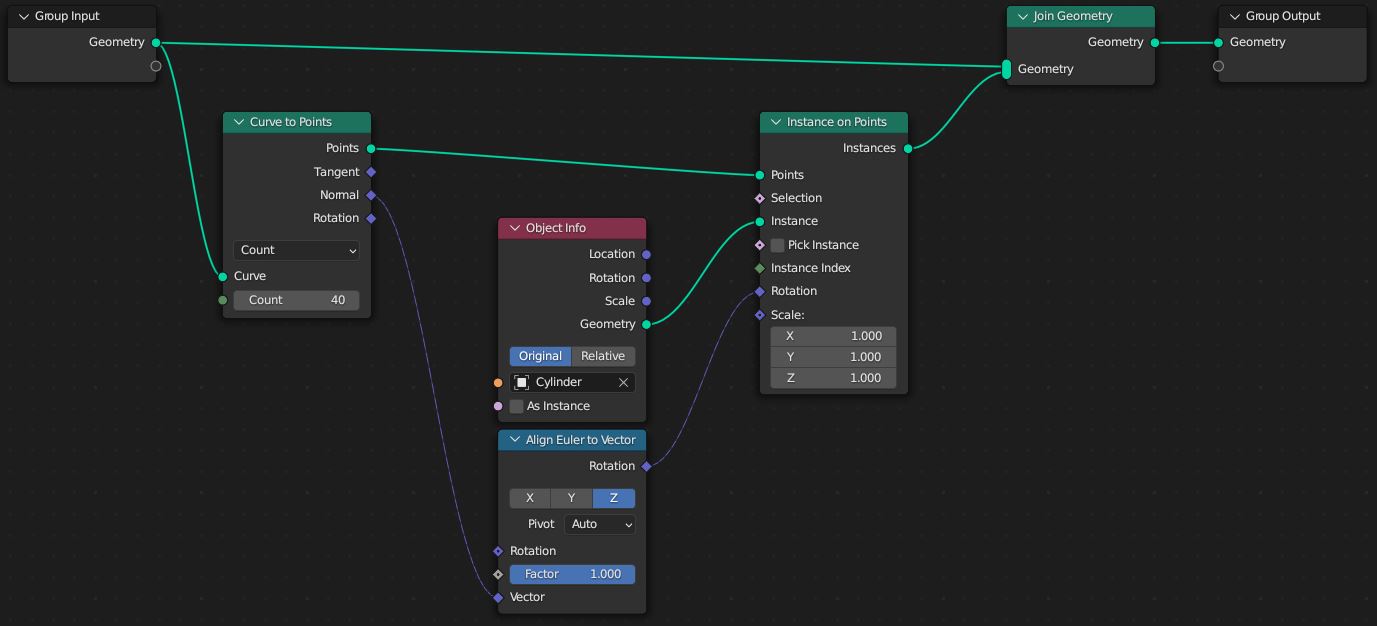
We'll need to make a few modifications to the setup above for it to work with curves. Create a curve to points node. Disconnect the distribute points on faces and the capture attribute nodes. Connect the group input geometry output to the curve to points curve input.
Connect the points output to the instance on points, points input, and connect the normals output to the align to Euler vector input.
While the process of aligning to normals with geometry nodes is a bit different than how it was done previously this new method allows for a lot more customization. Like the example with distributing the points on a mesh or curve, if we were to use particles this wouldn't be possible.
These geometry nodes setups are quite expandable and give us much more control than the constraint and particle alternatives. On top of that, any setups we've made in this article can be reused on other objects.
Thank you for your time.
