


Pro lighting: Studio is one of those add-ons that has been around for quite a while. For me, it is an add-on that often gets used as part of my workflow, but in the community, it seems to live in the shadows of its slightly older brother, Pro lighting: Skies. Let's see if it doesn't deserve some more attention.
Pro lighting: Studio is a lighting add-on that makes it easy to set up quick lighting for a single object or collection of objects in Blenders render engine Cycles. It also works great for isometric low poly renders or anywhere you need a studio like setup.
We will first run through a workflow then we will dive a bit deeper into each section learning about the installation, features, and options we have with this add-on. Then we will wrap up by summarizing some benefits and downsides.
External content: Get Pro Lighting: Studio on Blendermarket

Pro lighting: studio is useful from the moment our model is complete, and we have set up the camera. At this stage we can use Pro lighting: Studio to set up our lighting before we start the rendering process.
We go through several sections. Each section corresponds to an aspect of the light setup. Each section has a checkbox to enable or disable that section.
The sections are:
We generally start at the light section, select the object or collection of objects that you want to light and hit "set subject" this will center the light setup on our selection and scale it accordingly.

The add-on will rotate the setup according to our scene camera. Therefore, it is important to have the camera position set before we start to light.
The add-on will also give us some guidance. For instance, if we have other lights in the scene or the background isn't set to black. This will be detected, and we can solve the problem with a single click without leaving the add-on interface.
We choose a light setup that fits our needs then we continue through to the background, floor, and reflection sections. We can always jump back and forth to tweak any section we need, but there is also a sense of flow through the sections.
The installation of Pro lighting: Studio is a little more involved than your usual add-on. After we installed the zip-file, we need to locate and install the asset files that comes as part of the add-on.
While we do this, Blender freezes for sometimes while it extracts and install those asset files. Once Blender regain consciousness, we would get a notification if the installation went on successfully.
Pro lighting: Studio lives in the world tab in the properties panel. There we will find a new section conveniently named Pro Lighting Studio.
As we open the section for the first time, a convenient warning tells us that the add-on only works with Cycles and give us the option to enable it right in the add-on interface. A convenient hand holding feature that smells quality.
Let's now zoom in a bit on each section in turn and see what options and features we have access to.
There is a substantial number of light presets in this section, luckily with a simple filter function. The product page says 161 light presets, but I counted 164. Although it is hard to know if those three extra presets will make your lighting better, it is still nice to see more rather than less than advertised. Not that I would expect that.
The light setups are divided up into three categories.
While nothing stops you from lighting a character with a car setup, these are the major categories. We can filter them one by one or view them all at once. There are also some filters. These are some examples.
Just to name a few. We can also mark certain setups as favorite and filter out those separately.

Each light setup also has its own name loosely related to the inspiration for that light setup. For instance, there is a green tint light setup called "jacked in" referencing the Matrix.
There are a few basic settings here as well, such as energy and temperature, saturation, and light rotation. We can also expand an advanced section.
Among the settings in the advanced section, there is one I find remarkably interesting called "Make real". This feature detaches the light setup from the parameters in the add-on, essentially "applying" the light setup.
When we stretched the limits of what we can do with the light section we can also start to tweak the setup as we please. Everything that the light setup does is add objects in Blender to light for us, so there is no stopping us from going into the interface and tweak the light setup however we want. Moving lights and changing settings.
The add-on parents the light setup to an empty object. We can change the light setup dramatically by just transforming this empty object. If we mess up, we can always select our subject and go back to the light setup and press "set subject" to center the setup again.
In the background section we primarily three parameters that together create our background. That is a background color, a gradient or mask overlay and a background texture.
There are fifteen background presets, but we can combine these in a lot more variations.
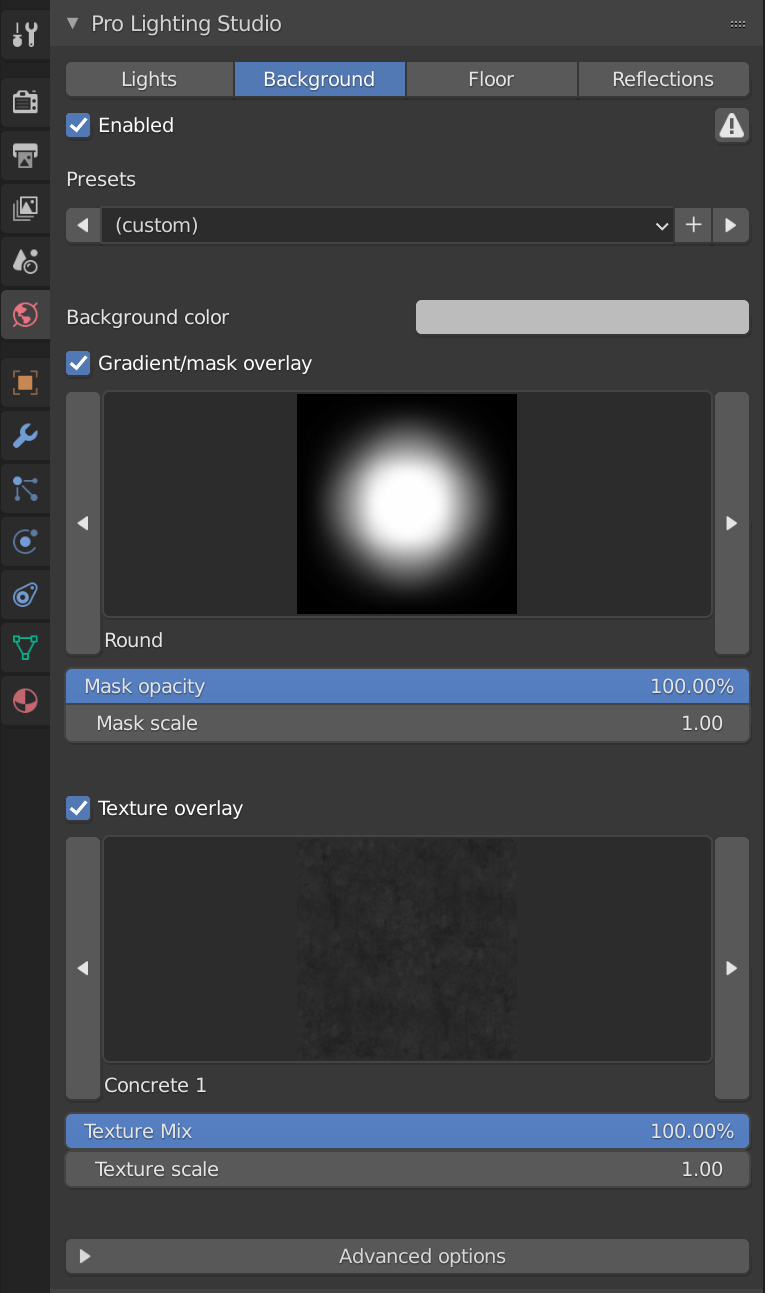
We also have some basic settings like opacity and scale for the textures and masks and in the advanced section we can offset, rotate, and invert the mask.
We also have settings for the texture such as rotation, brightness, and saturation for extra control, should we need it. There is also a feature to save the used texture files to a folder so that we can easily share the blend file.
There are a few different options to set up a basic floor. We can choose between a few base shapes, like a circular floor, backdrop, and a simple pedestal. We also got an option to fade the edges of the floor, this is nice to quickly remove any edge between floor and background.

We can then choose between setting up a color or a texture. There are sixteen textures varying from abstract shapes to concrete and wood floors to name a few.
What I find odd here is that the default scaling of textures is very high, making every floor very obviously tiled. Luckily, there is a slider to change this right below where we choose the texture. Normally, I bring this down to 1 or 2 and increase from there until the floor makes sense.
Since this is a very solid add-on as it is, I feel the need to point out the small annoyances that I found. This scaling would be one of them.
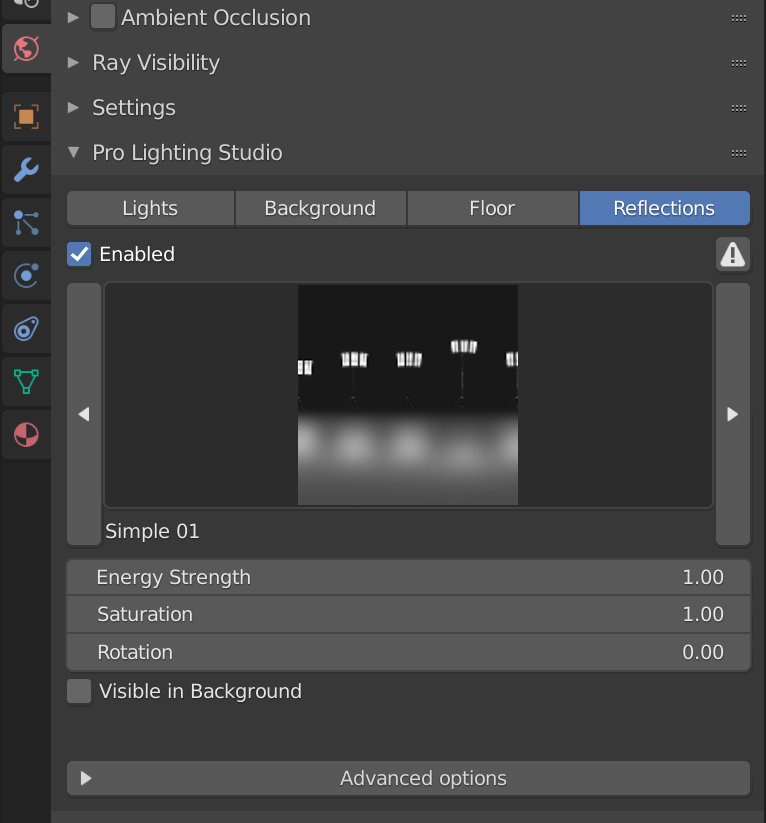
The reflection section has a few different equirectangular images we can quickly set up as background images. It is meant to complement the light setup with reflections from this background. The reason I say equirectangular instead of HDR image is because these are not HDR images. They are JPEG files. Normally we carelessly use the terms equirectangular image and HDR image interchangeably even if they are quite different things.
On Pro lighting: studios product page it says hdr environments in a comparison sheet at the bottom. But this is not the case. They are regular jpeg files.
While it would be nice if these were hdri images that we could use as complement to the light setups, it does what it is supposed to do. Add reflection.
There is a diverse collection to choose from, with good variation, from forest or park environments to garage, skies and cityscapes along with some studio setups and more artificial reflection maps.
In the advanced options we can also load in a custom environment map.
The options we must tweak the reflection maps in the add-on interface are the strength, saturation, and rotation. There is also a checkbox to toggle background visibility on or off.
Pro lighting: Studio is a collection of presets and templates to light subjects. Templates and presets are hugely underestimated in my opinion. They allow you to set up a huge amount of work in just a few clicks.
The add-on is also stable. While there hasn't been any new content added to the add-on since it's release, there have been several updates with bug fixes and stability issues fixed. The add-on is very stable and I seldom run into any bugs.
Pro lighting: Studio also has light setups that isn't just randomly shuffled together, they are well-thought-out and most of them if not all are based on some movie or scenario where the light setup has been successful.
In this case it also allows you to shuffle through light setups in a rapid pace and give you a large variety of ideas and possibilities.
It helps your brain get to work and think about light differently as you feed yourself with your 3D models in different light.
External content: Get Pro Lighting: Studio on Blendermarket
Pro lighting: studio has been a great companion for me as I have developed as an artist. Earlier it allowed me to focus on modeling, texturing and shading in turn and the lighting was already sorted out.
Then as I learned more about those subjects, I could focus on lighting and have presets to look at to see what works and what doesn't.
Now, I generally use it to set up the initial light, then I tweak it according to my needs to have a much quicker workflow then if I were to set up everything from scratch every time.
External content: Get Pro Lighting: Studio on Blendermarket
Artisticrender is affiliated with Blenderguru through the Blendermarket and if you buy the add-on through one of the links on this page you do not only get a very good tool for lighting, but you also support both Artisticrender and the continued development of the add-on.
