


There are a wide variety of effects we can use to spice up our renders in Blender. From a subtle vignette to a nice bit of bloom to brighten our render. So, let's take a look at some of the post-processing effects at our disposal.
Let's dive in and explain each a bit further.
Vignette is the circular dark edge we sometimes see in an image. This effect can really set the tone of our render or help guide the viewers eye towards a focal point. Another use is giving our renders a moodier look.
As we can see the vignette creates a nice soft edge around the image. Another thing to note that will depend on the image is that the vignette helps makes the borders of an image look less harsh.
In the linked article we go over the compositing setup for creating a vignette in Blender and how to make it customizable.
Related Content: Vignette setup in Blender compositor
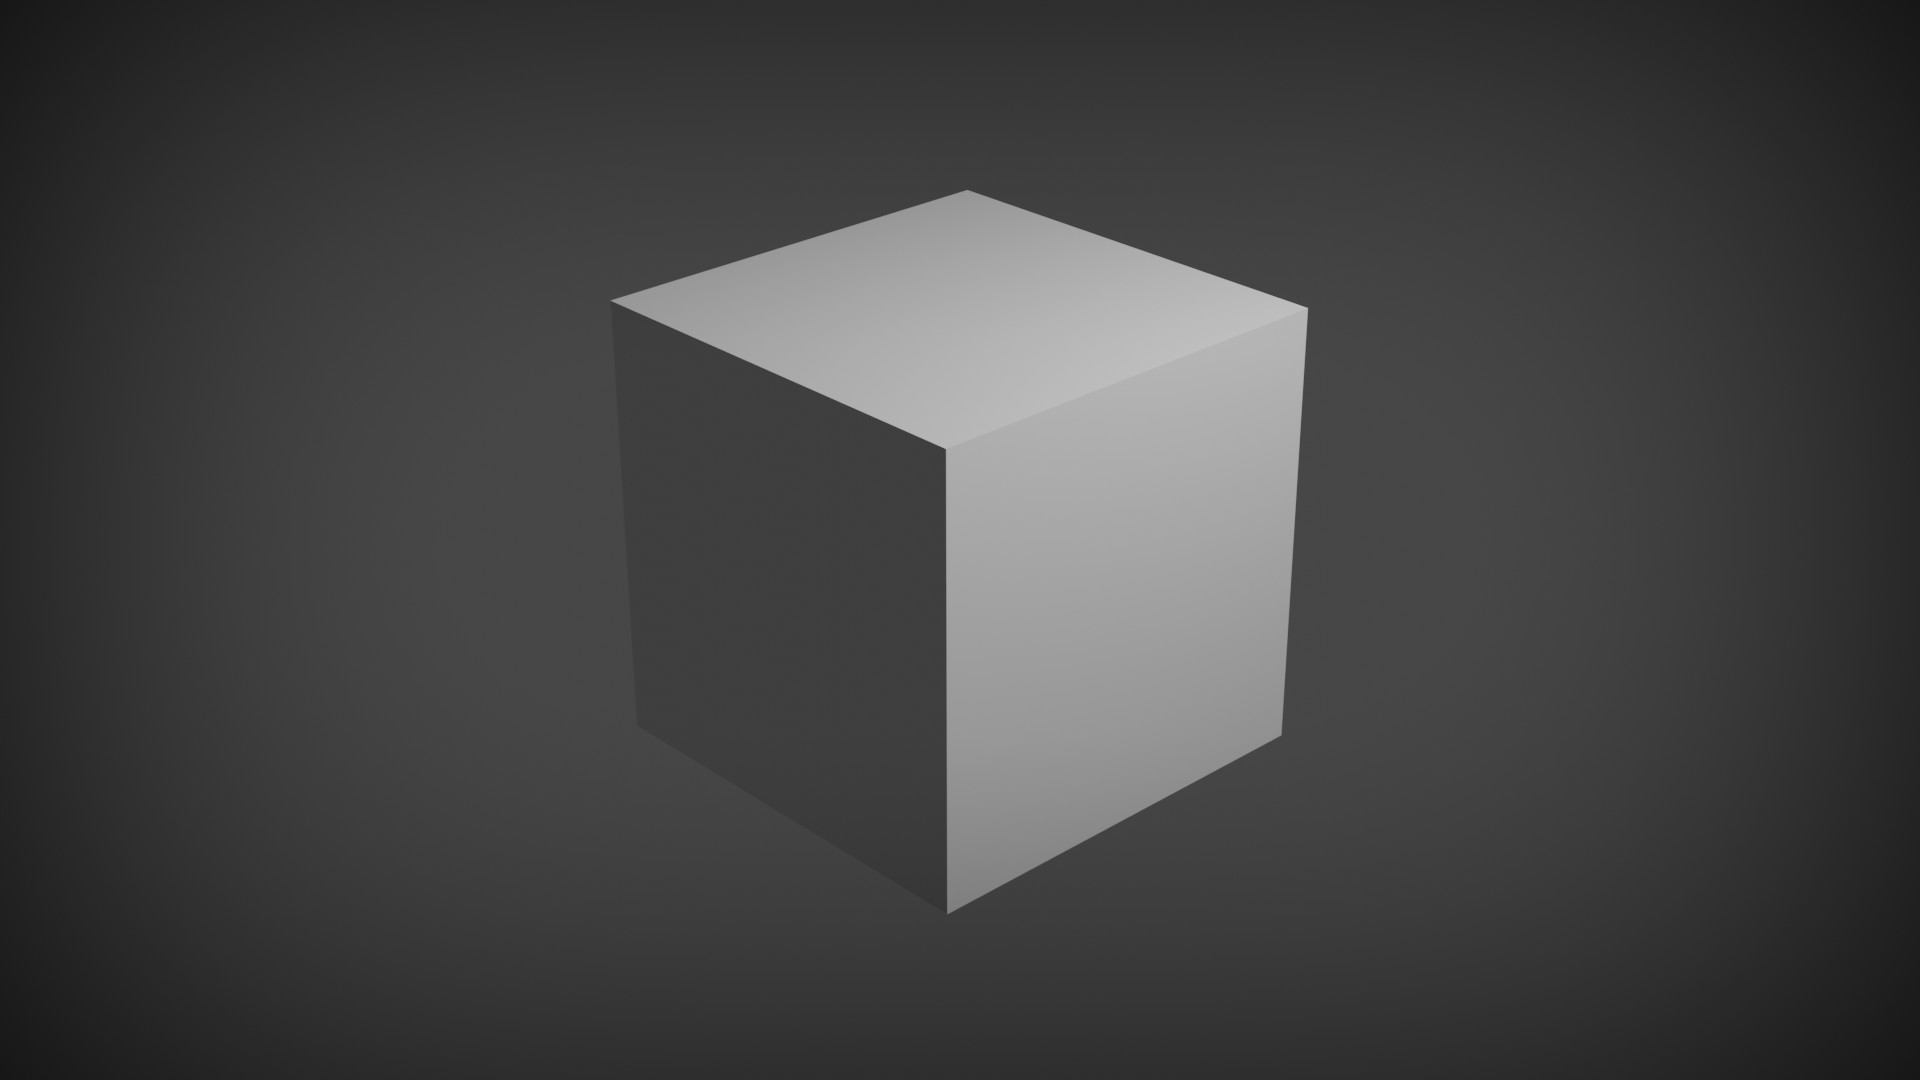
Color correction can help us dial in the our render. Whether we're setting the tone of our render or just dialing in the look. With the color correction node we can adjust multiple aspect of the image such as shadows, highlights. We can also just adjust the overall image.
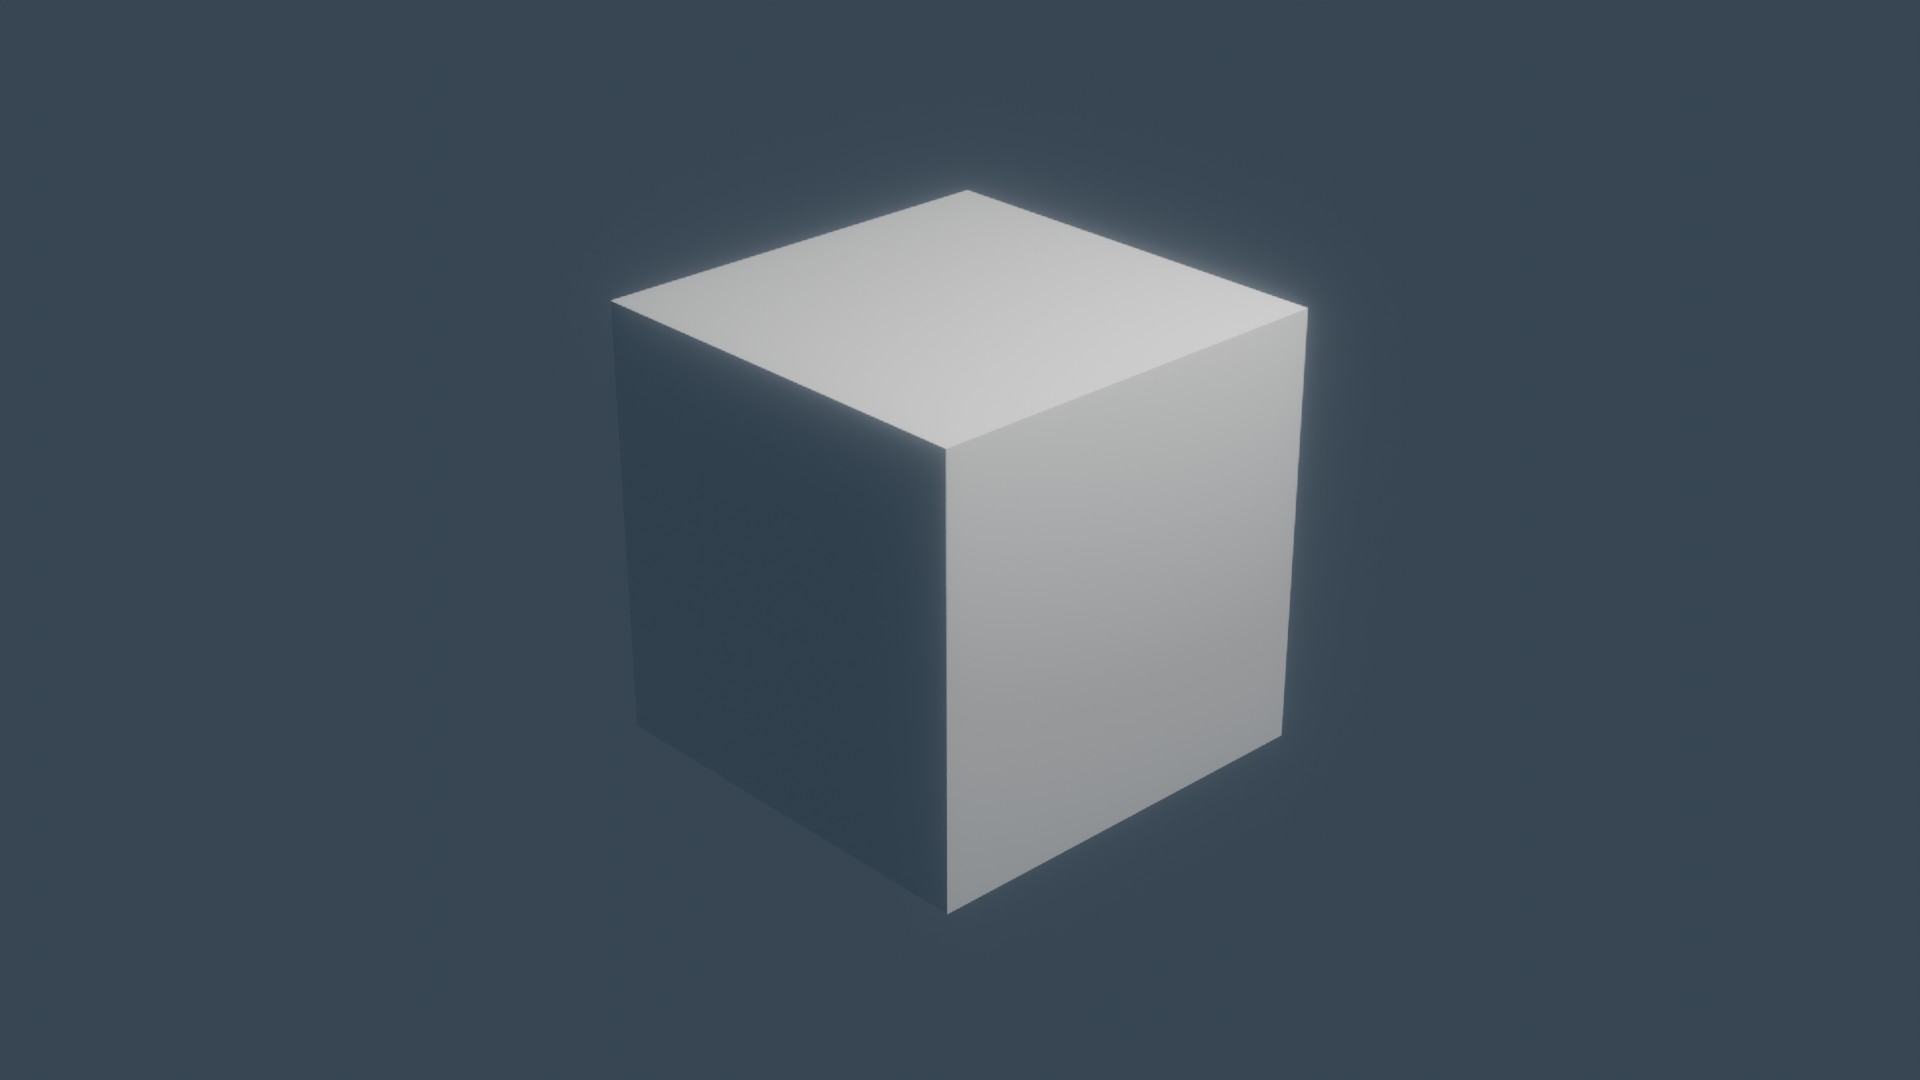
Often, we won't be able to achieve these results without color correction. While color correction isn't exactly realistic it is useful for making our render as appealing as possible. In general, the colors, brightness, and saturation of our image will help set the tone of the render.
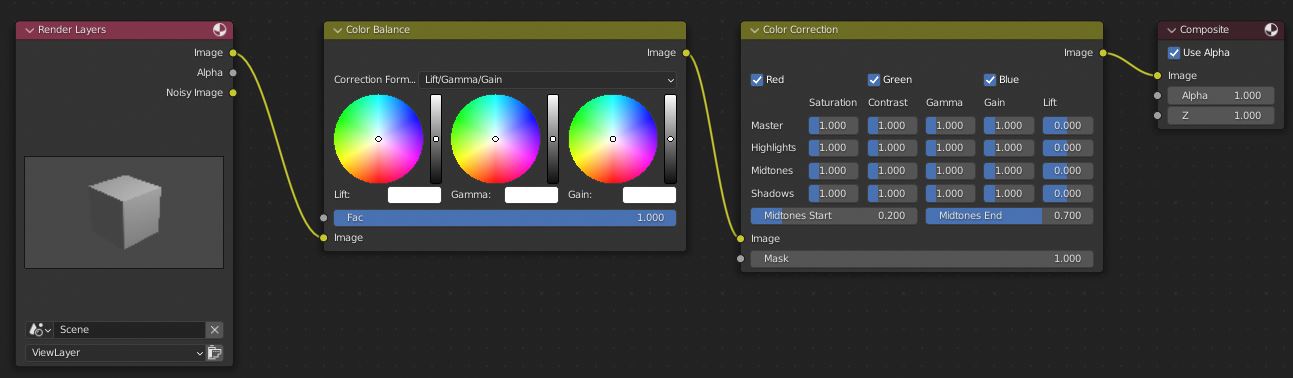
Since this is a fairly simple effect lets go over how to set it up. Go to the compositing workspace and enable use nodes. Next go to add > search > color correct and place it in the graph.
Connect either the Render layer image out to the color correct image in. We can also just connect the results of the node tree to the color correct image in.
There is also a Color Balance node we can use to in the color correction of our image. With both of these nodes we can fine the values of our render as well as adjusting the colors.
Film grain is great for giving our render a more rough or aged look. There are a couple ways we could create this effect. We could use a very subtle white noise mixed with our image. The other approach is to use an image or footage of film grain instead.
This effect is created by the very subtle texture of film as well as on older film the degradation of the film resulting in grain.
On top of that as film aged more noticeable grain would build up like a scratch in the film or a bit of film that didn't develop properly.

While this is a bit subjective overall film grain helps make the render more cohesive. It can also be a good way to make unrealistically sharp edges look more natural.
Film grain is another effect that takes a little bit of setup. In the article below we'll go over that setup. We'll also cover a few variations of the setup.
Related Content: How to add film grain in the compositor using Blender
Lens flares can make lights look so much better as well as giving a cool sci-fi look for space renders.
Flares can look like anything from a soft glow around lights to sun spikes and the rainbow like circles we see in photographs of very bright objects. They are created by bright lights refracting off of the lens of the camera and then into the sensor.
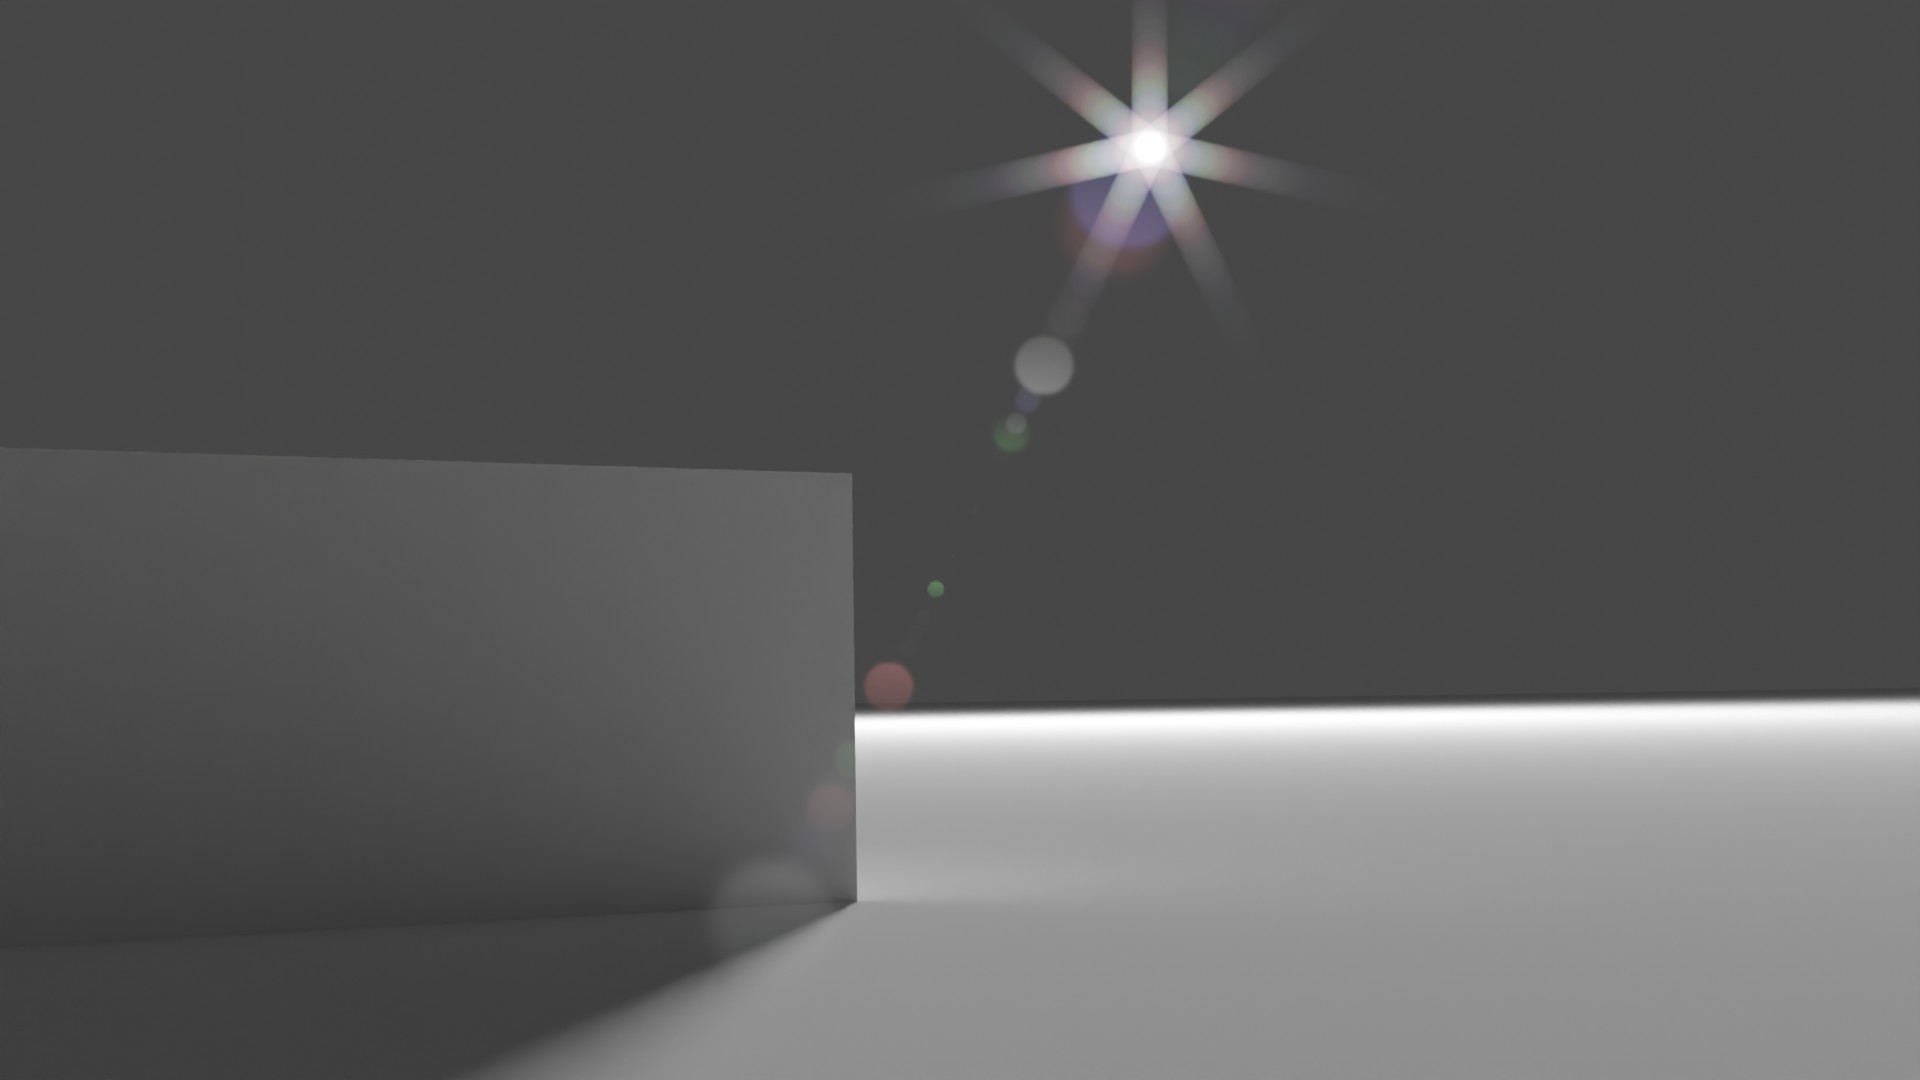
As we can see in this example the light looks much more like it would in a photograph. It also just adds more interest to the render.
How we create this will depend on the render. In the article below we go over one of the more versatile techniques which involves using Blenders lens flare node. This will work with still renders or animations.
Related Content: Creating a lens flare in the compositor in Blender
Sometimes we just want to add text to our renders, this is a fairly easy thing to do. The way we'll go about doing this in Blender is by either creating an image that contains our text or by overlaying a render that has our text in it.

Note that for both solutions we'll need to do a little work outside of the compositor to create our text. Now lets go ahead and setup our text.
The easiest solution of these two is just to create our text using the Blender text editor. Then get our text as a separate pass and use the alpha channel to combine it with our Render. To do this we can either use View layers or multiple scenes.
For our example lets use multiple scenes. Go to the top right of the window and on the scene dropdown create a new scene then go to add > text. We can press TAB to enter edit mode on the text and then use it like any other text editor.
Once we've created the text we want go to Render Properties > Film and enable transparent. Create a camera and place it in the scene as well as the lighting and world material. Now if we select our main scene again at the top of the window we can go to the compositing workspace.
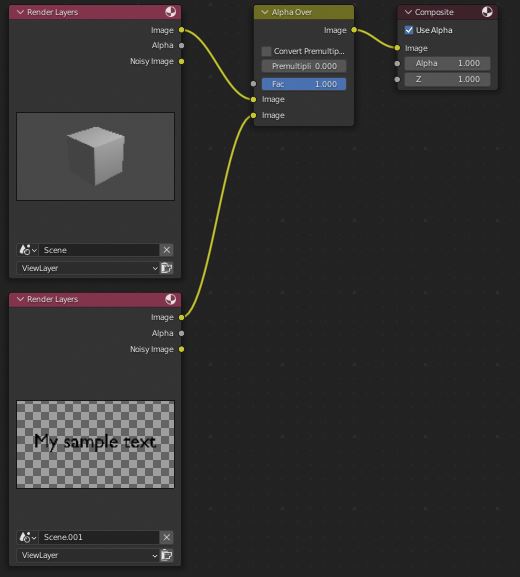
In the compositing workspace go to add > search > render layers and set the scene to our text scene. Go to add > search alpha over and then connect the main scene to the first input. Connect the text scene to the second input.
Similar to lens flares, glow, glare, and bloom are a great way to make our render pop. They also help give our lights a more realistic look as well as bright spots in our render. In general all of these effects are the same thing.
The basic idea of each of these is just to take the bright parts of the image and blur out the lighting. This gives a soft glow to bright spots as well as smoothing them out. It also really highlights just how bright something is.
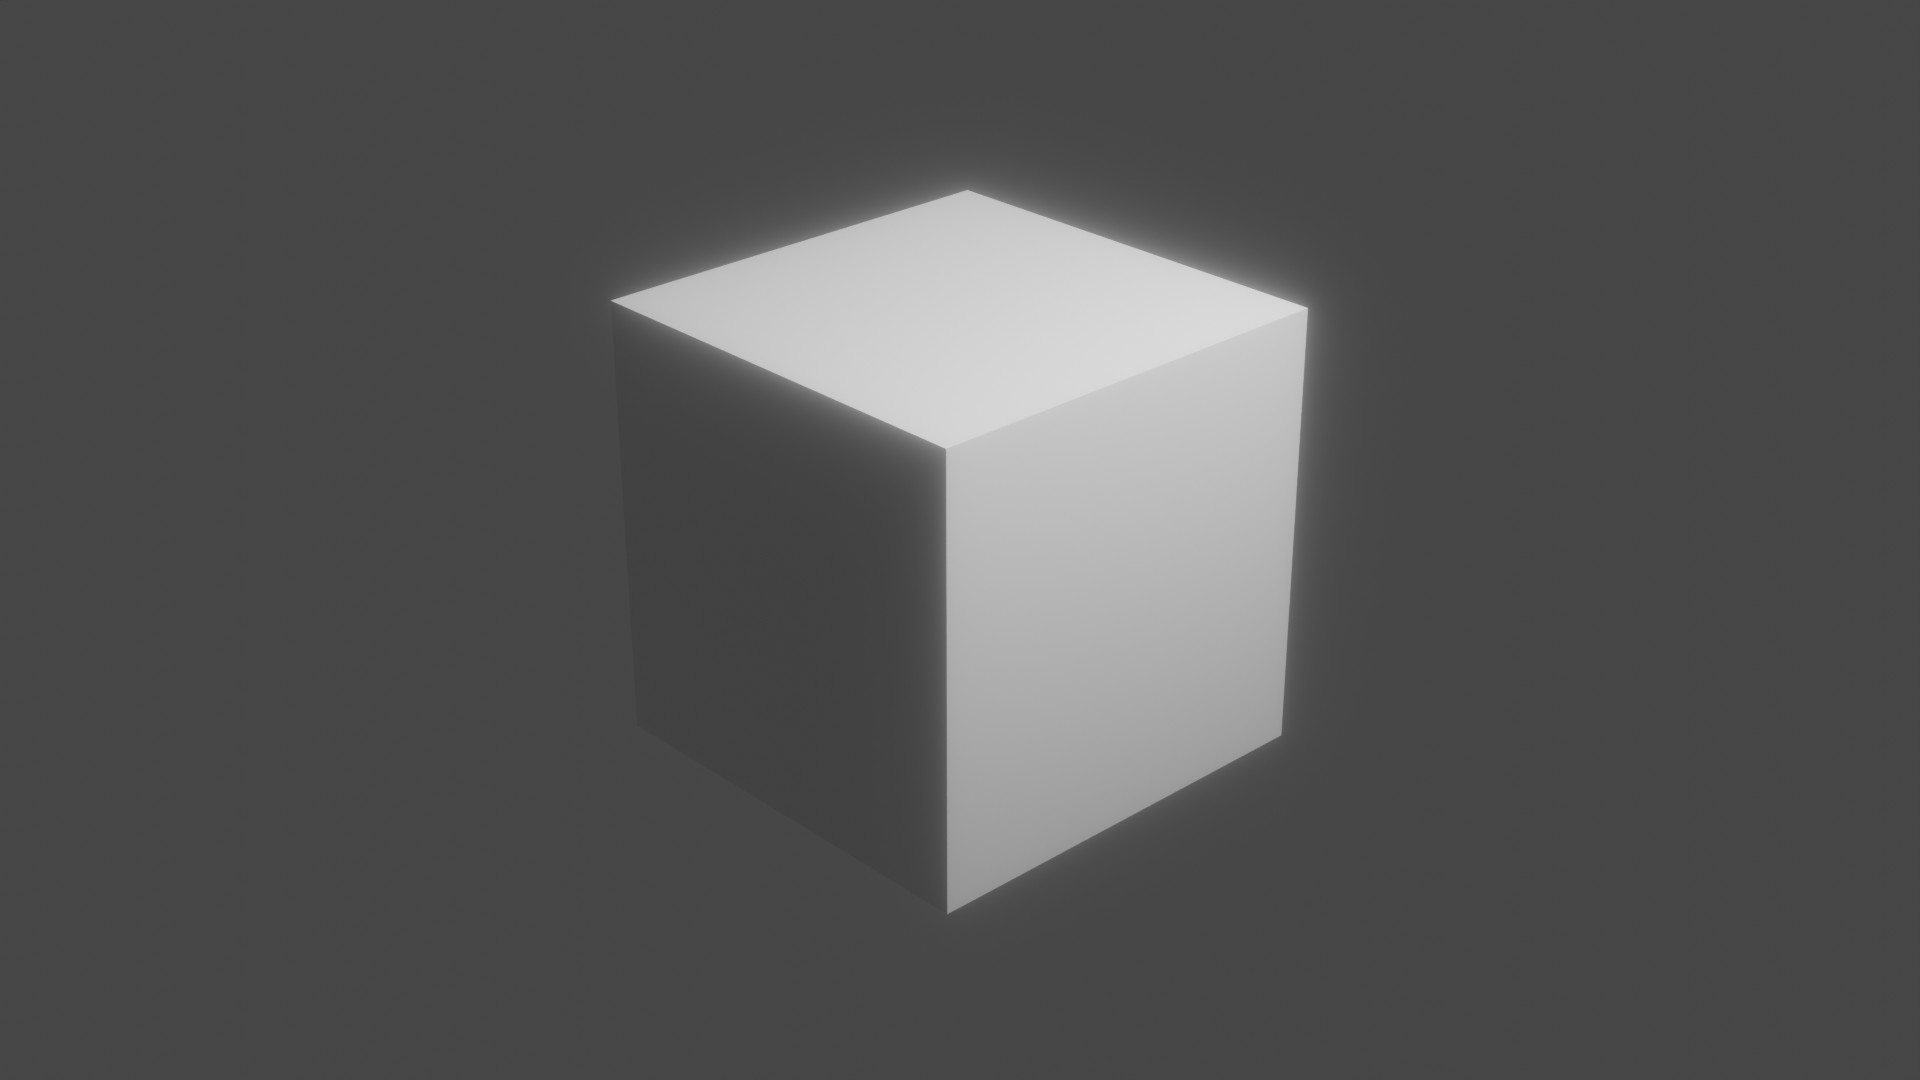
As we can see in this example all of the bright spots in this render have a soft glow around them that help show to the viewer just how bright they are rather than just being a weird white spot, it also helps smooth out any super bright spots created by harsh lighting.
To Setup a fog glow effect in Blender first go to the compositing workspace and enable use nodes if isn't enabled already.
Go to Add > Search > Glare and place it in the graph then connect the Render Layer image out to the Glare image in. Connect the glare image out to the composite image or just connect the glare to the end of your node. Set the mode to fog glow and adjust the settings accordingly.
We can also set the mix to one and go to add > search > mix and set the mode to add. Connect the render to the first input of the mix node then connect the Glare node output to the second input of the mix node. Now just connect the output of the mix node to the same input that the Glare node was going to.
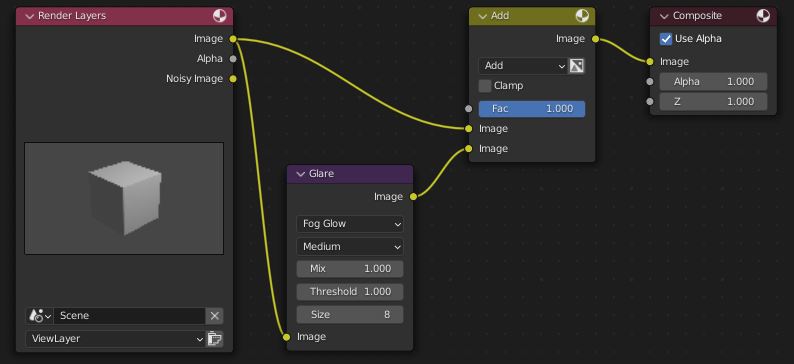
Now we can make adjustments to the Glare node output without effecting the whole image and we have more fine control of how the glare is mixed with the image.
Related content: How to make a glow effect in Blender?
One way to quickly remove noise from our render is to use denoise. Noise is a very common problem with cycles renders and the denoise tools in Blender do a great job of handling it. Denoise kind of acts like a very smart blur that blurs out noise while preserving details.
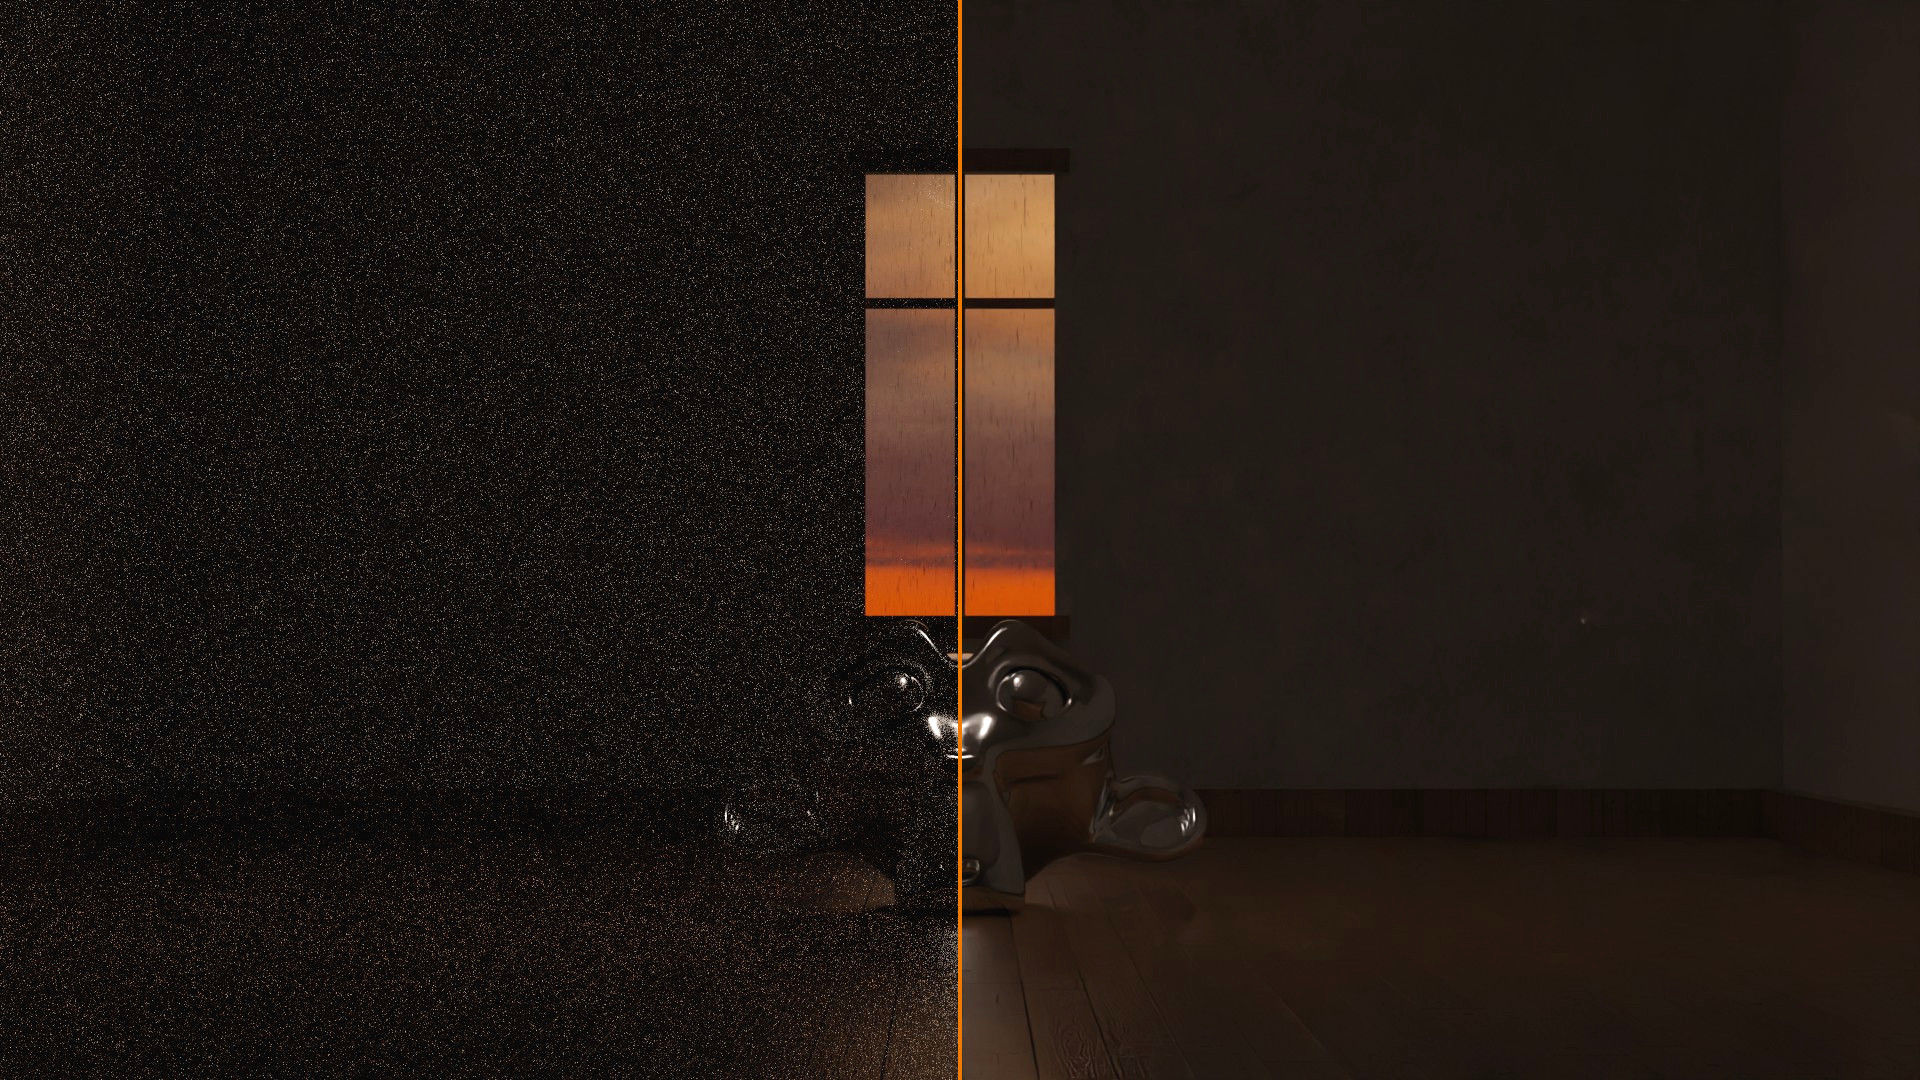
This has become quite a useful feature especially with the introduction of the open image denoiser. For most renders this denoiser will produce great results and basically just do exactly what we want it to.
We should make sure that the render isn't too noisy before we denoise as otherwise there won't be enough data from the denoiser to work with and it will result in a blurry image with a lot of artifacts. There are also some cases where the denoiser will end up degrading quality rather than improving it.
The article linked below will go over we can use the denoiser as well as more details about it.
Related Content: How to use intel denoiser in Blender
Sometimes our renders will look a little too perfect. Lens distortion can help with adding more realistic imperfections to our render. It can also just be an interesting and weird effect depending on how far we push it.
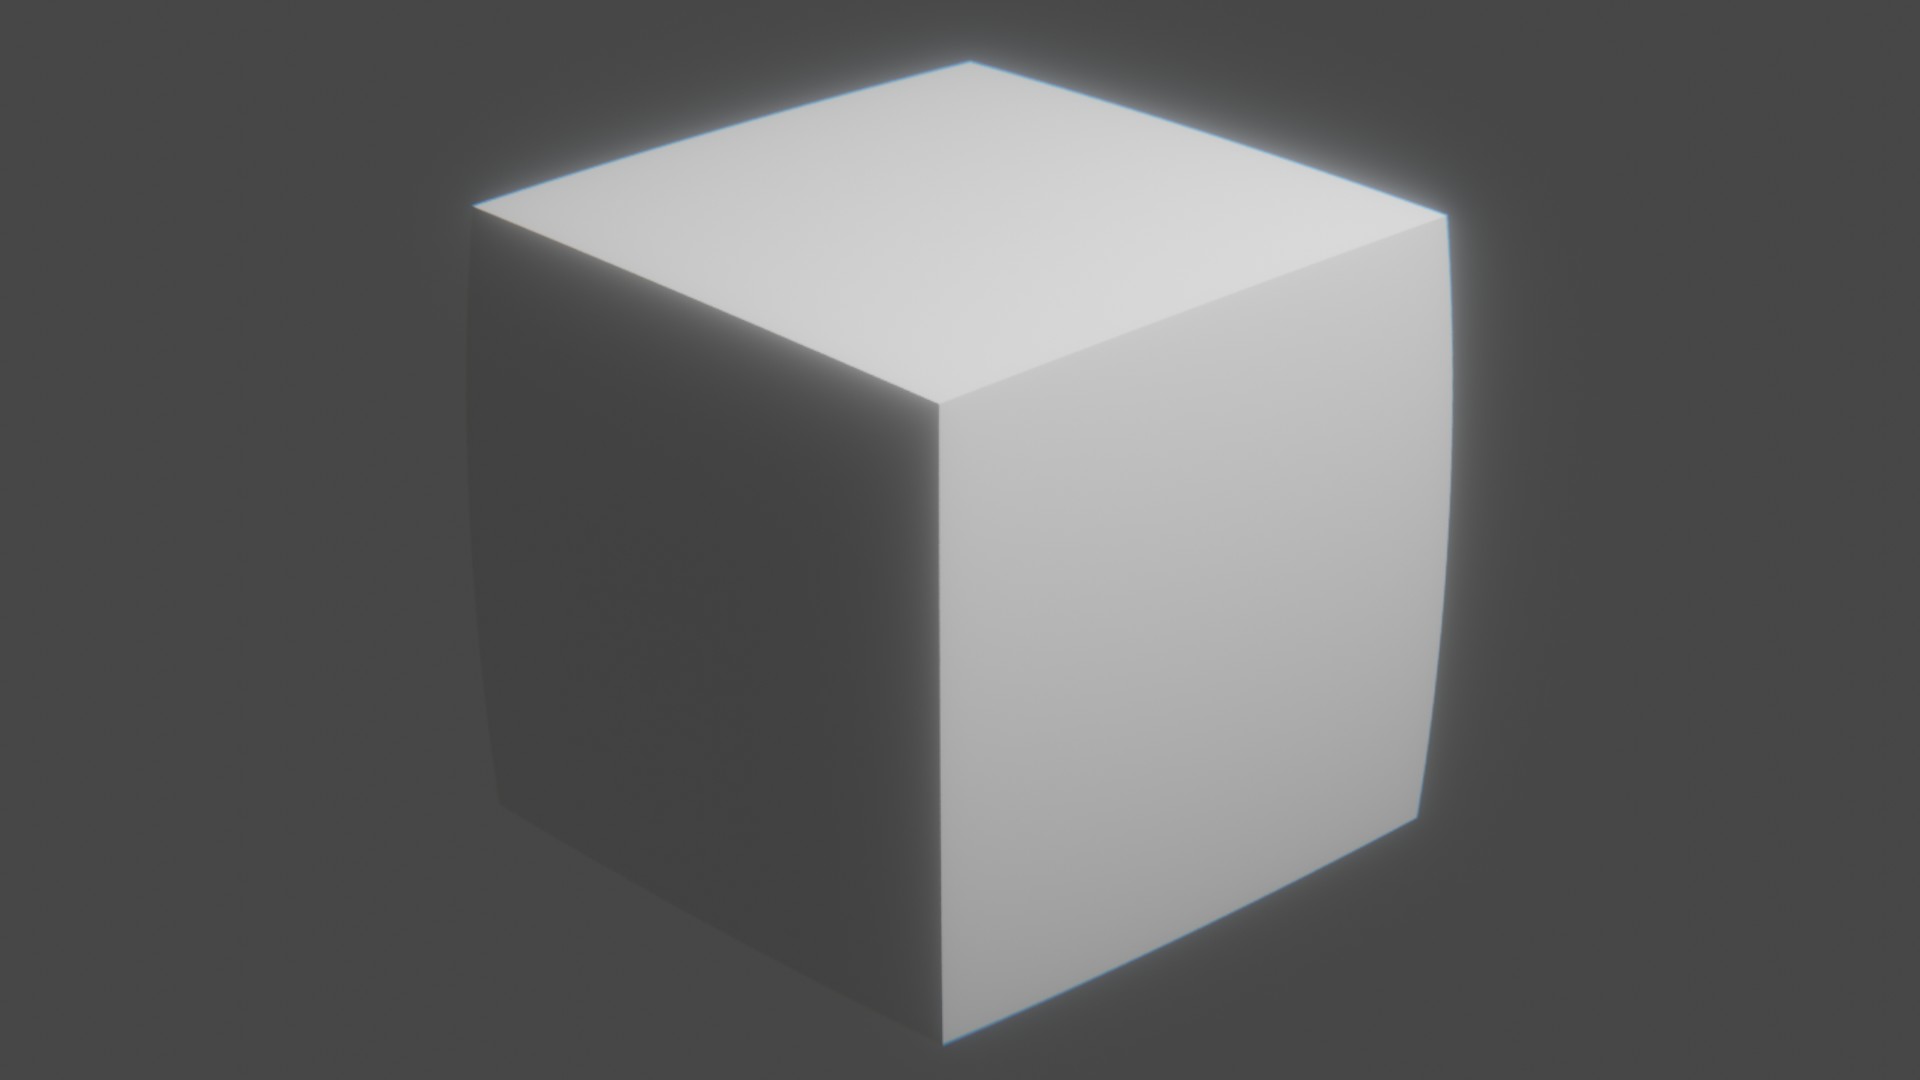
The basic idea of lens distortion is that the lens of a camera is not perfectly flat and especially in higher FOV images the curvature of the lens can cause a bit of a spherical distortion in the photo. Depending on the lens there may also sometimes be a slight bit of dispersion.
Lens Distortion is actually pretty simple to setup so lets go over how to create it. First go over the compositing workspace and enable use nodes if it isn't enabled already.
Go to Add > Search > Lens Distortion and place in in the graph. Either connect the node to the end of your node tree or connect the render layer image out to the Lens Distortion image in then connect the Lens Distortion image out the composite image in.
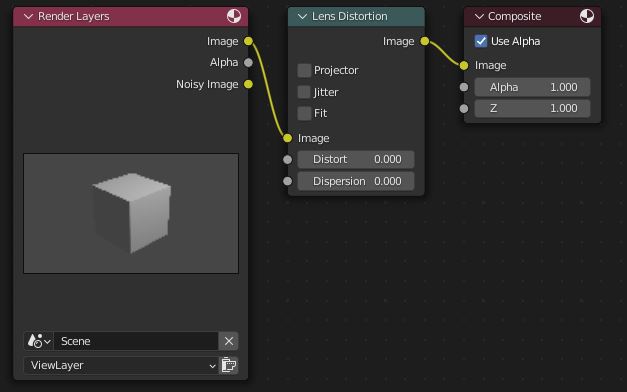
The distort value will increase the lens distortion and the dispersion value will create a sort of color aberration effect.
Related content: Creating a lens flare in the compositor in Blender
Light groups are a quick way to adjust our lights in the compositor after we've rendered, we can separate the world light any other lights into their own groups or into the same group depending on we need.
The light groups are output as separate passes that we can then additively combine and adjust individually. This gives us even more fine control over our render in the compositor and just like color correction can help us get everything look exactly how we want it.
Cryptomatte is an awesome tool we can use to setup masks in Blender. With cryptomatte we can easily mask objects and materials and then we can make whatever compositing adjustments we want to them.
Maybe we want to make an objects metal material a little more blue, we could use cryptomatte to mask out that material and then use the mask as a factor to adjusts the hue and saturation of the image. This can be handy for color correcting specific elements rather than the whole image.
Related Content: How to use cryptomatte for masking in Blender
We may also run into issues with a small edge around our cryptomatte masks. This tutorial doesn't discuss cryptomatte specifically but it goes over an important concept on why just using a mask to adjust hue and saturation will result in edges having the wrong color as well as how to fix it.
Sometimes we just need to do a classic green screen effect in Blender. The green screen acts like an alpha channel in an image. In blender we can isolate the color of the green screen and set it as the alpha channel to isolate whatever is in front of it.
This is another compositing effect that is actually fairly simple to setup. First go to the compositing workspace and enable use nodes if it's not enabled already. Next go to add > search > keying and then Connect your image or footage into the image input of the keying node.
To make the next step easier lets also setup a viewer node. Go to add > search > Viewer and place it in the graph Connect the image we're going to key into the Viewer and then enable backdrop, if the image doesn't fit press N to open the side panel and under View click fit.
Connect the output to either the composite or whichever node you want to use to combine it with something else for example an alpha over node. Next on the Keying node click on the key color and in the pop up click on the eye dropper and select the color in the image that we're going to key.
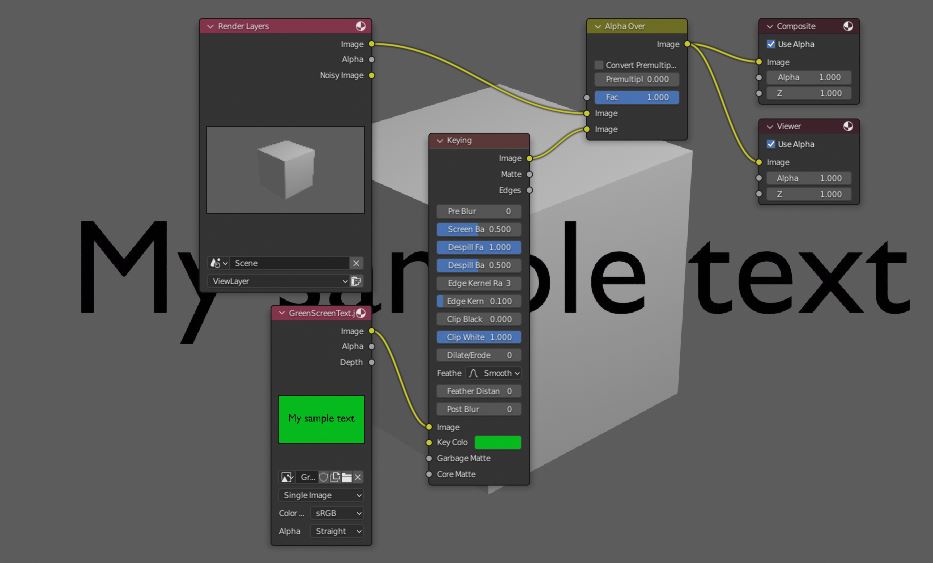
Sometimes we'll have weird edges around the transparent objects, this can be pretty easily fixed by just going to add > search > Alpha convert and then passing our keying output through the node.
Motions blur can give our renders a sense of speed by creating directional blurs around fast-moving objects. Motion blur can also add a bit of realism to our render and just make movement feel more natural.
The video below will go over how to setup motion blur in the compositor. This method will work for either cycles or Eevee. You can also check out our own guide on motion blur in Eevee.
Related content: Blender Eevee Motion Blur guide
There are a wide range of compositing effects we can use in Blender to improve our renders. With all of the tricks we've gone over we have may options for doing post processing on our render that would actually help us improve their look.
We also went over some useful compositing techniques for adding text and setting up green screens which are both problems we often need to solve but isn't as intuitive as some of the other post processing effects.
Thank you for your time.
