


A crucial skill when working with 3D art is to be able to manage our objects and organizing them. This includes separating and combining them in several ways. So how do we merge and separate objects in Blender?
We can merge objects in object mode by holding shift while selecting them and pressing Ctrl+J to join them. To separate objects, we need to be in edit mode, select the mesh you want to separate and press P then choose selection.
In the rest of this article, we'll go more into depth about joining and merging objects as well as separating them. We'll also cover how to do something similar with booleans since it might be related to what you are trying to achieve.
Related content: How parenting works in Blender

These are the steps to join or merge objects in Blender.
Let's look at what happens when we merge objects in a bit more detail.
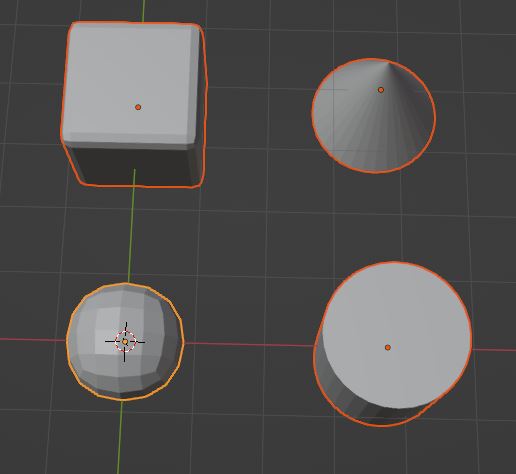
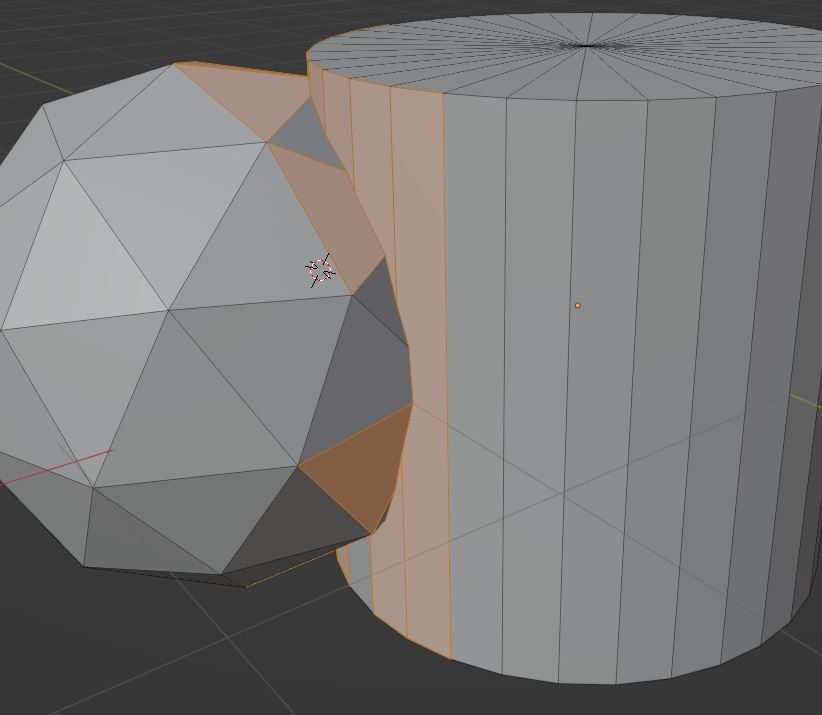
You may notice when we select objects there are two outline colors. One object will have a yellow highlight and the rest will have an orange highlight.
By the way, if you are looking for a great modeling tool, I can recommend that you check out Mechmachine over at Blender market. It is especially good for any kind of hard surface modeling.
External content: Blendermarket - Mechmachine
The object with the yellow highlight is the active object. There is only ever one active object at a time. All the objects with the orange highlights will merge to this object when we hit Ctrl+J.
As an example, if all objects have modifiers the merged object will only keep the active objects modifiers. The rest will be removed.
While modifiers won't be preserved on the merged object things such as materials and vertex groups will be. The new merged object will also just use the active objects origin.
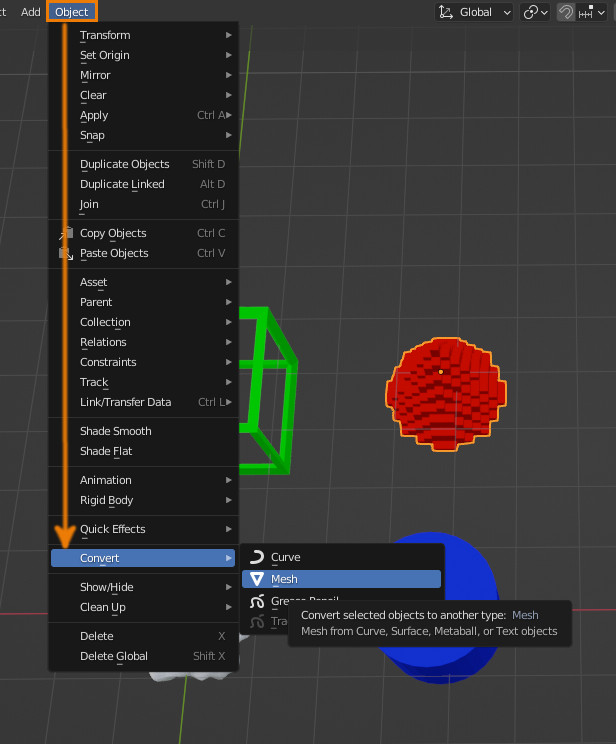
When we're merging objects, we should make sure to apply the modifiers before we merge. One way to quickly apply all modifiers on an object is to go object > Convert > Mesh.
Related content: Blender convert curve into mesh
We could also do the same thing by going to the object modifiers and applying all of them in order. Converting to mesh just makes this process simpler and makes sure the modifiers are applied in order.
Related content: How to apply modifiers in Blender
After we have merged two objects, we might still want to be able to quickly select the pices that were previously multiple objects.
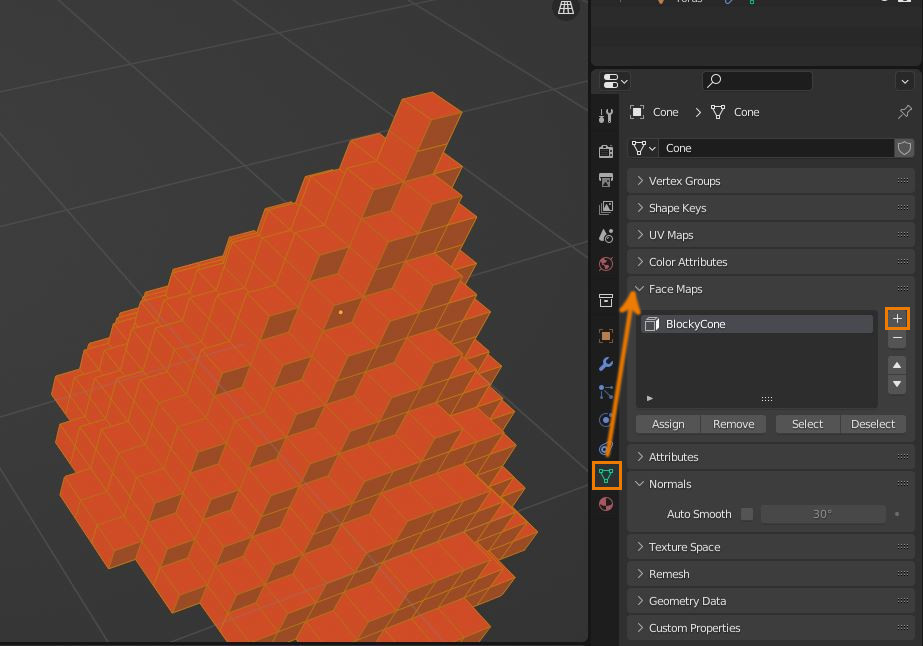
We can do this with face maps. Before we join objects, we can set the object mode to edit and press A to select all the geometry. In the object data properties tab in the face map dropdown press the + icon to add a face map.
A face map is a saved selection that can be restored from the data properties tab in the properties panel. The face map will also be preserved when we merge the objects.
Just note that face maps and face sets are not the same thing. If you are interested in face sets, you can read more about them here:
Related content: How to use face sets in Blender
It's also a good idea to make the name of the face map something unique. The reason is that identical face maps names will merge when the objects join together.
When the objects are joined together, we can now select the face map to quickly select the mesh belonging to the original object while in edit mode.
Note that vertex groups and UV maps can also be created beforehand and maintained after two objects merge.
Related content: The definitive tutorial to UV mapping in Blender
Related content: How to use vertex groups in Blender
Joining objects with boolean is different. This will use a modifier to merge one objects mesh into another.
To join objects using boolean follow these steps:
To join objects with a boolean:
For a complete guide on booleans you can read this article:
Related content: How to use boolean modifier in Blender
Sometimes booleans can be a bit weird, the common tricks to fix this are to toggle between Exact and Fast, you can also try slightly moving one of the objects you're trying to join.
You may notice that if the solver is set to fast it doesn't preserve materials, this is actually fairly simple to fix. On the object you added the boolean modifier go to the material properties and click on the + icon to add a material slot and then select one of the materials on the object you're joining to the this object.
Related content: Boolean modifier problems and how to solve them
Repeat this for all the materials on the other object that aren't on the object that has the boolean modifier.
Note that the boolean modifier will often create N-gons, make sure to check the geometry around when the objects have been merged but the rest of the models geometry should be preserved.
Related content: Blender N-gon guide
The Boolean method is different in that the original object still remains its own object, but we can hide that from the viewport and final render by turning off the eye and camera icon for the object in the outliner.
If you didn't already check it out, go take a look at Mechmachine, a great add-on for Blender modelers. Especially for hard surface projects.
Related content: Blender - Mechmachine
To separate Objects:
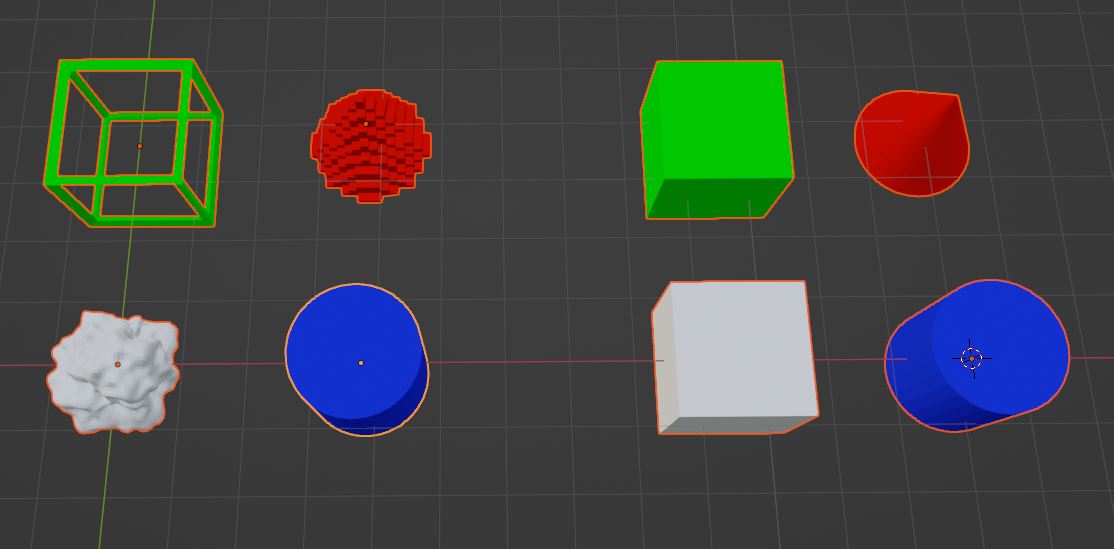
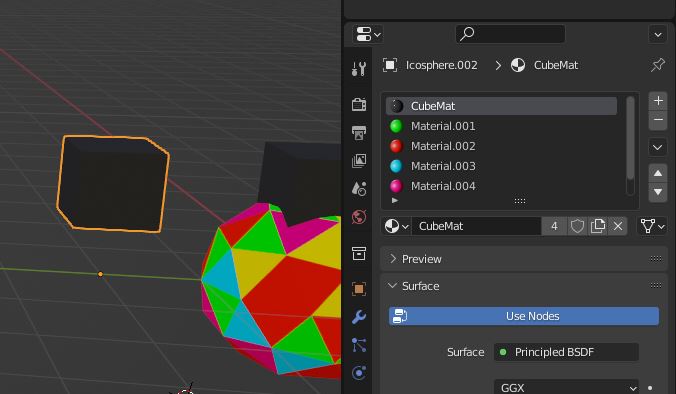
When we separate objects in Blender all the object data will be copied from the object that its separated from. This includes the materials, modifiers, vertex groups, etc.
Even if the separated object doesn't have all the materials in the first object it will still have all the materials in the material properties.
In the image below the sphere with all the different materials and the black cube where one object. When separated, the black cube still have all the materials and material slots from the sphere.
When separating by selection it is important to have a good understanding of how to select accurately. If you need to learn more about selection tools in Blender, you can read this guide:
Related content: How selecting works in Blender
When using a selection to separate objects, we can only separate away one object at a time.
When pressing P to separate parts of an object, we also get additional options. Selection is the most common one, but we can also separate the object by loose parts or by material we can create multiple objects from our single object in one action.
Separating by loose parts can be especially useful if we have an object containing many different real-world objects.
For example, let's say that we have an object with a particle system, and we convert all the particles to mesh, they are now loose parts, and we can easily separate them all into individual objects if we need to by using the "by loose parts" option.
Also, keep in mind that if the original object contains shared data, that data will still be shared after the separation. In that case, while in object mode you can go to object->relations->make single user->object & data to make each separated object contain its own unique copy of its data.
We can also use a Boolean to separate objects or rather part of an object, but it is more related to cutting out shapes from an object than separating them. Booleans does not change what mesh belongs to what object, instead it only changes the data inside the objects procedurally thanks to how modifiers work.
Related content: How to cut out a shape in your object in Blender?
Related content: How modifiers work in Blender, an overview
We follow the same steps as we did when combining objects. But instead of having two objects that we want to be visible and merged using a boolean, we create an object that cut out a part to separate from the object that we then hide in the final render.
To separate parts of an object using a boolean, follow these steps:
The result should look something like this. Whatever part of the object that is inside the bounds of the cutter object will remain while the rest will be cut away.
If you change the boolean modifier to difference, the opposite will be true, like in the image blow.
The benefit of this method is that we do not need to rely as much on the underlying mesh, we can cut straight through existing faces. just keep in mind that if the object is too low poly or we don't want to cut straight edges, Blender might have a hard time figuring out how to connect the mesh around the cut parts. For example, it can lead to shading artefacts in the cut areas.
Related content: How to smooth the shading on an object in Blender?
There are many cases where we might need to join and separate objects. Both the basic way of joining and separating objects as well as the boolean modifier will come in handy often.
Knowing what happens when we join, and separate objects can help us speed up our workflow. We'll also have an easier time understanding why our model behaves a certain way when merged.
If you made it this far you probably like the content, chances are that you would enjoy reading the Artisticrender E-Book as well. Feel free to check it out.
Related content: Artisticrender's Blender E-Book
Thank you for your time.
